Enable SSO with Okta SAML
Single Sign-On (SSO) is an authentication method that enables users to log in to multiple applications and websites with one set of credentials. SSO uses certificates to establish and maintain a trust relationship between the Service Provider (SP) and an Identity Provider (IdP). Palette supports SSO based on either the Security Assertion Markup Language (SAML) or OpenID Connect (OIDC).
The following steps will guide you on how to enable Palette SSO with Okta Workforce Identity Cloud based on SAML.
Prerequisites
- You need to have either a free or paid subscription with Okta. Okta provides free developer subscriptions for testing purposes.
Enablement
Create Teams in Palette
This step is to create teams in Palette that will be used for Okta SAML, this will give them the appropriate
permissions. For this example, you will create the Okta Team team and give it Tenant Admin permissions. You can
repeat this for any other team that you configured with group claims.
- Open a web browser and navigate to your Palette subscription. Navigate to Tenant Settings --> Users & Teams --> Teams tab, and click + Create Team.
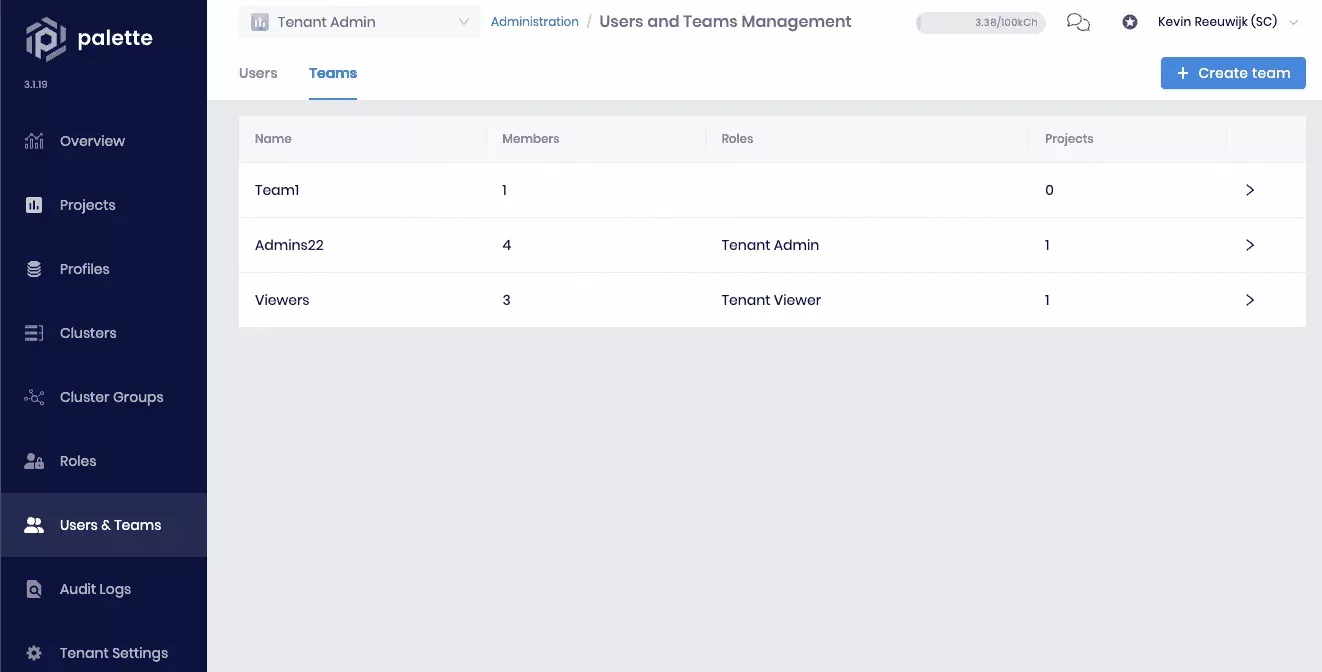
- Specify
Okta Teamin the Team name field. You don't need to set any members now, as this will happen automatically from the SSO. Click Confirm to create the team.

- The list of teams displays again. Select the newly created Okta Team team to review its details. To give this team administrative access to the entire tenant and all the projects in it, assign the Tenant Admin role. Select Tenant Roles and click + Add Tenant Role:
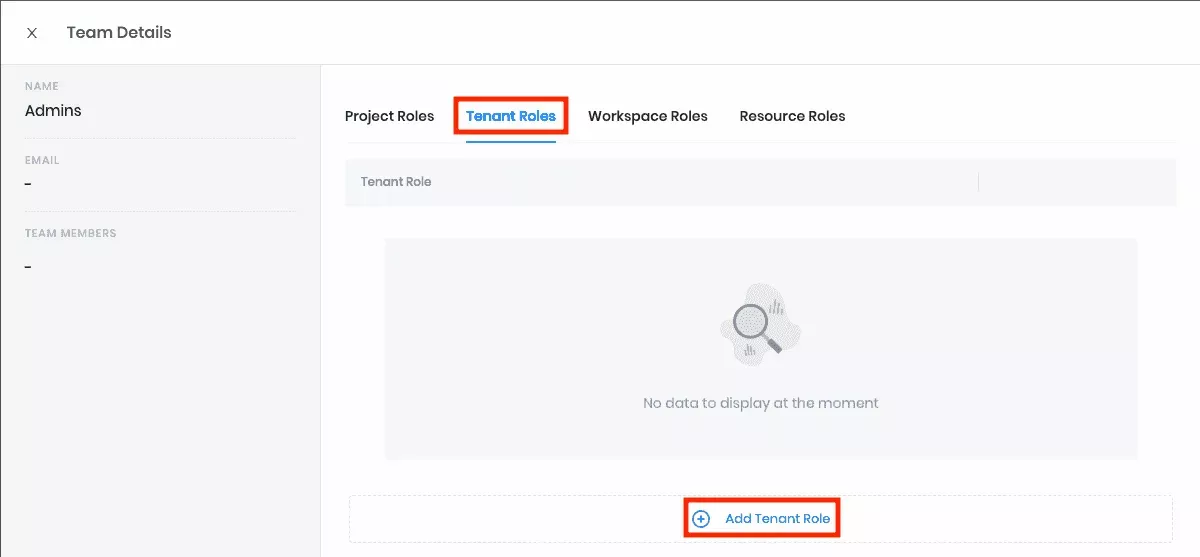
- Click on Tenant Admin to enable the role. Click Confirm to add the role.

You will receive a message stating Roles have been updated. Repeat this procedure for any other teams, taking care to ensure they are given the appropriate permissions.
- Click the X next to Team Details in the top left corner to exit this screen.
Create the Okta Application
- Log in to your Okta Admin console and navigate to Applications --> Applications. Click the Create App Integration button.
Your Okta login URL has the following format, https://{your-okta-account-id}-admin.okta.com/admin/getting-started.
Replace {your-okta-account-id} with your Okta account ID.
- In the screen that opens, select SAML 2.0 for the sign-in method. Then click Next.
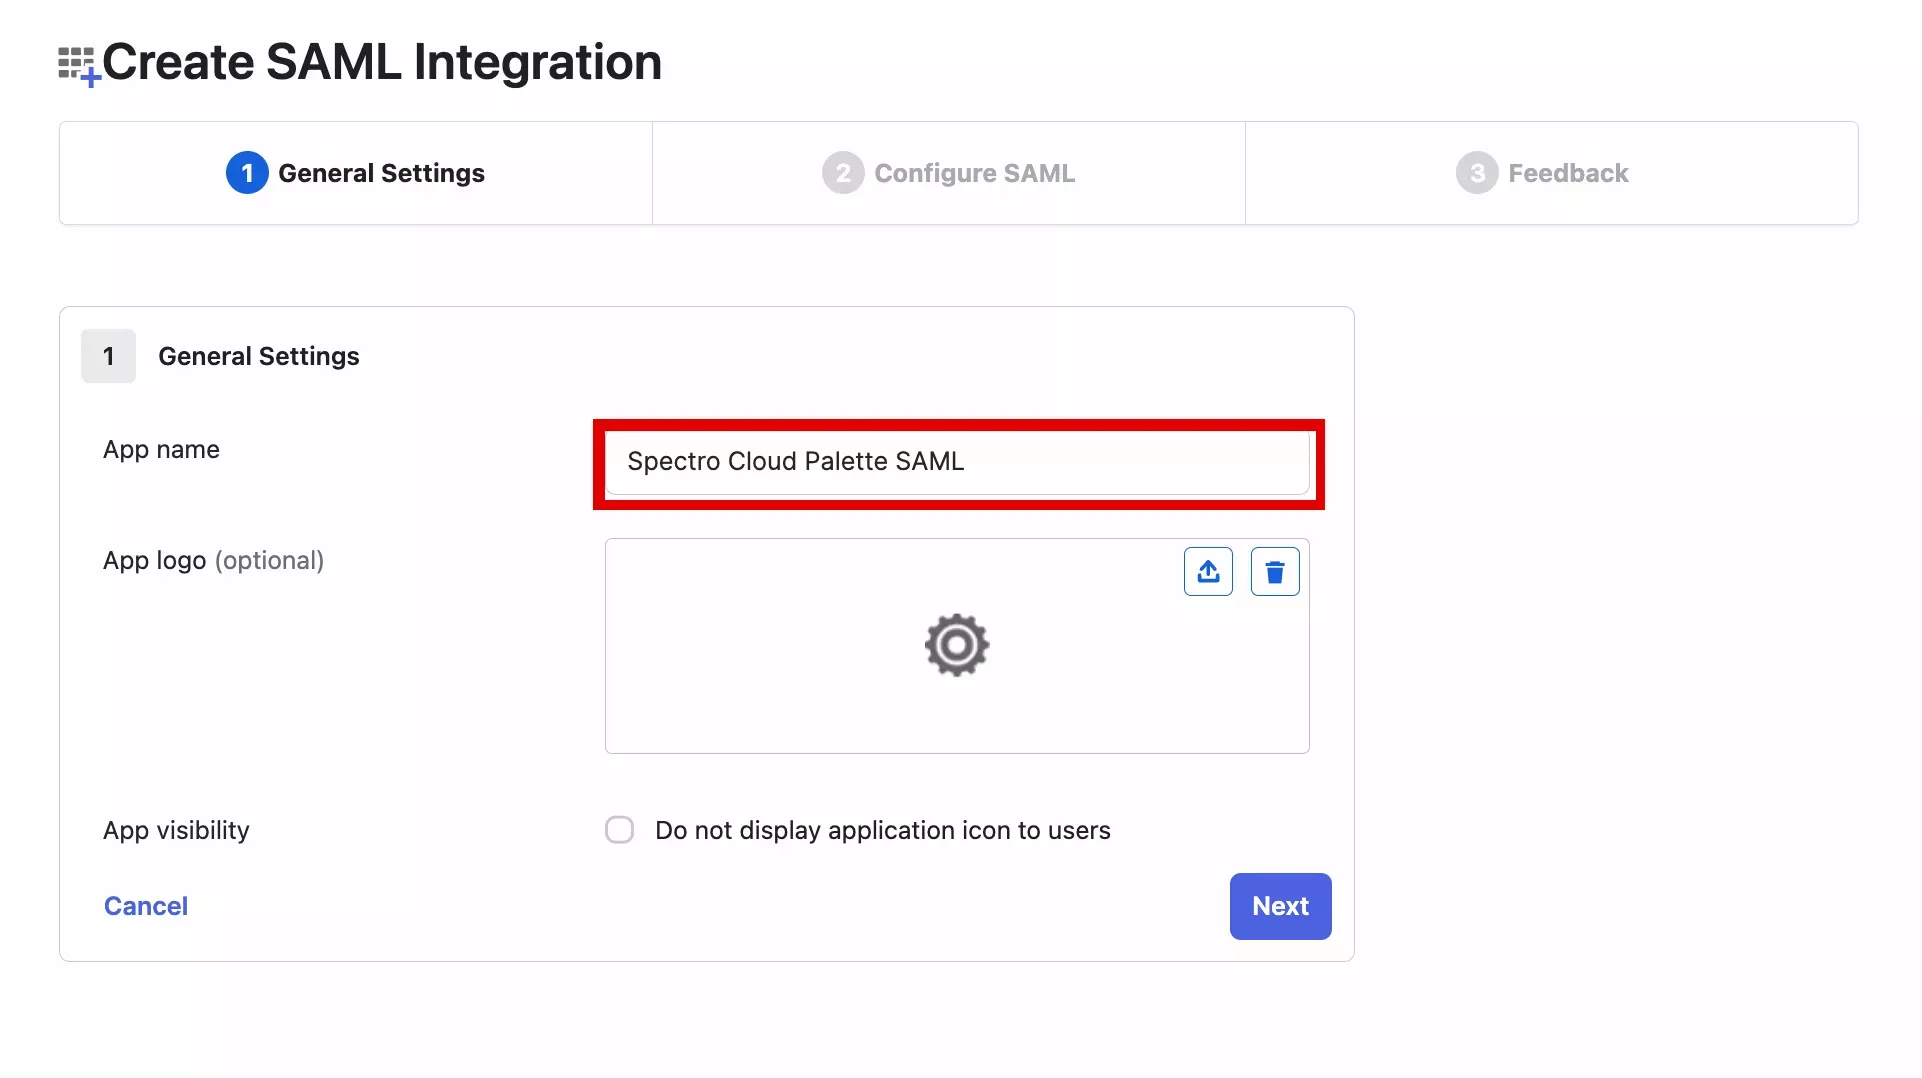
- The following screen allows you to configure the new App Integration. On the App name field, change the name from
My Web ApptoSpectro Cloud Palette SAML. If desired, you can also upload a logo for the application.
-
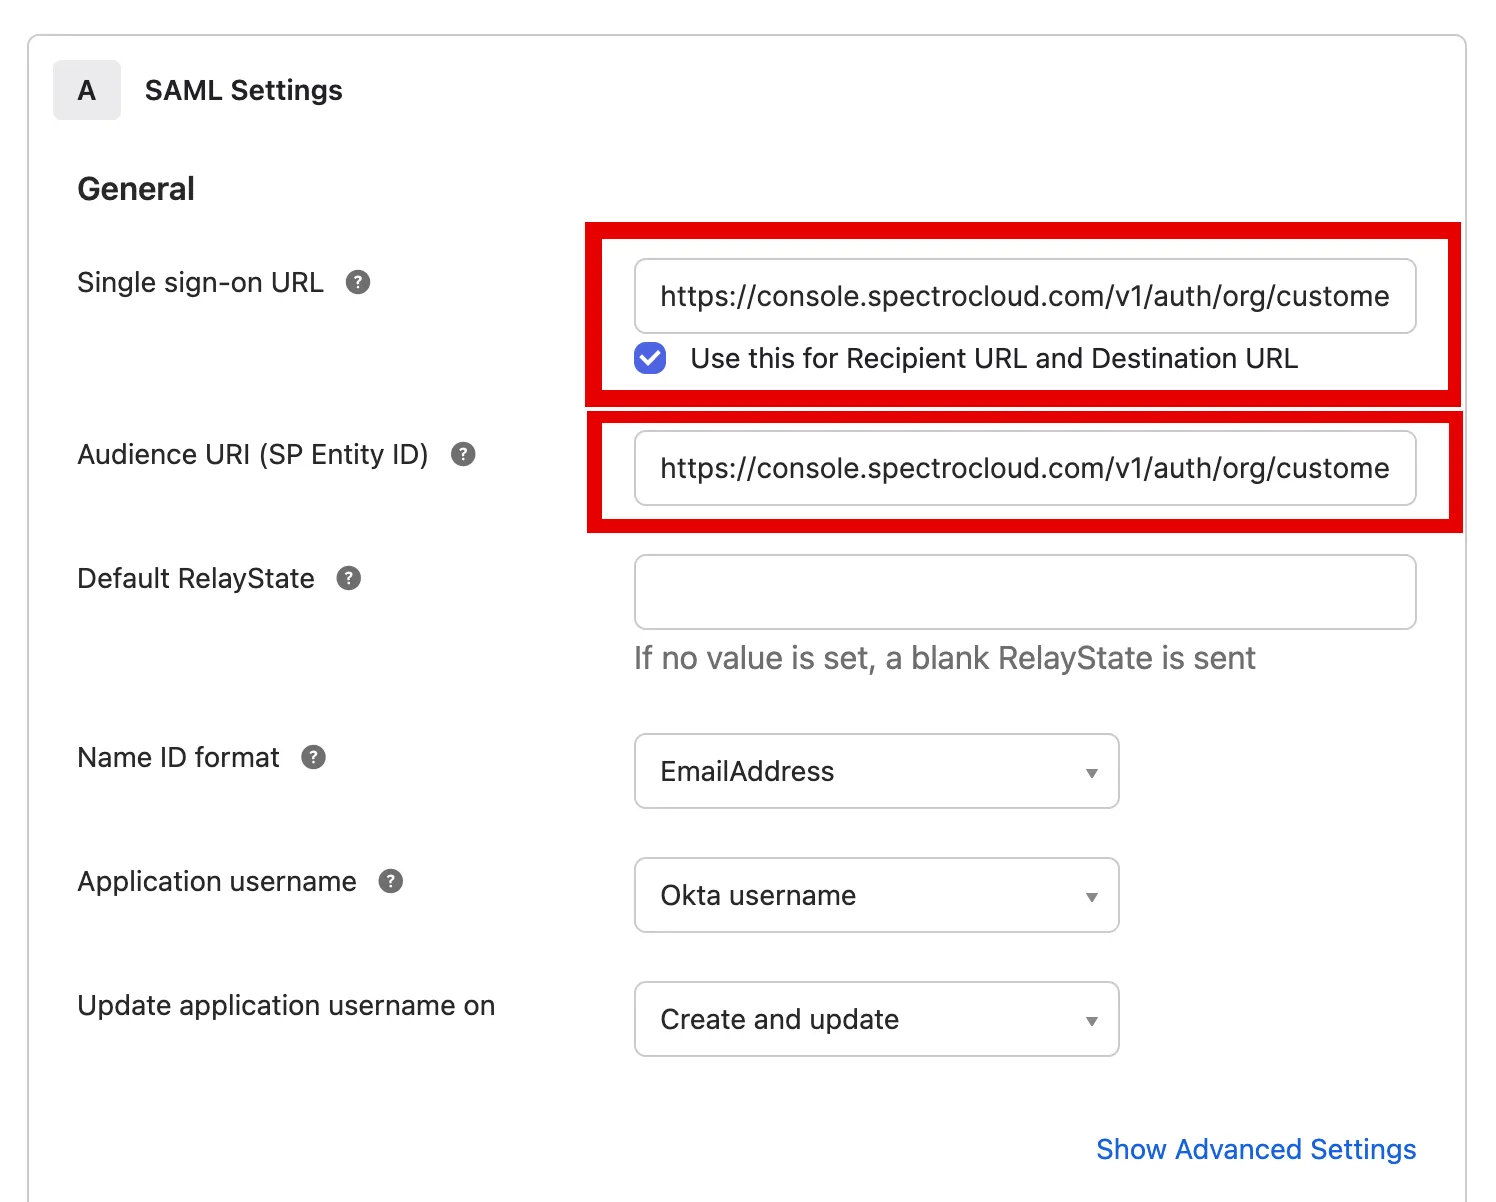
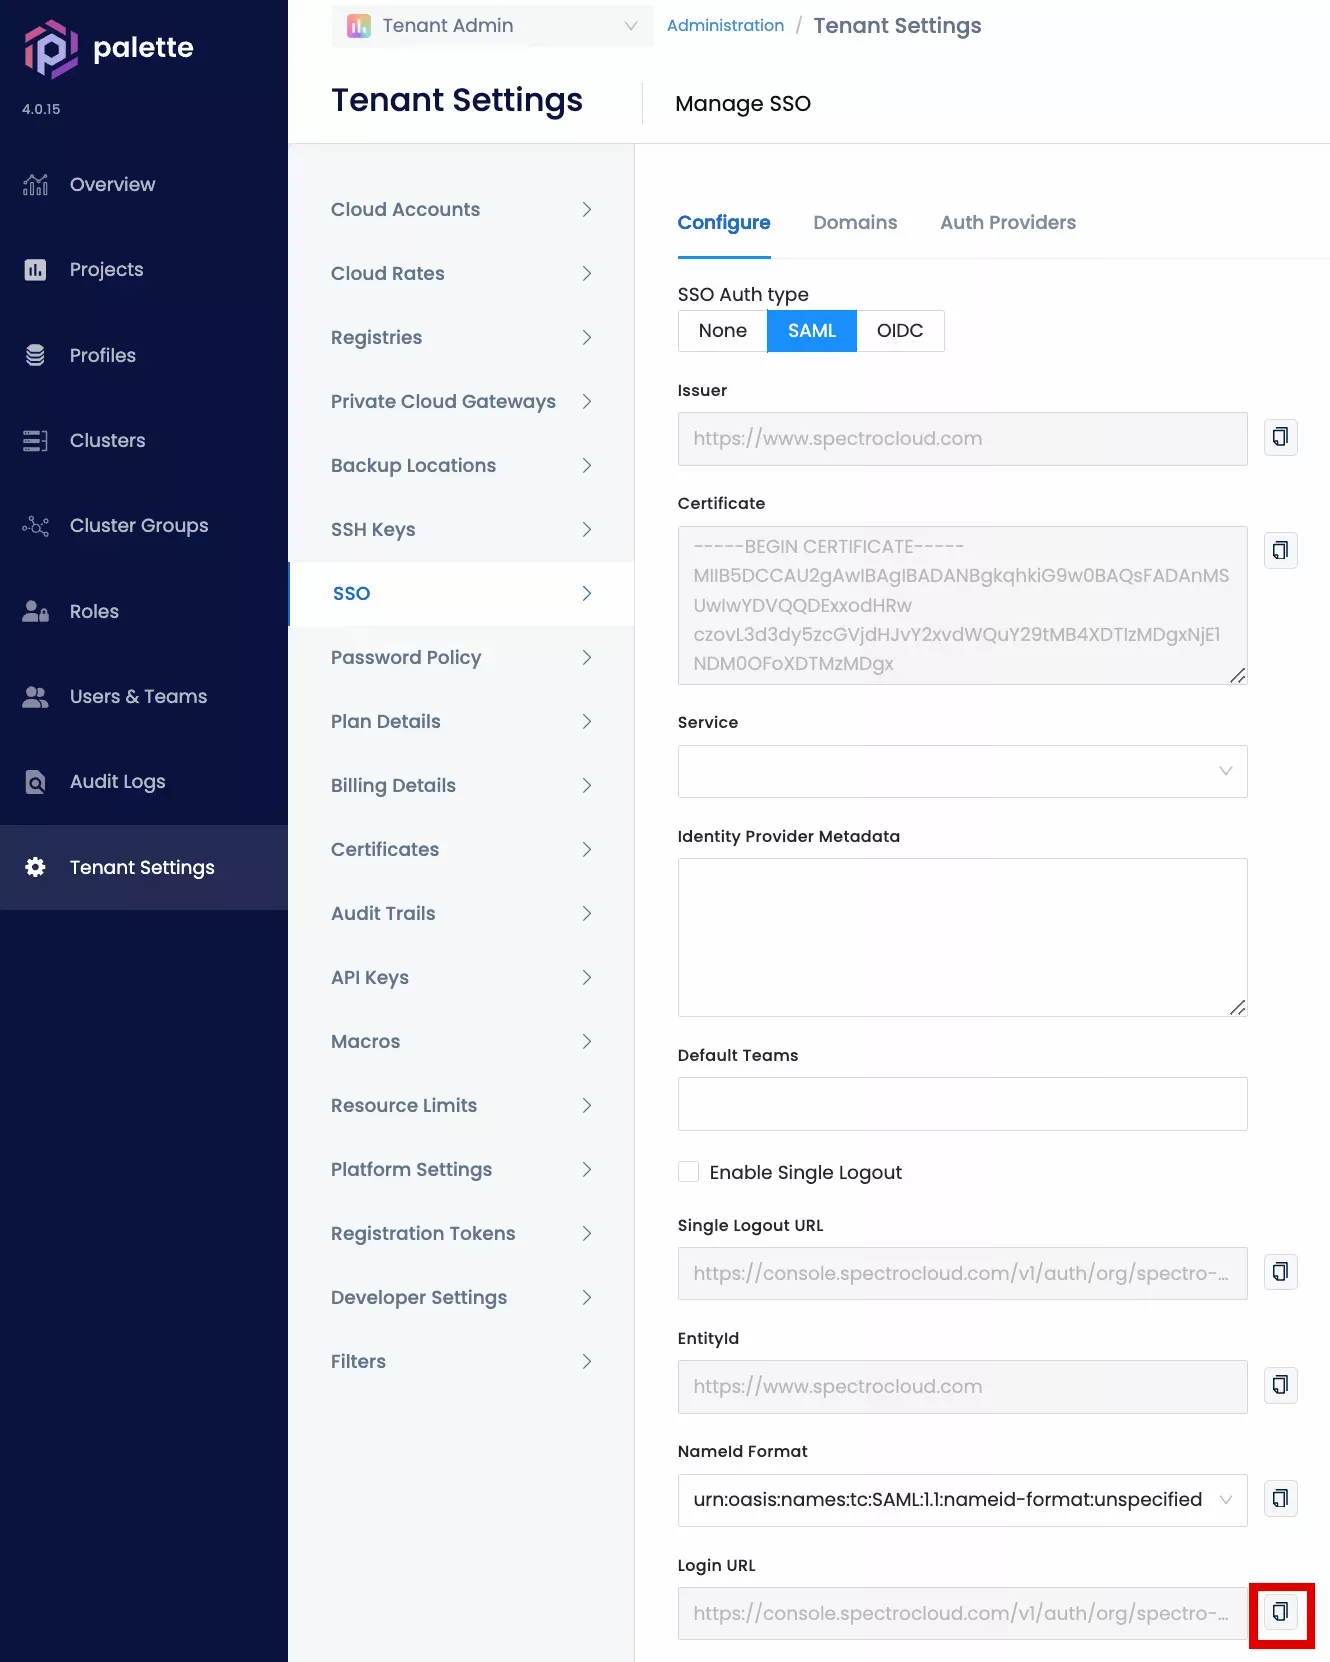
Open a web browser and navigate to your Palette subscription. Navigate to Tenant Settings --> SSO and click SAML. Click the button next to Login URL to copy the value to the clipboard.
-
Set the value of Service to Okta.
-
Switch back to your Okta Admin console and paste the copied value to the Single sign-on URL and Audience URI (SP Entity ID).
-
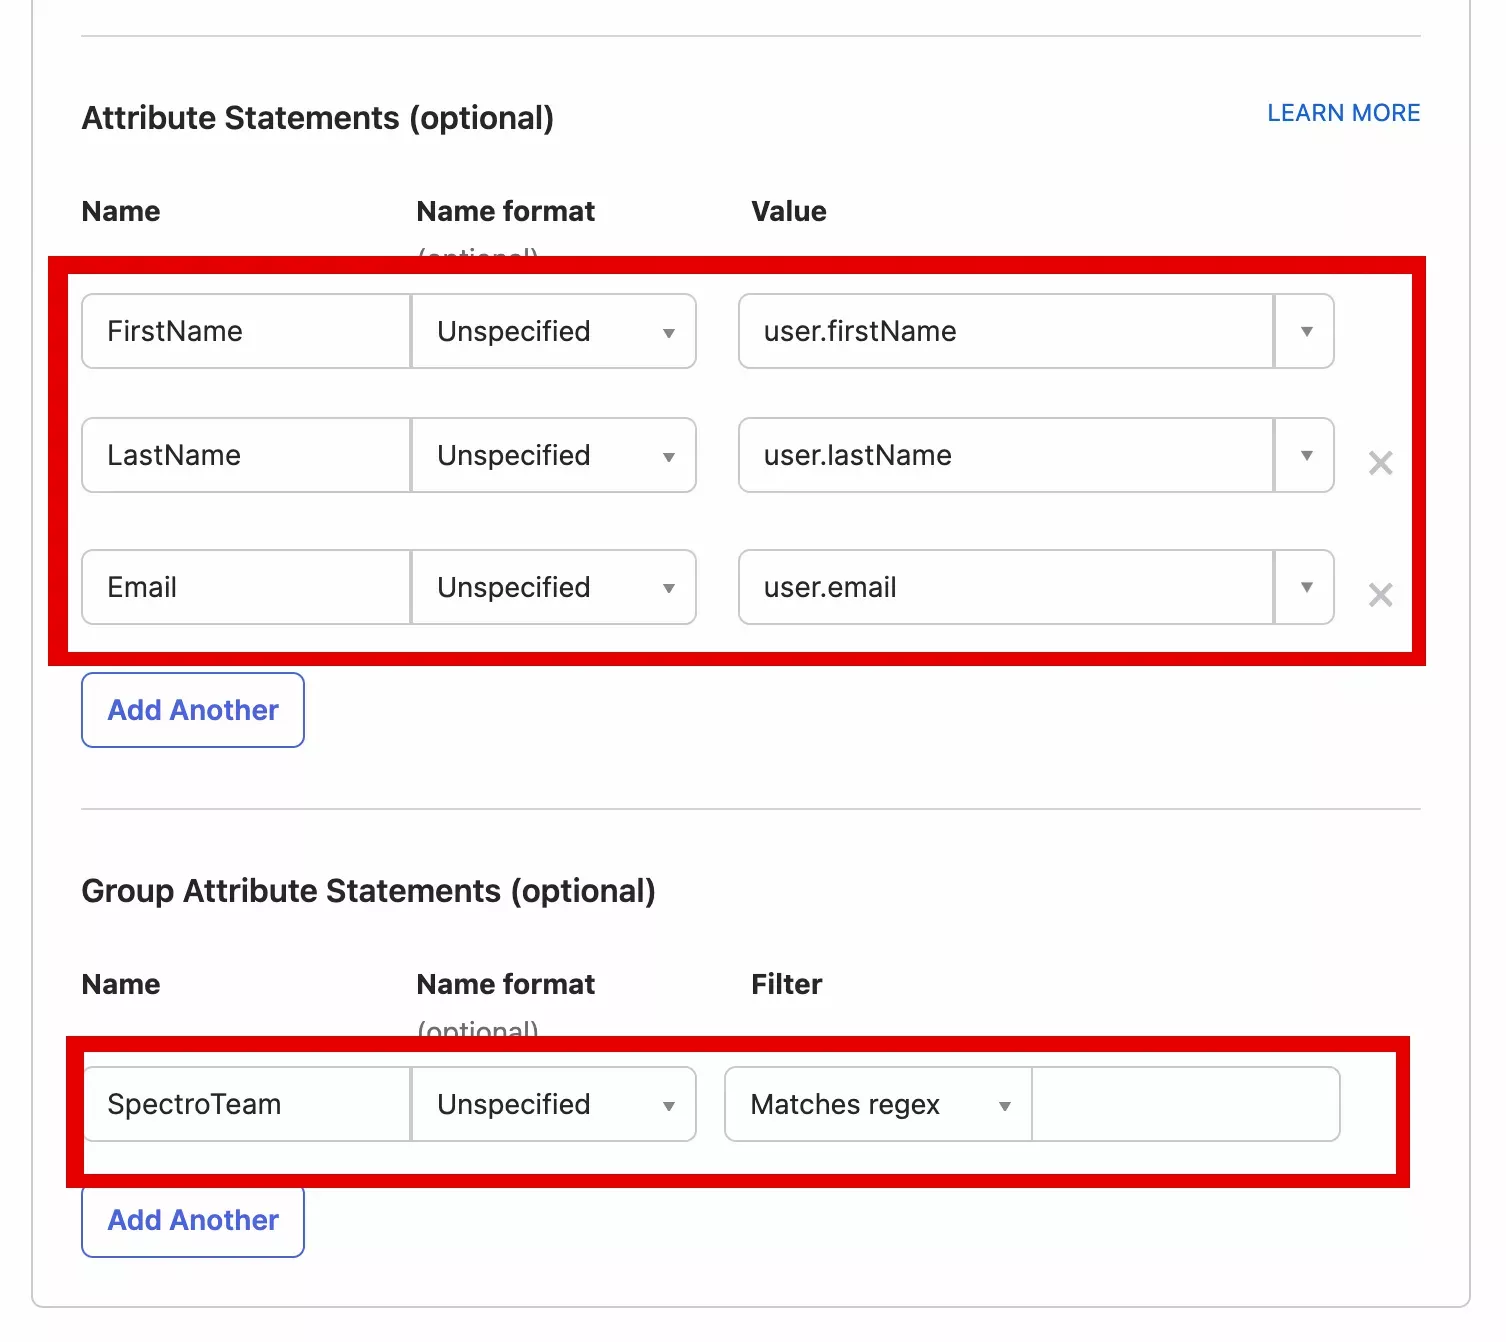
Specify values within Attribute Statements and Group Attribute Statements to link user values from Okta to SpectroCloud.
Under Attribute Statements (Optional) specify the below values.
| Name | Name Format | Value |
|---|---|---|
FirstName | Unspecified | user.firstName |
LastName | Unspecified | user.lastName |
Email | Unspecified | user.email |
Under Group Attribute Statements (Optional) specify the below values.
| Name | Name Format | Filter | Value |
|---|---|---|---|
SpectroTeam | Unspecified | Matches Regex | Blank |
-
Finish the creation of the application with default values.
-
Once brought to main application page, copy the Metadata URL, open it up in a separate page, then copy of the contents of the XML.
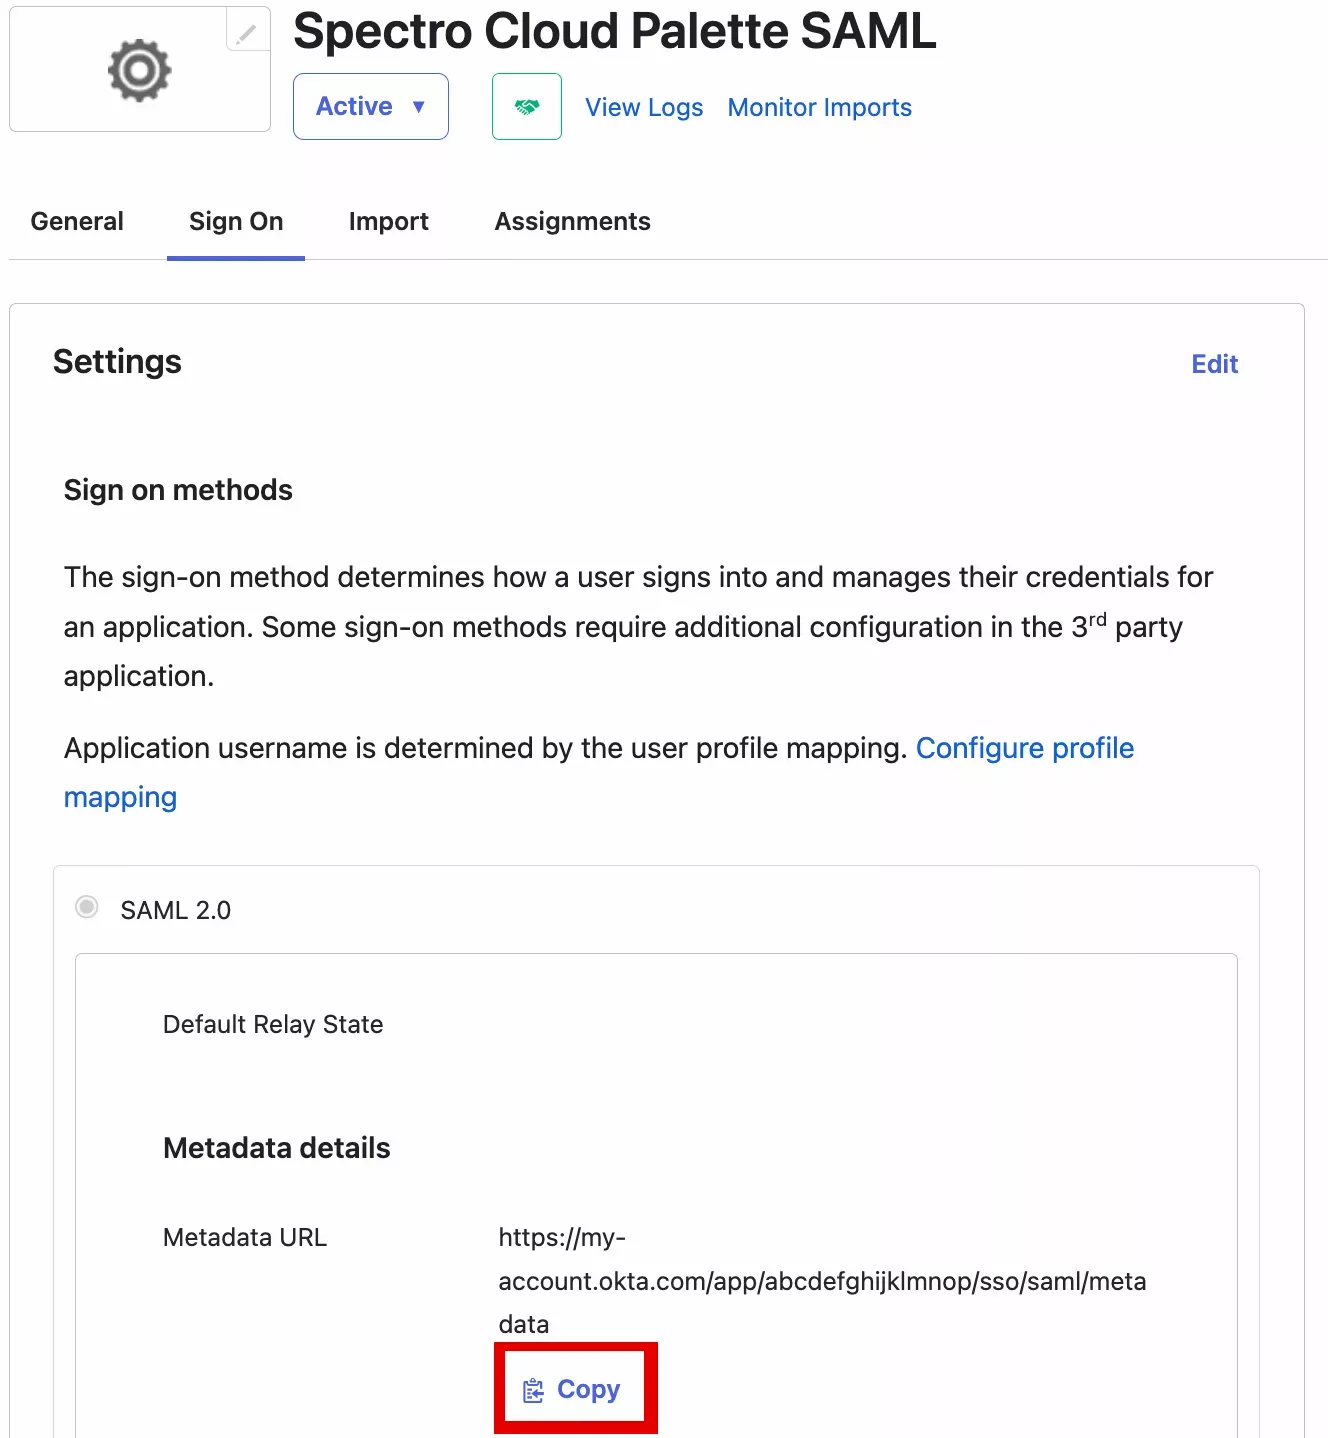
- Go back to Palette SSO settings then paste the contents of the Okta SAML Metadata into Identity Provider Metadata.
-
Under Default Teams, search for then click the Palette team we created called Okta Team. This connects all Okta users with the team and the team permissions we set earlier.
-
When all the information has been entered, click Enable to activate SSO. You will receive a message stating SAML configured successfully.
Validate
- Log in to Palette through SSO as an Okta user who is a member of the Okta application to verify SSO. If you are still logged into Palette with a non-SSO user, log out by selecting Logout in the User Menu at the top right.

- The Palette login screen now displays a Sign in button and no longer presents a username and password field. Below the Sign In button, there is an SSO issues? --> Use your password link. This link can be used to bypass SSO and log in with a local Palette account in case there is an issue with SSO and you need to access Palette without SSO. Click on the Sign in button to log in via SSO.

- If this is the first time you are logging in with SSO, you will be redirected to the Okta login page. Depending on your organization's SSO settings, this could be a simple login form or require MFA (Multi-Factor Authentication).
- You are now automatically added to the
Okta Teamteam in Palette. To verify, navigate to the left Main Menu, select Tenant Settings --> Users & Teams --> Teams tab. Click on the Okta Team team and view the team members section.