Node Pools
A node pool is a group of nodes within a cluster that all have the same configuration. You can use node pools for different workloads. For example, you can create a node pool for your production workloads and another for your development workloads. You can update node pools for active clusters or create a new one for the cluster.
Exercise caution when modifying node pools. We recommend creating a backup before you make a change in the event a configuration change causes an issue.
Repave Behavior and Configuration
In Kubernetes, the term "repave" refers to the process of replacing a node with a new node. Repaving is a common practice in Kubernetes to ensure that nodes are deployed with the latest version of the operating system and Kubernetes. Repaving is also used to replace nodes that are unhealthy or have failed. You can configure the repave time interval for a node pool.
Different types of repaving operations may occur, depending on what causes them:
This section only applies to non-Edge clusters. To learn about the upgrade behavior of Edge clusters, refer to the Edge Cluster Upgrade Behavior page.
-
Control plane repave: This takes place when certain changes are made to the Kubernetes configuration, such as changing the apiServer specification. This type of repave also occurs when there are changes in the hardware specifications of the control plane nodes, such as during a node scale-up operation or when changing from one instance type to another. Control plane nodes are repaved sequentially.
-
Worker node pool repave: This happens when changes to a node pool's specifications cause the the existing nodes to become incompatible with the pool's specified criteria. For instance, changing the hardware specifications of a worker pool. Nodes within the affected pool are sequentially replaced with new nodes that meet the updated specifications.
-
Full cluster repave: This occurs if changes are made to the Operating System (OS) layer or if modifications to the Kubernetes layer impact all nodes, such as when upgrading to a different Kubernetes version. All nodes across all pools are sequentially repaved starting with the control plane.
You can customize the repave time interval for all node pools except the control plane node pool. The default repave time interval is zero seconds, meaning the old worker node is considered for deletion as soon as a new worker node is initialized. Because the new worker node can take some time to become fully operational, you can extend the repave time interval to preserve the old worker node until the new one is ready. If you need to modify the repave time interval post-cluster creation, follow the Change a Node Pool guide.
To ensure that repave operations do not interfere with your existing workloads, Palette requires explicit cluster-level approval to initiate them. Refer to the Approve Cluster Repave guide to learn how to approve cluster repaves.
Node Pool Configuration Settings
The following tables contain the configuration settings for node pools. Depending on the type of node pool, some of the settings may not be available.
Control Plane Node Pool
| Property | Description |
|---|---|
| Node pool name | A descriptive name for the node pool. |
| Number of nodes in the pool | Number of nodes to be provisioned for the node pool. For the control plane pool, this number can be 1, 3, or 5. |
| Allow worker capability | Select this option to allow workloads to be provisioned on control plane nodes. |
| Additional Labels | Optional labels apply placement constraints on a pod. For example, you can add a label to make a node eligible to receive the workload. To learn more, refer to the Node Labels. |
| Taints | Sets toleration to pods and allows (but does not require) the pods to schedule onto nodes with matching taints. To learn more, refer to the Taints and Tolerations guide. |
| Availability Zones | The Availability Zones from which to select available servers for deployment. If you select multiple zones, Palette will deploy servers evenly across them as long as sufficient servers are available to do so. |
| Disk Size | Give the required storage size. |
Worker Node Pool
| Property | Description |
|---|---|
| Node pool name | A descriptive name for the worker pool. |
| Number of nodes in the pool | Number of nodes to be provisioned for the node pool. |
| Node repave interval | The time interval in seconds between repaves. The default value is 0 seconds. |
| Additional Labels | Optional labels apply placement constraints on a pod. For example, you can add a label to make a node eligible to receive the workload. To learn more, refer to the Node Labels guide. |
| Taints | Sets toleration to pods and allows (but does not require) the pods to schedule onto nodes with matching taints. To learn more, refer to the Taints and Tolerations guide. |
| Rolling update | Apply the update policy. Expand first launches new nodes and then terminates old notes. Contract first terminates old nodes and then launches new ones. |
| Instance Option | AWS options for compute capacity. On Demand gives you full control over the instance lifecycle without long-term commitment. Spot allows the use of spare EC2 capacity at a discount but which can be reclaimed if needed. |
| Instance Type | The compute size. |
| Availability Zones | The Availability Zones from which to select available servers for deployment. If you select multiple zones, Palette will deploy servers evenly across them as long as sufficient servers are available to do so. If you select public subnets, ensure those subnets have automatic public IP addresses assigned. Otherwise, node deployment errors will occur. Automatic public IP address assignment is typically handled by the infrastructure provider Palette is deploying a cluster to. Discuss this with your network team for additional guidance. |
| Disk Size | Give the required storage size. |
Some features may not be available for all infrastructure providers. Review each infrastructure provider's node pool configuration settings to learn more.
Create a New Node Pool
Prerequisites
-
An active cluster in Palette.
-
The
cluster.updatepermission that is required to edit clusters.
Create Node Pool
You can create a new node pool for an active cluster. To create a new node pool follow the steps below.
-
Log in to Palette.
-
Navigate to the left Main Menu and click on Clusters.
-
Click on the row of the cluster you want to edit the node pool.
-
Click on the Nodes tab.
-
Click on New Node Pool.
-
Fill out the input fields in the Add node pool page. Refer to the Node Pool Configuration Settings tables for more information on each field.
-
Click on Confirm to create the new node pool.
Validate
After you create a new node pool, you can validate the node pool by following the steps below.
-
Log in to Palette.
-
Navigate to the left Main Menu and click on Clusters.
-
Click on the row of the cluster you added the new node pool.
-
Click on the Nodes tab.
-
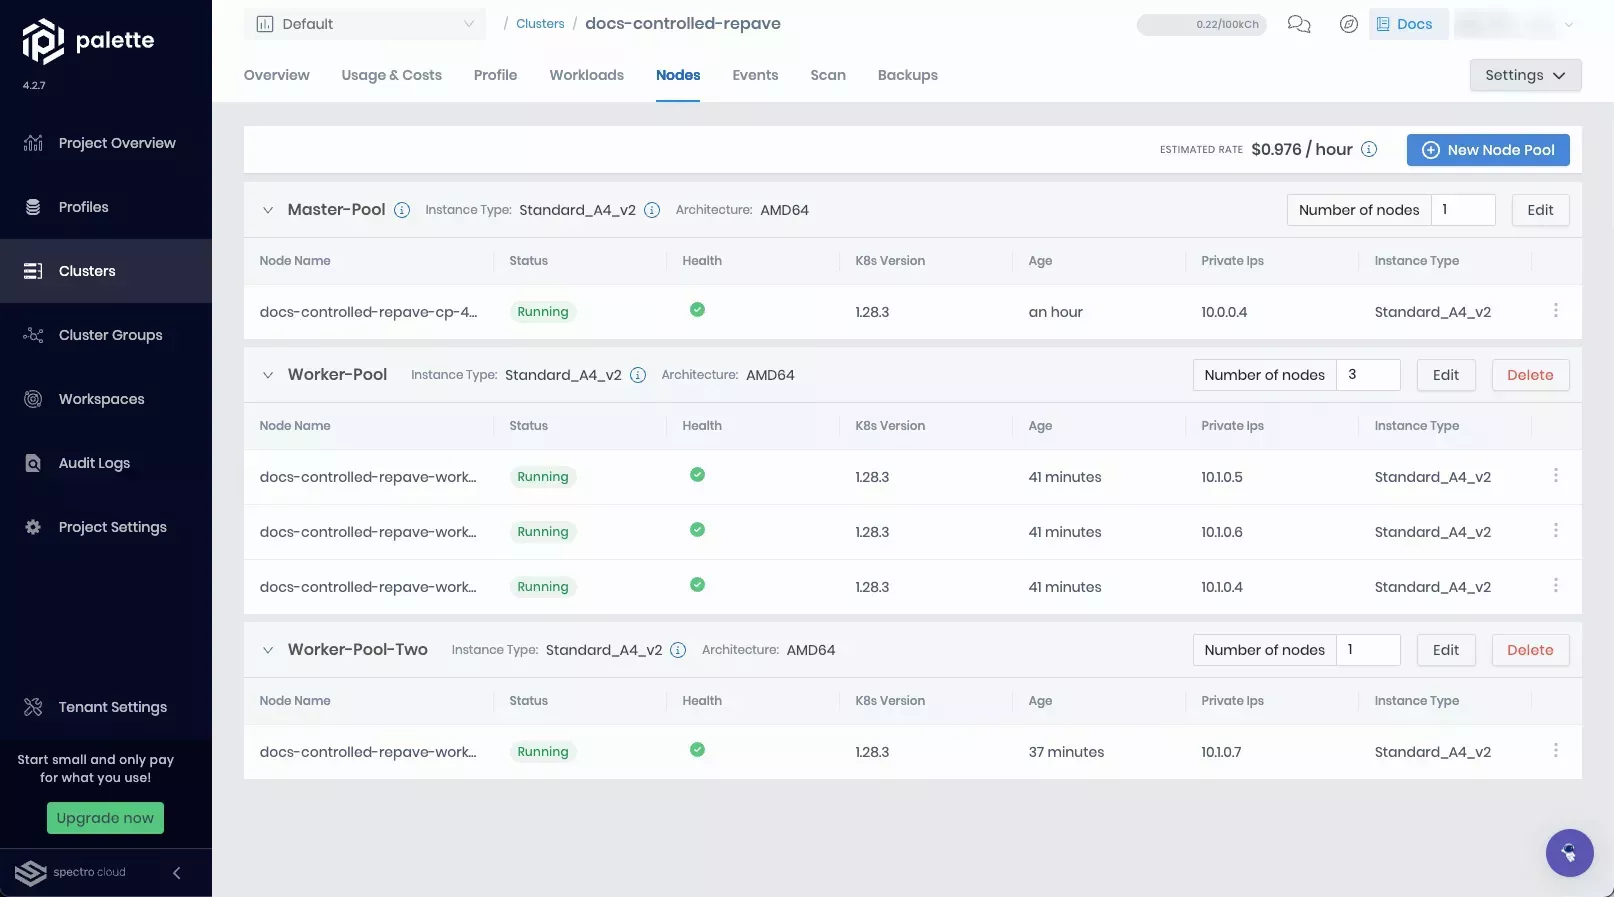
Ensure the new node pool is listed in the Node Pools section and that all compute instances are in the healthy status.
Change a Node Pool
You can apply changes to a node pool after a cluster is created and deployed. You can change the node pool's taints label, node repavement interval, number of compute instances in the node pool and more. To make changes to an active cluster's node pools, follow the steps below.
If you have enabled Autoscaler for a node pool, you cannot adjust the number of nodes in the pool manually.
Prerequisites
-
An active cluster in Palette.
-
The
cluster.updatepermission that is required to edit clusters.
Edit Node Pool
-
Log in to Palette.
-
Navigate to the left Main Menu and click on Clusters.
-
Select a cluster to edit the node pool.
-
Click on the Nodes tab.
-
The nodes details page is where you can review the existing node pools and their configuration. You can also add a new node pool from this page. Click on the Edit button to make changes to the node pool.
-
Make the changes as needed. Refer to the Node Pool Configuration Settings tables for more information on each field.
-
Click on Confirm to update the node pool.
Validate
After you have modified a new node pool, you can validate the node pool by following the steps below.
-
Log in to Palette.
-
Navigate to the left Main Menu and click on Clusters.
-
Select the cluster with the new node pool.
-
Click on the Nodes tab.
-
Ensure the new node pool is listed in the Node Pools section and that all compute instances are in the healthy status.
Approve Cluster Repave
Prerequisites
-
An active cluster in Palette.
-
The
cluster.updatepermission that is required to edit clusters. -
Pending cluster repave operations.
Approve Cluster Repave
-
Log in to Palette.
-
Navigate to the left Main Menu and click on Clusters.
-
Select a cluster with pending repave operations.
-
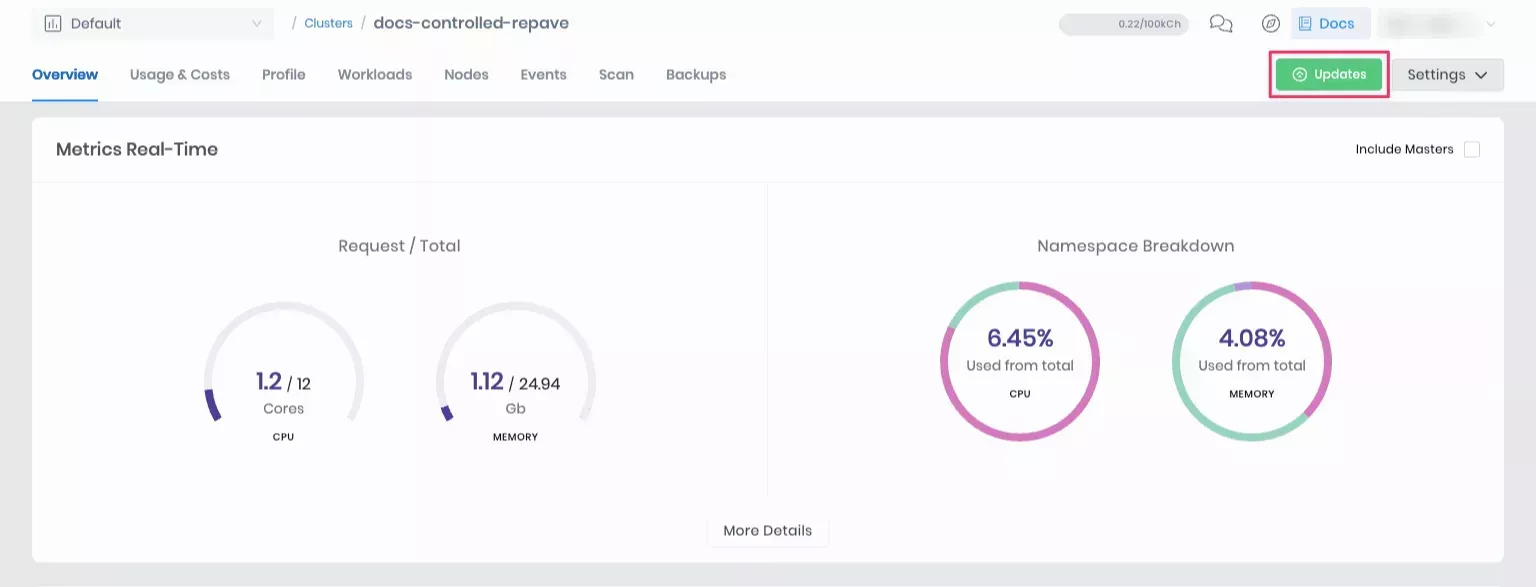
Click Updates.
-
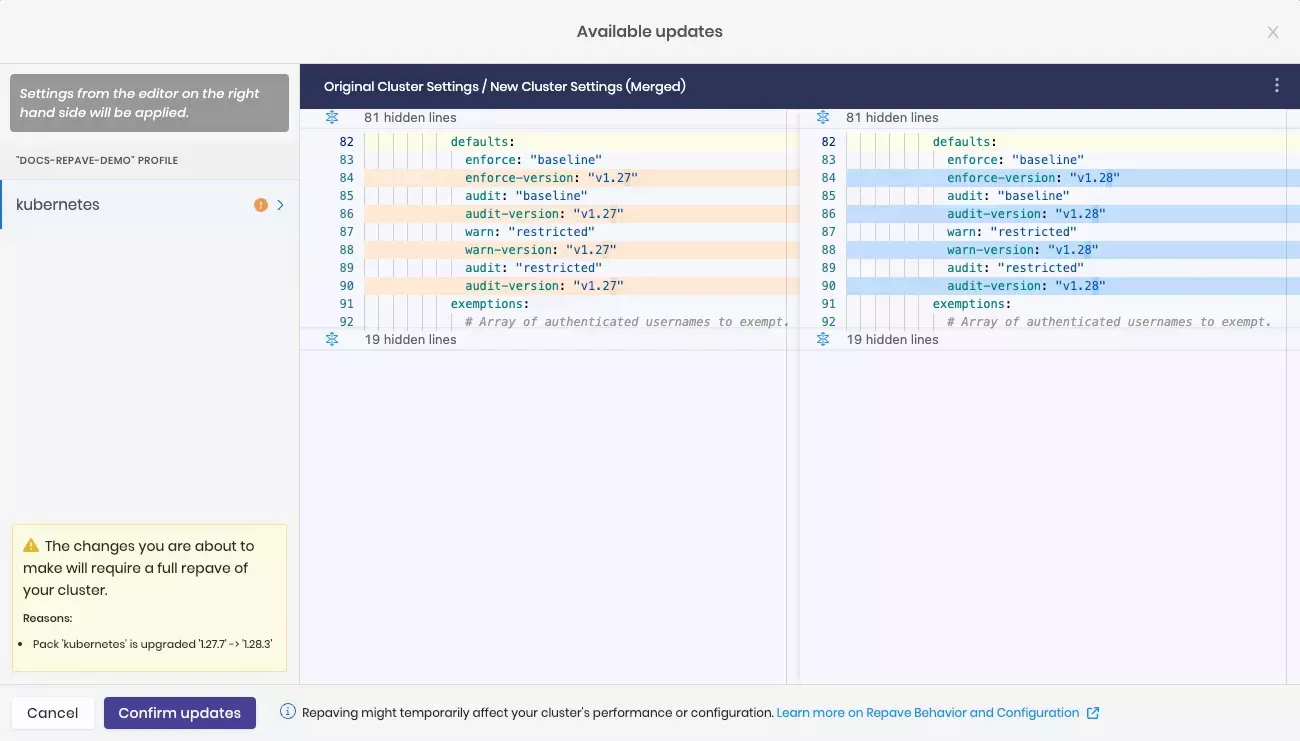
Review and, optionally, override changes that the repave introduces.
-
Click Confirm updates.
Validation
-
Log in to Palette.
-
Navigate to the left Main Menu and click on Clusters.
-
Click on the Nodes tab.
-
Verify that all compute instances are in the healthy status and reflect the applied repave changes.