Install Non-Airgap Self-Hosted Palette VerteX
You can use the Palette VerteX Helm Chart to install VerteX in a multi-node Kubernetes cluster in your production environment.
This installation method is common in secure environments with restricted network access that prohibits using VerteX SaaS. Review our architecture diagrams to ensure your Kubernetes cluster has the necessary network connectivity for VerteX to operate successfully.
Prerequisites
-
kubectl is installed and available.
-
Helm is installed and available.
-
Access to the target Kubernetes cluster's kubeconfig file. You must be able to interact with the cluster using
kubectlcommands and have sufficient permissions to install VerteX. We recommend using a role with cluster-admin permissions to install VerteX. -
Ensure
unzipor a similar extraction utility is installed on your system. -
The Kubernetes cluster must be set up on a supported version of Kubernetes, which includes versions v1.25 to v1.27.
-
Ensure the Kubernetes cluster does not have Cert Manager installed. VerteX requires a unique Cert Manager configuration to be installed as part of the installation process. If Cert Manager is already installed, you must uninstall it before installing VerteX.
-
The Kubernetes cluster must have a Container Storage Interface (CSI) installed and configured. VerteX requires a CSI to store persistent data. You may install any CSI that is compatible with your Kubernetes cluster.
-
We recommend the following resources for VerteX. Refer to the VerteX size guidelines for additional sizing information.
-
8 CPUs per node.
-
16 GB Memory per node.
-
100 GB Disk Space per node.
-
A Container Storage Interface (CSI) for persistent data.
-
A minimum of three worker nodes or three untainted control plane nodes.
-
-
The following network ports must be accessible for VerteX to operate successfully.
-
TCP/443: Inbound and outbound to and from the VerteX management cluster.
-
TCP/6443: Outbound traffic from the VerteX management cluster to the deployed clusters' Kubernetes API server.
-
-
Ensure you have an SSL certificate that matches the domain name you will assign to VerteX. You will need this to enable HTTPS encryption for VerteX. Reach out to your network administrator or security team to obtain the SSL certificate. You need the following files:
-
x509 SSL certificate file in base64 format.
-
x509 SSL certificate key file in base64 format.
-
x509 SSL certificate authority file in base64 format.
-
-
Ensure the OS and Kubernetes cluster you are installing VerteX onto is FIPS-compliant. Otherwise, VerteX and its operations will not be FIPS-compliant.
-
An Nginx controller will be installed by default. If you already have an Nginx controller deployed in the cluster, you must set the
ingress.enabledparameter tofalsein the values.yaml file. -
A custom domain and the ability to update Domain Name System (DNS) records. You will need this to enable HTTPS encryption for VerteX.
-
If you are installing VerteX behind a network proxy server, ensure you have the Certificate Authority (CA) certificate file in the base64 format. You will need this to enable VerteX to communicate with the network proxy server.
-
Access to the VerteX Helm Charts. Refer to the Access VerteX for instructions on how to request access to the Helm Chart.
Do not use a VerteX-managed Kubernetes cluster when installing VerteX. VerteX-managed clusters contain the VerteX agent and VerteX-created Kubernetes resources that will interfere with the installation of VerteX.
Install VerteX
The following instructions are written agnostic to the Kubernetes distribution you are using. Depending on the underlying infrastructure provider and your Kubernetes distribution, you may need to modify the instructions to match your environment. Reach out to our support team if you need assistance.
-
Open a terminal session and navigate to the directory where you downloaded the Palette install zip file provided by our support. Unzip the file to a directory named vertex-install.
unzip release-*.zip -d vertex-install -
Navigate to the release folder inside the vertex-install directory.
cd vertex-install/charts/release-* -
Install Cert Manager using the following command. Replace the actual file name of the Cert Manager Helm Chart with the one you downloaded, as the version number may be different.
 helm upgrade --values extras/cert-manager/values.yaml \
 cert-manager extras/cert-manager/cert-manager-*.tgz --install
Release "cert-manager" does not exist. Installing it now.
NAME: cert-manager
LAST DEPLOYED: Mon Jan 29 16:32:33 2024
NAMESPACE: default
STATUS: deployed
REVISION: 1
TEST SUITE: None -
Open the values.yaml in the spectro-mgmt-plane folder with a text editor of your choice. The values.yaml contains the default values for the VerteX installation parameters. However, you must populate the following parameters before installing VerteX. You can learn more about the parameters in the values.yaml file in the Helm Configuration Reference page.
Parameter Description Type env.rootDomainThe URL name or IP address you will use for the VerteX installation. string ociPackRegistryorociPackEcrRegistryThe OCI registry credentials for VerteX FIPS packs. These credentials are provided by our support team. object scarThe Spectro Cloud Artifact Repository (SCAR) credentials for VerteX FIPS images. These credentials are provided by our support team. object ingress.enabledWhether to install the Nginx ingress controller. Set this to falseif you already have an Nginx controller deployed in the cluster.boolean reach-systemSet reach-system.enabledtotrueand configure thereach-system.proxySettingsparameters to configure VerteX to use a network proxy in your environmentobject Save the values.yaml file after you have populated the required parameters mentioned in the table.
Select one of the following tabs to review an example of the values.yaml file with the required parameters highlighted.
- AWS ECR Registry
- OCI Registry
#########################
# Spectro Cloud Palette #
#########################
# MongoDB Configuration
mongo:
  # Whether to deploy MongoDB in-cluster (internal == true) or use Mongo Atlas
  internal: true

  # Mongodb URL. Only change if using Mongo Atlas.
  databaseUrl: "mongo-0.mongo,mongo-1.mongo,mongo-2.mongo"
  # Mongo Atlas password, base64 encoded. Only enter if using Mongo Atlas.
  databasePassword: ""

  #No. of mongo replicas to run, default is 3
  replicas: 3
  # The following only apply if mongo.internal == true
  cpuLimit: "2000m"
  memoryLimit: "4Gi"
  pvcSize: "20Gi"
  storageClass: "" # leave empty to use the default storage class

config:
  installationMode: "connected" #values can be connected or airgap.

  # SSO SAML Configuration (Optional for self-hosted type)
  sso:
    saml:
      enabled: false
      acsUrlRoot: "myfirstpalette.spectrocloud.com"
      acsUrlScheme: "https"
      audienceUrl: "https://www.spectrocloud.com"
      entityId: "https://www.spectrocloud.com"
      apiVersion: "v1"

  # Email Configurations. (Optional for self-hosted type)
  email:
    enabled: false
    emailId: "noreply@spectrocloud.com"
    smtpServer: "smtp.gmail.com"
    smtpPort: 587
    insecureSkipVerifyTls: true
    fromEmailId: "noreply@spectrocloud.com"
    password: "" # base64 encoded SMTP password

  env:
    # rootDomain is a DNS record which will be mapped to the ingress-nginx-controller load balancer
    # E.g., myfirstpalette.spectrocloud.com
    # - Mandatory if ingress.internal == false
    # - Optional if ingress.internal == true (leave empty)
    #
    # IMPORTANT: a DNS record must be created separately and it must be a wildcard to account for Organization prefixes
    # E.g., *.myfirstpalette.spectrocloud.com
    rootDomain: "vertex.example.com"

  # stableEndpointAccess is used when deploying EKS clusters in Private network type.
  # When your Saas installed instance have connectivity to the private VPC where you want to launch the cluster set the stableEndpointAccess to true
  cluster:
    stableEndpointAccess: false

  #  registry:
  #    endpoint: "" #<Contact Spectro Cloud Sales for More info>
  #    name: "" #<Contact Spectro Cloud Sales for More info>
  #    password: "" #<Contact Spectro Cloud Sales for More info>
  #    username: "" #<Contact Spectro Cloud Sales for More info>
  #    insecureSkipVerify: false
  #    caCert: ""

  #  ociPackRegistry:
  #    endpoint: "" #<Contact Spectro Cloud Sales for More info>
  #    name: "" #<Contact Spectro Cloud Sales for More info>
  #    password: "" #<Contact Spectro Cloud Sales for More info>
  #    username: "" #<Contact Spectro Cloud Sales for More info>
  #    baseContentPath: "" #<Contact Spectro Cloud Sales for More info>
  #    insecureSkipVerify: false
  #    caCert: ""

  ociPackEcrRegistry:
    endpoint: "15789037893.dkr.ecr.us-east-1.amazonaws.com" #<Contact Spectro Cloud Sales for More info>
    name: "VerteX Packs OCI" #<Contact Spectro Cloud Sales for More info>
    accessKey: "*************" #<Contact Spectro Cloud Sales for More info>
    secretKey: "*************" #<Contact Spectro Cloud Sales for More info>
    baseContentPath: "production-fips" #<Contact Spectro Cloud Sales for More info>
    isPrivate: true
    insecureSkipVerify: false
    caCert: ""

  # ociImageRegistry:
  #   endpoint: "" #<Contact Spectro Cloud Sales for More info>
  #   name: "" #<Contact Spectro Cloud Sales for More info>
  #   password: "" #<Contact Spectro Cloud Sales for More info>
  #   username: "" #<Contact Spectro Cloud Sales for More info>
  #   baseContentPath: "" #<Contact Spectro Cloud Sales for More info>
  #   insecureSkipVerify: false
  #   caCert: ""
  #   mirrorRegistries: ""

  scar:
    endpoint: "https://saas-repo-fips.console.spectrocloud.com"
    username: "**********"
    password: "**********"
    insecureSkipVerify: true
    caCert: ""

  imageSwapImages:
    imageSwapInitImage: "gcr.io/spectro-images-public/release-fips/thewebroot/imageswap-init:v1.5.2"
    imageSwapImage: "gcr.io/spectro-images-public/release-fips/thewebroot/imageswap:v1.5.2"

  imageSwapConfig:
    isEKSCluster: true #If the Cluster you are trying to install is EKS cluster set value to true else set to false

nats:
  # Should we install nats as part of the nats chart bundled with hubble charts
  # If not enabled NATS service should be installed as a separate service.

  enabled: true

  # Whether to front NATS with a cloud load balancer (internal == false) or
  # either share the ingress load balancer or use hostNetwork (internal == true).
  # See nats.natsUrl comments for further detail.
  internal: true

  # NATS URL
  # Comma separated list of <dns_name:port> mappings for nats load balancer service
  # E.g., "message1.dev.spectrocloud.com:4222,message2.dev.spectrocloud.com:4222"
  #
  # Mandatory if nats.internal == false
  # Otherwise, if nats.internal == true:
  # - If ingress.ingress.internal == true: leave empty (use hostNetwork)
  # - If ingress.ingress.internal == false: use "<config.env.rootDomain>:4222" (share ingress lb)
  natsUrl: ""

  # *********************** IMPORTANT NOTE ******************************
  # * if nats.internal == true, ignore all of the following NATS config *
  # *********************************************************************

  # NATS load balancer annotations
  annotations: {}

  # AWS example
  # service.beta.kubernetes.io/aws-load-balancer-ssl-cert: <ACM_ARN>
  # service.beta.kubernetes.io/aws-load-balancer-ssl-ports: "server-port"
  # service.beta.kubernetes.io/aws-load-balancer-backend-protocol: tcp

  # Azure example
  # service.beta.kubernetes.io/azure-load-balancer-internal: "true"
  # service.beta.kubernetes.io/azure-dns-label-name: myserviceuniquelabel

  # Static IP for the nats loadbalancer service. If empty, a dynamic IP will be generated.
  natsStaticIP: ""
grpc:
  external: false
  endpoint: "" #Please provide DNS endpoint with the port eg: msg.spectrocloud.com:443
  caCertificateBase64: "" #Please provide caCertificate for the grpc server Cert
  serverCrtBase64: ""
  serverKeyBase64: ""
  insecureSkipVerify: false

ingress:
  # When enabled nginx ingress controller would be installed
  enabled: true

  ingress:
    # Whether to front NGINX Ingress Controller with a cloud
    # load balancer (internal == false) or use host network
    internal: false

    # Default SSL certificate and key for NGINX Ingress Controller (Optional)
    # A wildcard cert for config.env.rootDomain, e.g., *.myfirstpalette.spectrocloud.com
    # If left blank, the NGINX ingress controller will generate a self-signed cert (when terminating TLS upstream of ingress-nginx-controller)
    certificate: ""
    key: ""

    #If ACM is enabled please use grpc as a non internal and bring grpc on different LB. Provide certificate and dns for it.
    annotations: {}
    # AWS example
    # service.beta.kubernetes.io/aws-load-balancer-internal: "true"
    # service.beta.kubernetes.io/aws-load-balancer-backend-protocol: tcp
    # service.beta.kubernetes.io/aws-load-balancer-ssl-cert: <ACM_ARN>
    # service.beta.kubernetes.io/aws-load-balancer-ssl-ports: "https"

    # Azure example
    # service.beta.kubernetes.io/azure-load-balancer-internal: "true"
    # service.beta.kubernetes.io/azure-dns-label-name: myserviceuniquelabel

    # Static IP for the Ingress load balancer service. If empty, a dynamic IP will be generated.
    ingressStaticIP: ""

    # For Service like AWS Load Balancer using https we would want to terminate the HTTPS at Load Balancer.
    terminateHTTPSAtLoadBalancer: false
  nats:
    enabled: true

frps:
  frps:
    enabled: false
    frpHostURL: proxy.sample.spectrocloud.com
    server:
      crt: LS0tLS1CRUdJTiBDRVJUSUZJQ0FURS0tLS0tCk1JSURqekNDQW5lZ0F3SUJBZ0lVZTVMdXBBZGljd0Z1SFJpWWMyWEgzNTFEUzJJd0RRWUpLb1pJaHZjTkFRRUwKQlFBd0tERW1NQ1FHQTFVRUF3d2RjSEp2ZUhrdWMyRnRjR3hsTG5Od1pXTjBjbTlqYkc5MVpDNWpiMjB3SGhjTgpNakl4TURFME1UTXlOREV5V2hjTk1qY3hNREV6TVRNeU5ERXlXakI3TVFzd0NRWURWUVFHRXdKVlV6RUxNQWtHCkExVUVDQk1DUTBFeEV6QVJCZ05WQkFjVENsTmhiblJoUTJ4aGNtRXhGVEFUQmdOVkJBb1RERk53WldOMGNtOUQKYkc5MVpERUxNQWtHQTFVRUN4TUNTVlF4SmpBa0JnTlZCQU1USFhCeWIzaDVMbk5oYlhCc1pTNXpjR1ZqZEhKdgpZMnh2ZFdRdVkyOXRNSUlCSWpBTkJna3Foa2lHOXcwQkFRRUZBQU9DQVE4QU1JSUJDZ0tDQVFFQXd5bEt3MmlxClBXM2JrQU0wV3RhaEFLbEppcWFHd05LUDVRRTZ6ZW5NM2FURko3TjIwN0dWcUNGYzJHTDNodmNhTDFranZjeEkKK2lybHpkbm9hcVhUSmV3ZkJiTGs2SGVhZmdXUVp3NHNNeE5QRUVYYlNXYm54Mm03Y2FlbVJiUWZSQWhPWXRvWgpIWG1IMzQ1Q25mNjF0RnhMeEEzb0JRNm1yb0JMVXNOOUh2WWFzeGE5QUFmZUNNZm5sYWVBWE9CVmROalJTN1VzCkN5NmlSRXpEWFgvem1nOG5WWFUwemlrcXdoS3pqSlBJd2FQa2ViaXVSdUJYdEZ0VlQwQmFzS3VqbURzd0lsRFQKVmR4SHRRQUVyUmM4Q2Nhb20yUkpZbTd1aHNEYlo2WVFzS3JiMmhIbU5rNENVWUd5eUJPZnBwbzR2bFd1S2FEcgpsVFNYUXlPN0M0ejM1d0lEQVFBQm8xNHdYREJhQmdOVkhSRUVVekJSZ2dsc2IyTmhiR2h2YzNTSEJIOEFBQUdDCkhYQnliM2g1TG5OaGJYQnNaUzV6Y0dWamRISnZZMnh2ZFdRdVkyOXRnaDhxTG5CeWIzaDVMbk5oYlhCc1pTNXoKY0dWamRISnZZMnh2ZFdRdVkyOXRNQTBHQ1NxR1NJYjNEUUVCQ3dVQUE0SUJBUUEvRFJFVm54SWJRdi9uMDEvSQpJd1d0ekhKNGNHOUp6UlB6dmszNUcvRGJOVzZYZ0M3djBoWlFIVHg5bzMrckxoSUFiWTNmbjc1VEtlN3hMRWpiCkI3M3pGWURJSStkYzM5NkQzZU51M2NxRGIvY01kYmlFalhod2ttZk9NRm9qMnpOdHJIdzFsSjA0QlNFMWw1YWgKMDk0Vy9aaEQ2YTVLU3B0cDh1YUpKVmNrejRYMEdRWjVPYjZadGdxZVVxNytqWVZOZ0tLQzJCMW1SNjMyMDNsZwozVFZmZEkrdmI3b292dVdOOFRBVG9qdXNuS25WMmRMeTFBOWViWXYwMEM3WWZ6Q0NhODgrN2dzTGhJaUJjRHBPClJkWjU3QStKanJmSU5IYy9vNm5YWFhDZ2h2YkFwUVk1QnFnMWIzYUpUZERNWThUY0hoQVVaQzB5eU04bXcwMnQKWHRRQwotLS0tLUVORCBDRVJUSUZJQ0FURS0tLS0tCg==
      key: LS0tLS1CRUdJTiBSU0EgUFJJVkFURSBLRVktLS0tLQpNSUlFb3dJQkFBS0NBUUVBd3lsS3cyaXFQVzNia0FNMFd0YWhBS2xKaXFhR3dOS1A1UUU2emVuTTNhVEZKN04yCjA3R1ZxQ0ZjMkdMM2h2Y2FMMWtqdmN4SStpcmx6ZG5vYXFYVEpld2ZCYkxrNkhlYWZnV1FadzRzTXhOUEVFWGIKU1dibngybTdjYWVtUmJRZlJBaE9ZdG9aSFhtSDM0NUNuZjYxdEZ4THhBM29CUTZtcm9CTFVzTjlIdllhc3hhOQpBQWZlQ01mbmxhZUFYT0JWZE5qUlM3VXNDeTZpUkV6RFhYL3ptZzhuVlhVMHppa3F3aEt6akpQSXdhUGtlYml1ClJ1Qlh0RnRWVDBCYXNLdWptRHN3SWxEVFZkeEh0UUFFclJjOENjYW9tMlJKWW03dWhzRGJaNllRc0tyYjJoSG0KTms0Q1VZR3l5Qk9mcHBvNHZsV3VLYURybFRTWFF5TzdDNHozNXdJREFRQUJBb0lCQUFPVVZFeTFOTG9mczdFMgpmZFZVcm10R3I1U2RiVWRJRlYrTDREbzZtWWxQSmxhT0VoWGI0ZlROZDloNEtEWVBmaWwwSnhXcUU0U1RHTmZuCnNUMlRnUVhuQ01LZi8xYk1Lc2M0N3VjVStYYU9XaHJnVFI5UmhkckFjN0duODRLL3hQc0ljL2VZTEhHLzh1QUUKeWUvLzVmRkM2QmpXY0hUM1NkTlZnd3duamJudG5XTXIzTFJBVnJBamZBckxveWUwS0F2YytYdXJLTEVCcmMyVQpjaHlDbitZemJKN0VlSG44UXdQNGdBNXVSK0NCMFJPeFErYXIzS3M5YUhkZTQ1OEVNNEtLMnpUOXA4RWZRc1lFCkFtNUpxWjliR0JEVHV1dEkyNm9GK0pLQ1IzZzhXNERRcHVYRUZoVjlya0pMSm13RDhQb0JaclF6UzZvdmJhdkkKRk42QVM4RUNnWUVBOEcxQzFxZVh4dTQ4aEYxak5MTCswRmxkeWdFem9SMmFoRGJCai8weUZkQVVjU2pYTzk0NAozN1dORTBUUG10WG1Vc3NZTlBTR21XaWI2OUhicEFoMTY3SWVwNE9LaVlZdkozYm1oUC9WNzFvK3M0SWJlSHh1CkVJbWVVckFOZWRoQURVQnZ4c1lXRWxlVlVJSFFRcjY1VHM2ZjIrWkpTKzg4TU05bUorL3BmcmNDZ1lFQXo4MXgKR3JiSE5oak56RjhZMjhiK0hMNW5rdDR0SUdkU3hnbW9PMFFJeGkrQVNZTzB0WW42VFk0ZHI5ZXErMzE3b21ZawpMbDNtNENORDhudG1vYzRvWnM4SUpDQ0IrZjNqcTY4OHdoQU9vVHZ4dDhjZVJqOFRhRHl1SHZwS043OVNsVVd2CjBJd2ZRNDNIemd3SWJiSWhjcTRJVGswanI0VHdWbThia283VElGRUNnWUJoNnUzVXhHN0JHeGZVaE1BNW4waSsKREJkeGhPbkZEV3gzdW1FOHhrN1dxV2NaNnhzMWk3eTRCNVhNS2pNdkNUeURyYWxQTCtOOXFTZ1BjK216TmFybwo4aU1mOENmRStMeE5vMVFoQ0p6Vm5YaDUzVnhZeHJ5QXlidU1TNTFCYVh3MHFYQ2NrT0krV0NNOHBaSHZEUVFsCmYydUZ3SlZMY3NTZDBHbjNpL01ab3dLQmdBY1BzUjg2Uk15MnpROTd6OGx3R3FSNVorV2F2U2ZUdXdGVnhLeTIKNUNGdjdja1J1NnRMbEFEY3FtK1dRWTRvTm5KUFREMXpIV3hTWm5XdjhjM2Z4b212MFZRQThzbSs4ZVNjb05EcgpZTVBqMkpQcEpVTTMwMzRBU2Q1dG5PWUdEMVZaTjk4N1U3aWs4Ynd6dG5tYnl2MHRvc1NlWkc4TGNtdE5mVDllCnNSZnhBb0dCQUpTV1lDellyTlRMNnRUSnh5M2FqWm5jZkxrMEV0eWNCd05FRXZHVzVSVE9LOUFYTE96RzN0eHUKajZqWlRpaUFRU09aaVd0clJHU0U0bEkyQ1MvcjNjd3VuSGlnZlovd1dKZldkZ0JpRnZqOTVFbUVQWUZaRDRobQpkT3l5UHhRRXFTRmprQ21BS2plOFBpTDdpU01GbGhBZTZQWFljQlExdCtzd01UeXBnY3RrCi0tLS0tRU5EIFJTQSBQUklWQVRFIEtFWS0tLS0tCg==
    ca:
      crt: LS0tLS1CRUdJTiBDRVJUSUZJQ0FURS0tLS0tCk1JSURNVENDQWhtZ0F3SUJBZ0lVSHhWK0ljVGZHUElzdW8yY3dqQ0Q0Z2RSTFFRd0RRWUpLb1pJaHZjTkFRRUwKQlFBd0tERW1NQ1FHQTFVRUF3d2RjSEp2ZUhrdWMyRnRjR3hsTG5Od1pXTjBjbTlqYkc5MVpDNWpiMjB3SGhjTgpNakl4TURFME1UTXlOREV5V2hjTk16WXdOakl5TVRNeU5ERXlXakFvTVNZd0pBWURWUVFEREIxd2NtOTRlUzV6CllXMXdiR1V1YzNCbFkzUnliMk5zYjNWa0xtTnZiVENDQVNJd0RRWUpLb1pJaHZjTkFRRUJCUUFEZ2dFUEFEQ0MKQVFvQ2dnRUJBSy90WXBHVi9HRURUWnZzL25QQ2lOK0U3K1dOQ21GeU1NQjdkazVOT3JzQWZIaVVvZ1JRVUo0WQptSjhwVmYrSzhTRFBsdGNYcW40WVVTbmxiUERsVlBkWU5zOTEwT3RaS1EwNW96aUtGV2pNbS85NHlLSjVyVzNsCndDNEN0ayttUm9Ib0ZQQS81dmFVbVZHdlVadjlGY0JuL0pKN2F4WnRIQk1PRiticXQ0Zmd0ci9YMWdOeWhPVzUKZTVScGpESkozRjJTVnc5NUpBQSt4a3V3UitFSmVseEtnQVpxdDc0ejB4U2ROODZ0QzNtK0wxRGs2WVVlQWEzZApvM3Rsa3ZkeDV6dUJvSmI2QmpZWEV4UE1PbThRcHFNVWRLK3lDZUdrem9XQStDOUtFdGtVaERCWktENStNWXRZCktVMUh1RXJCbmw2Z3BuWTRlbzJjVTRxdkNwZzZ4S3NDQXdFQUFhTlRNRkV3SFFZRFZSME9CQllFRklKMkRkTjgKc2ZtVjRCT1ZFL0FjZ0VEejArNmlNQjhHQTFVZEl3UVlNQmFBRklKMkRkTjhzZm1WNEJPVkUvQWNnRUR6MCs2aQpNQThHQTFVZEV3RUIvd1FGTUFNQkFmOHdEUVlKS29aSWh2Y05BUUVMQlFBRGdnRUJBQWhQVi9RMVl1YWVTOTZVCmhjVGQ4RWdJaHhpbHFiTWlTQm5WaVdrdlJzWk94UUIwNTFScWtwT3g0UTRsckdaOGVJWWc3T0trTTdzejhuTVQKL2pxS21sZDY0MzJCcURCMlNkNVp5ZFdReHAwU1laRTlnVWszYk9KRGtZVXQ4b1cvZDBWeG9uU05LQVN3QmZKaApWV1VZUUlpNm55K0ZZZmtuRFNvRnFlY2Z3SDBQQVUraXpnMkI3KzFkbko5YisyQ21IOUVCallOZ2hoNlFzVlFQCkh2SkdQQURtandPNkJOam5HK0Z3K0Z6cmFXUTNCTjAwb08zUjF6UmgxZERmTTQzR3oxRmZGRW5GSXI5aGFuUnQKWHJFZm8vZWU5bjBLWUFESEJnV1g4dlhuNHZrRmdWRjgwYW9MUUJSQTBxWXErcW1pVlp6YnREeE9ldFEyRWFyTQpyNmVWL0lZPQotLS0tLUVORCBDRVJUSUZJQ0FURS0tLS0tCg==
    service:
      annotations: {}

ui-system:
  enabled: true
  ui:
    nocUI:
      enable: true
      mapBoxAccessToken: "" # Leave Empty to use Default Access Token from Palette
      mapBoxStyledLayerID: "" # Leave Empty to use Default Style Layer ID

reachSystem:
  enabled: false
  proxySettings:
    http_proxy: ""
    https_proxy: ""
    no_proxy: ""
    ca_crt_path: "" # Set the 'ca_crt_path' parameter to the location of the certificate file on each node. This file should contain the Proxy CA Certificate, in case the Proxy being used requires a certificate.
  scheduleOnControlPlane: true
#########################
# Spectro Cloud VerteX #
#########################
# MongoDB Configuration
mongo:
# Whether to deploy MongoDB in-cluster (internal == true) or use Mongo Atlas
internal: true
# Mongodb URL. Only change if using Mongo Atlas.
databaseUrl: "mongo-0.mongo,mongo-1.mongo,mongo-2.mongo"
# Mongo Atlas password, base64 encoded. Only enter if using Mongo Atlas.
databasePassword: ""
#No. of mongo replicas to run, default is 3
replicas: 3
# The following only apply if mongo.internal == true
cpuLimit: "2000m"
memoryLimit: "4Gi"
pvcSize: "20Gi"
storageClass: "" # leave empty to use the default storage class
config:
installationMode: "connected" #values can be connected or airgap.
# SSO SAML Configuration (Optional for self-hosted type)
sso:
saml:
enabled: false
acsUrlRoot: "myfirstpalette.spectrocloud.com"
acsUrlScheme: "https"
audienceUrl: "https://www.spectrocloud.com"
entityId: "https://www.spectrocloud.com"
apiVersion: "v1"
# Email Configurations. (Optional for self-hosted type)
email:
enabled: false
emailId: "noreply@spectrocloud.com"
smtpServer: "smtp.gmail.com"
smtpPort: 587
insecureSkipVerifyTls: true
fromEmailId: "noreply@spectrocloud.com"
password: "" # base64 encoded SMTP password
env:
# rootDomain is a DNS record which will be mapped to the ingress-nginx-controller load balancer
# E.g., myfirstpalette.spectrocloud.com
# - Mandatory if ingress.internal == false
# - Optional if ingress.internal == true (leave empty)
#
# IMPORTANT: a DNS record must be created separately and it must be a wildcard to account for Organization prefixes
# E.g., *.myfirstpalette.spectrocloud.com
rootDomain: "vertex.example.com"
# stableEndpointAccess is used when deploying EKS clusters in Private network type.
# When your Saas installed instance have connectivity to the private VPC where you want to launch the cluster set the stableEndpointAccess to true
cluster:
stableEndpointAccess: false
# registry:
# endpoint: "" #<Contact Spectro Cloud Sales for More info>
# name: "" #<Contact Spectro Cloud Sales for More info>
# password: "" #<Contact Spectro Cloud Sales for More info>
# username: "" #<Contact Spectro Cloud Sales for More info>
# insecureSkipVerify: false
# caCert: ""
ociPackRegistry:
endpoint: "example.harbor.org" #<Contact Spectro Cloud Sales for More info>
name: "VerteX Packs OCI" #<Contact Spectro Cloud Sales for More info>
password: "**************" #<Contact Spectro Cloud Sales for More info>
username: "**************" #<Contact Spectro Cloud Sales for More info>
baseContentPath: "spectro-packs" #<Contact Spectro Cloud Sales for More info>
insecureSkipVerify: false
caCert: ""
# ociPackEcrRegistry:
# endpoint: "" #<Contact Spectro Cloud Sales for More info>
# name: "" #<Contact Spectro Cloud Sales for More info>
# accessKey: "" #<Contact Spectro Cloud Sales for More info>
# secretKey: "" #<Contact Spectro Cloud Sales for More info>
# baseContentPath: "" #<Contact Spectro Cloud Sales for More info>
# isPrivate: true
# insecureSkipVerify: false
# caCert: ""
# ociImageRegistry:
# endpoint: "" #<Contact Spectro Cloud Sales for More info>
# name: "" #<Contact Spectro Cloud Sales for More info>
# password: "" #<Contact Spectro Cloud Sales for More info>
# username: "" #<Contact Spectro Cloud Sales for More info>
# baseContentPath: "" #<Contact Spectro Cloud Sales for More info>
# insecureSkipVerify: false
# caCert: ""
# mirrorRegistries: ""
# Instruction for mirrorRegistries.
# ----------------------------------
# Please provide the registry endpoint for the following registries, separated by double colons (::):
# docker.io
# gcr.io
# ghcr.io
# k8s.gcr.io
# registry.k8s.io
# quay.io
# For each registry, follow this example format:
# docker.io::<PLACE_HOLDER_FOR_ENDPOINT>/v2/<DOCKER_IO_ENDPOINT>,gcr.io::<PLACE_HOLDER_FOR_ENDPOINT>/v2/<GCR_IO_ENDPOINT>,ghcr.io::<PLACE_HOLDER_FOR_ENDPOINT>/v2/<GHCR_IO_ENDPOINT>,k8s.gcr.io::<PLACE_HOLDER_FOR_ENDPOINT>/v2/<K8S_IO_ENDPOINT>,registry.k8s.io::<PLACE_HOLDER_FOR_ENDPOINT>/v2/<REGISTRY_K8S_IO_ENDPOINT>,quay.io::<PLACE_HOLDER_FOR_ENDPOINT>/v2/<QUAY_IO_ENDPOINT>
# Replace <PLACE_HOLDER_FOR_ENDPOINT> with your actual registry endpoint and <DOCKER_IO_ENDPOINT>, <GCR_IO_ENDPOINT>, <GHCR_IO_ENDPOINT>, <K8S_IO_ENDPOINT>, <REGISTRY_K8S_IO_ENDPOINT>, and <QUAY_IO_ENDPOINT> with the specific endpoint details for each registry.
scar:
endpoint: "https://saas-repo-fips.console.spectrocloud.com"
username: "**********"
password: "**********"
insecureSkipVerify: true
caCert: ""
imageSwapImages:
imageSwapInitImage: "gcr.io/spectro-images-public/release-fips/thewebroot/imageswap-init:v1.5.2"
imageSwapImage: "gcr.io/spectro-images-public/release-fips/thewebroot/imageswap:v1.5.2"
imageSwapConfig:
isEKSCluster: true #If the Cluster you are trying to install is EKS cluster set value to true else set to false
nats:
# Should we install nats as part of the nats chart bundled with hubble charts
# If not enabled NATS service should be installed as a separate service.
enabled: true
# Whether to front NATS with a cloud load balancer (internal == false) or
# either share the ingress load balancer or use hostNetwork (internal == true).
# See nats.natsUrl comments for further detail.
internal: true
# NATS URL
# Comma separated list of <dns_name:port> mappings for nats load balancer service
# E.g., "message1.dev.spectrocloud.com:4222,message2.dev.spectrocloud.com:4222"
#
# Mandatory if nats.internal == false
# Otherwise, if nats.internal == true:
# - If ingress.ingress.internal == true: leave empty (use hostNetwork)
# - If ingress.ingress.internal == false: use "<config.env.rootDomain>:4222" (share ingress lb)
natsUrl: ""
# *********************** IMPORTANT NOTE ******************************
# * if nats.internal == true, ignore all of the following NATS config *
# *********************************************************************
# NATS load balancer annotations
annotations: {}
# AWS example
# service.beta.kubernetes.io/aws-load-balancer-ssl-cert: <ACM_ARN>
# service.beta.kubernetes.io/aws-load-balancer-ssl-ports: "server-port"
# service.beta.kubernetes.io/aws-load-balancer-backend-protocol: tcp
# Azure example
# service.beta.kubernetes.io/azure-load-balancer-internal: "true"
# service.beta.kubernetes.io/azure-dns-label-name: myserviceuniquelabel
# Static IP for the nats loadbalancer service. If empty, a dynamic IP will be generated.
natsStaticIP: ""
grpc:
external: false
endpoint: "" #Please provide DNS endpoint with the port eg: msg.spectrocloud.com:443
caCertificateBase64: "" #Please provide caCertificate for the grpc server Cert
serverCrtBase64: ""
serverKeyBase64: ""
insecureSkipVerify: false
ingress:
# When enabled nginx ingress controller would be installed
enabled: true
ingress:
# Whether to front NGINX Ingress Controller with a cloud
# load balancer (internal == false) or use host network
internal: false
# Default SSL certificate and key for NGINX Ingress Controller (Optional)
# A wildcard cert for config.env.rootDomain, e.g., *.myfirstpalette.spectrocloud.com
# If left blank, the NGINX ingress controller will generate a self-signed cert (when terminating TLS upstream of ingress-nginx-controller)
certificate: ""
key: ""
#If ACM is enabled please use grpc as a non internal and bring grpc on different LB. Provide certificate and dns for it.
annotations: {}
# AWS example
# service.beta.kubernetes.io/aws-load-balancer-internal: "true"
# service.beta.kubernetes.io/aws-load-balancer-backend-protocol: tcp
# service.beta.kubernetes.io/aws-load-balancer-ssl-cert: <ACM_ARN>
# service.beta.kubernetes.io/aws-load-balancer-ssl-ports: "https"
# Azure example
# service.beta.kubernetes.io/azure-load-balancer-internal: "true"
# service.beta.kubernetes.io/azure-dns-label-name: myserviceuniquelabel
# Static IP for the Ingress load balancer service. If empty, a dynamic IP will be generated.
ingressStaticIP: ""
# For Service like AWS Load Balancer using https we would want to terminate the HTTPS at Load Balancer.
terminateHTTPSAtLoadBalancer: false
nats:
enabled: true
frps:
frps:
enabled: false
frpHostURL: proxy.sample.spectrocloud.com
server:
crt: LS0tLS1CRUdJTiBDRVJUSUZJQ0FURS0tLS0tCk1JSURqekNDQW5lZ0F3SUJBZ0lVZTVMdXBBZGljd0Z1SFJpWWMyWEgzNTFEUzJJd0RRWUpLb1pJaHZjTkFRRUwKQlFBd0tERW1NQ1FHQTFVRUF3d2RjSEp2ZUhrdWMyRnRjR3hsTG5Od1pXTjBjbTlqYkc5MVpDNWpiMjB3SGhjTgpNakl4TURFME1UTXlOREV5V2hjTk1qY3hNREV6TVRNeU5ERXlXakI3TVFzd0NRWURWUVFHRXdKVlV6RUxNQWtHCkExVUVDQk1DUTBFeEV6QVJCZ05WQkFjVENsTmhiblJoUTJ4aGNtRXhGVEFUQmdOVkJBb1RERk53WldOMGNtOUQKYkc5MVpERUxNQWtHQTFVRUN4TUNTVlF4SmpBa0JnTlZCQU1USFhCeWIzaDVMbk5oYlhCc1pTNXpjR1ZqZEhKdgpZMnh2ZFdRdVkyOXRNSUlCSWpBTkJna3Foa2lHOXcwQkFRRUZBQU9DQVE4QU1JSUJDZ0tDQVFFQXd5bEt3MmlxClBXM2JrQU0wV3RhaEFLbEppcWFHd05LUDVRRTZ6ZW5NM2FURko3TjIwN0dWcUNGYzJHTDNodmNhTDFranZjeEkKK2lybHpkbm9hcVhUSmV3ZkJiTGs2SGVhZmdXUVp3NHNNeE5QRUVYYlNXYm54Mm03Y2FlbVJiUWZSQWhPWXRvWgpIWG1IMzQ1Q25mNjF0RnhMeEEzb0JRNm1yb0JMVXNOOUh2WWFzeGE5QUFmZUNNZm5sYWVBWE9CVmROalJTN1VzCkN5NmlSRXpEWFgvem1nOG5WWFUwemlrcXdoS3pqSlBJd2FQa2ViaXVSdUJYdEZ0VlQwQmFzS3VqbURzd0lsRFQKVmR4SHRRQUVyUmM4Q2Nhb20yUkpZbTd1aHNEYlo2WVFzS3JiMmhIbU5rNENVWUd5eUJPZnBwbzR2bFd1S2FEcgpsVFNYUXlPN0M0ejM1d0lEQVFBQm8xNHdYREJhQmdOVkhSRUVVekJSZ2dsc2IyTmhiR2h2YzNTSEJIOEFBQUdDCkhYQnliM2g1TG5OaGJYQnNaUzV6Y0dWamRISnZZMnh2ZFdRdVkyOXRnaDhxTG5CeWIzaDVMbk5oYlhCc1pTNXoKY0dWamRISnZZMnh2ZFdRdVkyOXRNQTBHQ1NxR1NJYjNEUUVCQ3dVQUE0SUJBUUEvRFJFVm54SWJRdi9uMDEvSQpJd1d0ekhKNGNHOUp6UlB6dmszNUcvRGJOVzZYZ0M3djBoWlFIVHg5bzMrckxoSUFiWTNmbjc1VEtlN3hMRWpiCkI3M3pGWURJSStkYzM5NkQzZU51M2NxRGIvY01kYmlFalhod2ttZk9NRm9qMnpOdHJIdzFsSjA0QlNFMWw1YWgKMDk0Vy9aaEQ2YTVLU3B0cDh1YUpKVmNrejRYMEdRWjVPYjZadGdxZVVxNytqWVZOZ0tLQzJCMW1SNjMyMDNsZwozVFZmZEkrdmI3b292dVdOOFRBVG9qdXNuS25WMmRMeTFBOWViWXYwMEM3WWZ6Q0NhODgrN2dzTGhJaUJjRHBPClJkWjU3QStKanJmSU5IYy9vNm5YWFhDZ2h2YkFwUVk1QnFnMWIzYUpUZERNWThUY0hoQVVaQzB5eU04bXcwMnQKWHRRQwotLS0tLUVORCBDRVJUSUZJQ0FURS0tLS0tCg==
key: LS0tLS1CRUdJTiBSU0EgUFJJVkFURSBLRVktLS0tLQpNSUlFb3dJQkFBS0NBUUVBd3lsS3cyaXFQVzNia0FNMFd0YWhBS2xKaXFhR3dOS1A1UUU2emVuTTNhVEZKN04yCjA3R1ZxQ0ZjMkdMM2h2Y2FMMWtqdmN4SStpcmx6ZG5vYXFYVEpld2ZCYkxrNkhlYWZnV1FadzRzTXhOUEVFWGIKU1dibngybTdjYWVtUmJRZlJBaE9ZdG9aSFhtSDM0NUNuZjYxdEZ4THhBM29CUTZtcm9CTFVzTjlIdllhc3hhOQpBQWZlQ01mbmxhZUFYT0JWZE5qUlM3VXNDeTZpUkV6RFhYL3ptZzhuVlhVMHppa3F3aEt6akpQSXdhUGtlYml1ClJ1Qlh0RnRWVDBCYXNLdWptRHN3SWxEVFZkeEh0UUFFclJjOENjYW9tMlJKWW03dWhzRGJaNllRc0tyYjJoSG0KTms0Q1VZR3l5Qk9mcHBvNHZsV3VLYURybFRTWFF5TzdDNHozNXdJREFRQUJBb0lCQUFPVVZFeTFOTG9mczdFMgpmZFZVcm10R3I1U2RiVWRJRlYrTDREbzZtWWxQSmxhT0VoWGI0ZlROZDloNEtEWVBmaWwwSnhXcUU0U1RHTmZuCnNUMlRnUVhuQ01LZi8xYk1Lc2M0N3VjVStYYU9XaHJnVFI5UmhkckFjN0duODRLL3hQc0ljL2VZTEhHLzh1QUUKeWUvLzVmRkM2QmpXY0hUM1NkTlZnd3duamJudG5XTXIzTFJBVnJBamZBckxveWUwS0F2YytYdXJLTEVCcmMyVQpjaHlDbitZemJKN0VlSG44UXdQNGdBNXVSK0NCMFJPeFErYXIzS3M5YUhkZTQ1OEVNNEtLMnpUOXA4RWZRc1lFCkFtNUpxWjliR0JEVHV1dEkyNm9GK0pLQ1IzZzhXNERRcHVYRUZoVjlya0pMSm13RDhQb0JaclF6UzZvdmJhdkkKRk42QVM4RUNnWUVBOEcxQzFxZVh4dTQ4aEYxak5MTCswRmxkeWdFem9SMmFoRGJCai8weUZkQVVjU2pYTzk0NAozN1dORTBUUG10WG1Vc3NZTlBTR21XaWI2OUhicEFoMTY3SWVwNE9LaVlZdkozYm1oUC9WNzFvK3M0SWJlSHh1CkVJbWVVckFOZWRoQURVQnZ4c1lXRWxlVlVJSFFRcjY1VHM2ZjIrWkpTKzg4TU05bUorL3BmcmNDZ1lFQXo4MXgKR3JiSE5oak56RjhZMjhiK0hMNW5rdDR0SUdkU3hnbW9PMFFJeGkrQVNZTzB0WW42VFk0ZHI5ZXErMzE3b21ZawpMbDNtNENORDhudG1vYzRvWnM4SUpDQ0IrZjNqcTY4OHdoQU9vVHZ4dDhjZVJqOFRhRHl1SHZwS043OVNsVVd2CjBJd2ZRNDNIemd3SWJiSWhjcTRJVGswanI0VHdWbThia283VElGRUNnWUJoNnUzVXhHN0JHeGZVaE1BNW4waSsKREJkeGhPbkZEV3gzdW1FOHhrN1dxV2NaNnhzMWk3eTRCNVhNS2pNdkNUeURyYWxQTCtOOXFTZ1BjK216TmFybwo4aU1mOENmRStMeE5vMVFoQ0p6Vm5YaDUzVnhZeHJ5QXlidU1TNTFCYVh3MHFYQ2NrT0krV0NNOHBaSHZEUVFsCmYydUZ3SlZMY3NTZDBHbjNpL01ab3dLQmdBY1BzUjg2Uk15MnpROTd6OGx3R3FSNVorV2F2U2ZUdXdGVnhLeTIKNUNGdjdja1J1NnRMbEFEY3FtK1dRWTRvTm5KUFREMXpIV3hTWm5XdjhjM2Z4b212MFZRQThzbSs4ZVNjb05EcgpZTVBqMkpQcEpVTTMwMzRBU2Q1dG5PWUdEMVZaTjk4N1U3aWs4Ynd6dG5tYnl2MHRvc1NlWkc4TGNtdE5mVDllCnNSZnhBb0dCQUpTV1lDellyTlRMNnRUSnh5M2FqWm5jZkxrMEV0eWNCd05FRXZHVzVSVE9LOUFYTE96RzN0eHUKajZqWlRpaUFRU09aaVd0clJHU0U0bEkyQ1MvcjNjd3VuSGlnZlovd1dKZldkZ0JpRnZqOTVFbUVQWUZaRDRobQpkT3l5UHhRRXFTRmprQ21BS2plOFBpTDdpU01GbGhBZTZQWFljQlExdCtzd01UeXBnY3RrCi0tLS0tRU5EIFJTQSBQUklWQVRFIEtFWS0tLS0tCg==
ca:
crt: LS0tLS1CRUdJTiBDRVJUSUZJQ0FURS0tLS0tCk1JSURNVENDQWhtZ0F3SUJBZ0lVSHhWK0ljVGZHUElzdW8yY3dqQ0Q0Z2RSTFFRd0RRWUpLb1pJaHZjTkFRRUwKQlFBd0tERW1NQ1FHQTFVRUF3d2RjSEp2ZUhrdWMyRnRjR3hsTG5Od1pXTjBjbTlqYkc5MVpDNWpiMjB3SGhjTgpNakl4TURFME1UTXlOREV5V2hjTk16WXdOakl5TVRNeU5ERXlXakFvTVNZd0pBWURWUVFEREIxd2NtOTRlUzV6CllXMXdiR1V1YzNCbFkzUnliMk5zYjNWa0xtTnZiVENDQVNJd0RRWUpLb1pJaHZjTkFRRUJCUUFEZ2dFUEFEQ0MKQVFvQ2dnRUJBSy90WXBHVi9HRURUWnZzL25QQ2lOK0U3K1dOQ21GeU1NQjdkazVOT3JzQWZIaVVvZ1JRVUo0WQptSjhwVmYrSzhTRFBsdGNYcW40WVVTbmxiUERsVlBkWU5zOTEwT3RaS1EwNW96aUtGV2pNbS85NHlLSjVyVzNsCndDNEN0ayttUm9Ib0ZQQS81dmFVbVZHdlVadjlGY0JuL0pKN2F4WnRIQk1PRiticXQ0Zmd0ci9YMWdOeWhPVzUKZTVScGpESkozRjJTVnc5NUpBQSt4a3V3UitFSmVseEtnQVpxdDc0ejB4U2ROODZ0QzNtK0wxRGs2WVVlQWEzZApvM3Rsa3ZkeDV6dUJvSmI2QmpZWEV4UE1PbThRcHFNVWRLK3lDZUdrem9XQStDOUtFdGtVaERCWktENStNWXRZCktVMUh1RXJCbmw2Z3BuWTRlbzJjVTRxdkNwZzZ4S3NDQXdFQUFhTlRNRkV3SFFZRFZSME9CQllFRklKMkRkTjgKc2ZtVjRCT1ZFL0FjZ0VEejArNmlNQjhHQTFVZEl3UVlNQmFBRklKMkRkTjhzZm1WNEJPVkUvQWNnRUR6MCs2aQpNQThHQTFVZEV3RUIvd1FGTUFNQkFmOHdEUVlKS29aSWh2Y05BUUVMQlFBRGdnRUJBQWhQVi9RMVl1YWVTOTZVCmhjVGQ4RWdJaHhpbHFiTWlTQm5WaVdrdlJzWk94UUIwNTFScWtwT3g0UTRsckdaOGVJWWc3T0trTTdzejhuTVQKL2pxS21sZDY0MzJCcURCMlNkNVp5ZFdReHAwU1laRTlnVWszYk9KRGtZVXQ4b1cvZDBWeG9uU05LQVN3QmZKaApWV1VZUUlpNm55K0ZZZmtuRFNvRnFlY2Z3SDBQQVUraXpnMkI3KzFkbko5YisyQ21IOUVCallOZ2hoNlFzVlFQCkh2SkdQQURtandPNkJOam5HK0Z3K0Z6cmFXUTNCTjAwb08zUjF6UmgxZERmTTQzR3oxRmZGRW5GSXI5aGFuUnQKWHJFZm8vZWU5bjBLWUFESEJnV1g4dlhuNHZrRmdWRjgwYW9MUUJSQTBxWXErcW1pVlp6YnREeE9ldFEyRWFyTQpyNmVWL0lZPQotLS0tLUVORCBDRVJUSUZJQ0FURS0tLS0tCg==
service:
annotations: {}
ui-system:
enabled: true
ui:
nocUI:
enable: true
mapBoxAccessToken: "" # Leave Empty to use Default Access Token from Palette
mapBoxStyledLayerID: "" # Leave Empty to use Default Style Layer ID
reachSystem:
enabled: false
proxySettings:
http_proxy: ""
https_proxy: ""
no_proxy: ""
ca_crt_path: "" # Set the 'ca_crt_path' parameter to the location of the certificate file on each node. This file should contain the Proxy CA Certificate, in case the Proxy being used requires a certificate.
scheduleOnControlPlane: truewarningEnsure you have configured the values.yaml file with the required parameters before proceeding to the next steps.
-
This step is only required if you are installing Palette in an environment where a network proxy must be configured for Palette to access the internet. If you are not using a network proxy, skip to the next step.
Install the reach-system chart using the following command. Point to the values.yaml file you configured in the previous step.
helm upgrade --values vertex/values.yaml \
reach-system extras/reach-system/reach-system-*.tgz --install
Release "reach-system" does not exist. Installing it now.
NAME: reach-system
LAST DEPLOYED: Mon Jan 29 17:04:23 2024
NAMESPACE: default
STATUS: deployed
REVISION: 1
TEST SUITE: None -
Install the Palette Helm Chart using the following command.
 helm upgrade --values vertex/values.yaml \
 hubble vertex/spectro-mgmt-plane-*.tgz --install
Release "hubble" does not exist. Installing it now.
NAME: hubble
LAST DEPLOYED: Mon Jan 29 17:07:51 2024
NAMESPACE: default
STATUS: deployed
REVISION: 1
TEST SUITE: None -
Track the installation process using the command below. VerteX is ready when the deployments in the namespaces
cp-system,hubble-system,ingress-nginx,jet-system, andui-systemreach the Ready state. The installation takes between two to three minutes to complete.kubectl get pods --all-namespaces --watchtipFor a more user-friendly experience, use the open-source tool k9s to monitor the installation process.
-
Create a DNS CNAME record that is mapped to the VerteX
ingress-nginx-controllerload balancer. You can use the following command to retrieve the load balancer IP address. You may require the assistance of your network administrator to create the DNS record.kubectl get service ingress-nginx-controller --namespace ingress-nginx \
--output jsonpath='{.status.loadBalancer.ingress[0].hostname}'infoAs you create tenants in VerteX, the tenant name is prefixed to the domain name you assigned to VerteX. For example, if you create a tenant named
tenant1and the domain name you assigned to VerteX isvertex.example.com, the tenant URL will betenant1.vertex.example.com. You can create an additional wildcard DNS record to map all tenant URLs to the VerteX load balancer. -
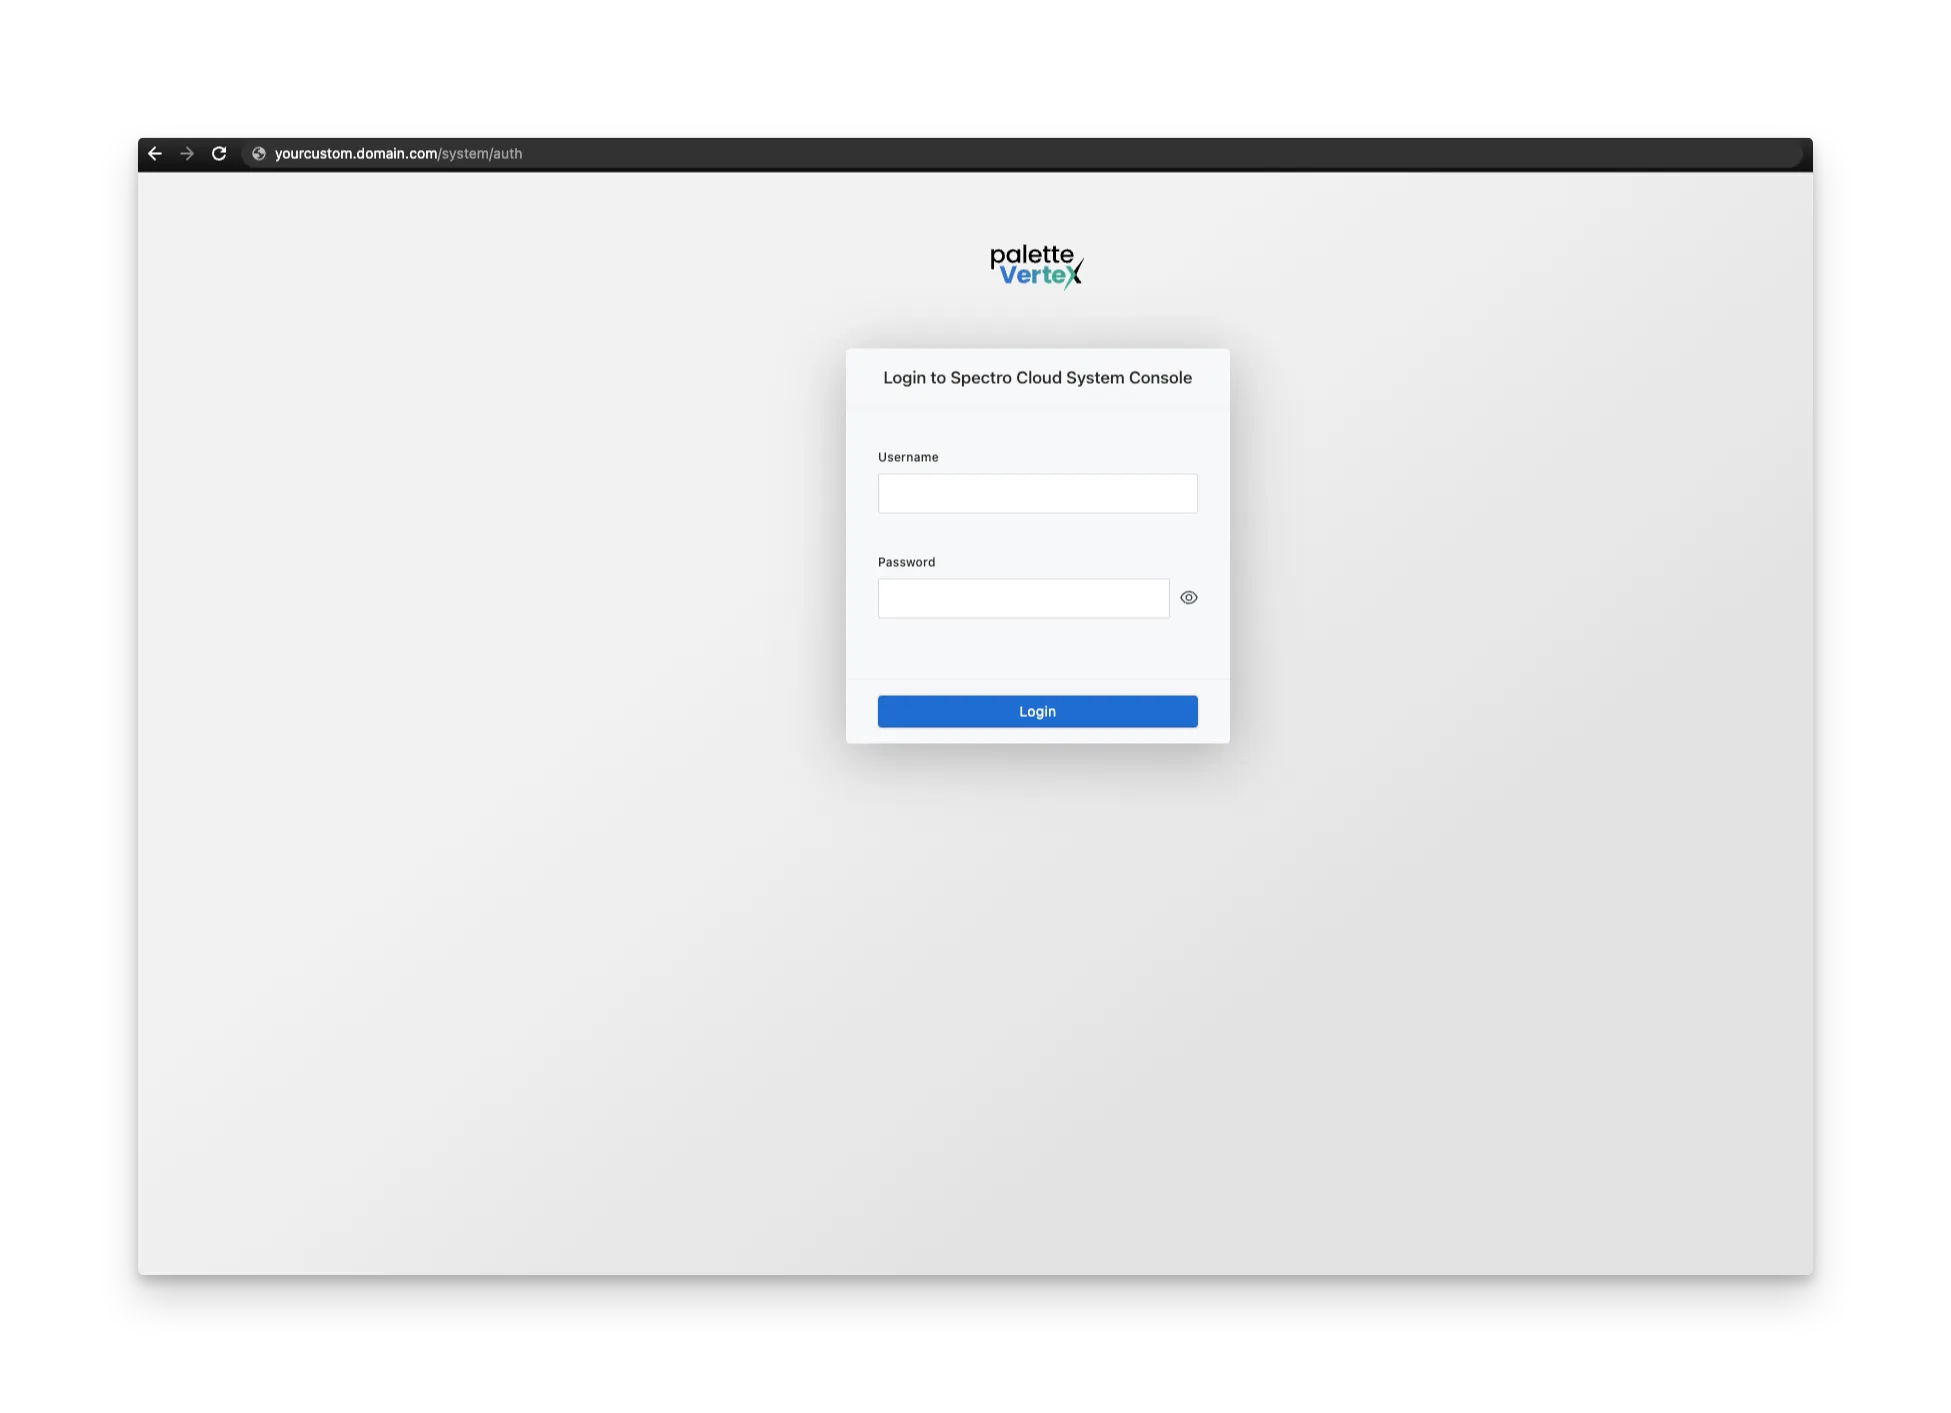
Use the custom domain name or the IP address of the load balancer to visit the VerteX system console. To access the system console, open a web browser and paste the custom domain URL in the address bar and append the value
/system. Replace the domain name in the URL with your custom domain name or the IP address of the load balancer. Alternatively, you can use the load balancer IP address with the appended value/systemto access the system console.The first time you visit the VerteX system console, a warning message about a not-trusted SSL certificate may appear. This is expected, as you still need to upload your SSL certificate to VerteX. You can ignore this warning message and proceed.
-
Log in to the system console using the following default credentials. Refer to the password requirements documentation page to learn more about password requirements.
Parameter Value Username adminPassword adminAfter login, you will be prompted to create a new password. Enter a new password and save your changes. You will be redirected to the VerteX system console. Use the username
adminand your new password to log in to the system console. You can create additional system administrator accounts and assign roles to users in the system console. Refer to the Account Management documentation page for more information. -
After login, a summary page is displayed. VerteX is installed with a self-signed SSL certificate. To assign a different SSL certificate you must upload the SSL certificate, SSL certificate key, and SSL certificate authority files to VerteX. You can upload the files using the VerteX system console. Refer to the Configure HTTPS Encryption page for instructions on how to upload the SSL certificate files to VerteX.
warningIf you plan to deploy host clusters into different networks, you may require a reverse proxy. Check out the Configure Reverse Proxy guide for instructions on how to configure a reverse proxy for VerteX.
You now have a self-hosted instance of VerteX installed in a Kubernetes cluster. Make sure you retain the values.yaml file as you may need it for future upgrades.
Validate
Use the following steps to validate the VerteX installation.
-
To access the VerteX system console, open a web browser and paste the
env.rootDomainvalue you provided in the address bar and append the value/system. You can also use the IP address of the load balancer. -
Log in using the credentials you received from our support team. After login, you will be prompted to create a new password. Enter a new password and save your changes. You will be redirected to the VerteX system console.
-
Open a terminal session and issue the following command to verify the VerteX installation. The command should return a list of deployments in the
cp-system,hubble-system,ingress-nginx,jet-system, andui-systemnamespaces.kubectl get pods --all-namespaces --output custom-columns="NAMESPACE:metadata.namespace,NAME:metadata.name,STATUS:status.phase" \
| grep -E '^(cp-system|hubble-system|ingress-nginx|jet-system|ui-system)\s'Your output should look similar to the following.
cp-system       spectro-cp-ui-689984f88d-54wsw             Running
hubble-system   auth-85b748cbf4-6drkn                      Running
hubble-system   auth-85b748cbf4-dwhw2                      Running
hubble-system   cloud-fb74b8558-lqjq5                      Running
hubble-system   cloud-fb74b8558-zkfp5                      Running
hubble-system   configserver-685fcc5b6d-t8f8h              Running
hubble-system   event-68568f54c7-jzx5t                     Running
hubble-system   event-68568f54c7-w9rnh                     Running
hubble-system   foreq-6b689f54fb-vxjts                     Running
hubble-system   hashboard-897bc9884-pxpvn                  Running
hubble-system   hashboard-897bc9884-rmn69                  Running
hubble-system   hutil-6d7c478c96-td8q4                     Running
hubble-system   hutil-6d7c478c96-zjhk4                     Running
hubble-system   mgmt-85dbf6bf9c-jbggc                      Running
hubble-system   mongo-0                                    Running
hubble-system   mongo-1                                    Running
hubble-system   mongo-2                                    Running
hubble-system   msgbroker-6c9b9fbf8b-mcsn5                 Running
hubble-system   oci-proxy-7789cf9bd8-qcjkl                 Running
hubble-system   packsync-28205220-bmzcg                    Succeeded
hubble-system   spectrocluster-6c57f5775d-dcm2q            Running
hubble-system   spectrocluster-6c57f5775d-gmdt2            Running
hubble-system   spectrocluster-6c57f5775d-sxks5            Running
hubble-system   system-686d77b947-8949z                    Running
hubble-system   system-686d77b947-cgzx6                    Running
hubble-system   timeseries-7865bc9c56-5q87l                Running
hubble-system   timeseries-7865bc9c56-scncb                Running
hubble-system   timeseries-7865bc9c56-sxmgb                Running
hubble-system   user-5c9f6c6f4b-9dgqz                      Running
hubble-system   user-5c9f6c6f4b-hxkj6                      Running
ingress-nginx   ingress-nginx-controller-2txsv             Running
ingress-nginx   ingress-nginx-controller-55pk2             Running
ingress-nginx   ingress-nginx-controller-gmps9             Running
jet-system      jet-6599b9856d-t9mr4                       Running
ui-system       spectro-ui-76ffdf67fb-rkgx8                Running
Next Steps
You have successfully installed VerteX in a Kubernetes cluster. Your next steps are to configure VerteX for your organization. Start by creating the first tenant to host your users. Use the Create a Tenant page for instructions on how to create a tenant.