Deploy a Cluster
This tutorial will teach you how to deploy a host cluster with Palette using Amazon Web Services (AWS), Microsoft Azure, or Google Cloud Platform (GCP) cloud providers. You will learn about Cluster Mode and Cluster Profiles and how these components enable you to deploy customized applications to Kubernetes with minimal effort.
As you navigate the tutorial, refer to this diagram to help you understand how Palette uses a cluster profile as a blueprint for the host cluster you deploy. Palette clusters have the same node pools you may be familiar with: control plane nodes and worker nodes where you will deploy applications. The result is a host cluster that Palette manages.
Prerequisites
To complete this tutorial, you will need the following.
-
A public cloud account from one of these providers:
-
Register the cloud account in Palette. The following resources provide additional guidance.
-
An SSH Key Pair. Use the Create and Upload an SSH Key guide to learn how to create an SSH key and upload it to Palette.
- AWS users must create an AWS Key pair before starting the tutorial. If you need additional guidance, check out the Create EC2 SSH Key Pair tutorial.
-
A Palette cluster profile. Follow the Create a Cluster Profile tutorial to create the required cluster profile for your chosen cloud provider.
Deploy a Cluster
The following steps will guide you through deploying the cluster infrastructure.
- AWS
- Azure
- Google Cloud
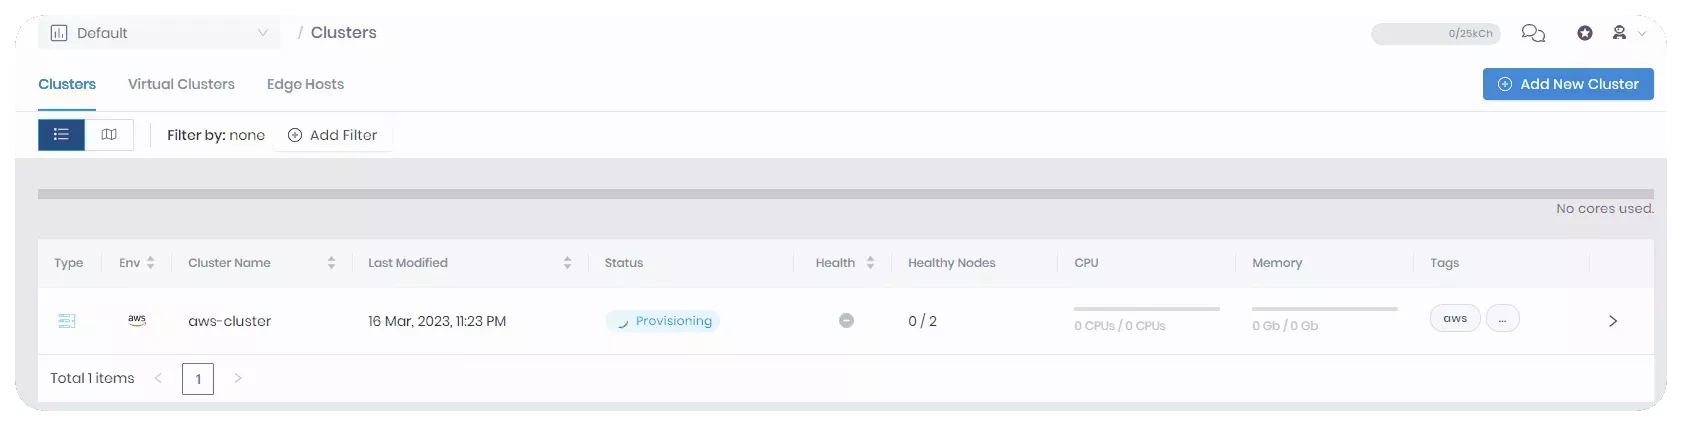
Navigate to the left Main Menu and select Cluster. From the clusters page, click on Add New Cluster.
Palette will prompt you to either deploy a new cluster or import an existing one. Click on Deploy New Cluster to access the cluster deployment wizard. Select AWS and click the Start AWS Configuration button. Use the following steps to create a host cluster in AWS.
In the Basic information section, insert the general information about the cluster, such as the Cluster name, Description, Tags, and Cloud account. Click on Next.

A list is displayed of available profiles you can choose to deploy to AWS. Select the cluster profile you created in the Create a Cluster Profile tutorial, named aws-profile, and click on Next.
The Parameters section displays all the layers in the cluster profile.
Each layer has a pack manifest file with the deploy configurations. The pack manifest file is in a YAML format. Each pack contains a set of default values. You can change the manifest values if needed. Click on Next to proceed.
The Cluster config section allows you to select the Region in which to deploy the host cluster and specify other options such as the SSH Key Pair to assign to the cluster. All clusters require you to select an SSH key. After you have selected the Region and your SSH Key Pair Name, click on Next.
The Nodes config section allows you to configure the nodes that make up the control plane and worker nodes of the host cluster.
Before you proceed to next section, review the following parameters.
-
Number of nodes in the pool - This option sets the number of control plane or worker nodes in the control plane or worker pool. For this tutorial, set the count to one for the control plane pool and two for the worker pool.
-
Allow worker capability - This option allows the control plane node to also accept workloads. This is useful when spot instances are used as worker nodes. You can check this box if you want to.
-
Instance Type - Select the compute type for the node pool. Each instance type displays the amount of CPU, RAM, and hourly cost of the instance. Select
m4.2xlarge. -
Availability zones - Used to specify the availability zones in which the node pool can place nodes. Select an availability zone.
-
Disk size - Set the disk size to 60 GiB.
-
Instance Option - This option allows you to choose on-demand instance or spot instance for worker nodes. Select On Demand.
Select Next to proceed with the cluster deployment.
In the Settings section, you can configure advanced options such as when to patch the OS, enable security scans, manage backups, add role-based access control (RBAC) bindings, and more.
For this tutorial, you can use the default settings. Click on Validate to continue.
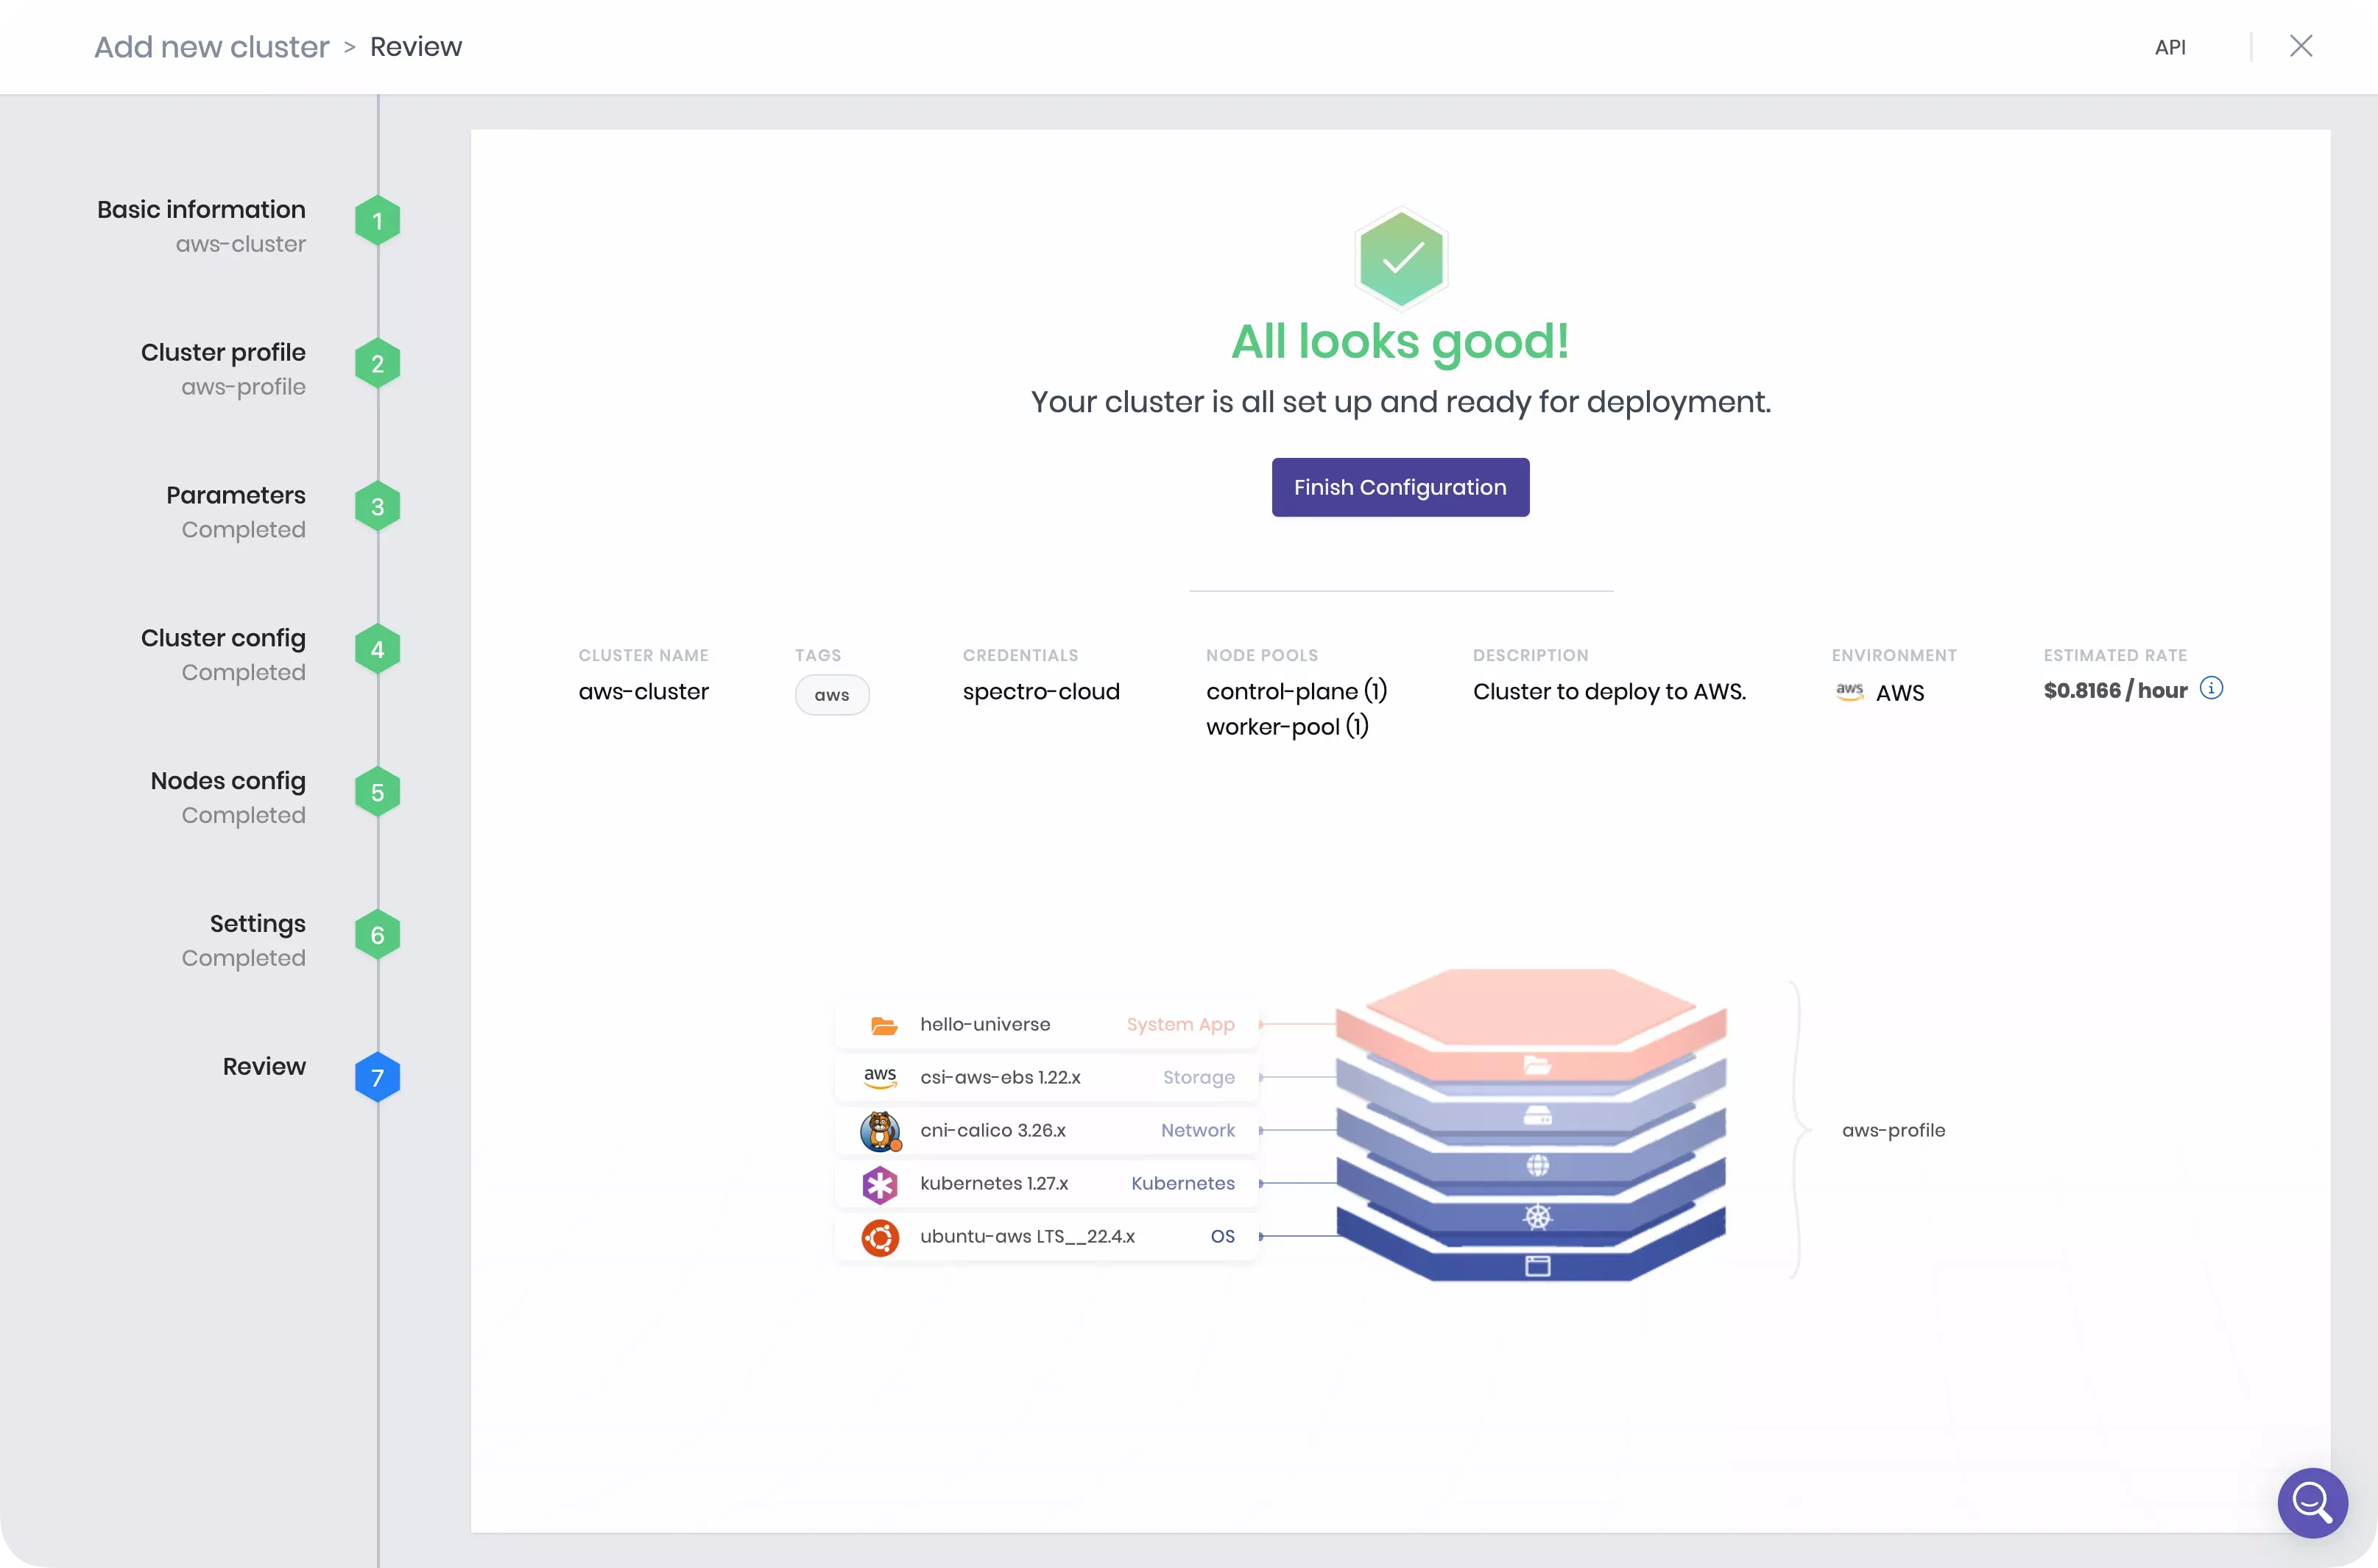
The Review section allows you to review the cluster configuration prior to deploying the cluster. Review all the settings and click on Finish Configuration to deploy the cluster.
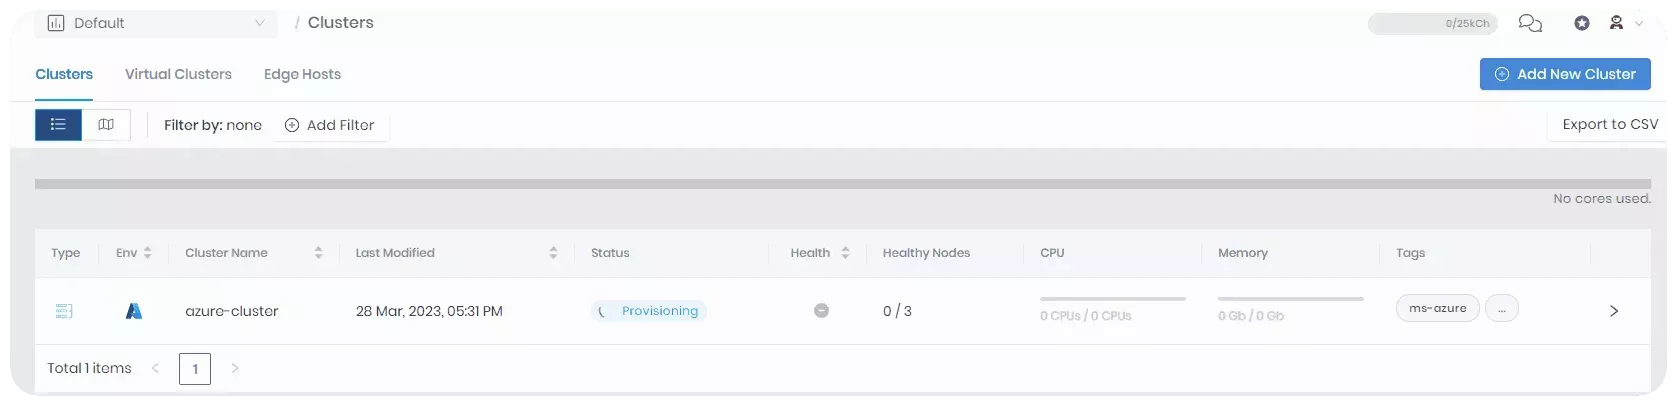
Navigate to the left Main Menu and select Clusters.
Navigate to the left Main Menu and select Clusters. Click on Add New Cluster.
Click on Deploy New Cluster to access the cluster deployment wizard. Select Azure and click the Start Azure Configuration button. Use the following steps to create a host cluster in Azure.
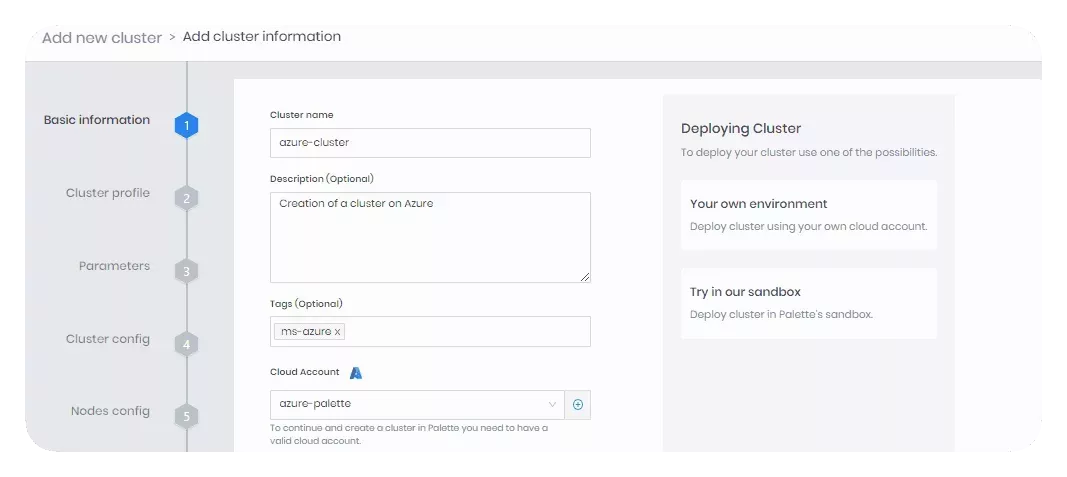
In the Basic information section, insert the general information about the cluster, such as the Cluster name, Description, Tags, and Cloud account. Click on Next.
A list is displayed of available profiles you can choose to deploy to Azure. Select the cluster profile you created in the Create a Cluster Profile tutorial, named azure-profile, and click on Next.
The Parameters section displays all the layers in the cluster profile.
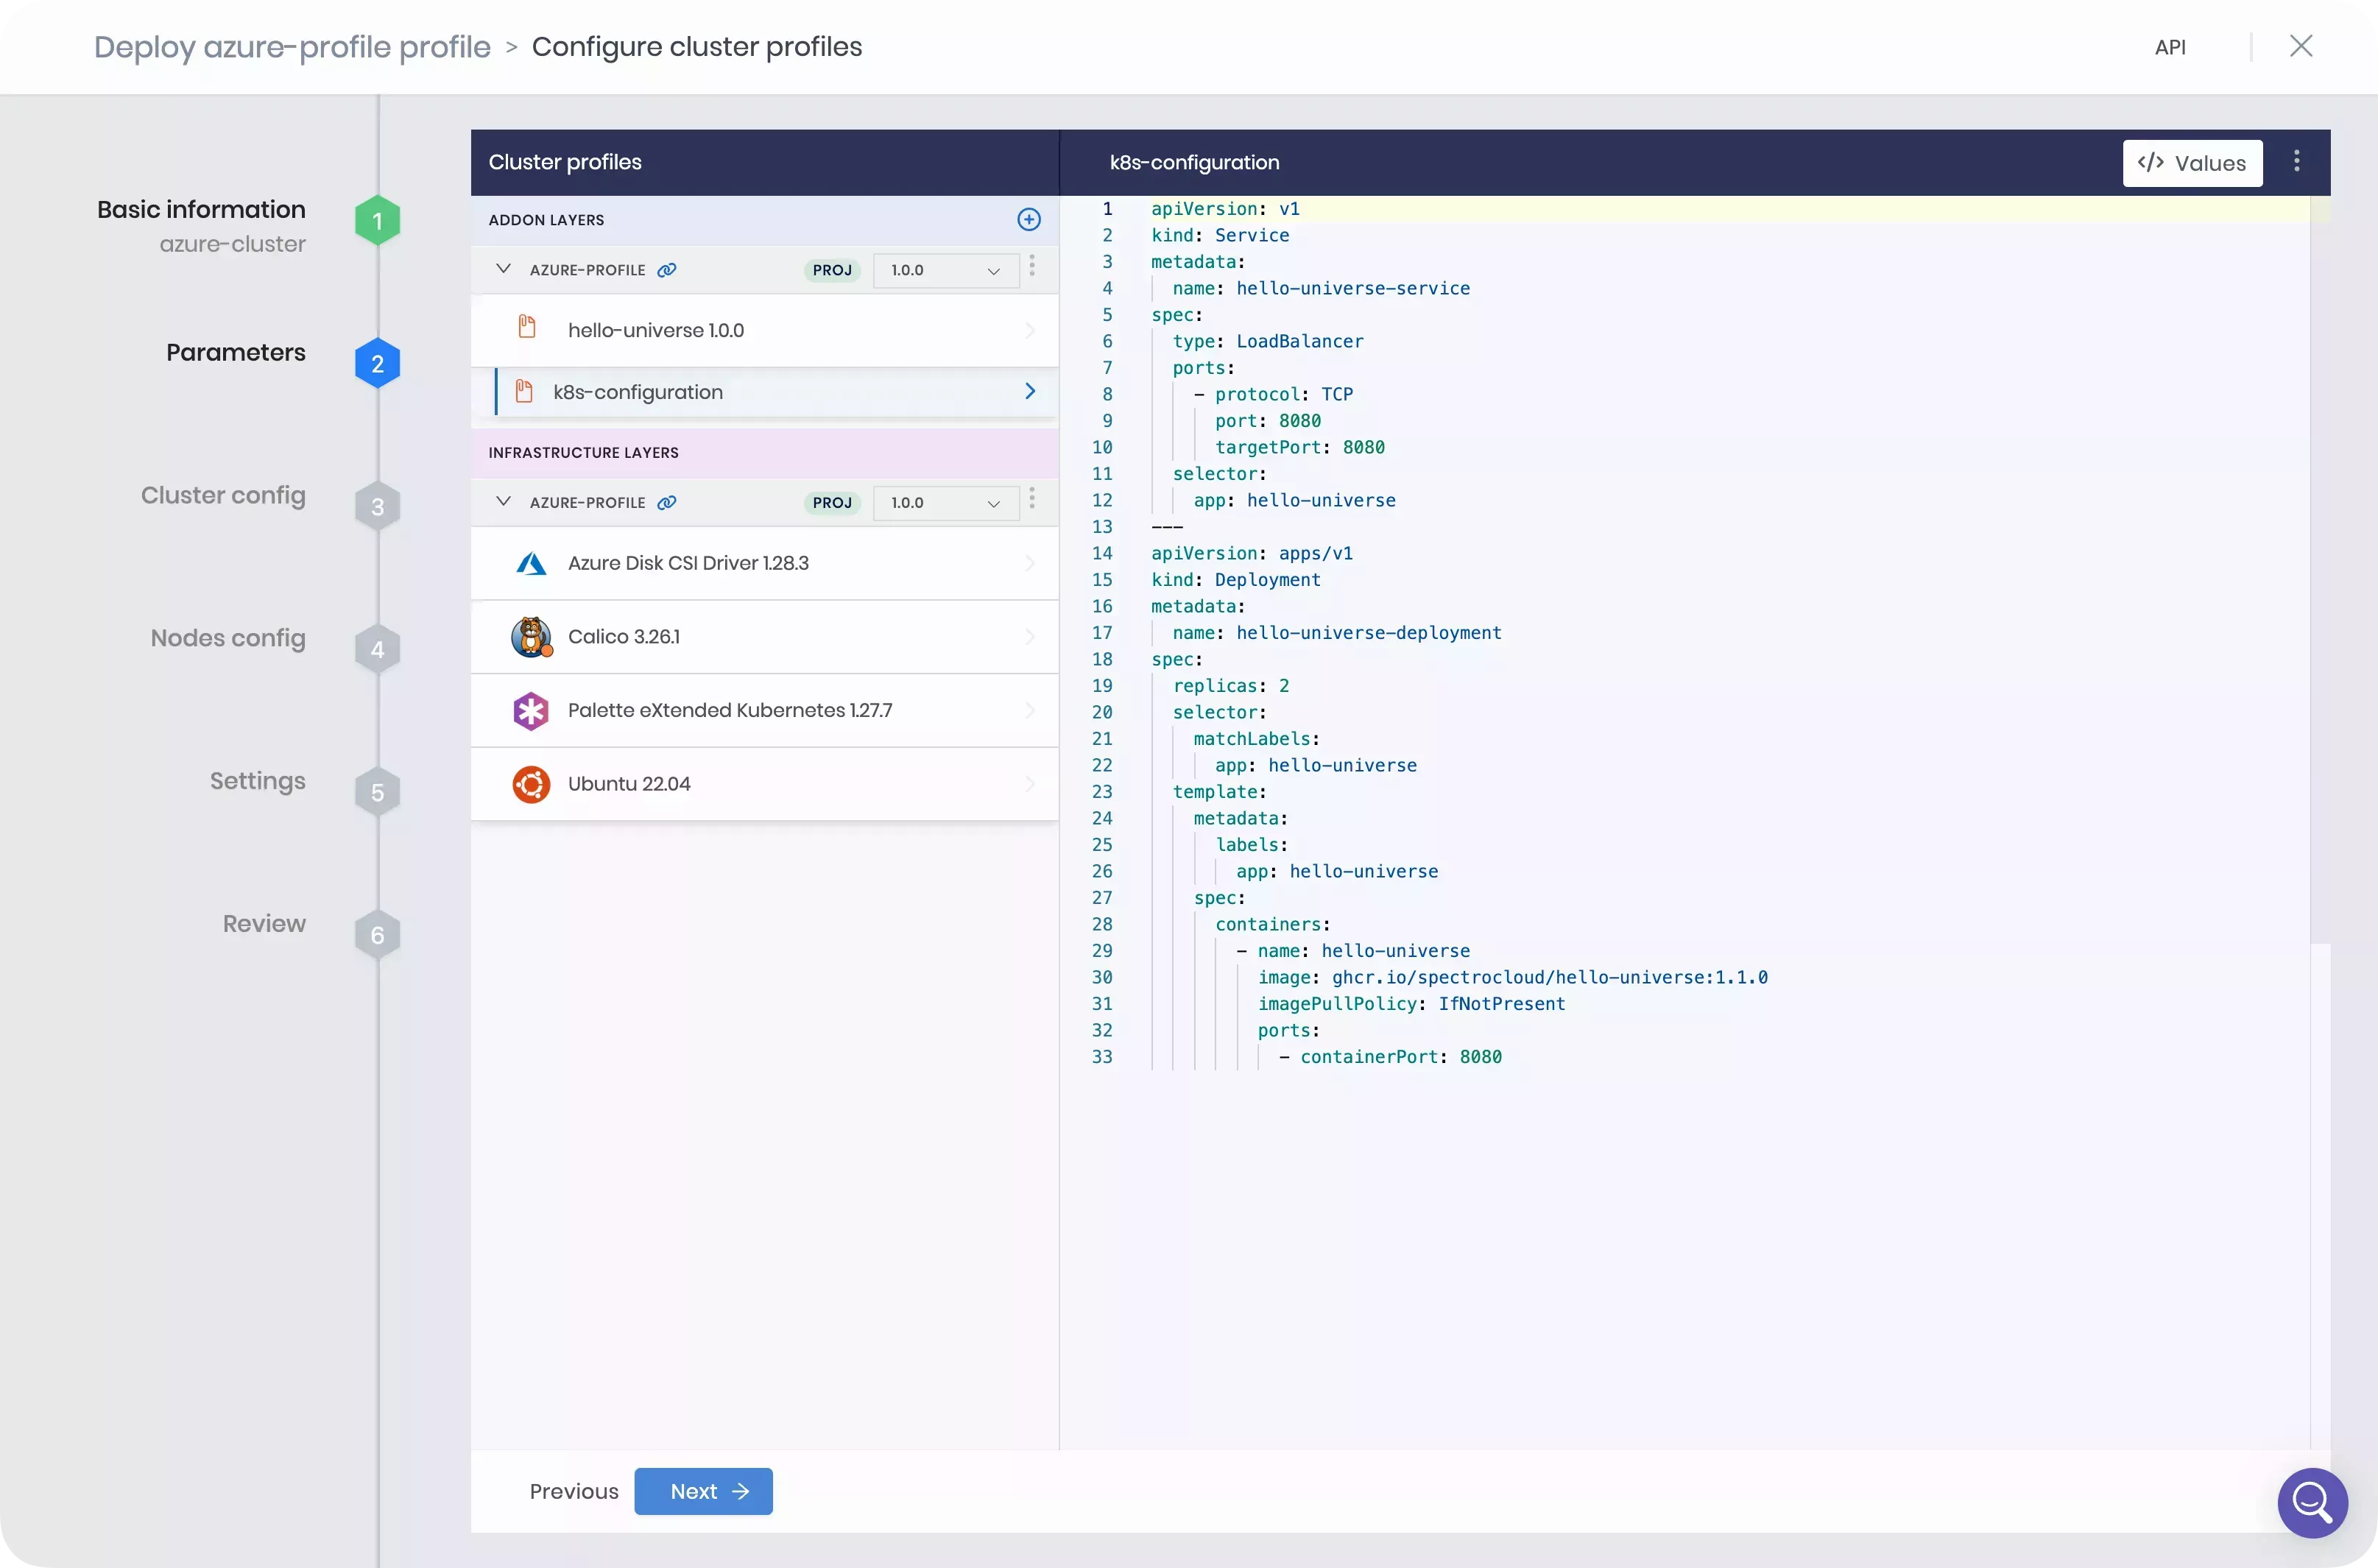
Each layer has a pack manifest file with the deploy configurations. The pack manifest file is in a YAML format. Each pack contains a set of default values. You can change the manifest values if needed. Click on Next to proceed.
The Cluster config section allows you to select the Subscription, Region, Resource Group, Storage account, and SSH Key to apply to the host cluster. All clusters require you to assign an SSH key. Refer to the SSH Keys guide for information about uploading an SSH key.
When you are done selecting a Subscription, Region, Resource Group, Storage account and SSH Key, click on Next.
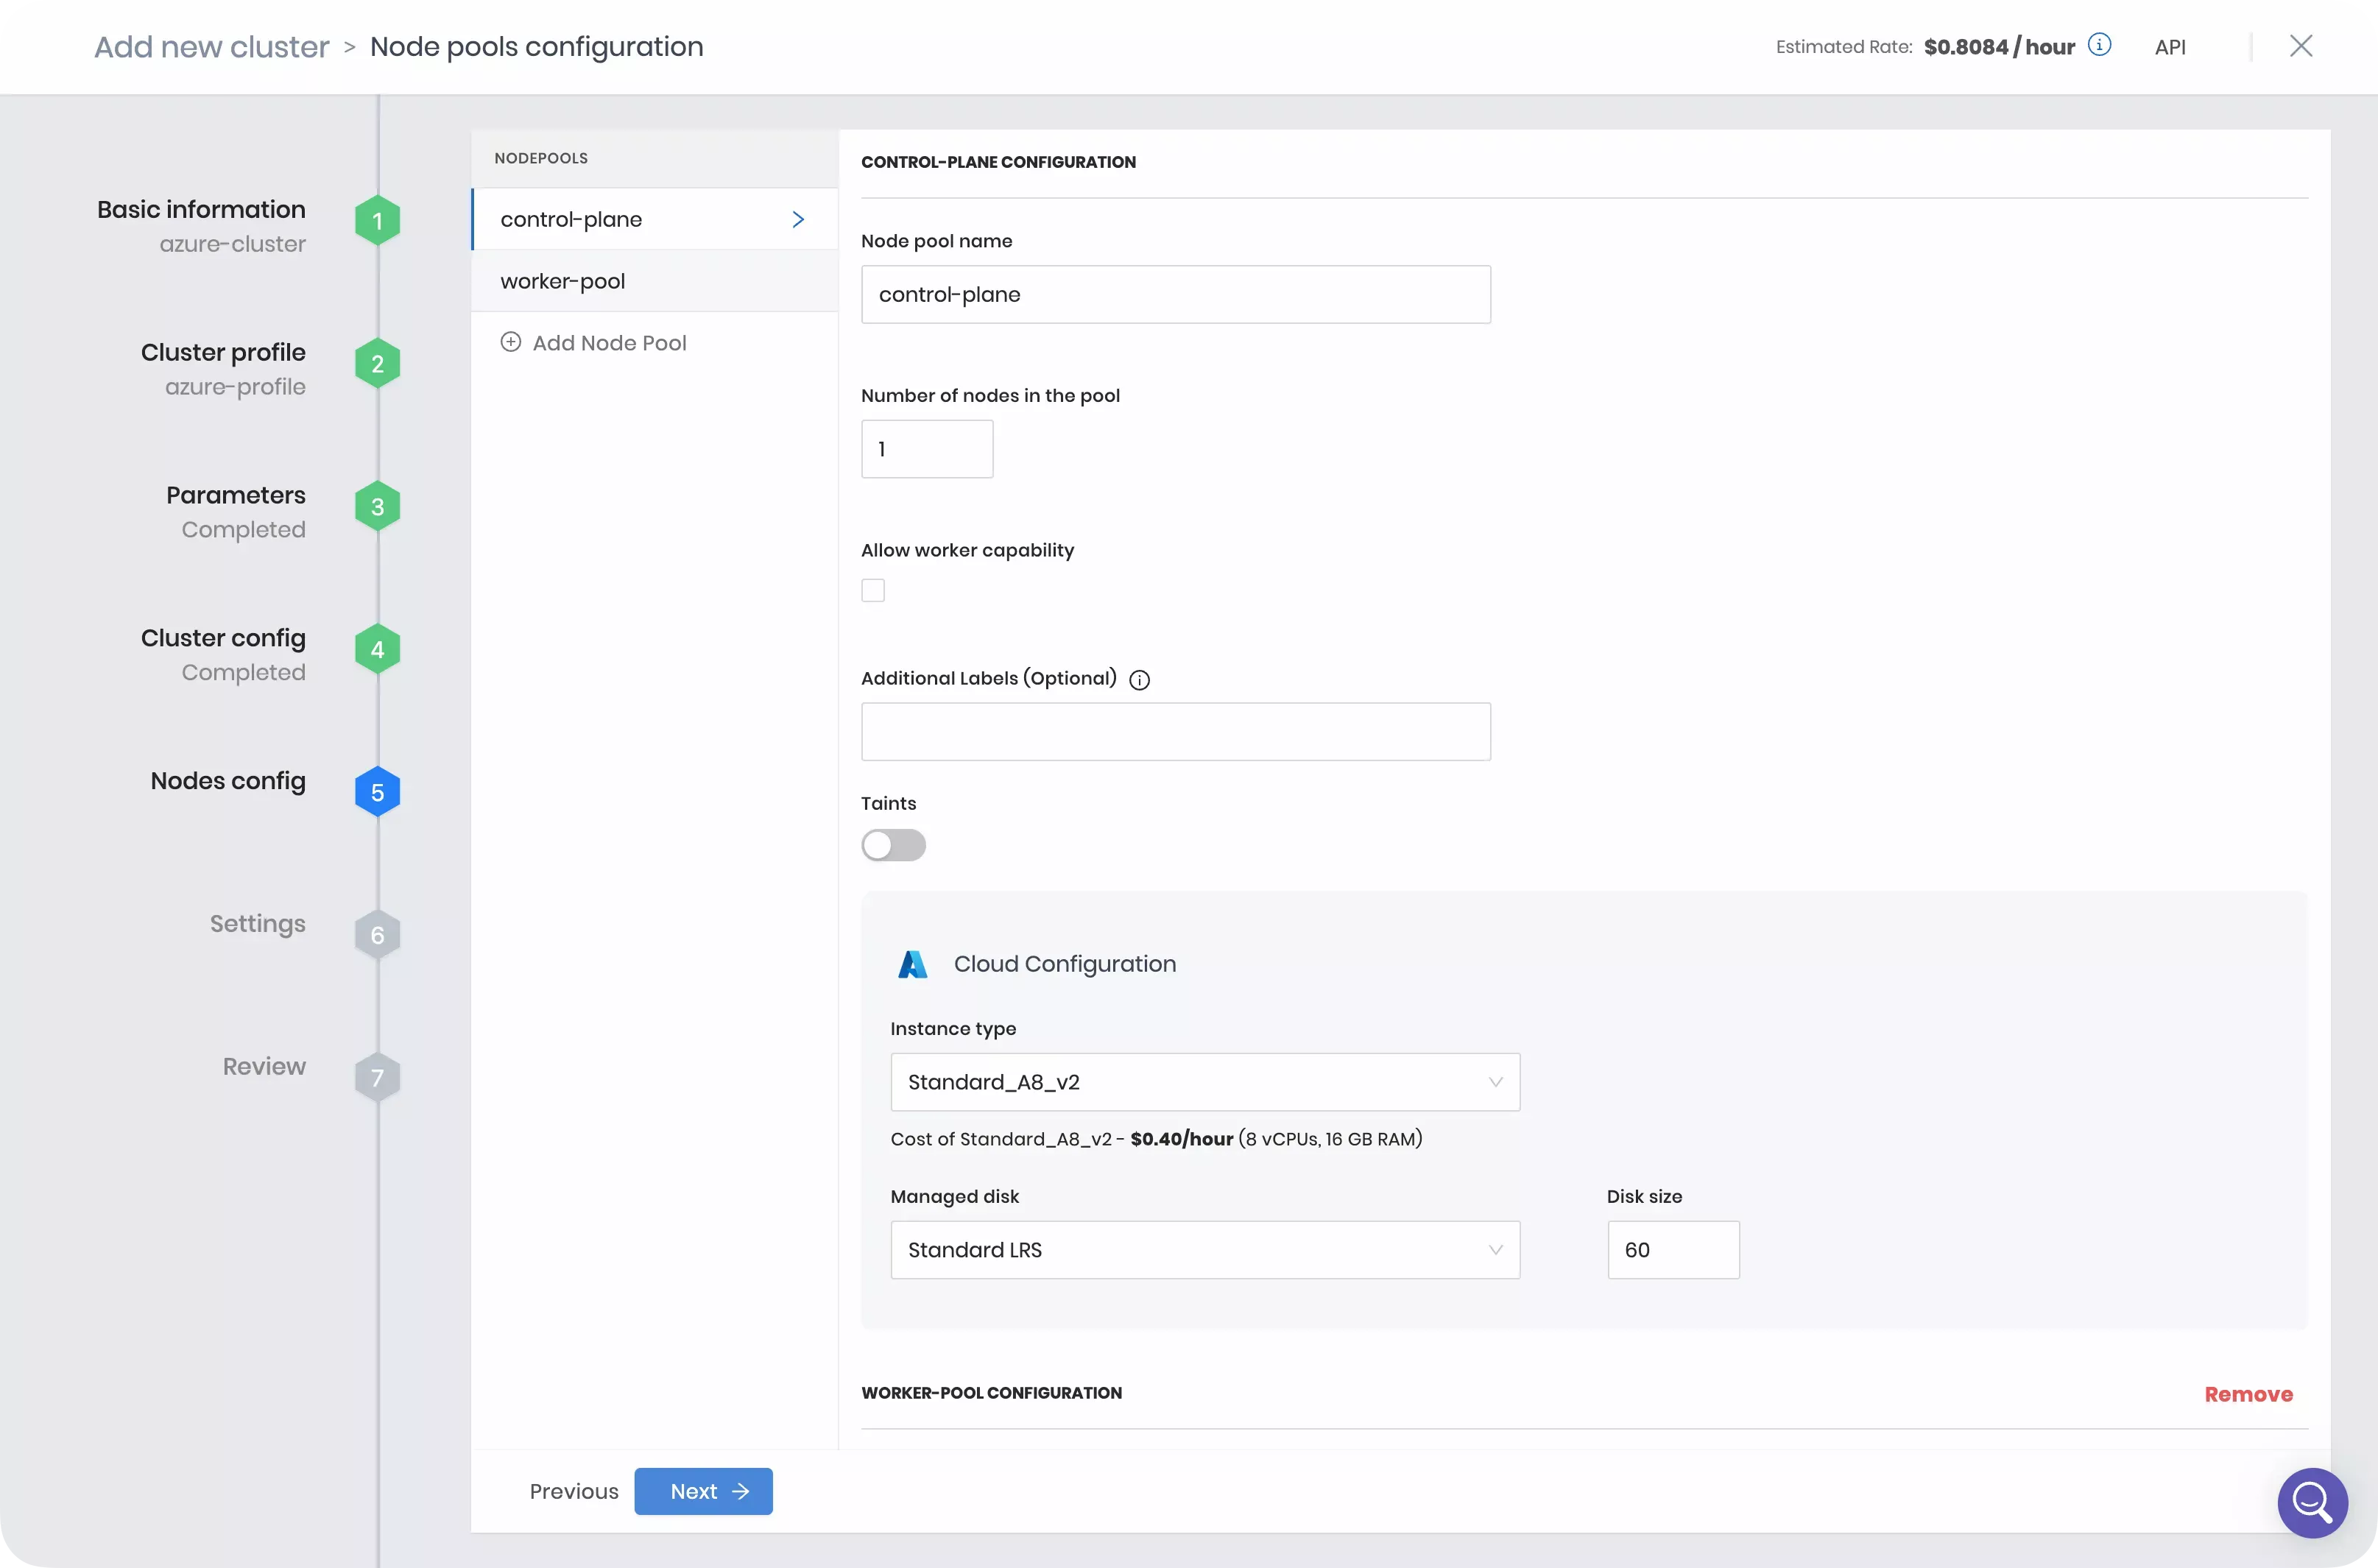
The Nodes config section allows you to configure the nodes that compose the control plane nodes and worker nodes of the Kubernetes cluster.
Refer to the Node Pool guide for a list and description of parameters.
Before you proceed to next section, review the following parameters.
-
Number of nodes in the pool - This option sets the number of control plane or worker nodes in the control plane or worker pool. For this tutorial, set the count to one for both the control plane and worker pools.
-
Allow worker capability - This option allows the control plane node to also accept workloads. This is useful when spot instances are used as worker nodes. You can check this box if you want to.
-
Instance Type - Select the compute type for the node pool. Each instance type displays the amount of CPU, RAM, and hourly cost of the instance. Select Standard_A8_v2.
-
Managed disk - Used to select the storage class. Select Standard LRS and set the disk size to 60.
-
Availability zones - Used to specify the availability zones in which the node pool can place nodes. Select an availability zone.
In the Settings section, you can configure advanced options such as when to patch the OS, enable security scans, manage backups, add Role-Based Access Control (RBAC) bindings, and more.
For this tutorial, you can use the default settings. Click on Validate to continue.
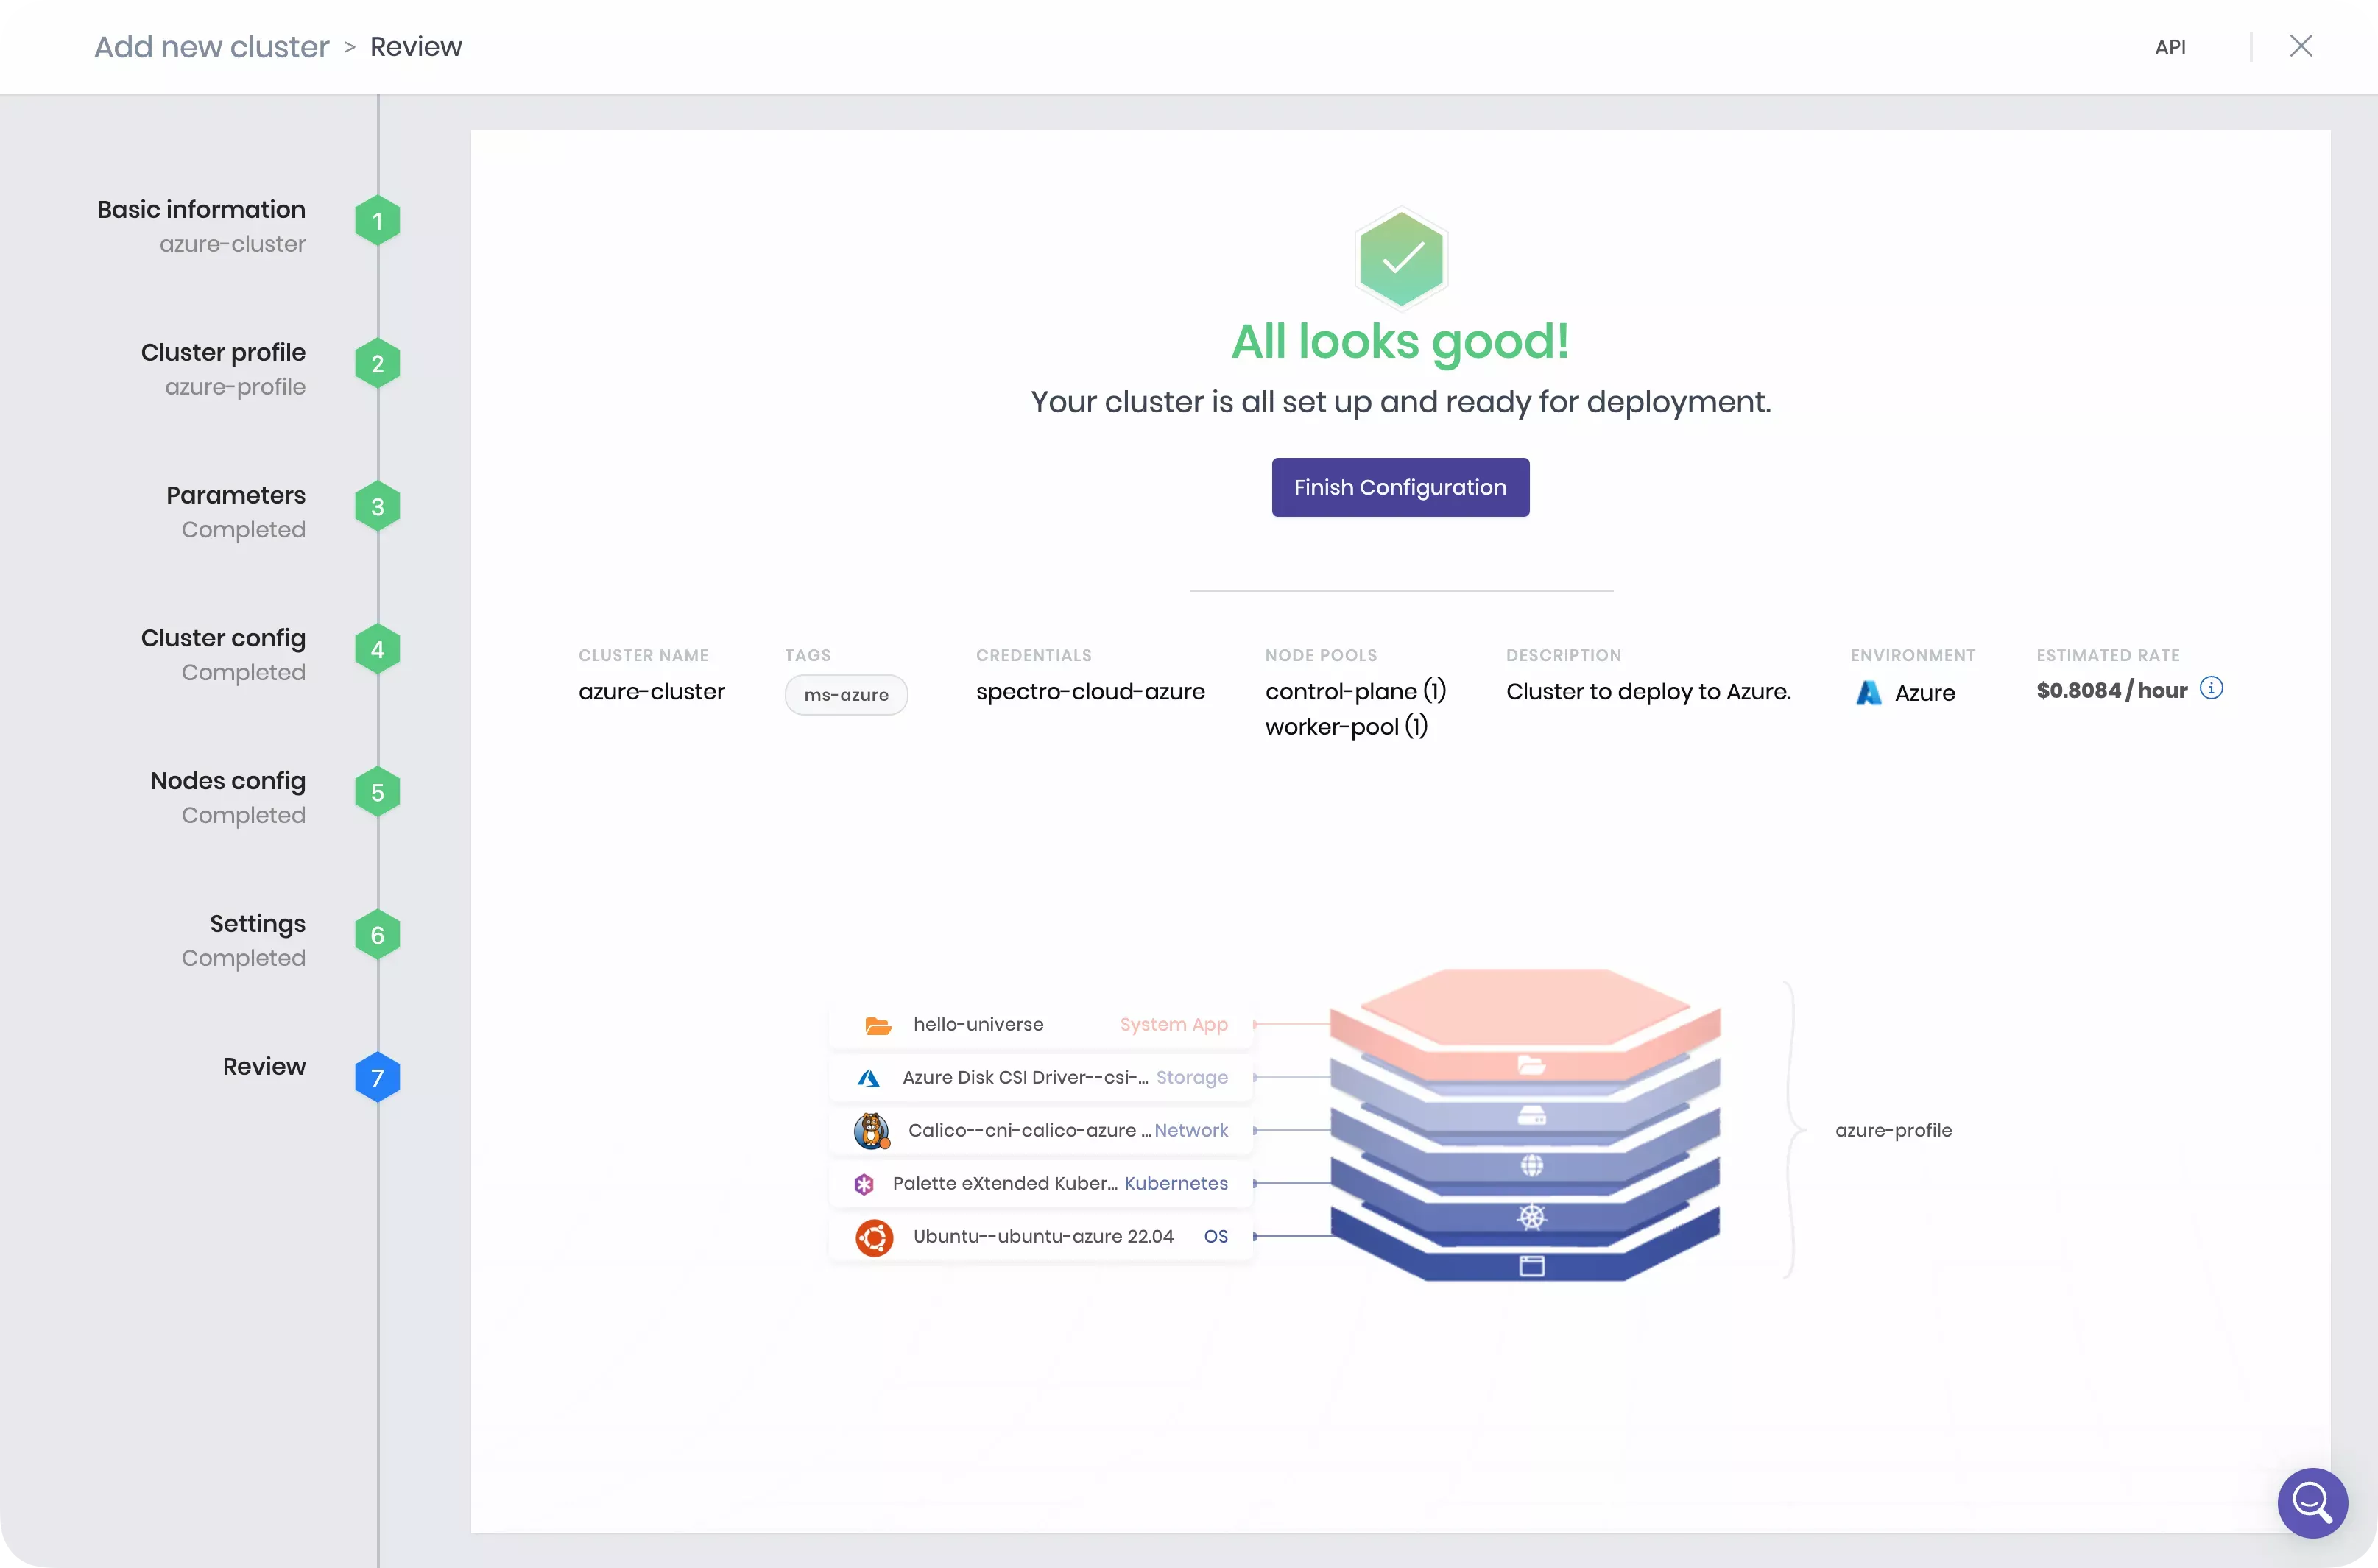
The Review section allows you to review the cluster configuration before deploying the cluster. Review all the settings and click on Finish Configuration to deploy the cluster.
Navigate to the left Main Menu and select Clusters.
Navigate to the left Main Menu and select Cluster. Click on Add New Cluster.
Click on Deploy New Cluster to access the cluster deployment wizard. Select Google Cloud and click the Start Google Cloud Configuration button. Use the following steps to create a host cluster in Google Cloud.
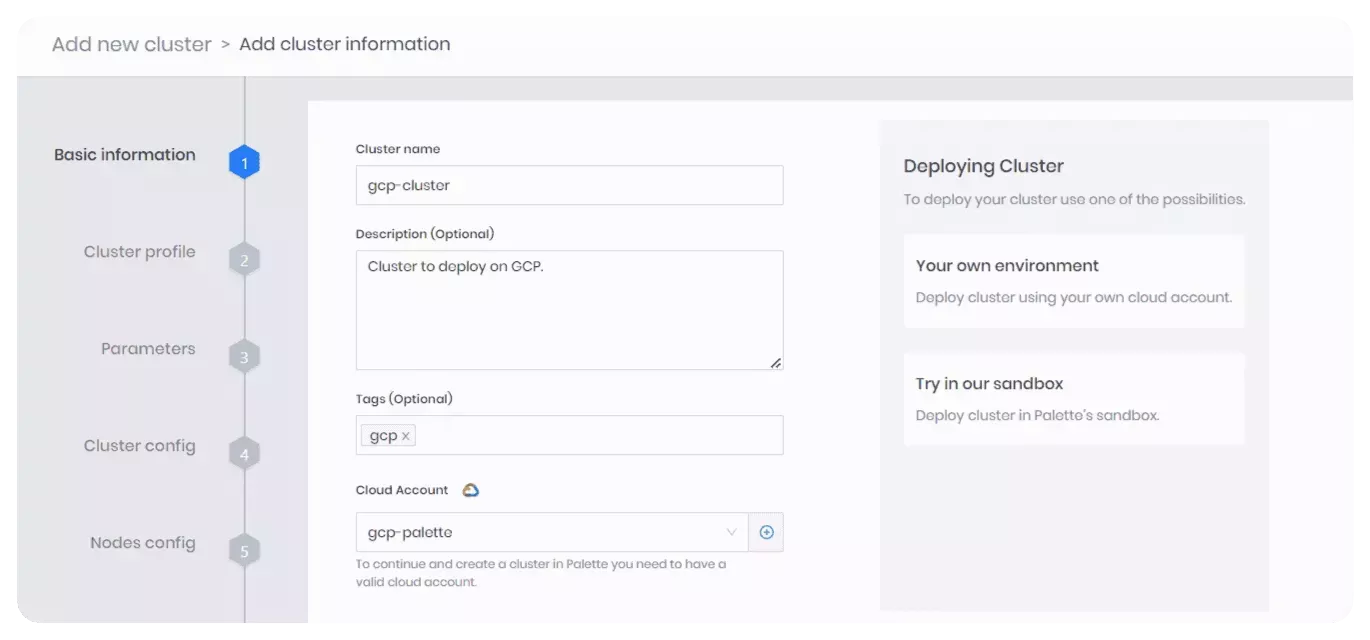
In the Basic information section, insert the general information about the cluster, such as the Cluster name, Description, Tags, and Cloud account. Click on Next.
A list is displayed of available profiles you can choose to deploy to GCP. Select the cluster profile you created in the Create a Cluster Profile tutorial, named gcp-profile, and click on Next.
The Parameters section displays all the layers in the cluster profile.
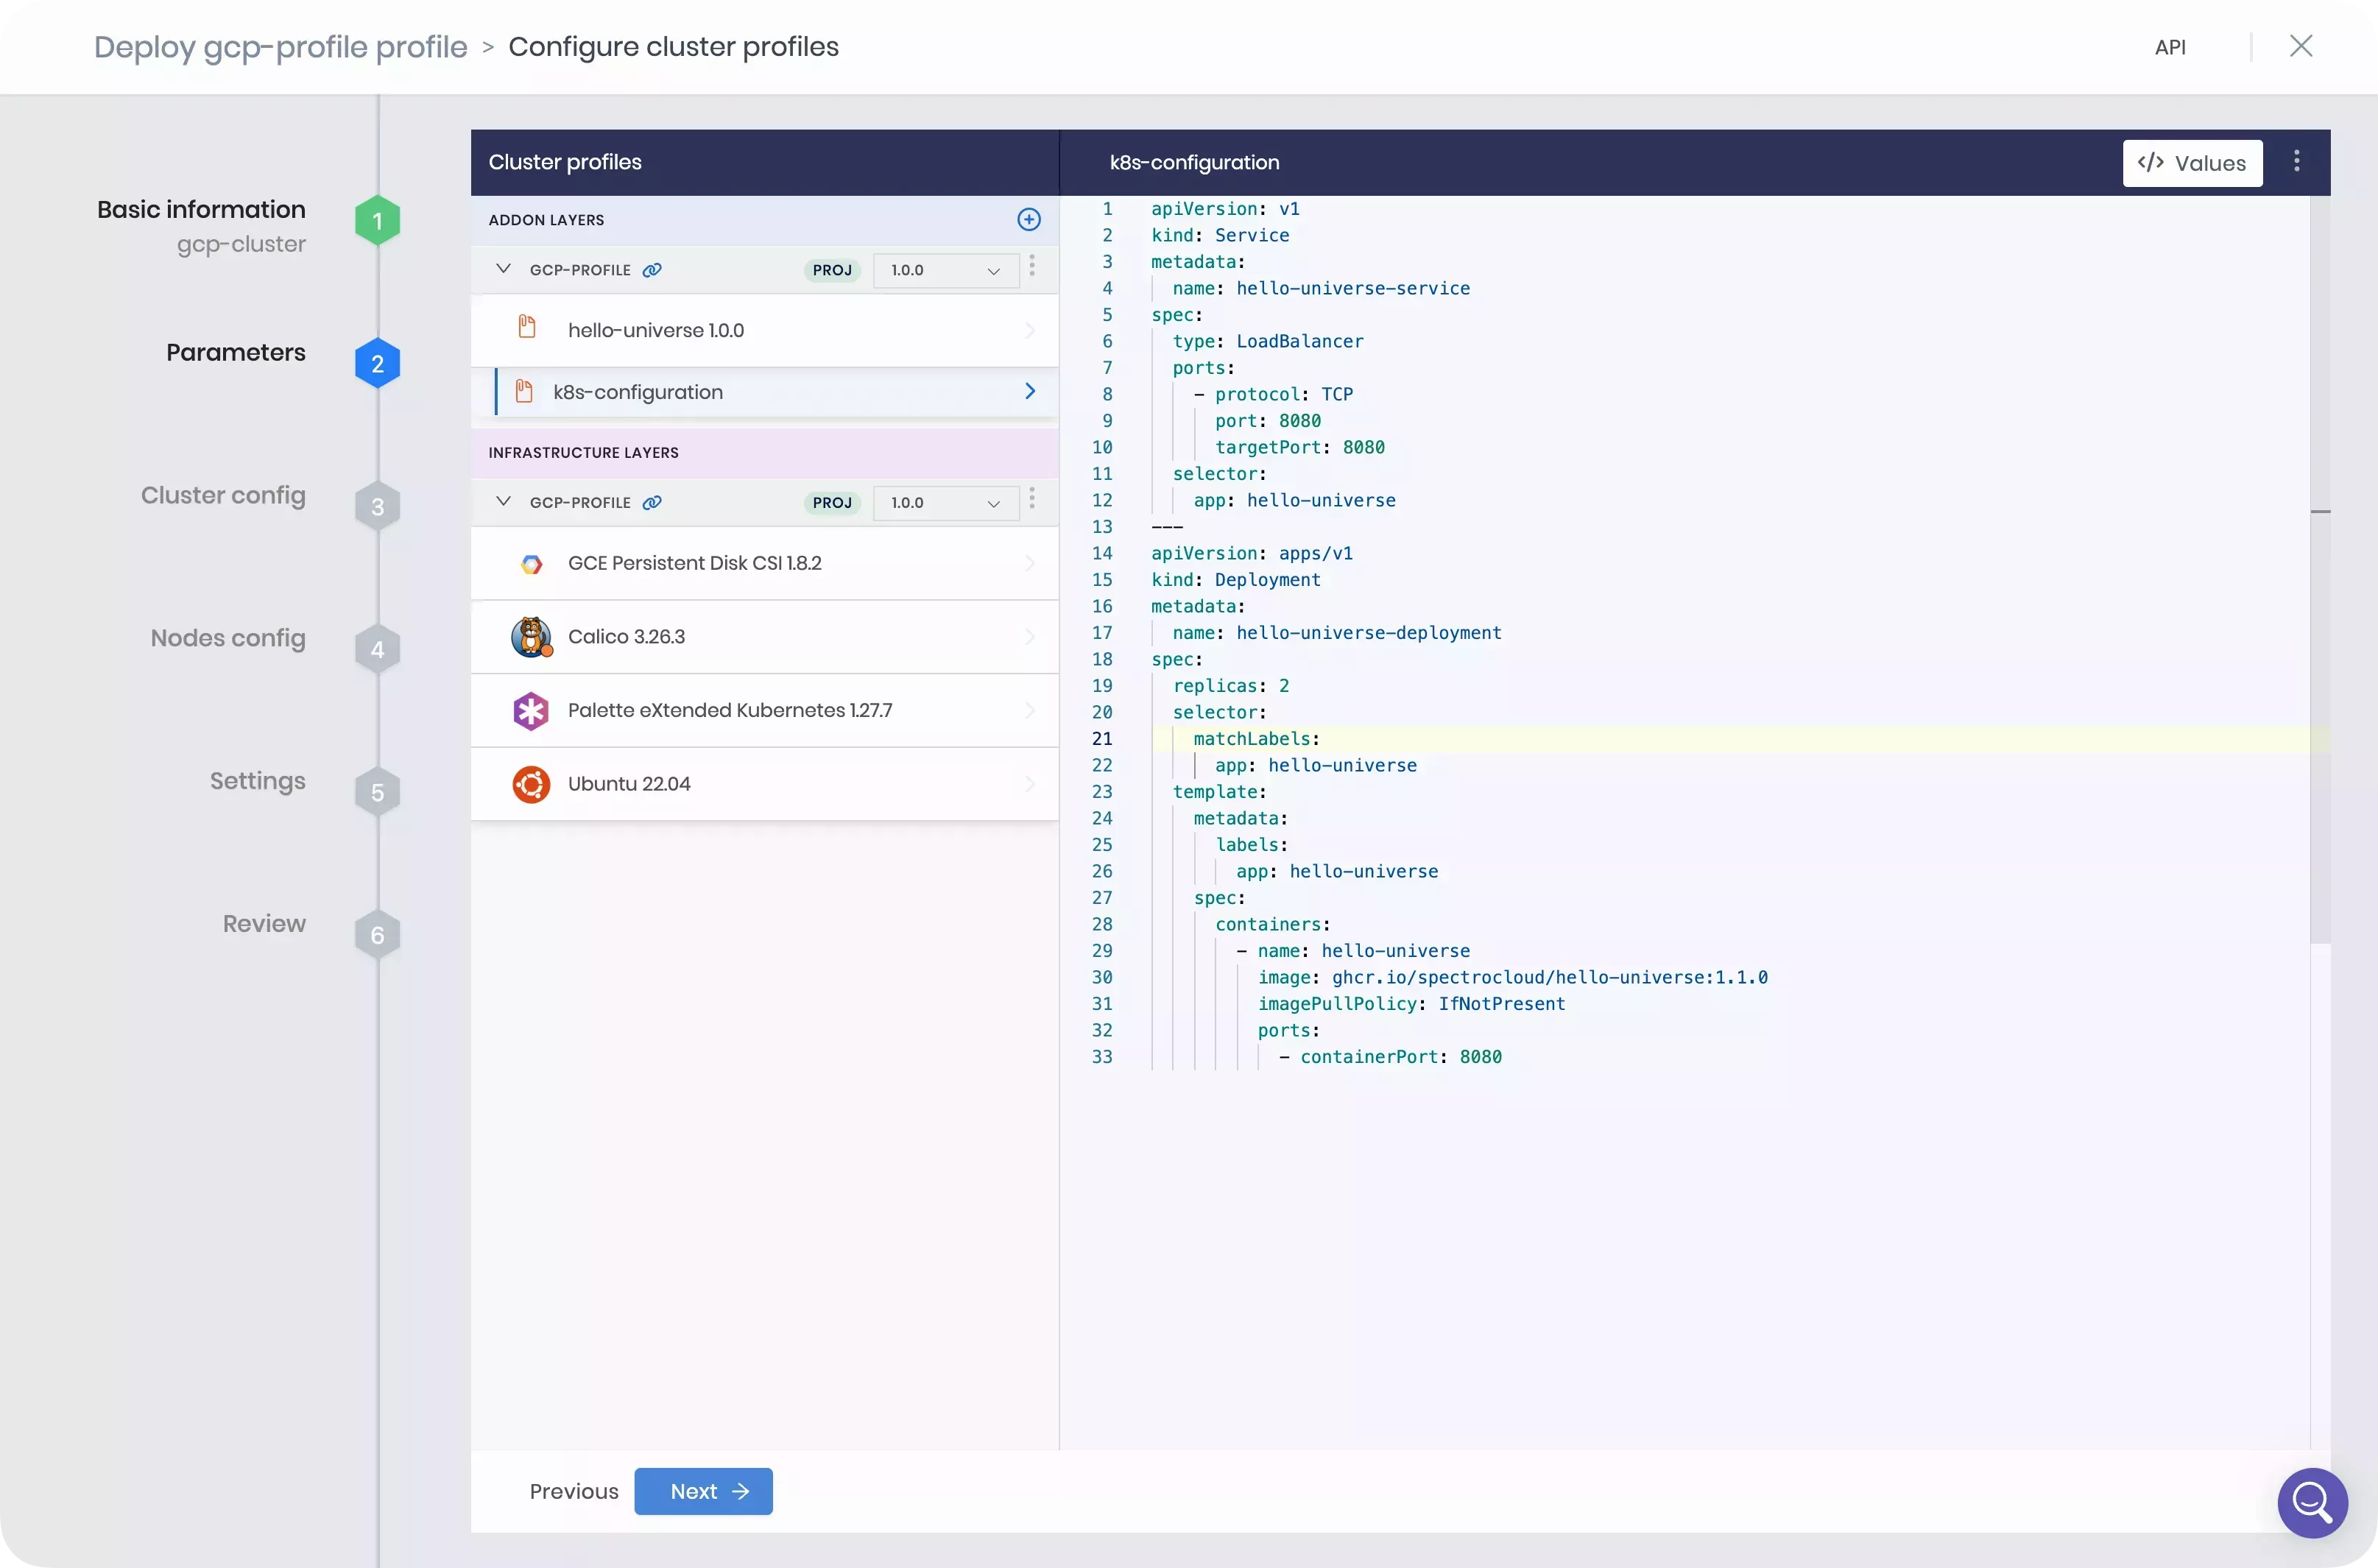
Each layer has a pack manifest file with the deploy configurations. The pack manifest file is in a YAML format. Each pack contains a set of default values. You can change the manifest values if needed. Click on Next to proceed.
The Cluster config section allows you to select the Project, Region, and SSH Key to apply to the host cluster. All clusters require you to assign an SSH key. Refer to the SSH Keys guide for information about uploading an SSH key.
After selecting a Project, Region, and SSH Key, click on Next.
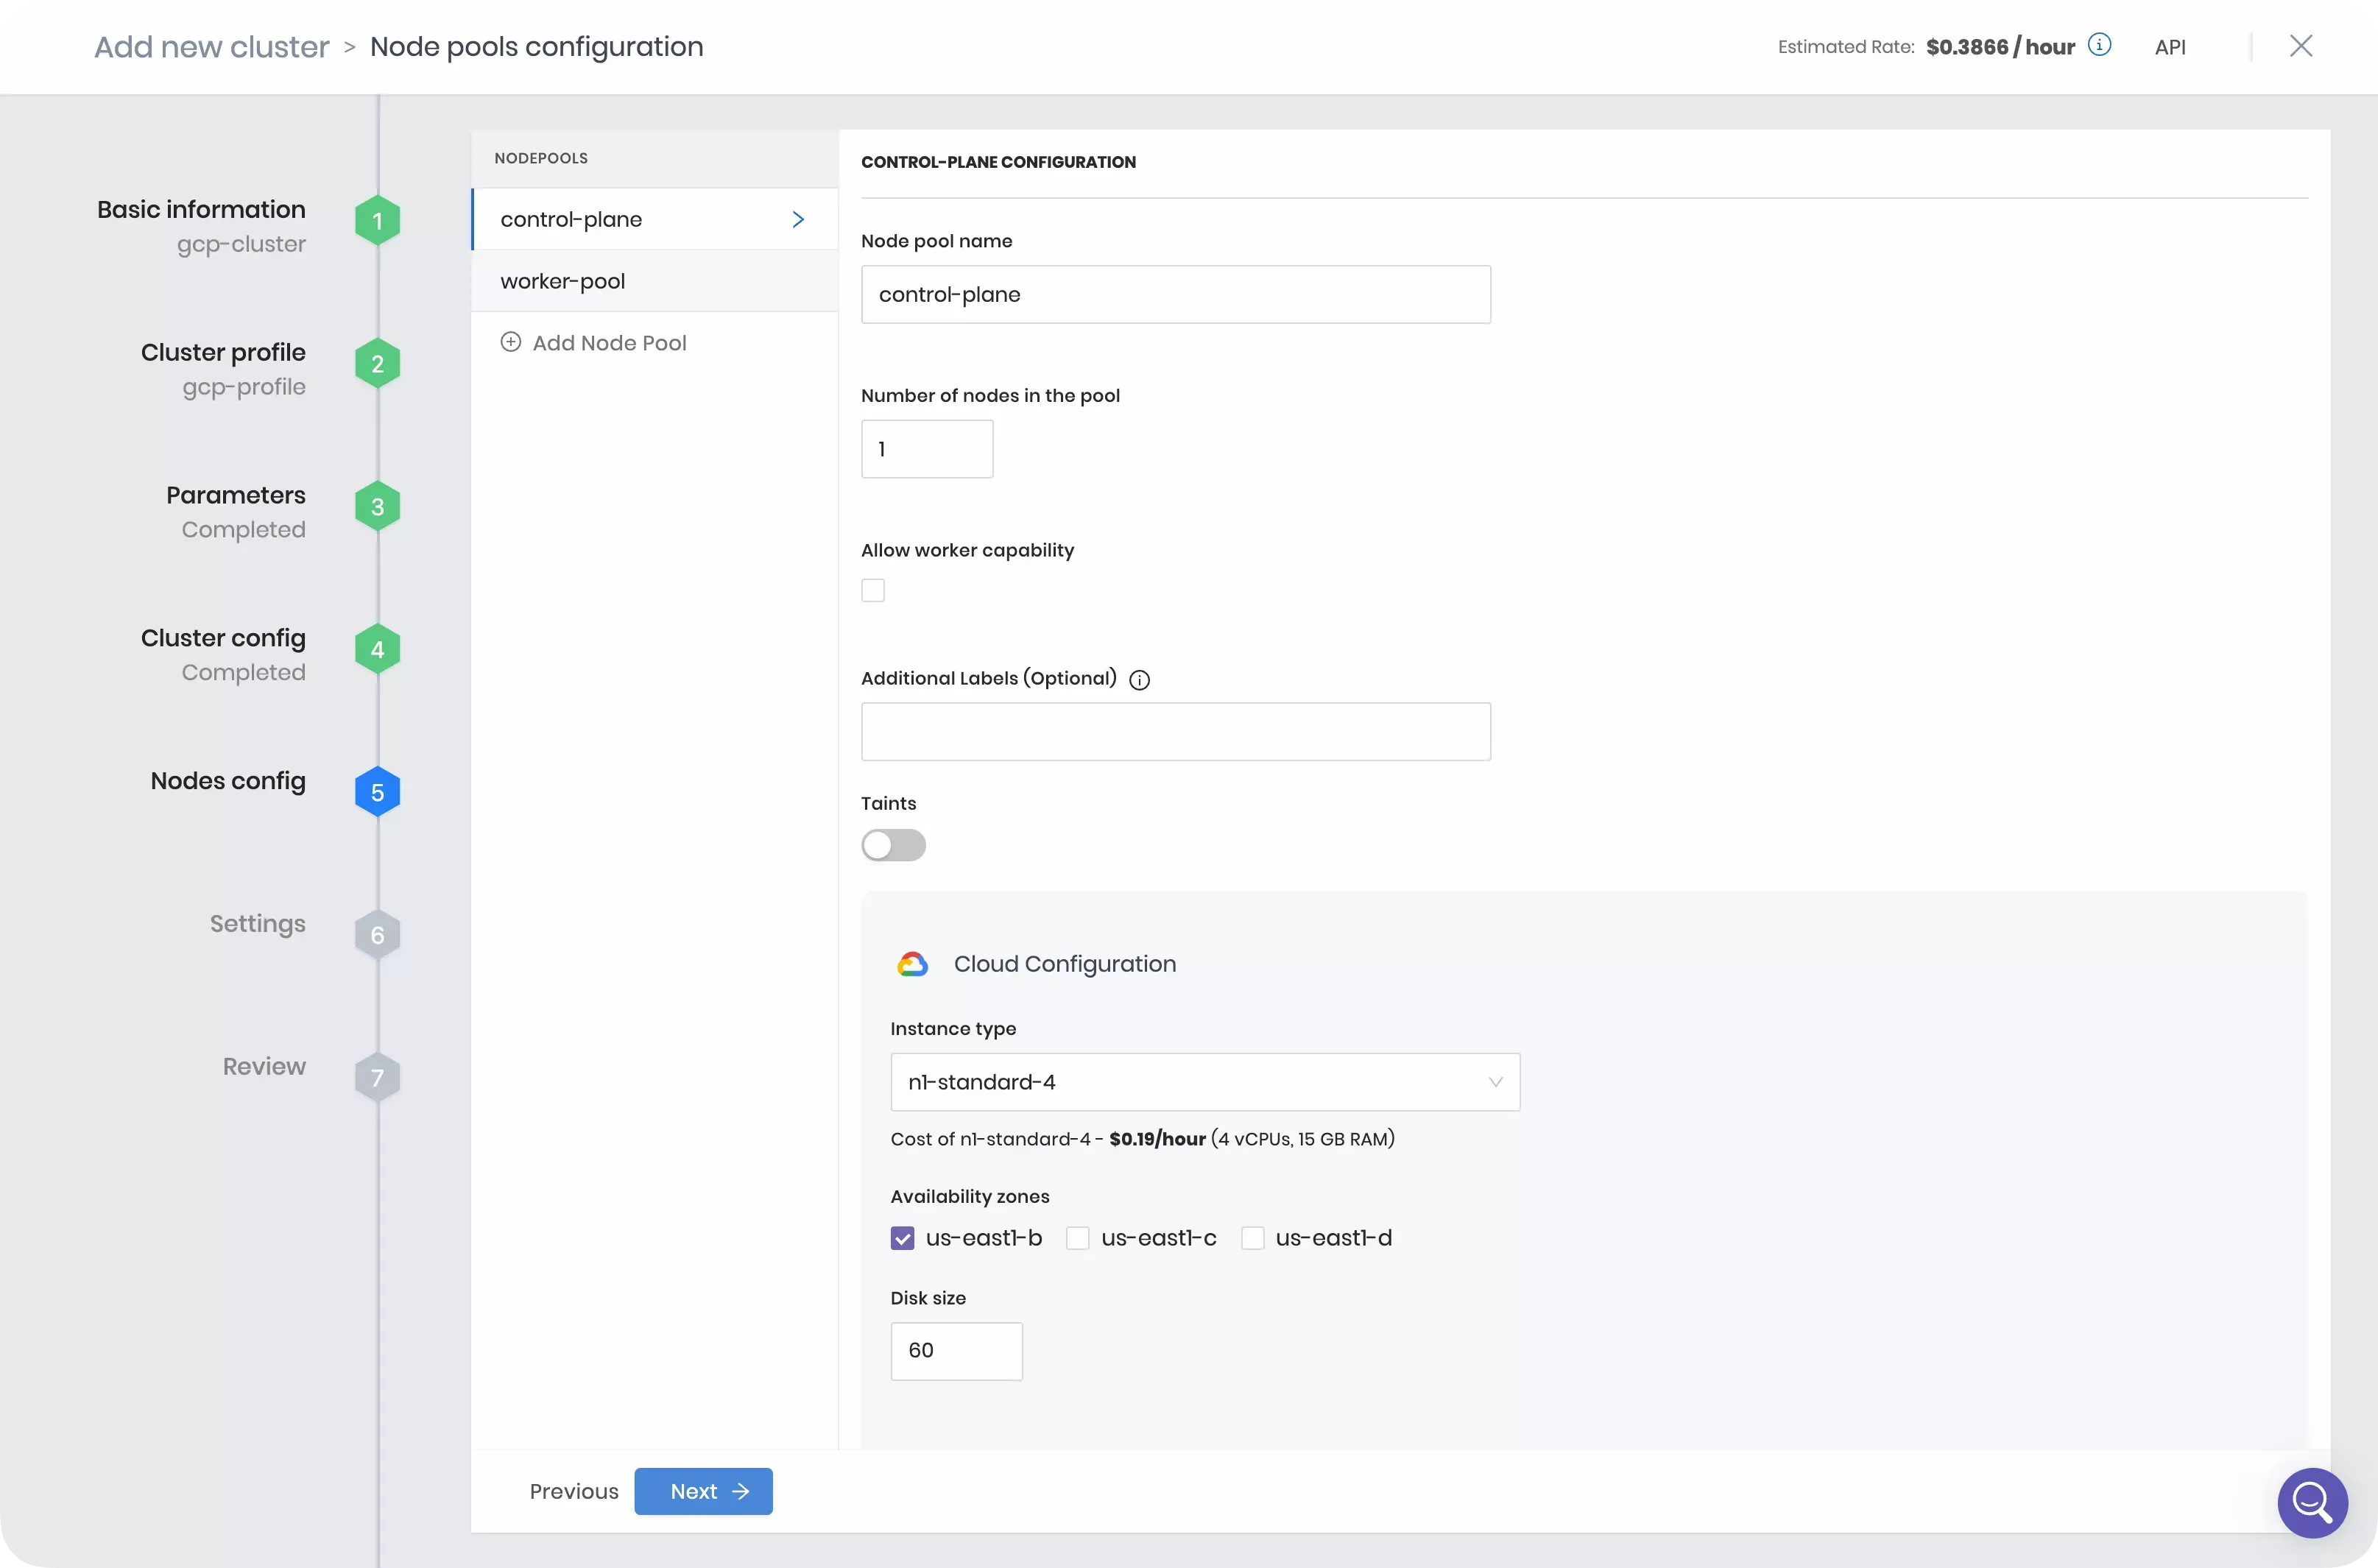
The Nodes config section allows you to configure the nodes that make up the control plane and worker nodes of the host cluster.
Before you proceed to the next section, review the following parameters.
Refer to the Node Pool guide for a list and description of parameters.
Before you proceed to next section, review the following parameters.
-
Number of nodes in the pool - This option sets the number of control plane or worker nodes in the control plane or worker pool. For this tutorial, set the count to one for the control plane pool and two for the worker pool.
-
Allow worker capability - This option allows the control plane node to also accept workloads. This is useful when spot instances are used as worker nodes. You can check this box if you want to.
-
Instance Type - Select the compute type for the node pool. Each instance type displays the amount of CPU, RAM, and hourly cost of the instance. Select n1-standard-4.
-
Disk size - Set the disk size to 60.
-
Availability zones - Used to specify the availability zones in which the node pool can place nodes. Select an availability zone.
Select Next to proceed with the cluster deployment.
In the Settings section, you can configure advanced options such as when to patch the OS, enable security scans, manage backups, add Role-Based Access Control (RBAC) bindings, and more.
For this tutorial, you can use the default settings. Click on Validate to continue.
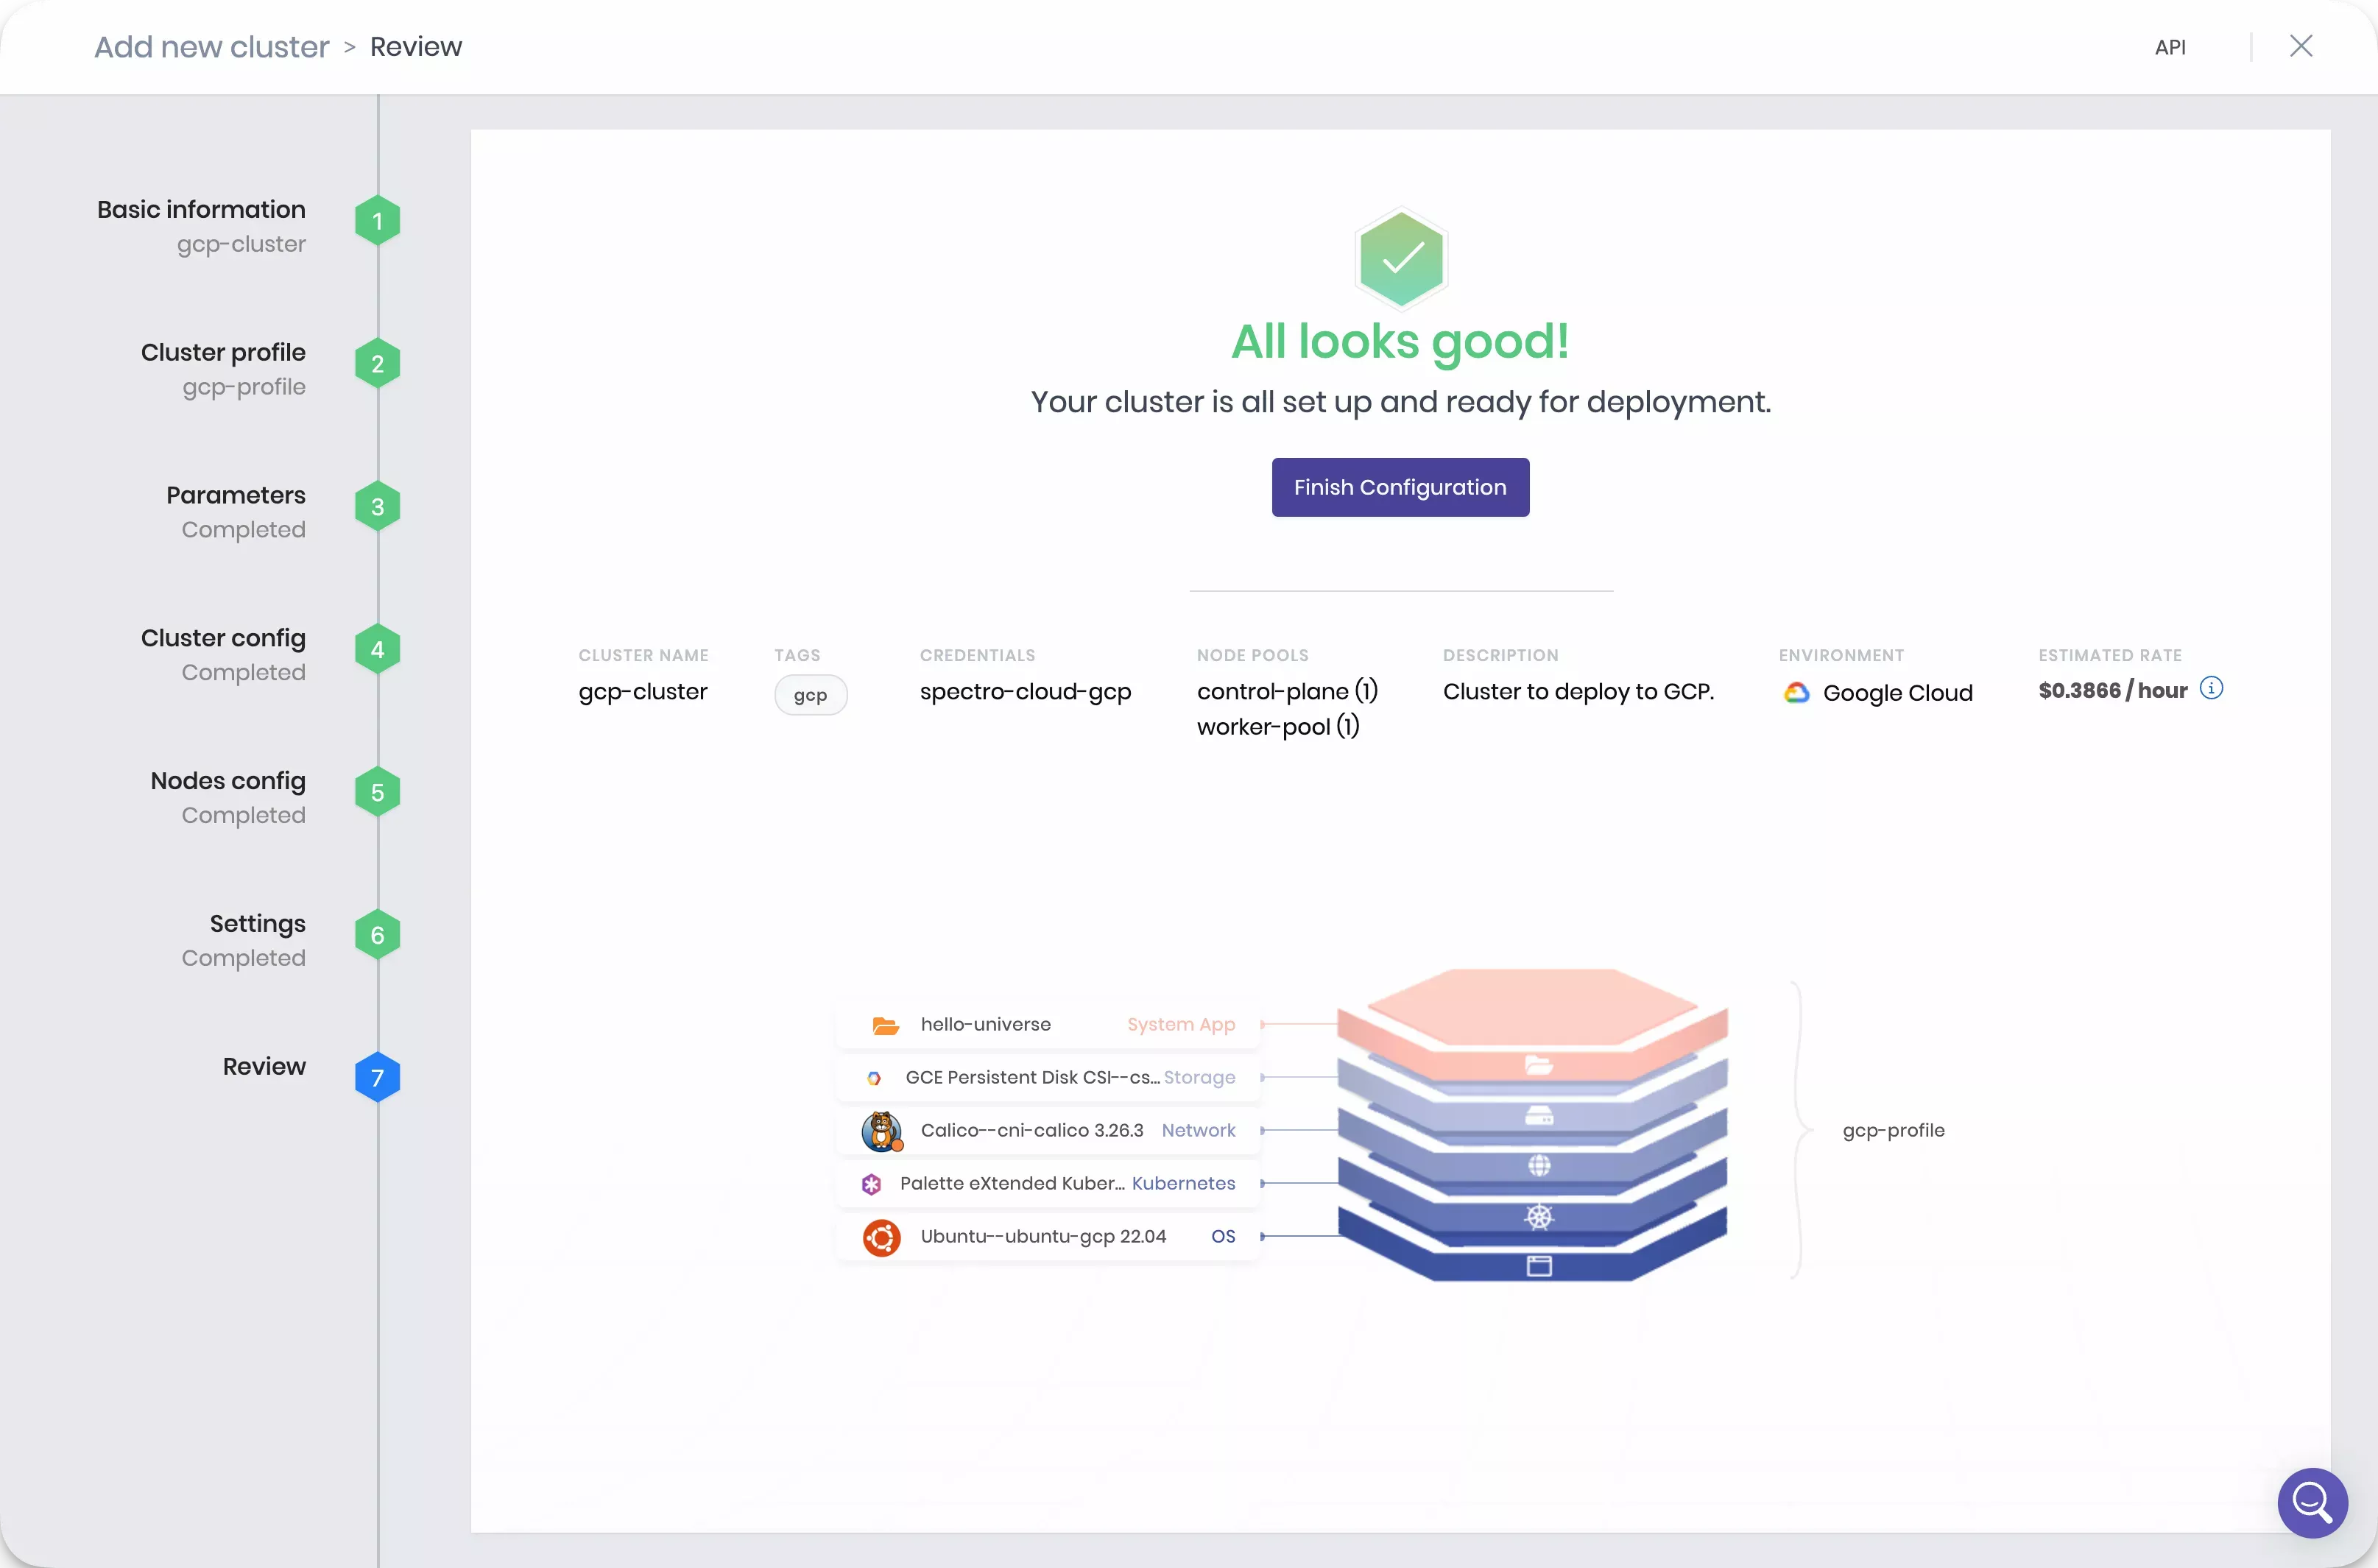
The Review section allows you to review the cluster configuration before deploying the cluster. Review all the settings and click on Finish Configuration to deploy the cluster.
Navigate to the left Main Menu and select Clusters.
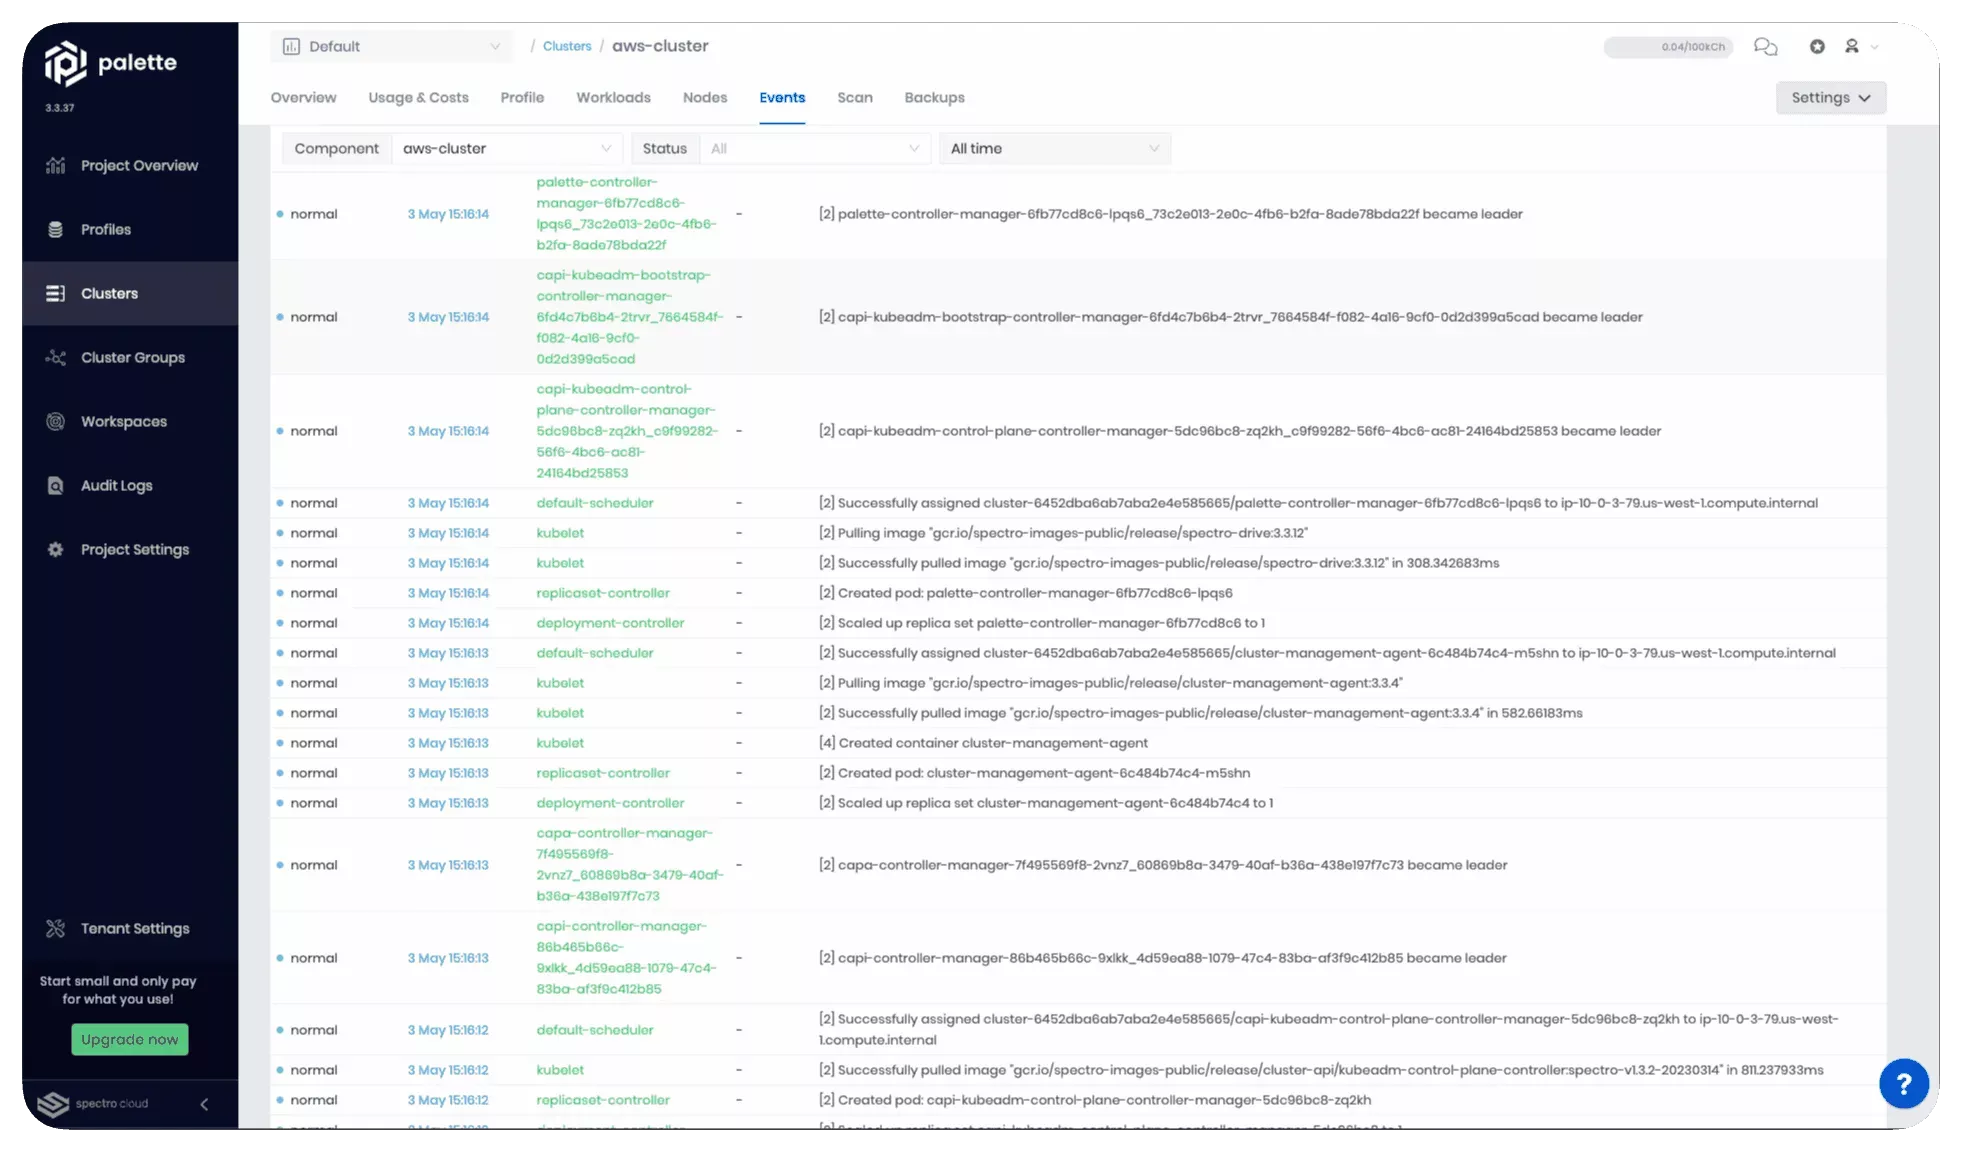
The cluster deployment process can take 15 to 30 min. The deployment time varies depending on the cloud provider, cluster profile, cluster size, and the node pool configurations provided. You can learn more about the deployment progress by reviewing the event log. Click on the Events tab to view the log.
While you wait for the cluster deployment process to complete, feel free to check out a video where we discuss the growing pains of using Kubernetes and how Palette can help your address these pain points.
Verify the Application
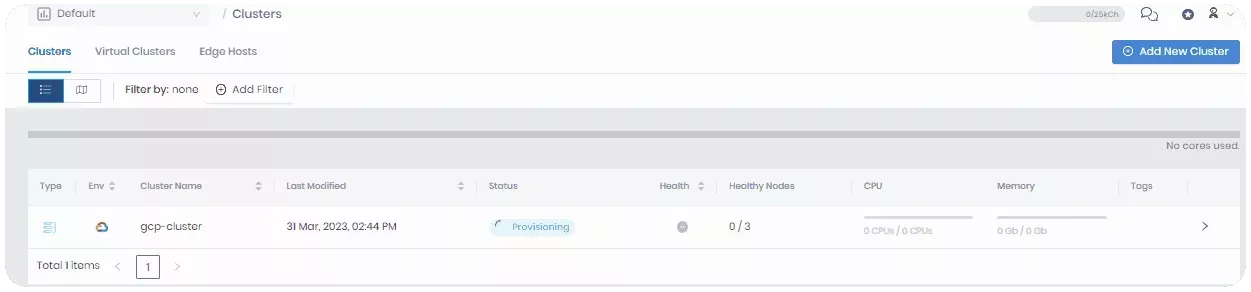
Navigate to the left Main Menu and select Clusters.
Select your cluster to view its Overview tab. When the application is deployed and ready for network traffic, indicated in the Services field, Palette exposes the service URL. Click on the URL for port :8080 to access the Hello Universe application.

It can take up to three minutes for DNS to properly resolve the public load balancer URL. We recommend waiting a few moments before clicking on the service URL to prevent the browser from caching an unresolved DNS request.
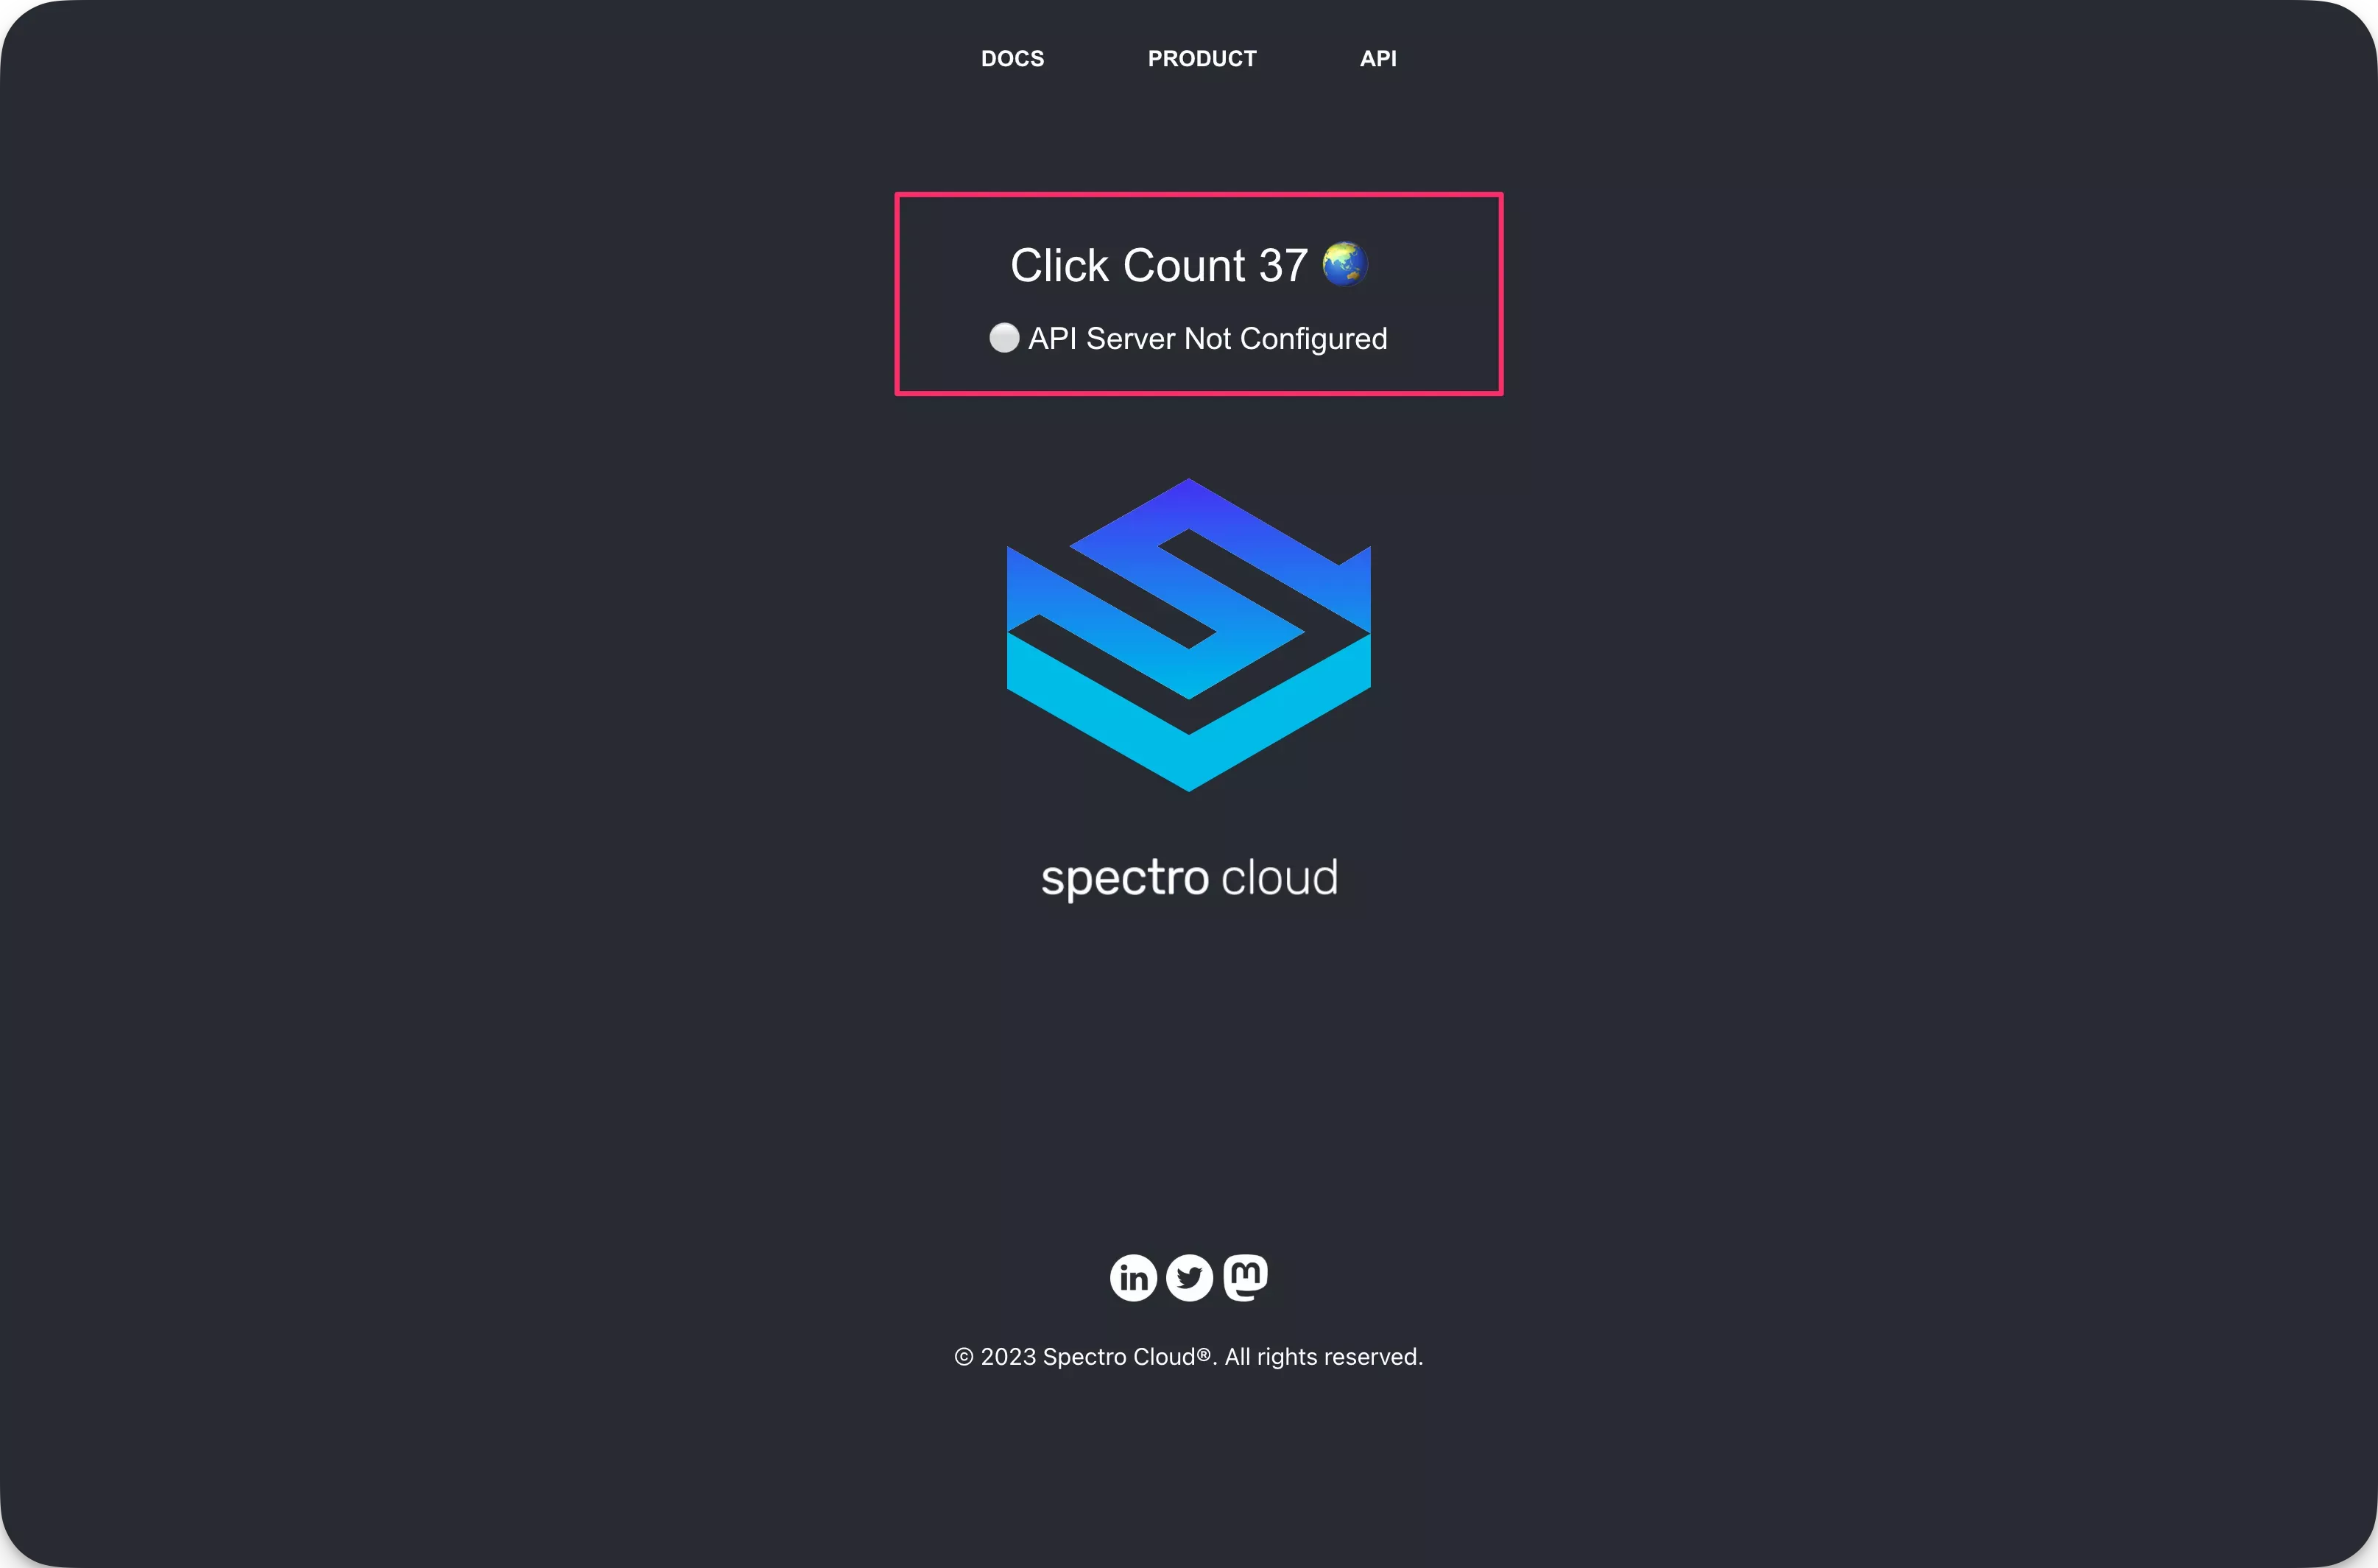
Welcome to Hello Universe, a demo application to help you learn more about Palette and its features. Feel free to click on the logo to increase the counter and for a fun image change.
You have deployed your first application to a cluster managed by Palette. Your first application is a single container application with no upstream dependencies.
Cleanup
Use the following steps to remove all the resources you created for the tutorial.
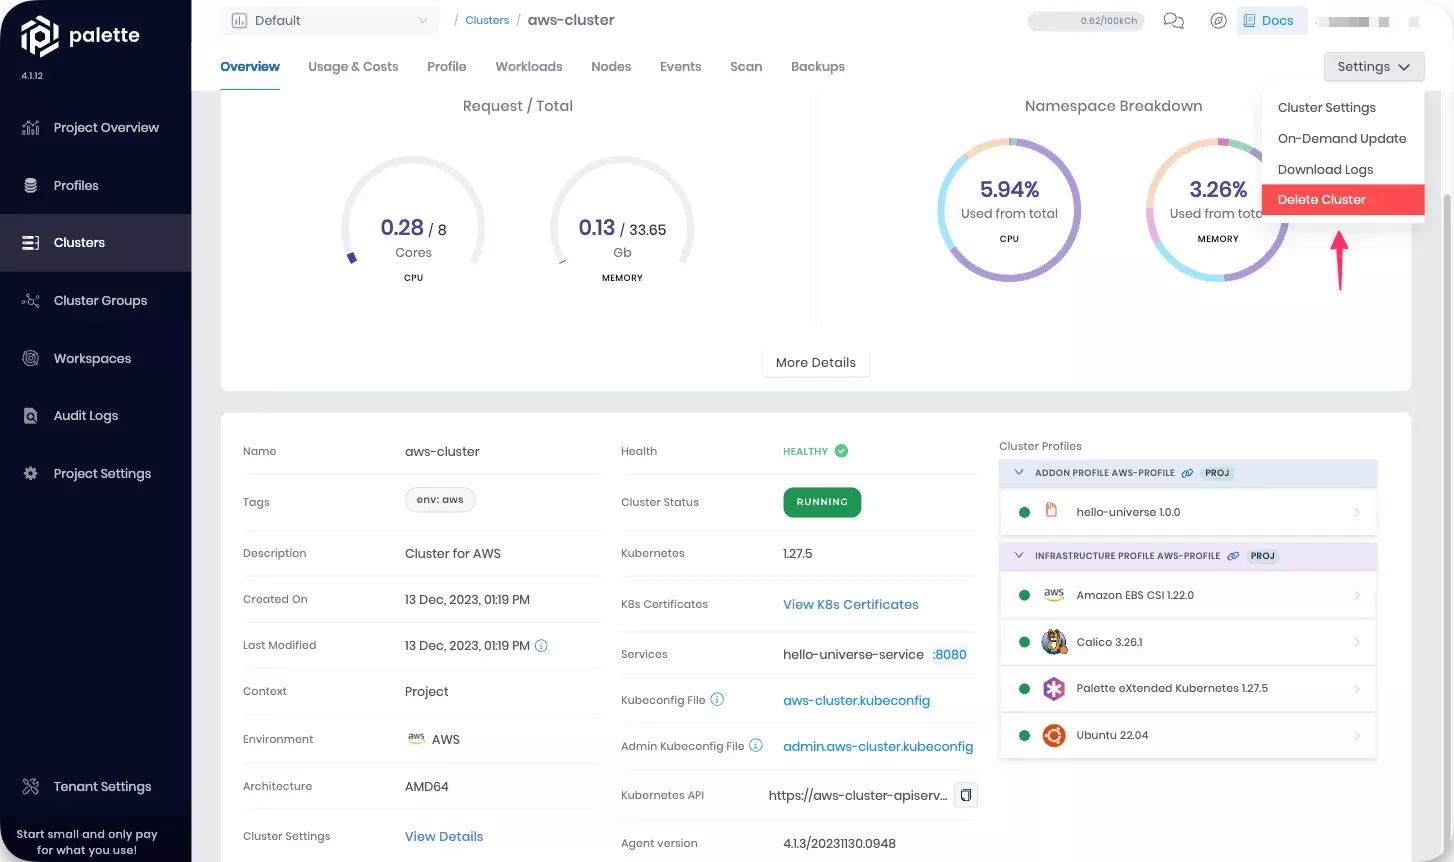
To remove the cluster, navigate to the left Main Menu and click on Clusters. Select the cluster you want to delete to access its details page.
Click on Settings to expand the menu, and select Delete Cluster.
You will be prompted to type in the cluster name to confirm the delete action. Type in the cluster name to proceed with the delete step. The deletion process takes several minutes to complete.
If a cluster remains in the delete phase for over 15 minutes, it becomes eligible for a force delete. To trigger a force delete, navigate to the cluster’s details page, click on Settings, then select Force Delete Cluster. Palette automatically removes clusters stuck in the cluster deletion phase for over 24 hours.
Once the cluster is deleted, navigate to the left Main Menu and click on Profiles. Find the cluster profile you created and click on the three-dot Menu to display the Delete button. Select Delete and confirm the selection to remove the cluster profile.
Wrap-Up
In this tutorial, you used the cluster profile you created in the previous Create a Cluster Profile tutorial to deploy a host cluster onto your preferred cloud service provider. After the cluster deployed, you verified the Hello Universe application was successfully deployed.
We recommend that you continue to the Deploy Cluster Profile Updates tutorial to learn how to update your host cluster.