Import a Cluster
When importing a cluster into Palette, you can select the mode you want Palette to use when managing the cluster. You can choose between read-only mode or full permission. Refer to the Imported Clusters reference page to learn more about each mode.
Select the mode you want to use when importing a cluster into Palette.
Full Permissions
Prerequisites
-
Kubernetes version >= 1.19.X
-
Ensure your environment has network access to Palette SaaS or your self-hosted Palette instance.
-
Ensure kubectl is installed and available in your local workstation.
-
Access to your cluster environment through kubectl.
Import a Cluster
-
Log in to Palette.
-
Navigate to the left Main Menu and select Clusters.
-
Click on Add New Cluster and select Import Cluster in the pop-up box.
-
Fill out the required information and make your selections:
- Cluster Name - The name of the cluster you want to import.
- Cloud Type - Select the infrastructure environment your cluster resides in. Select Generic if the environment list doesn't contain your specific environment, but be aware of the limitations with generic clusters.
- Proxy - Optional and only available for generic clusters. Specify a network proxy address or DNS value.
- No Proxy - Optional and only available for generic clusters. Specify a no proxy address or DNS value.
-
Select Full-permission mode and click on Create & Open Cluster Instance to start the import.
-
You will be redirected to the cluster details page. A set of instructions with commands is displayed on the right side of the screen. You will need to issue the following commands to complete the import process.
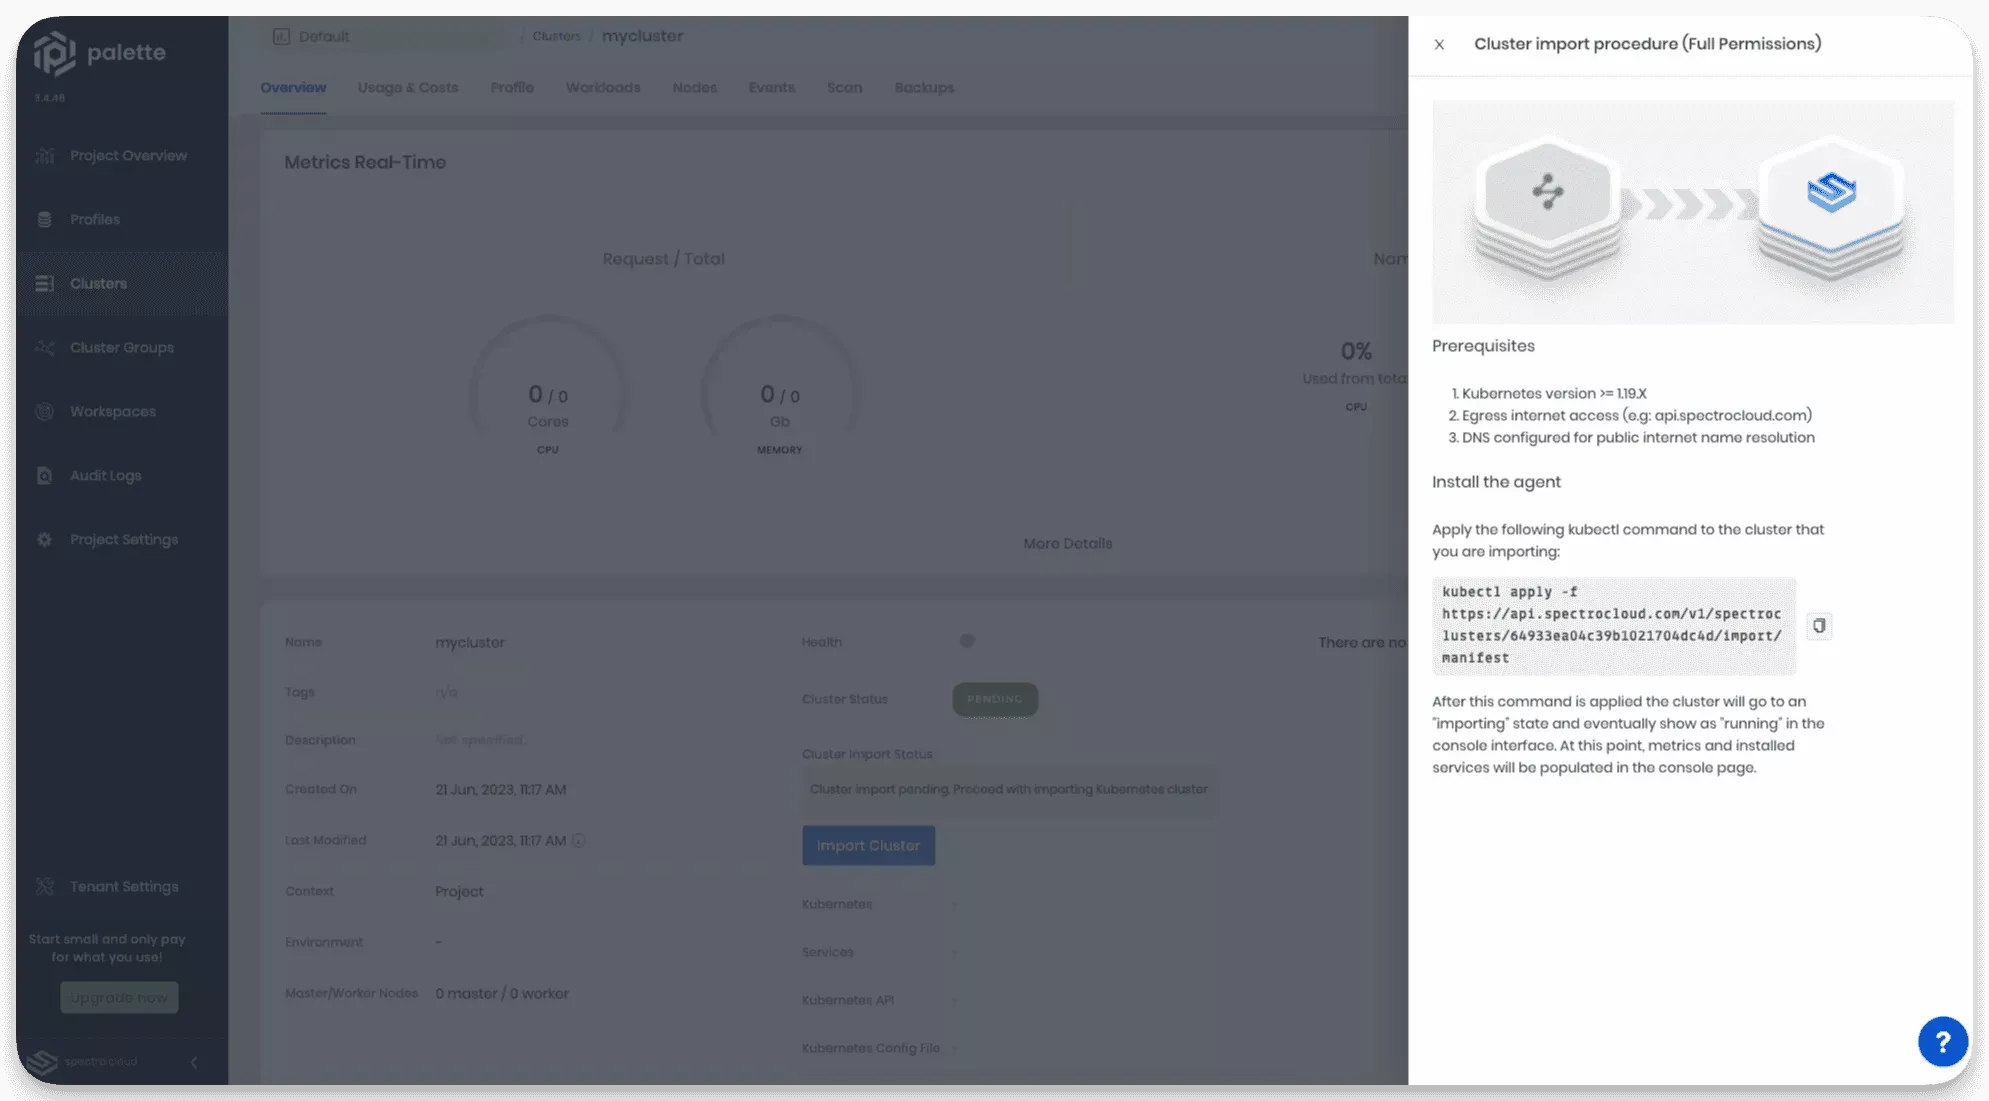
-
We recommend you install the metrics server so that Palette can expose and provide you with information about the cluster. Installing the metrics server is not required but is needed for Palette to expose cluster metrics. To enable the metrics server, open a terminal session and issue the commands below against the Kubernetes cluster you want to import.
helm repo add bitnami https://charts.bitnami.com/bitnami && \
helm install my-release bitnami/metrics-server -
To install the Palette agent, issue the command displayed in the cluster details page Install the agent section against the Kubernetes cluster you want to import. The command is customized for your cluster as it contains the assigned cluster ID. Below is an example output of the install command.
kubectl apply --filename https://api.spectrocloud.com/v1/spectroclusters/6491d4a94c39ad82d3cc30ae/import/manifestOutput
namespace/cluster-6491d4a94c39ad82d3cc30ae created
serviceaccount/cluster-management-agent created
clusterrole.rbac.authorization.k8s.io/read-only-mode created
clusterrolebinding.rbac.authorization.k8s.io/read-only-mode created
configmap/log-parser-config created
configmap/upgrade-info-8kfc2m8mt8 created
configmap/version-info-kbk5hk992f created
secret/spectro-image-pull-secret created
priorityclass.scheduling.k8s.io/spectro-cluster-critical created
deployment.apps/cluster-management-agent-lite created
configmap/cluster-info created
configmap/hubble-info created
secret/hubble-secrets created -
When the Palette agent completes initializing, the cluster import procedures at right will disappear, and your cluster will transition to Running status within a few minutes.
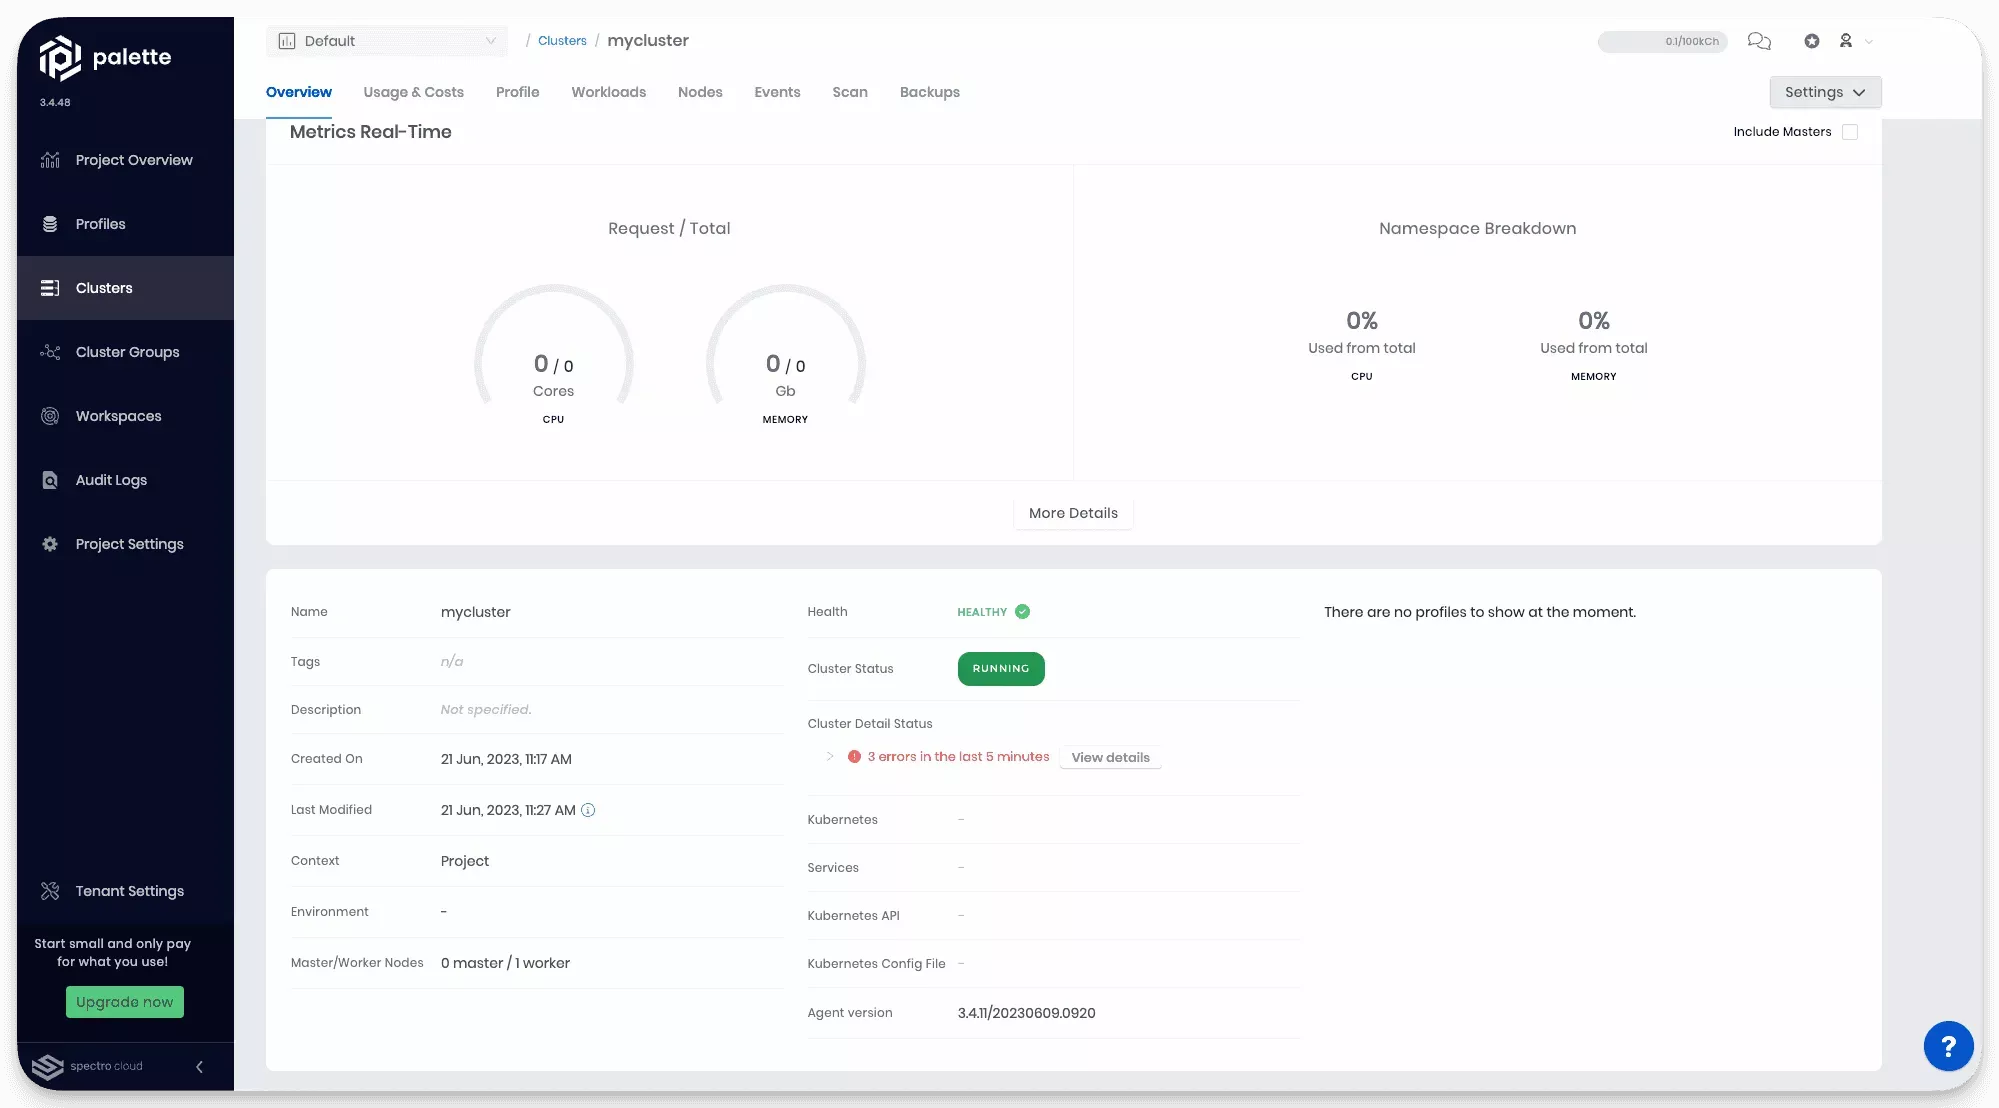
You now have imported a cluster into Palette with full permissions.
Validate
-
Log in to Palette.
-
Navigate to the left Main Menu and select Clusters.
-
Select your imported cluster from the cluster list.
-
Review the Cluster Status row from the cluster details view. A successful cluster import will have the cluster status Running.
Read-only Mode
Prerequisites
-
Kubernetes version >= 1.19.X
-
Ensure your environment has network access to Palette SaaS or your self-hosted Palette instance.
-
Ensure kubectl is installed and available in your local workstation.
-
Access to your cluster environment through kubectl.
Import a Cluster
-
Log in to Palette.
-
Navigate to the left Main Menu and select Clusters.
-
Click on Add New Cluster and select Import Cluster in the pop-up box.
-
Fill out the required information and make the proper selections:
- Cluster Name - The name of the cluster you want to import.
- Cloud Type - Select the infrastructure environment your cluster resides in. Select Generic if the environment list doesn't contain your specific environment but be aware of the limitations with generic clusters.
- Proxy - Optional and only available for generic clusters. Specify a network proxy address or DNS value.
- No Proxy - Optional and only available for generic clusters. Specify a no proxy address or DNS value.
-
Select Read-only mode and click on Create & Open Cluster Instance to start the import action.
-
You will be redirected to the cluster details page. A set of instructions with commands is displayed on the right-hand side of the screen. You will need to issue the following commands to complete the import process.
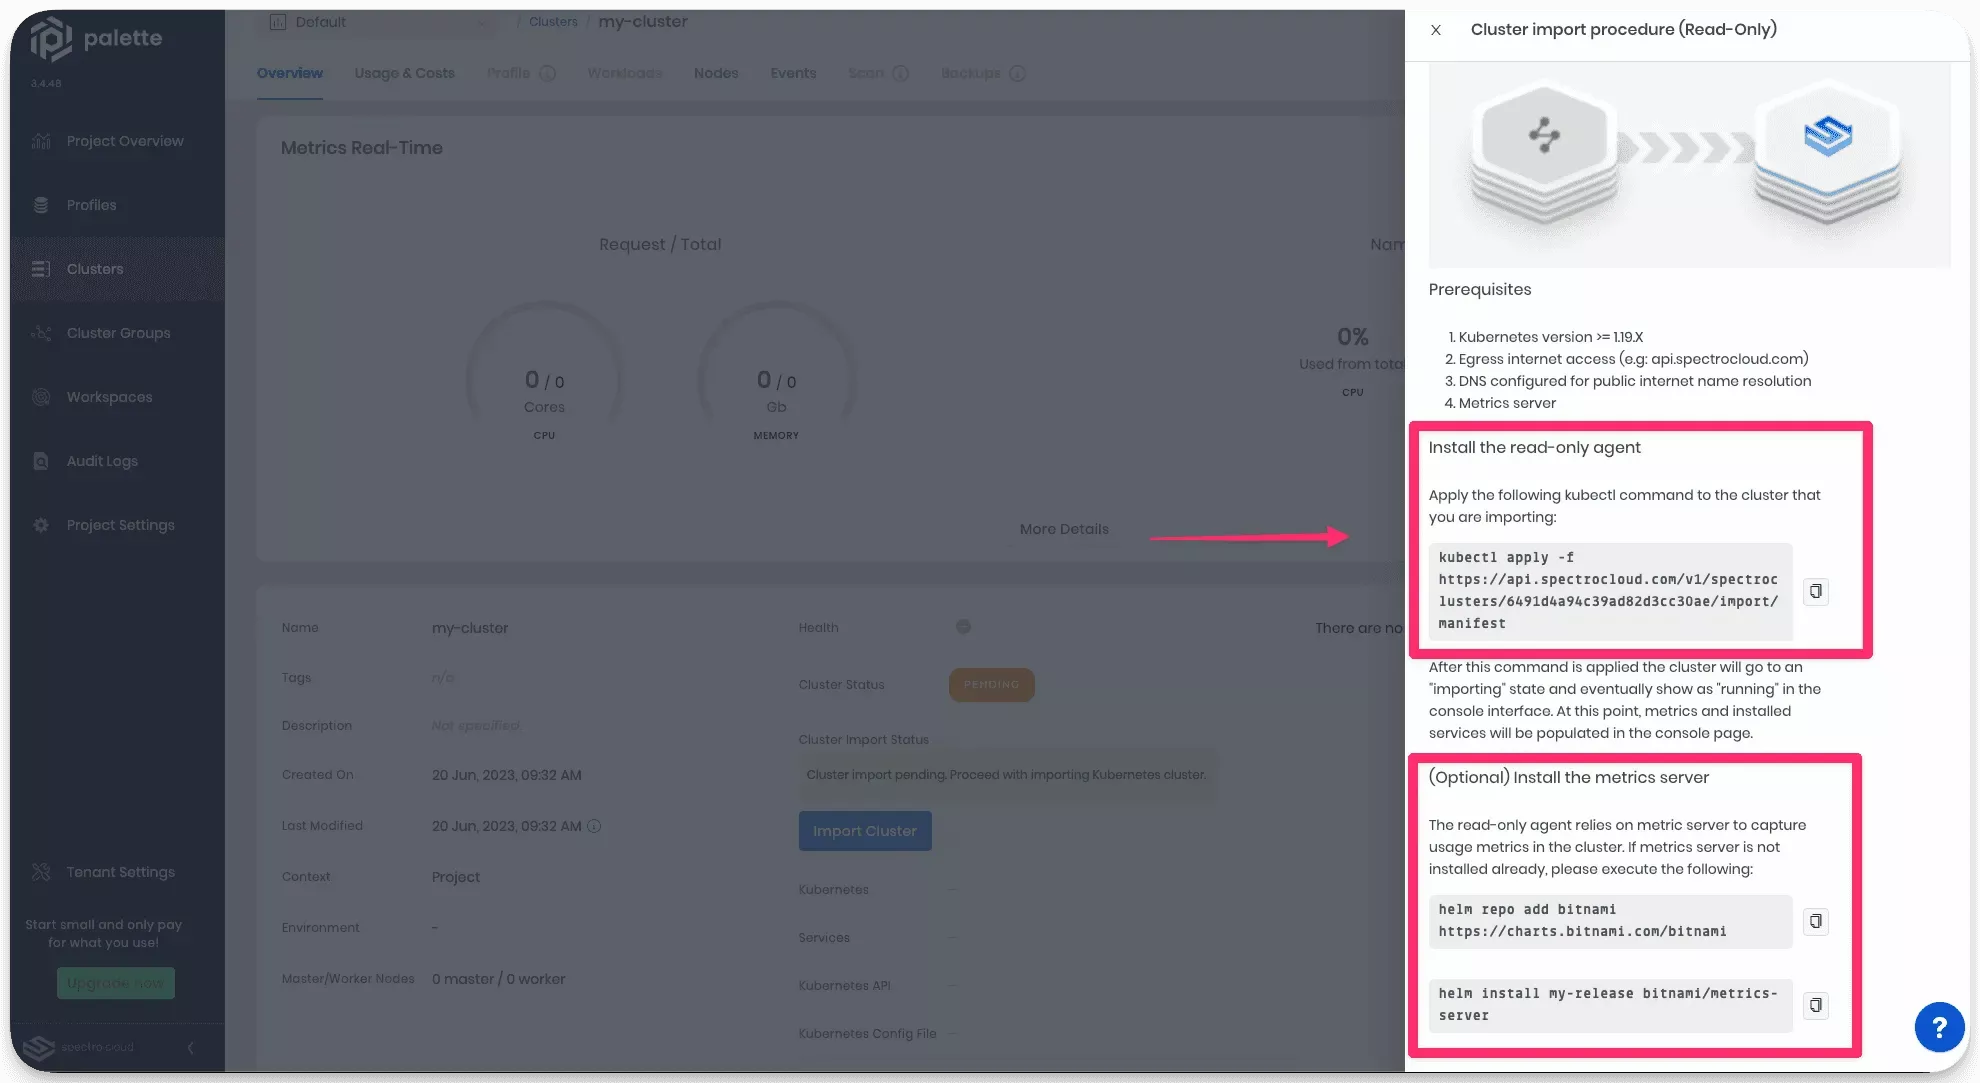
-
We recommend you install the metrics server so that Palette can expose and provide you with information about the cluster. Installing the metrics server is not required but is needed for Palette to expose cluster metrics. Open a terminal session and issue the commands below against the Kubernetes cluster you want to import if you want to enable the metrics server.
helm repo add bitnami https://charts.bitnami.com/bitnami && \
helm install my-release bitnami/metrics-server -
To install the Palette agent, issue the command displayed in the cluster details page Install the read-only agent** section against the Kubernetes cluster you want to import. The command is customized for your cluster as it contains the assigned cluster ID. Below is an example output of the install command.
kubectl apply --filename https://api.spectrocloud.com/v1/spectroclusters/6491d4a94c39ad82d3cc30ae/import/manifestOutput
namespace/cluster-6491d4a94c39ad82d3cc30ae created
serviceaccount/cluster-management-agent created
clusterrole.rbac.authorization.k8s.io/read-only-mode created
clusterrolebinding.rbac.authorization.k8s.io/read-only-mode created
configmap/log-parser-config created
configmap/upgrade-info-8kfc2m8mt8 created
configmap/version-info-kbk5hk992f created
secret/spectro-image-pull-secret created
priorityclass.scheduling.k8s.io/spectro-cluster-critical created
deployment.apps/cluster-management-agent-lite created
configmap/cluster-info created
configmap/hubble-info created
secret/hubble-secrets created -
Once the Palette agent completes the initialization, the side view drawer on the right will disappear, and your cluster will transition to a status of Running after a few moments.
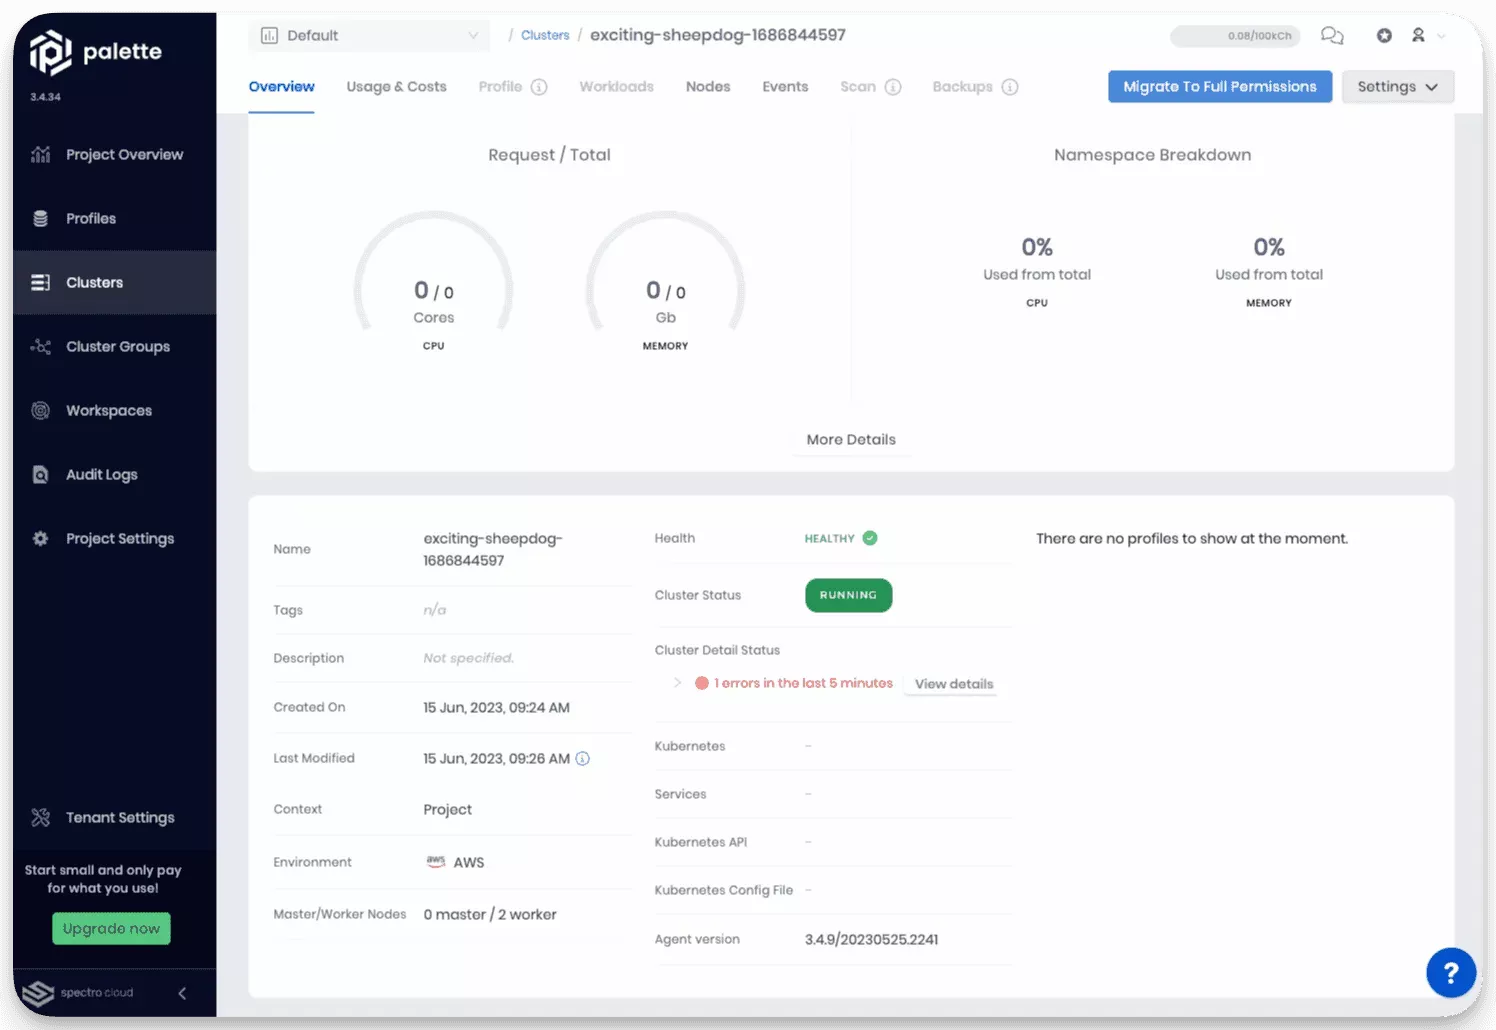
You now have imported a cluster into Palette in read-only mode. Keep in mind that a cluster imported in read-only mode has limited capabilities. You can migrate to full permissions anytime by clicking Migrate To Full Permissions.
Validate
-
Log in to Palette.
-
Navigate to the left Main Menu and select Clusters.
-
Select your imported cluster from the cluster list.
-
Review the Cluster Status row from the cluster details view. A successful cluster import displays cluster status as Running.
Next Steps
Depending on what mode you selected for the migration, your next step is to either Attach an Add-on Profile or you can Migrate to Full Permissions.