Deploy Cluster Profile Updates
Palette provides cluster profiles, which allow you to specify layers for your workloads using packs, Helm charts, Zarf packages, or cluster manifests. Packs serve as blueprints to the provisioning and deployment process, as they contain the versions of the container images that Palette will install for you. Cluster profiles provide consistency across environments during the cluster creation process, as well as when maintaining your clusters. Check out the cluster profiles page to learn more. Once provisioned, there are three main ways to update your Palette deployments.
| Method | Description | Cluster application process |
|---|---|---|
| Cluster profile versions | Create a new version of the cluster profile with your updates. | Select the new version of the cluster profile. Apply this new profile version to the clusters you want to update. |
| Cluster profile updates | Change the cluster profile in place. | Palette detects the difference between the provisioned resources and this profile. A pending update is available to clusters using this profile. Apply pending updates to the clusters you want to update. |
| Cluster overrides | Change the configuration of a single deployed cluster outside its cluster profile. | Save and apply the changes you've made to your cluster. |
This tutorial will teach you how to update a cluster deployed with Palette to Amazon Web Services (AWS), Microsoft Azure, or Google Cloud Platform (GCP) cloud providers. You will explore each cluster update method and learn how to apply these changes using Palette.
Prerequisites
This tutorial builds upon the resources and steps outlined in the Deploy a Cluster tutorial for creating initial clusters. To complete it, you will need the following items.
-
A public cloud account from one of these providers:
-
Register the cloud account with Palette. Use the following resource for additional guidance.
-
An SSH Key Pair. Use the Create and Upload an SSH Key guide to learn how to create an SSH key and upload it to Palette.
- AWS users must create an AWS Key pair before starting the tutorial. If you need additional guidance, check out the Create EC2 SSH Key Pair tutorial.
Set Up Clusters
Follow the instructions of the Deploy a Cluster tutorial to create a cluster profile and cluster with the hello-universe application. Your cluster should be successfully provisioned and in a healthy state in the cloud of your choosing.
The cluster profile name follows the pattern [cloud provider]-profile. The cluster name follows the pattern
[cloud provider]-cluster. This tutorial uses Azure for illustration purposes.
Navigate to the left Main Menu and select Profiles to view the cluster profile page. Find the cluster profile corresponding to your cluster in the list of profiles. Click on the three-dot Menu and select Clone.
A dialog appears to confirm the details of the cloned cluster profile. Fill in the Name input using the pattern
[cloud provider]-profile-api. Click on Confirm to create the profile.
The list of cluster profiles appears. Select the cloned cluster profile to view its details.
Select the hello-universe manifest. The editor appears. In the manifest editor, replace the existing code with the following content.
apiVersion: v1
kind: Namespace
metadata:
  name: hello-universe-api
---
apiVersion: v1
kind: Service
metadata:
  name: hello-universe-api-service
  namespace: hello-universe-api
spec:
  type: LoadBalancer
  ports:
    - protocol: TCP
      port: 3000
      targetPort: 3000
  selector:
    app: hello-universe-api
---
apiVersion: v1
kind: Service
metadata:
  name: hello-universe-db-service
  namespace: hello-universe-api
spec:
  type: ClusterIP
  ports:
    - protocol: TCP
      port: 5432
      targetPort: 5432
  selector:
    app: hello-universe-db
---
apiVersion: apps/v1
kind: Deployment
metadata:
  name: hello-universe-api-deployment
  namespace: hello-universe-api
spec:
  replicas: 1
  selector:
    matchLabels:
      app: hello-universe-api
  template:
    metadata:
      labels:
        app: hello-universe-api
    spec:
      containers:
        - name: hello-universe-api
          image: ghcr.io/spectrocloud/hello-universe-api:1.0.9
          imagePullPolicy: IfNotPresent
          ports:
            - containerPort: 3000
          env:
            - name: DB_HOST
              value: "hello-universe-db-service.hello-universe-api.svc.cluster.local"
---
apiVersion: apps/v1
kind: Deployment
metadata:
  name: hello-universe-db-deployment
  namespace: hello-universe-api
spec:
  replicas: 1
  selector:
    matchLabels:
      app: hello-universe-db
  template:
    metadata:
      labels:
        app: hello-universe-db
    spec:
      containers:
        - name: hello-universe-db
          image: ghcr.io/spectrocloud/hello-universe-db:1.0.0
          imagePullPolicy: IfNotPresent
          ports:
            - containerPort: 5432
The code snippet you added deploys the hello-universe-api and hello-universe-db applications. These applications serve as the API server and database for the hello-universe application.
Click on Confirm Updates and close the editor.
Click on Save Changes to confirm your updates.
Deploy this cluster profile to a new cluster using the same steps outlined in the Deploy a Cluster tutorial.
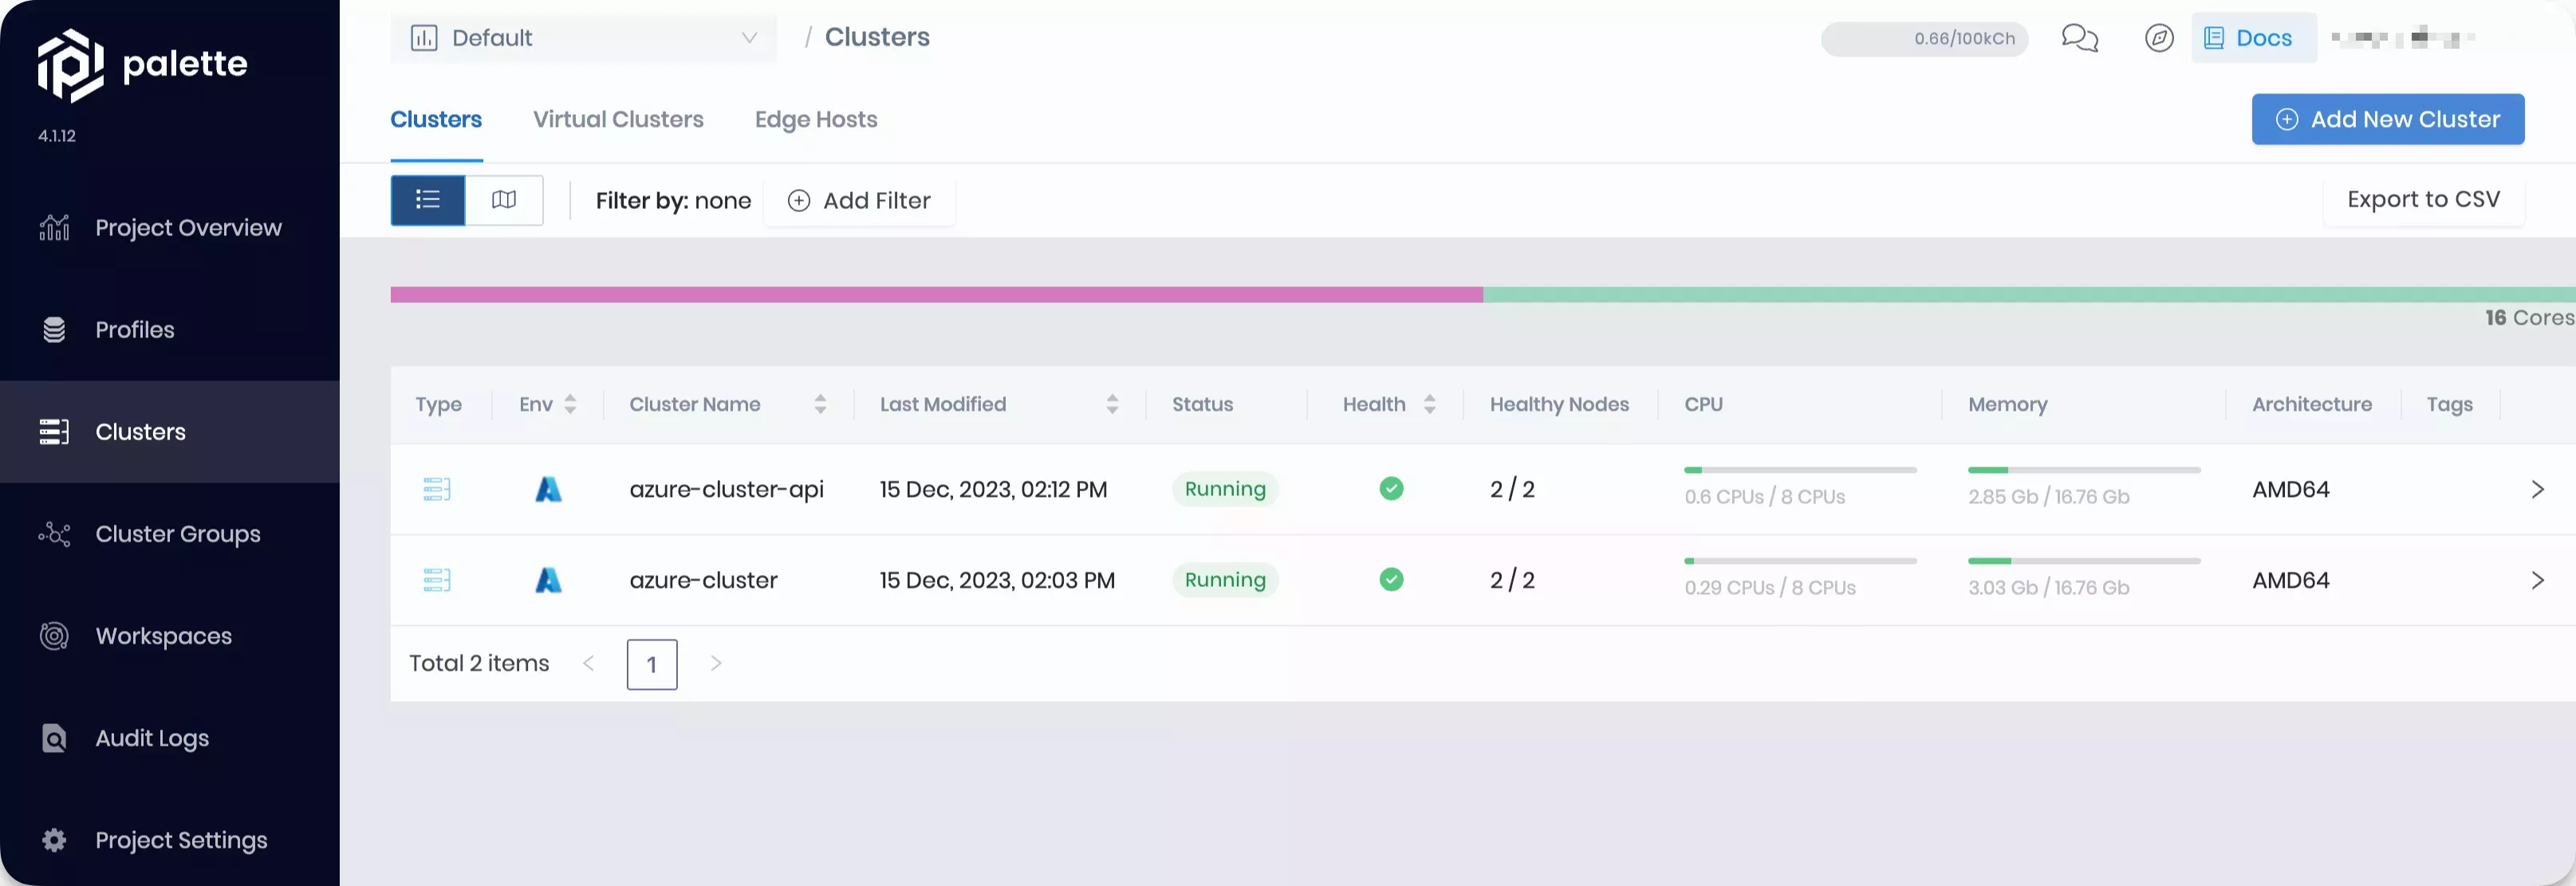
Once you have completed these steps and the host cluster creation process has finished, navigate to the left Main Menu and select Clusters to view your deployed clusters. You should have two healthy clusters.
Tag and Filter Clusters
Palette provides the ability to add tags to your cluster profiles and clusters. This helps you organize and categorize your clusters based on your custom criteria. You can add tags during the creation process or by editing the resource after it has been created.
Adding tags to your clusters helps you find and identify your clusters, without having to rely on cluster naming. This is especially important when operating with many clusters or multiple cloud deployments.
Navigate to the left Main Menu and select Clusters to view your deployed clusters. Find the
[cloud provider]-cluster you deployed with the hello-universe application. Click on it to view its Overview tab.
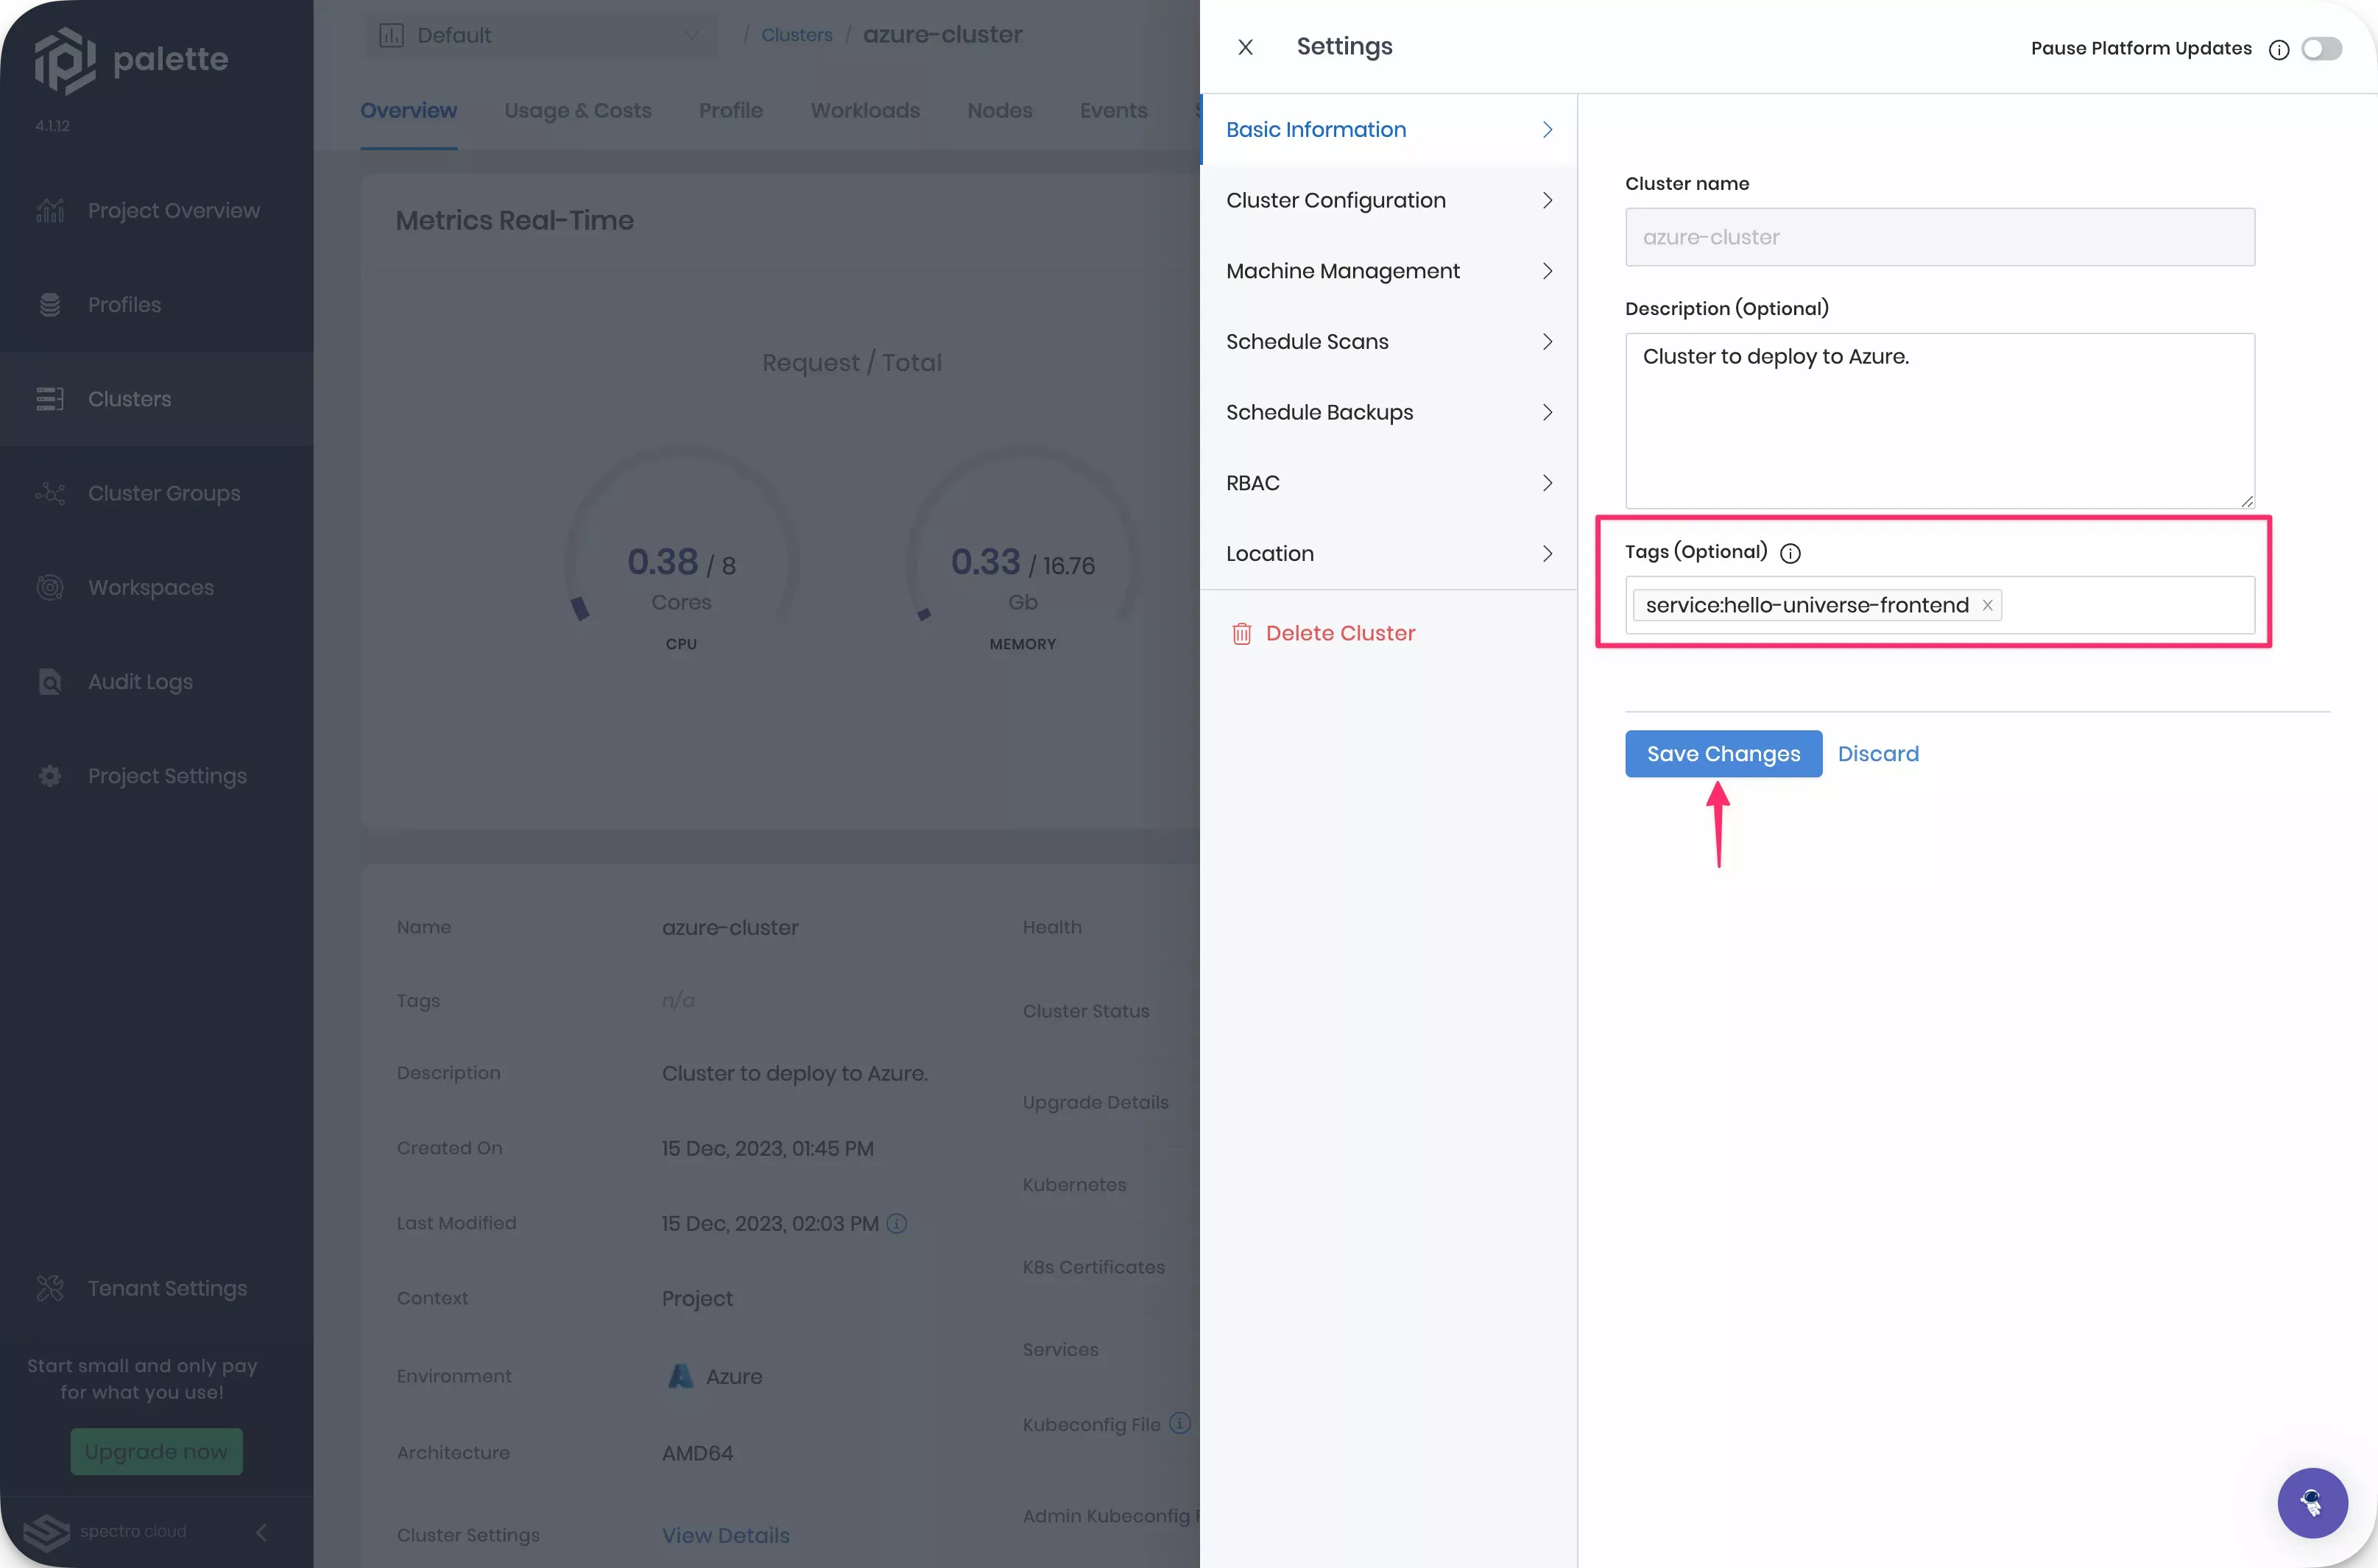
Click on the Settings drop-down Menu in the upper right corner and select Cluster Settings.
Fill service:hello-universe-frontend in the Tags (Optional) input box. Click on Save Changes. Close the panel.
Repeat the steps above for the [cloud provider]-cluster-api cluster you deployed with the hello-universe-api. Add
the service:hello-universe-backend tag to it.
Navigate to the left Main Menu and select Clusters to view your deployed clusters. Click on Add Filter, then select the Add custom filter option.
Use the drop-down boxes to fill in the values of the filter. Select Tags in the left-hand drop-down Menu. Select is in the middle drop-down Menu. Fill in service:hello-universe-frontend in the right-hand input box.
Click on Apply Filter.
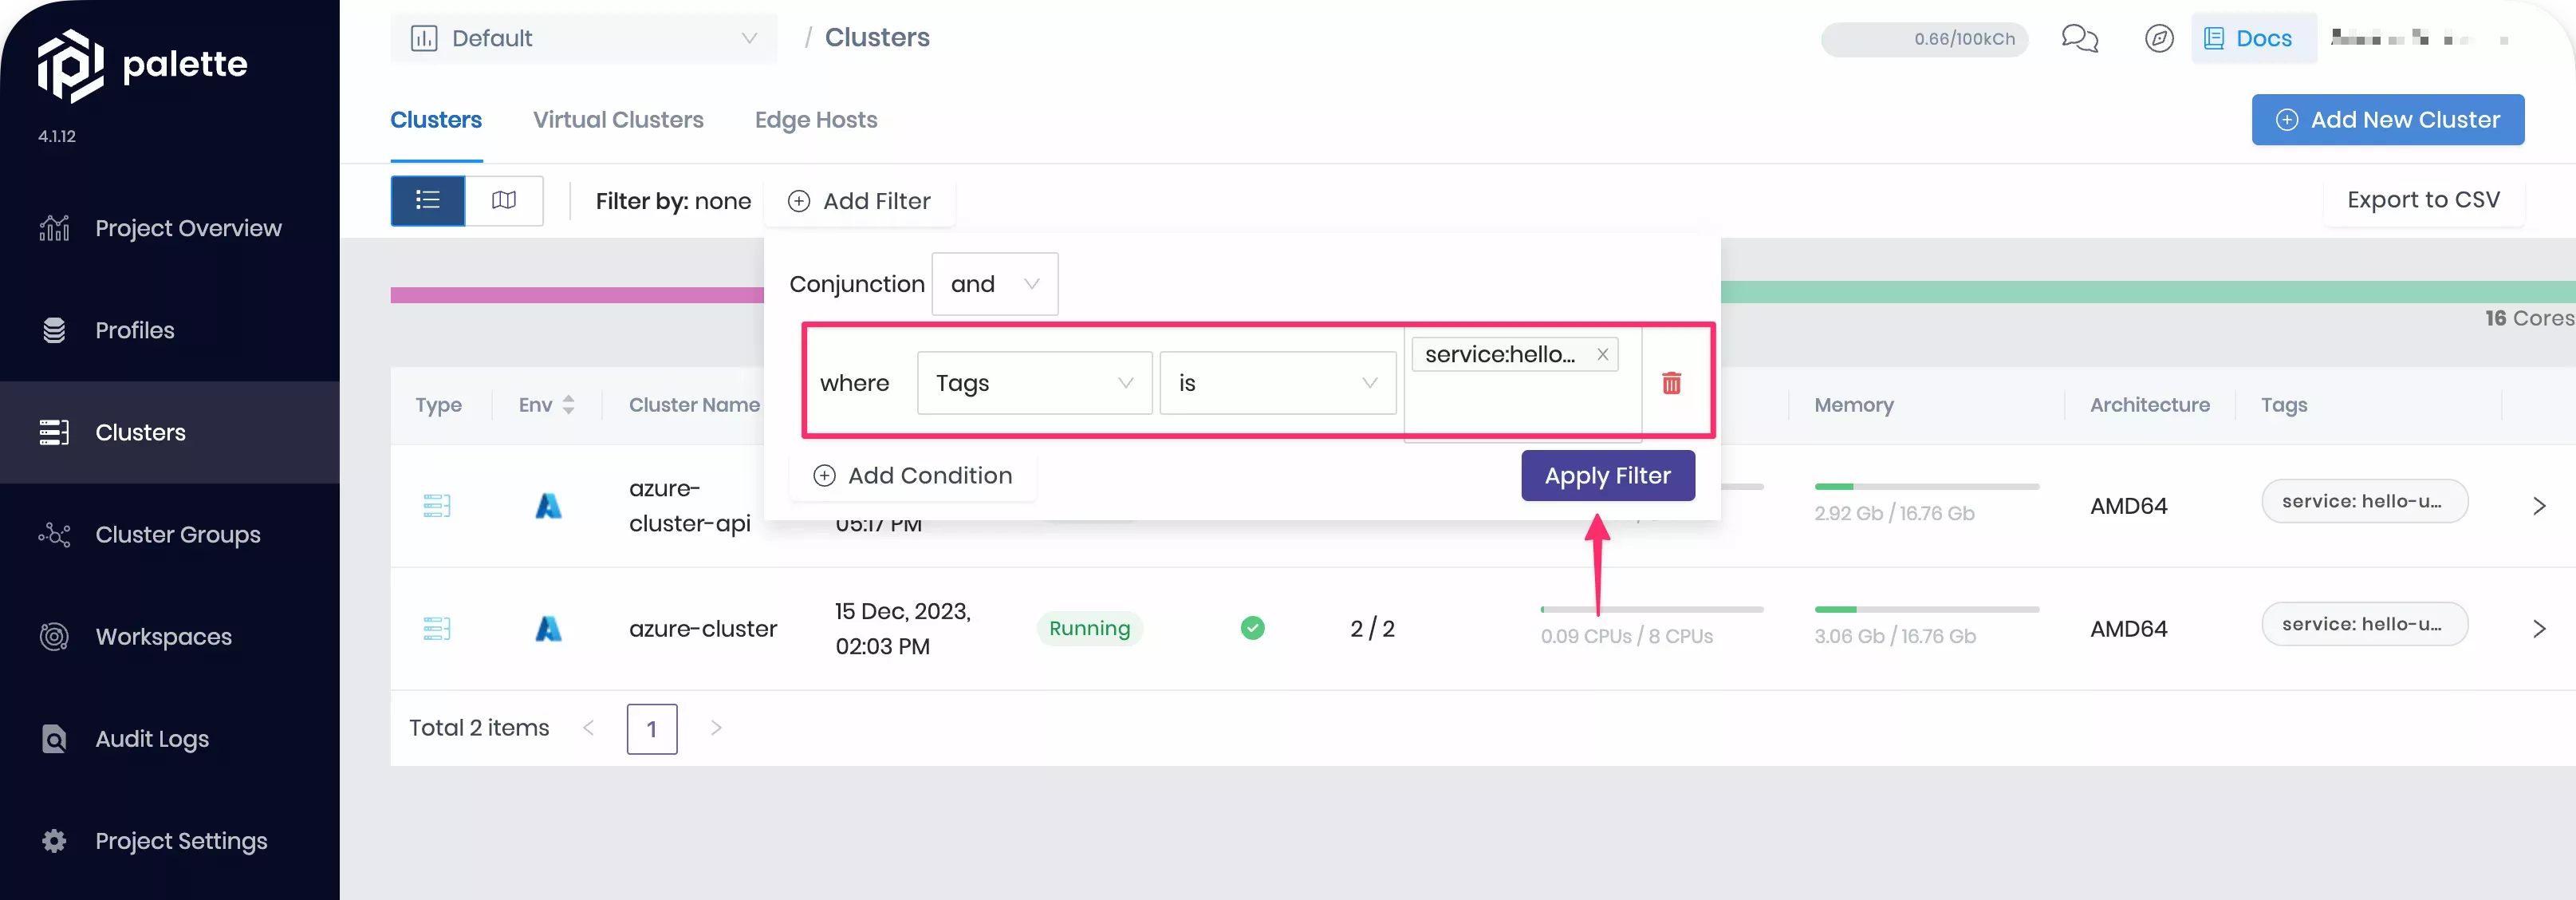
Once you apply the filter, only the [cloud provider]-cluster with this tag is displayed.
Version Cluster Profiles
Palette supports the creation of multiple cluster profile versions using the same profile name. This provides you with better change visibility and control over the layers in your host clusters. Profile versions are commonly used for adding or removing layers and pack configuration updates.
The version number of a given profile must be unique and use the semantic versioning format major.minor.patch. If you
do not specify a version for your cluster profile, it defaults to 1.0.0.
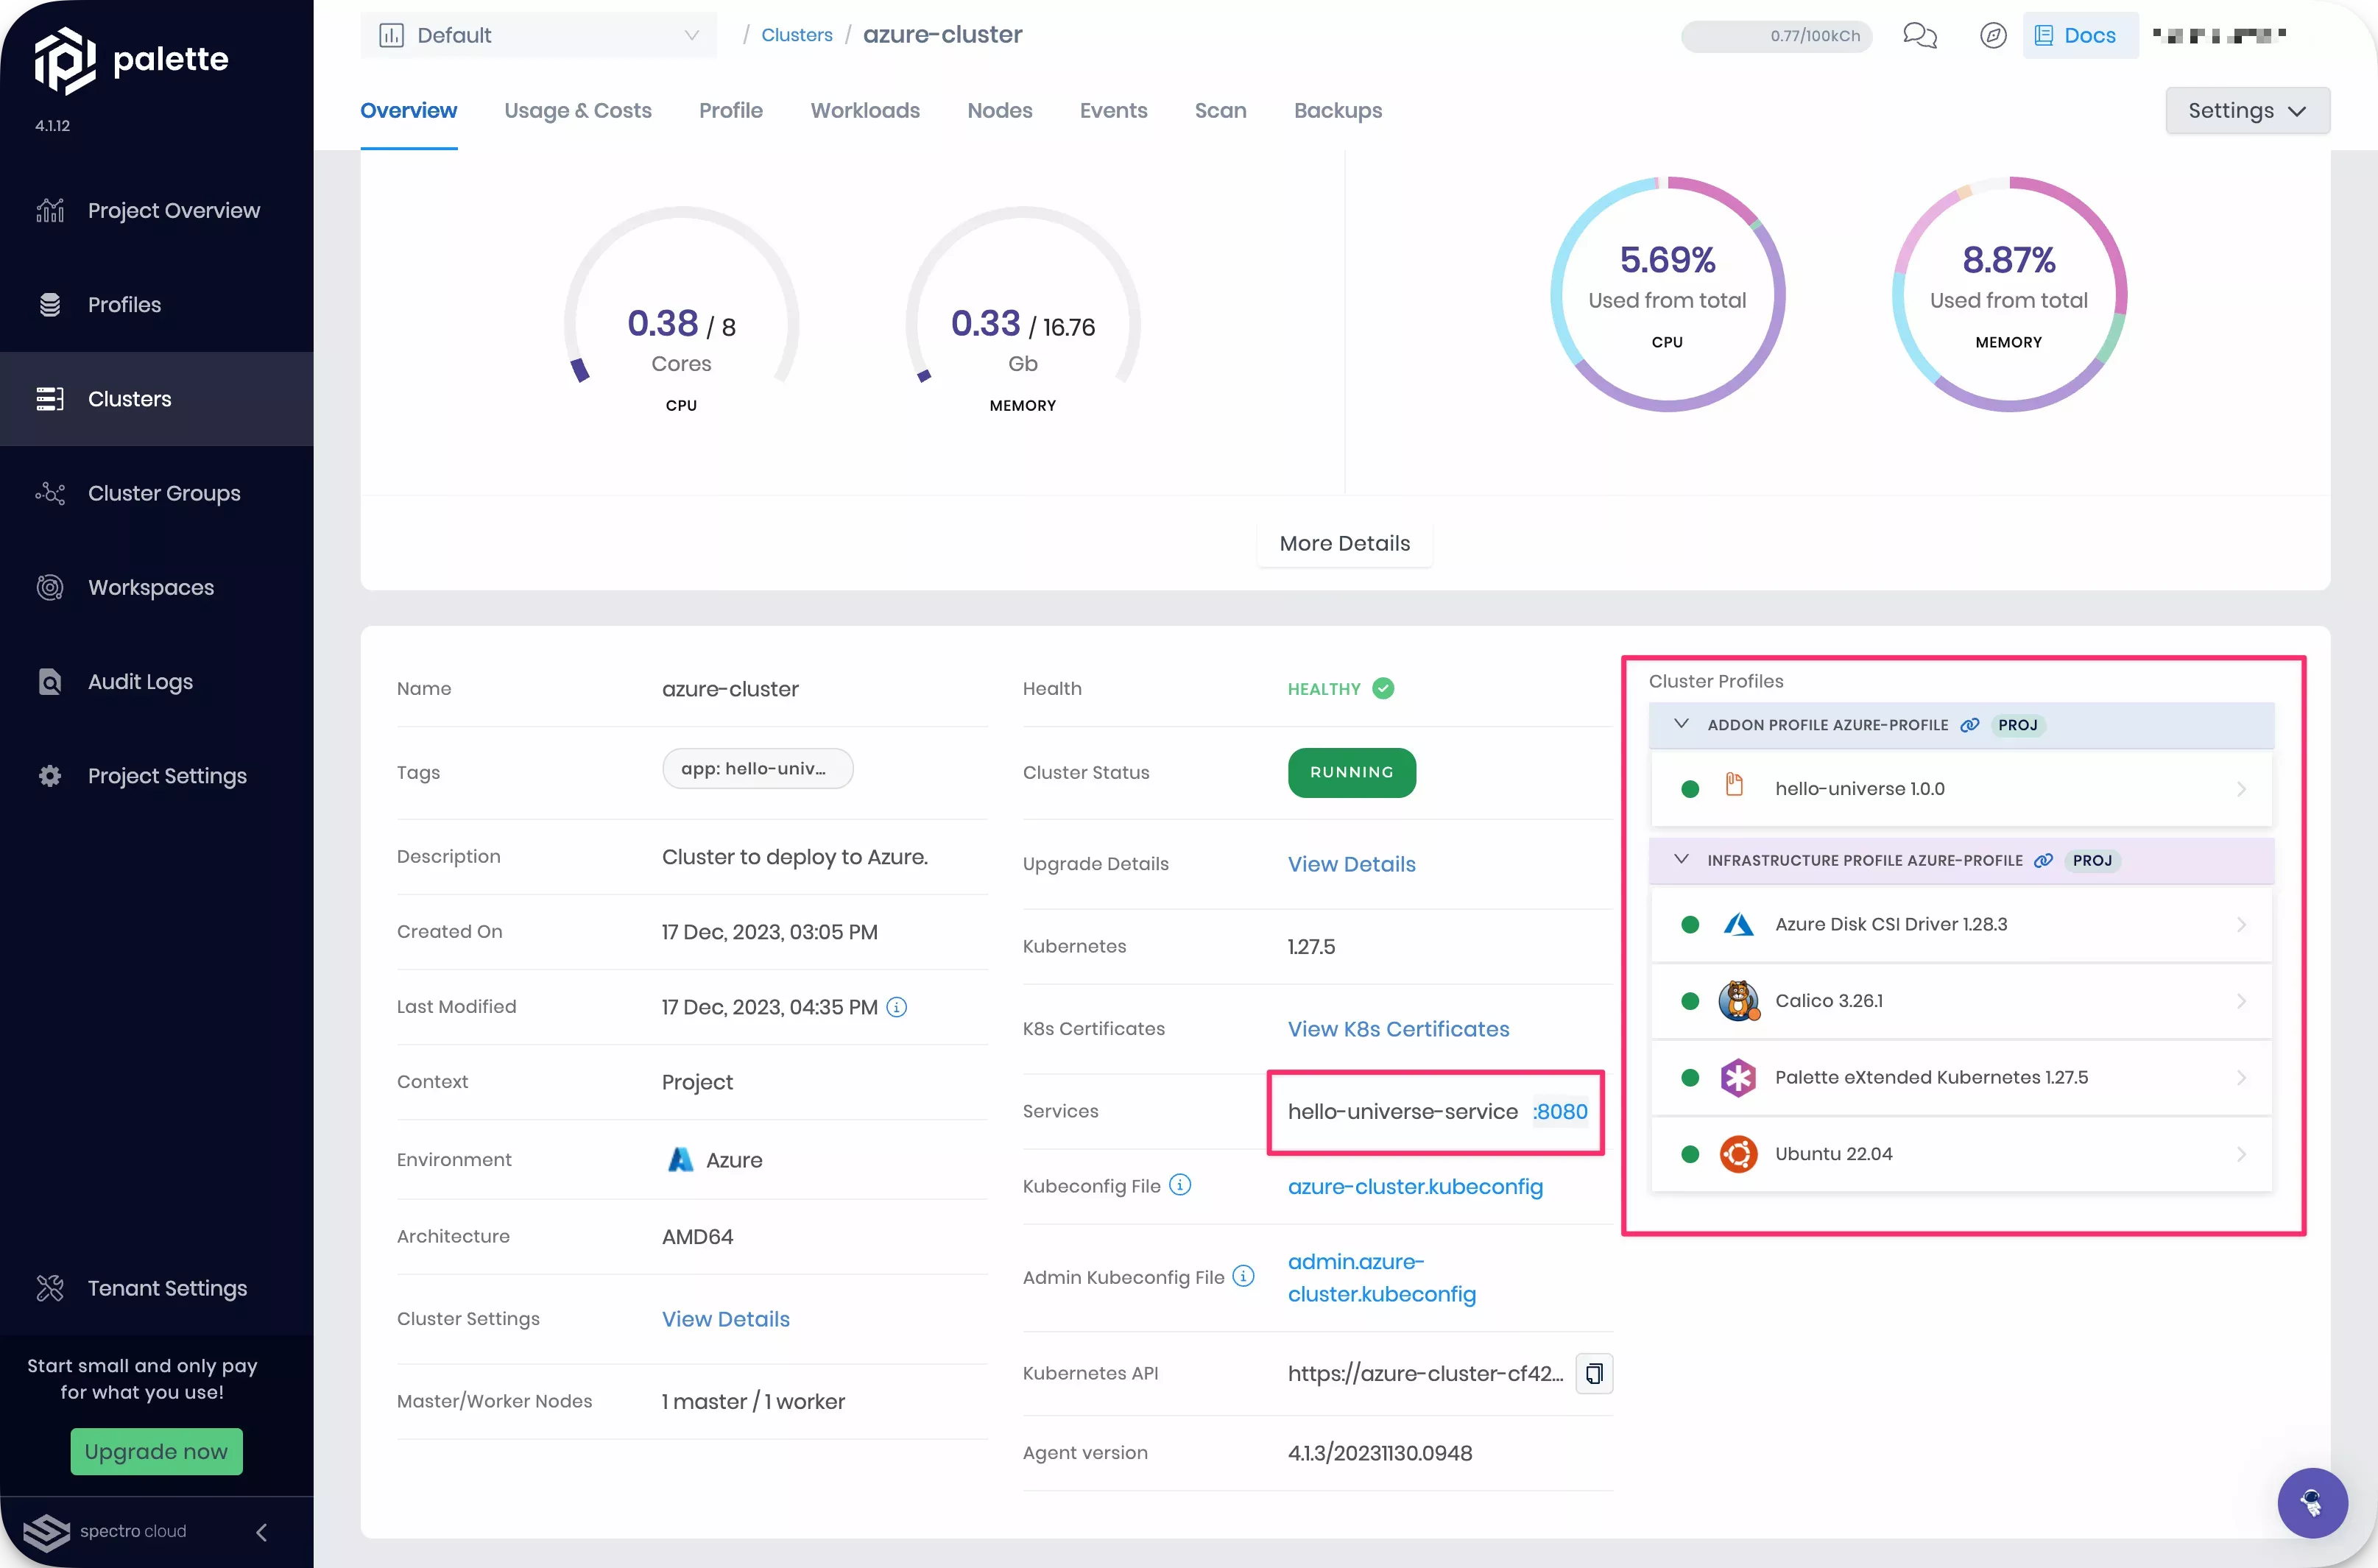
Navigate to the left Main Menu and select Clusters. Filter for the cluster with the service:hello-universe-backend tag. You can review how to filter your clusters in the Tag and Filter Clusters section.
Select cluster to open its Overview tab. Make a note of the IP address of the hello-universe-api-service present in this cluster. You can find it by opening the :3000 URL.
Navigate to the left Main Menu and select Profiles to view the cluster profile page. Find the cluster profile
corresponding to your hello-universe-frontend cluster. It should be named using the pattern
[cloud provider]-profile. Select it to view its details.
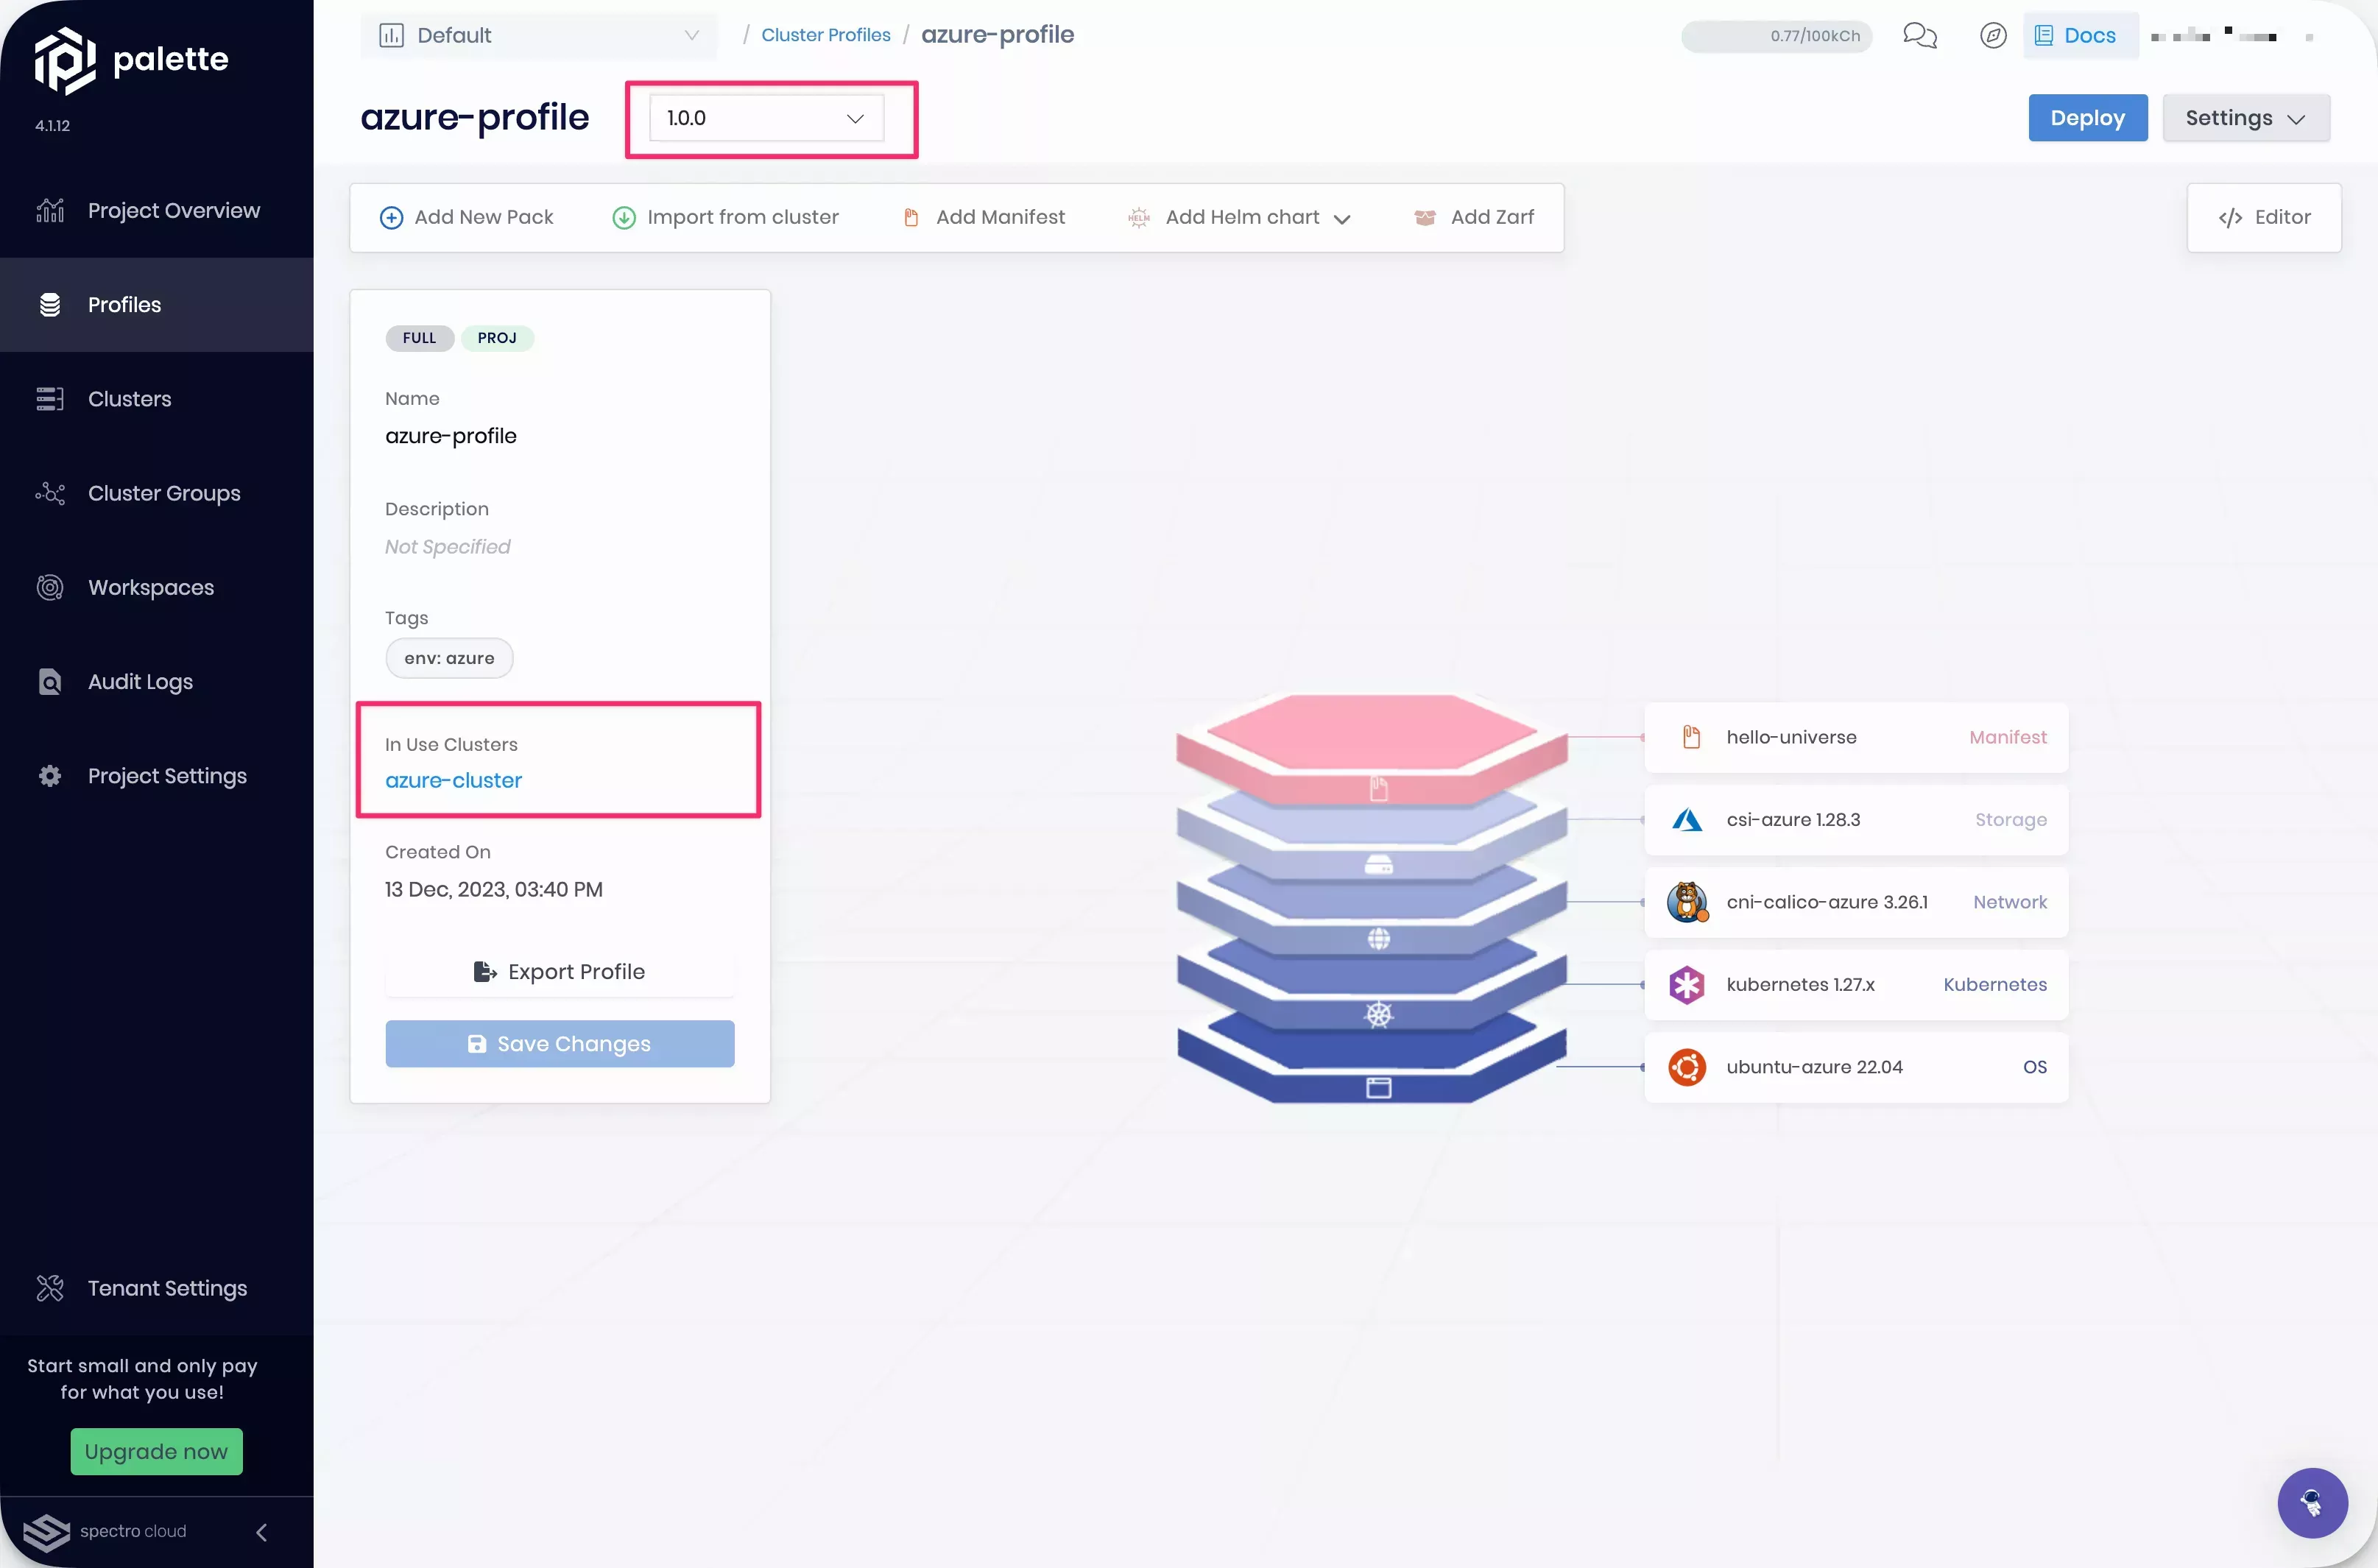
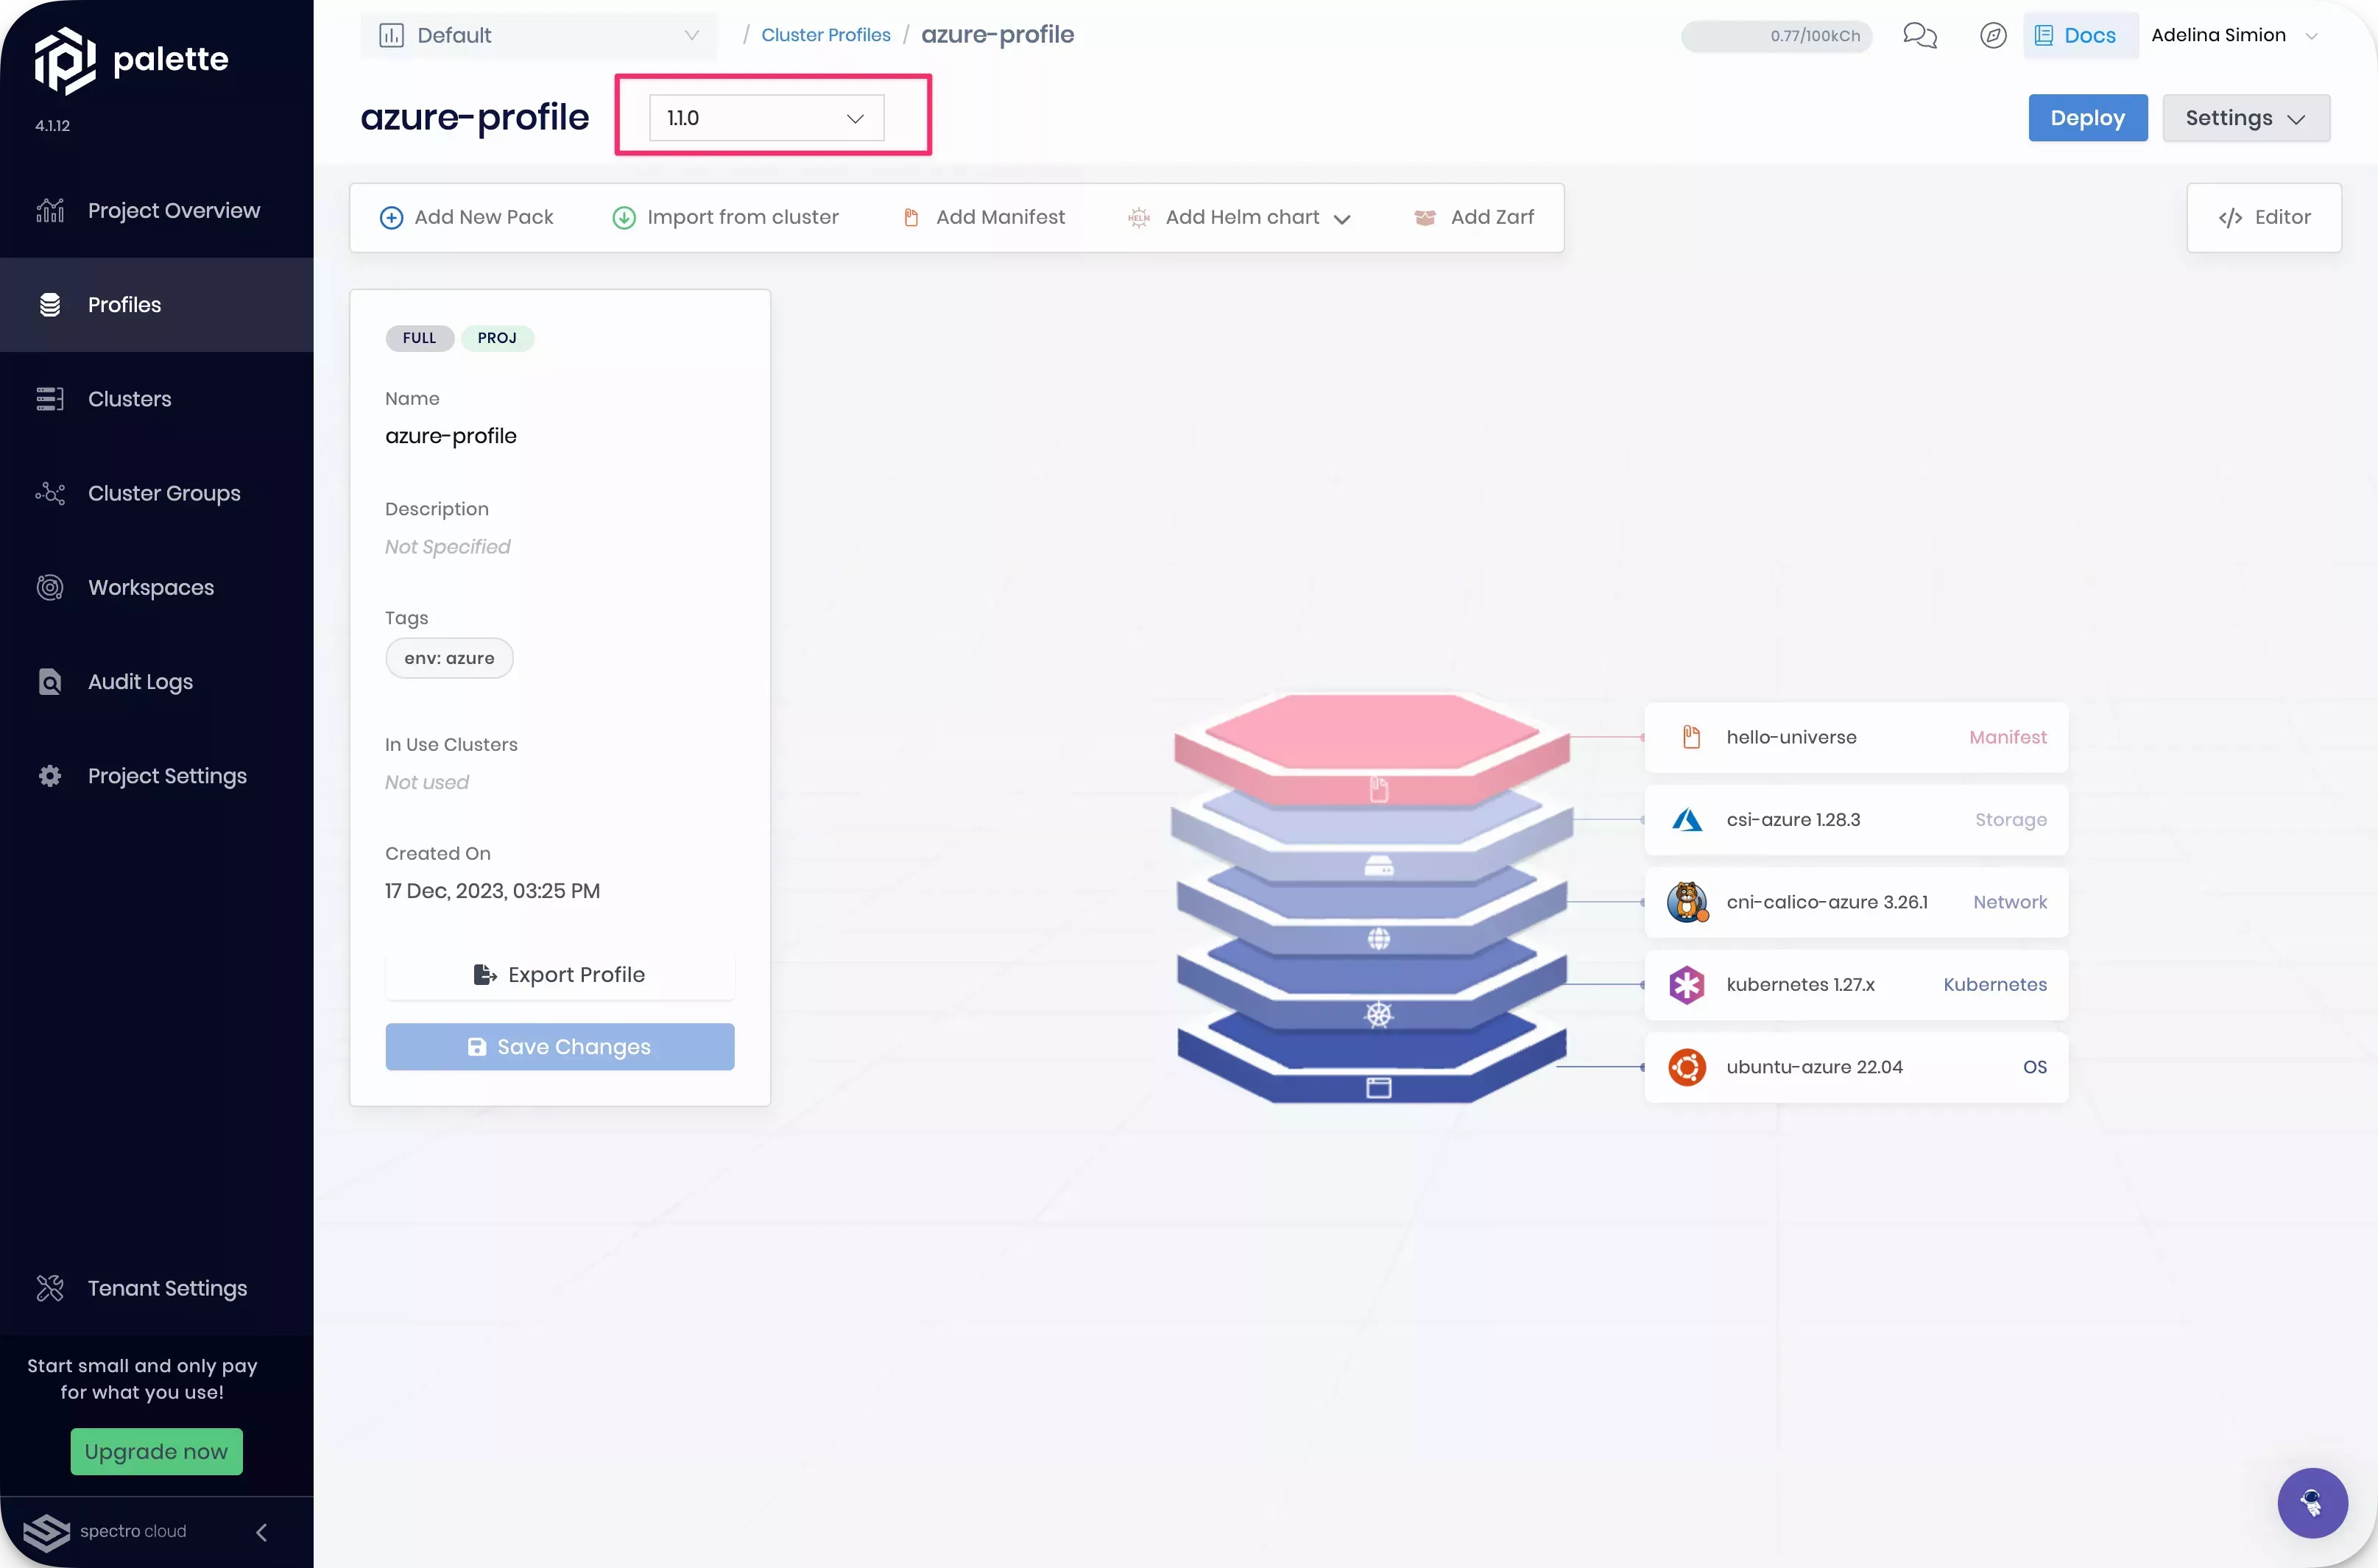
The current version is displayed in the drop-down Menu next to the profile name. This profile has the default value of 1.0.0, as you did not specify another value when you created it. The cluster profile also shows the host clusters that are currently deployed with this cluster profile version.
Click on the version drop-down Menu. Select the Create new version option.
A dialog box appears. Fill in the Version input with 1.1.0. Click on Confirm.
Palette creates a new cluster profile version and opens it. The version dropdown displays the newly created 1.1.0 profile. This profile version is not deployed to any host clusters.
The version 1.1.0 has the same layers as the version 1.0.0 it was created from. Click on the hello-universe manifest layer. The manifest editor appears.
Replace the code in the editor with the following content.
apiVersion: v1
kind: Namespace
metadata:
  name: hello-universe
---
apiVersion: v1
kind: Service
metadata:
  name: hello-universe-service
  namespace: hello-universe
spec:
  type: LoadBalancer
  ports:
    - protocol: TCP
      port: 8080
      targetPort: 8080
  selector:
    app: hello-universe
---
apiVersion: apps/v1
kind: Deployment
metadata:
  name: hello-universe-deployment
  namespace: hello-universe
spec:
  replicas: 2
  selector:
    matchLabels:
      app: hello-universe
  template:
    metadata:
      labels:
        app: hello-universe
    spec:
      containers:
        - name: hello-universe
          image: ghcr.io/spectrocloud/hello-universe:1.1.0
          imagePullPolicy: IfNotPresent
          ports:
            - containerPort: 8080
          env:
            - name: API_URI
              value: "http://REPLACE_ME:3000"
The code snippet you added deploys the hello-universe application
with the extra environment variable API_URI. This environment variable allows you to specify a hostname and port for
the hello-universe API server. Check out the
hello-universe readme to
learn more about how to expand the capabilities of the hello-universe application with an API Server.
Replace the REPLACE_ME placeholder in the code snippet provided with the IP address of the hello-universe-api-service that you made a note of earlier.
Click on Confirm Updates. The manifest editor closes.
Click on Save Changes to finish the configuration of this cluster profile version.
Navigate to the left Main Menu and select Clusters. Filter for the cluster with the service:hello-universe-frontend tag. Select it to view its Overview tab.
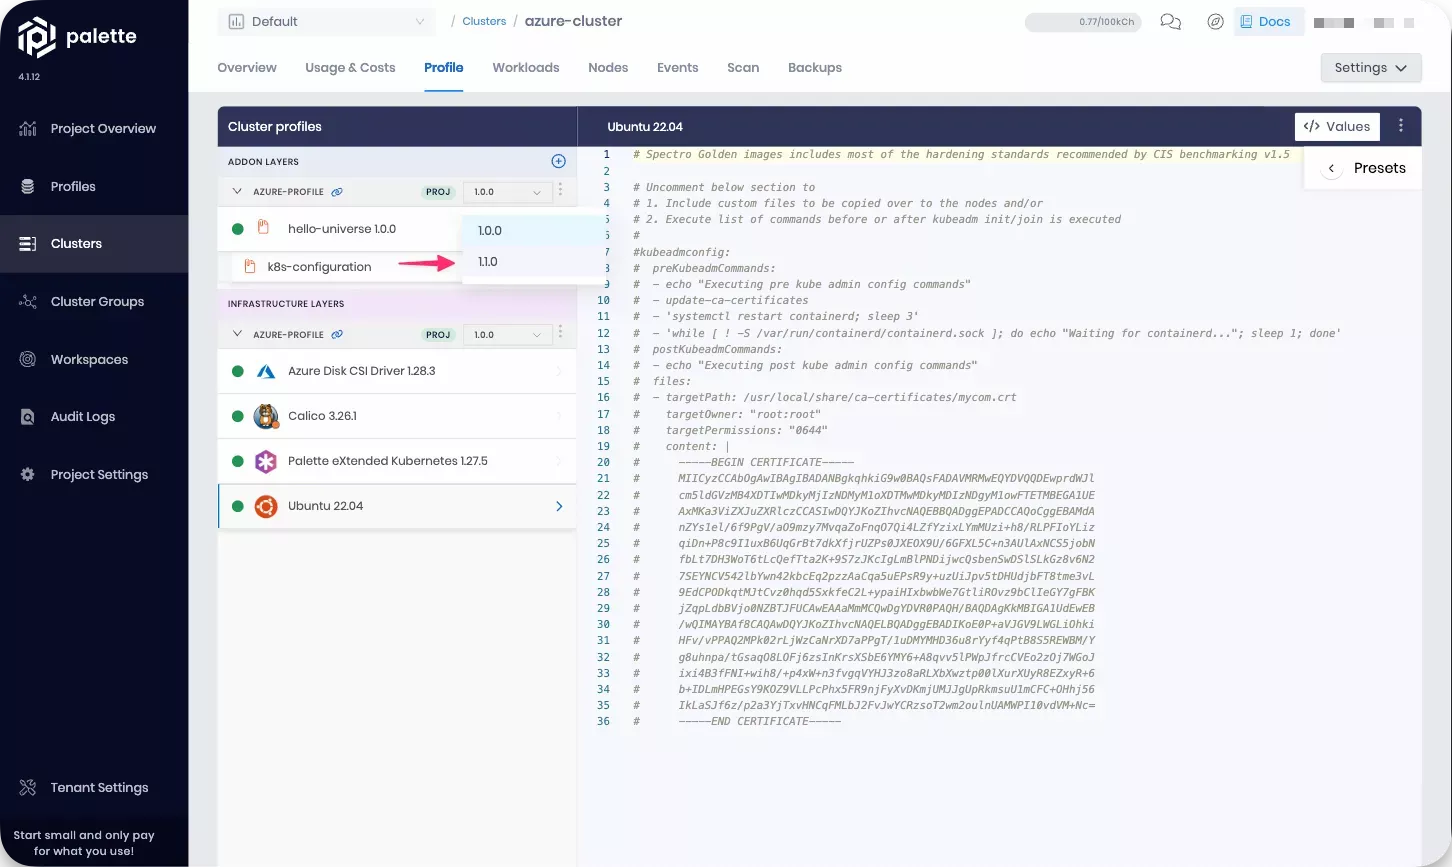
Select the Profile tab of this cluster. You can select a new version of your cluster profile by using the version dropdown.
Select the 1.1.0 version.
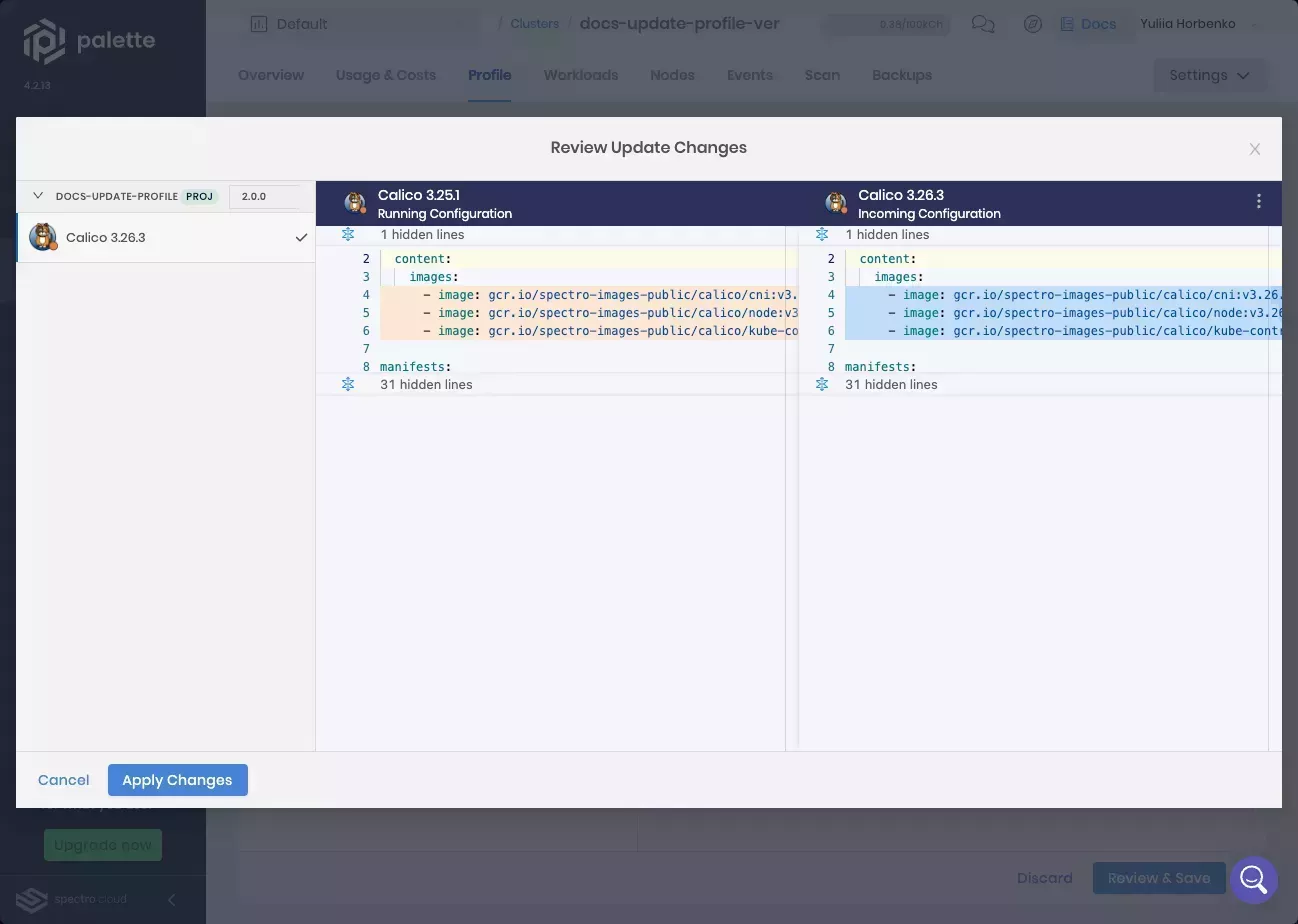
Click Review & Save. Palette prompts you to preview the change summary.
Click Review changes in Editor. Palette displays the changes, with the current configuration on the left and the incoming changes on the right.
Make sure to preserve any existing cluster profile overrides.
After reviewing the changes, click Apply Changes.
Palette has backup and restore capabilities available for your mission critical workloads. Ensure that you have adequate backups before you make any cluster profile version changes in your production environments. You can learn more in the Backup and Restore section.
Palette now makes the required changes to your cluster according to the specifications of the configured cluster profile version. Once your changes have completed, Palette marks your layers with the green status indicator.
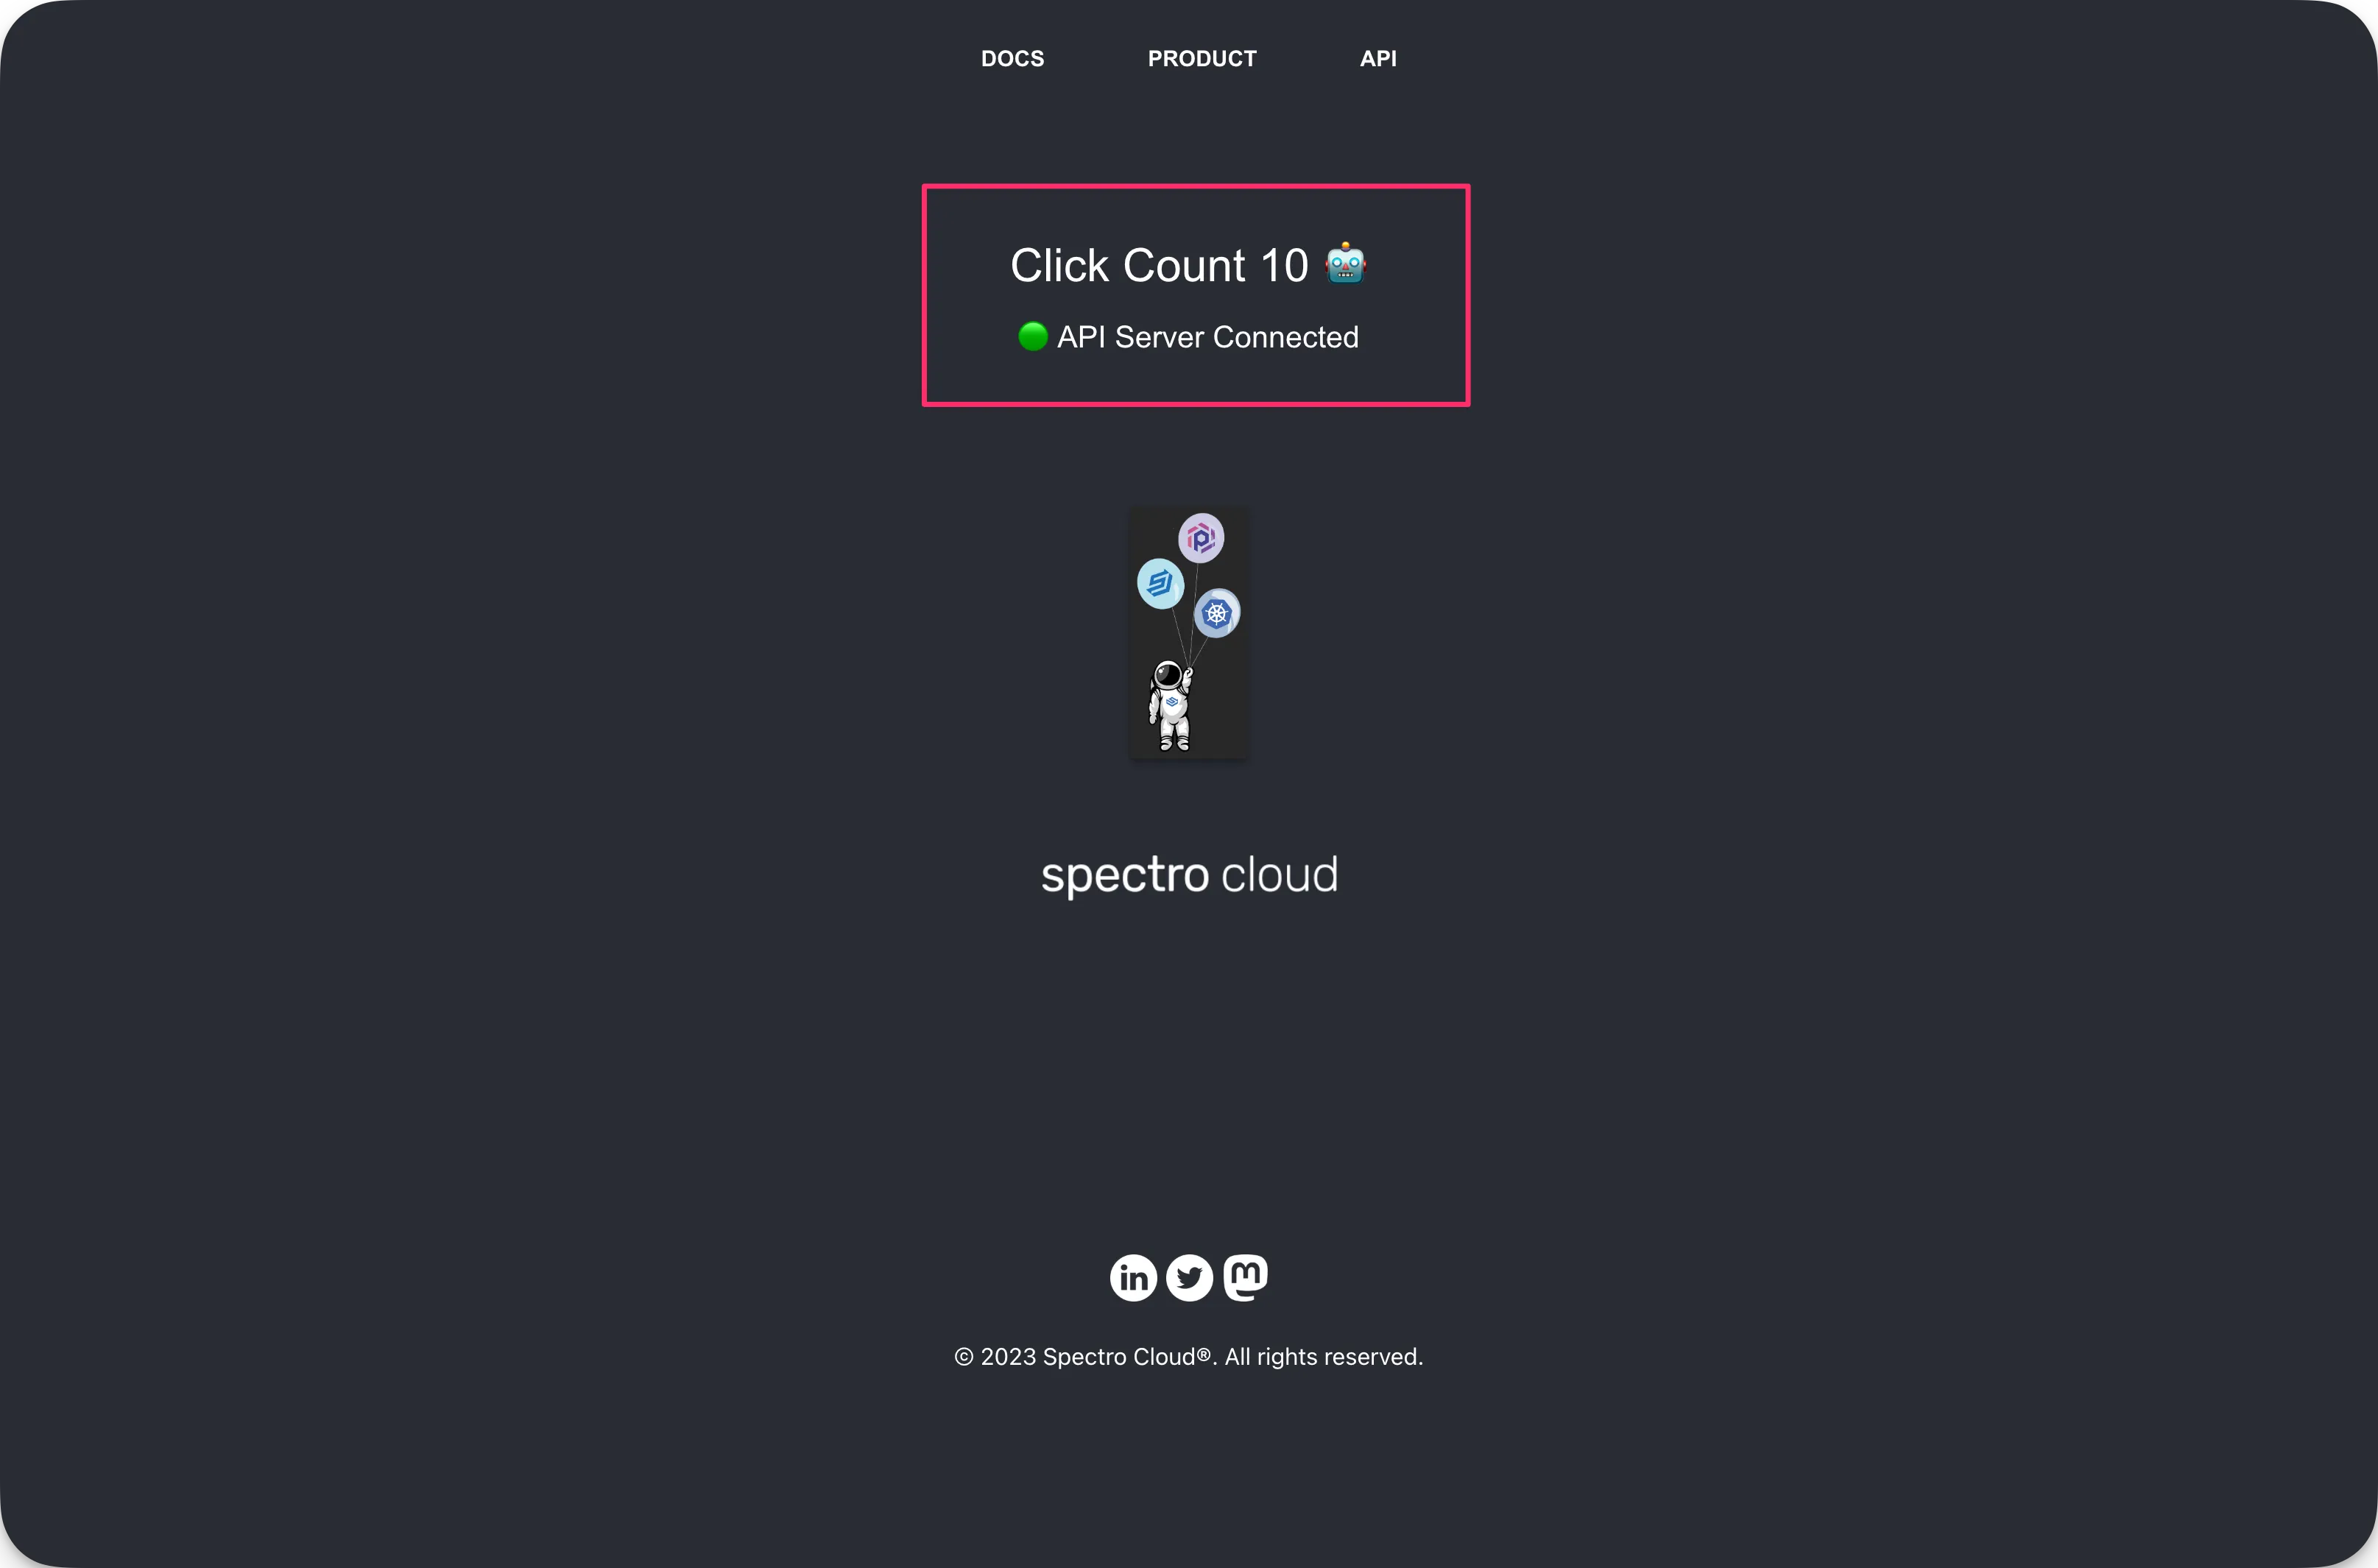
Click on the URL for port :8080 to access the Hello Universe application. The landing page of the application indicates that it is connected to the API server.
Roll Back Cluster Profiles
One of the key advantages of using cluster profile versions is that they make it possible to maintain a copy of previously known working states. The ability to roll back to a previously working cluster profile in one action shortens the time to recovery in the event of an incident.
The process to roll back to a previous version is identical to the process for applying a new version.
Navigate to the left Main Menu and select Clusters. Filter for the cluster with the service:hello-universe-frontend tag. Select it to view its Overview tab.
Select the Profile tab. This cluster is currently deployed using cluster profile version 1.1.0. Select the option 1.0.0 in the version dropdown. This process is the reverse of what you have done in the previous section, Version Cluster Profiles. Click on Save to confirm your changes.
Palette now makes the changes required for the cluster to return to the state specified in version 1.0.0 of your cluster profile. Once your changes have completed, Palette marks your layers with the green status indicator.
Click on the URL for port :8080 to access the Hello Universe application. The landing page of the application indicates that the application has returned to its original state and is no longer connected to the API server.
Pending Updates
Cluster profiles can also be updated in place, without the need to create a new cluster profile version. Palette monitors the state of your clusters and notifies you when updates are available for your host clusters. You may then choose to apply your changes at a convenient time.
The previous state of the cluster profile will not be saved once it is overwritten.
Navigate to the left Main Menu and select Clusters. Filter for the cluster with the tag service:hello-universe-frontend. Select it to view its Overview tab.
Select the Profile tab. Then, select the hello-universe manifest. Change the replicas field to 1 on line
26. Click on Save. The editor closes.
This cluster now contains an override over its cluster profile. Palette uses the configuration you have just provided for the single cluster over its cluster profile and begins making the appropriate changes.
Once these changes are complete, select the Workloads tab. Then, select the hello-universe namespace.
One replica of the hello-universe-deployment is available, instead of the two specified by your cluster profile. Your override has been successfully applied.
Navigate to the left Main Menu and select Profiles to view the cluster profile page. Find the cluster profile
corresponding to your hello-universe-frontend cluster. Its name follows the pattern [cloud provider]-profile.
Click on it to view its details. Select 1.0.0 in the version dropdown.
Select the hello-universe manifest. The editor appears. Change the replicas field to 3 on line 26. Click on
Confirm Updates. The editor closes.
Click on Save Changes to confirm the changes you have made to your profile.
Navigate to the left Main Menu and select Clusters. Filter for the clusters with the service tag. Both of your clusters match this filter. Palette indicates that the cluster associated with the cluster profile you updated has updates available.
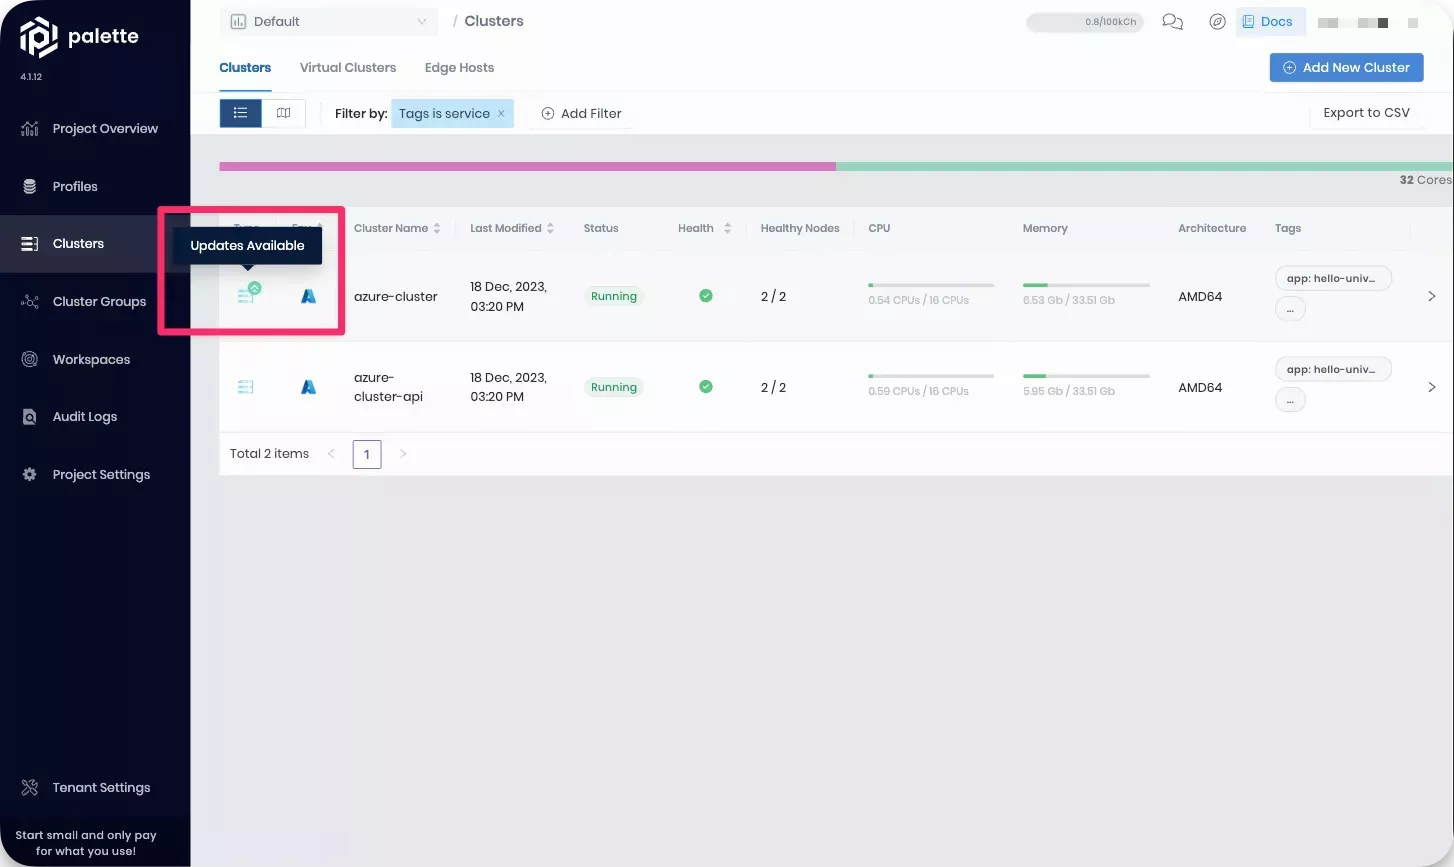
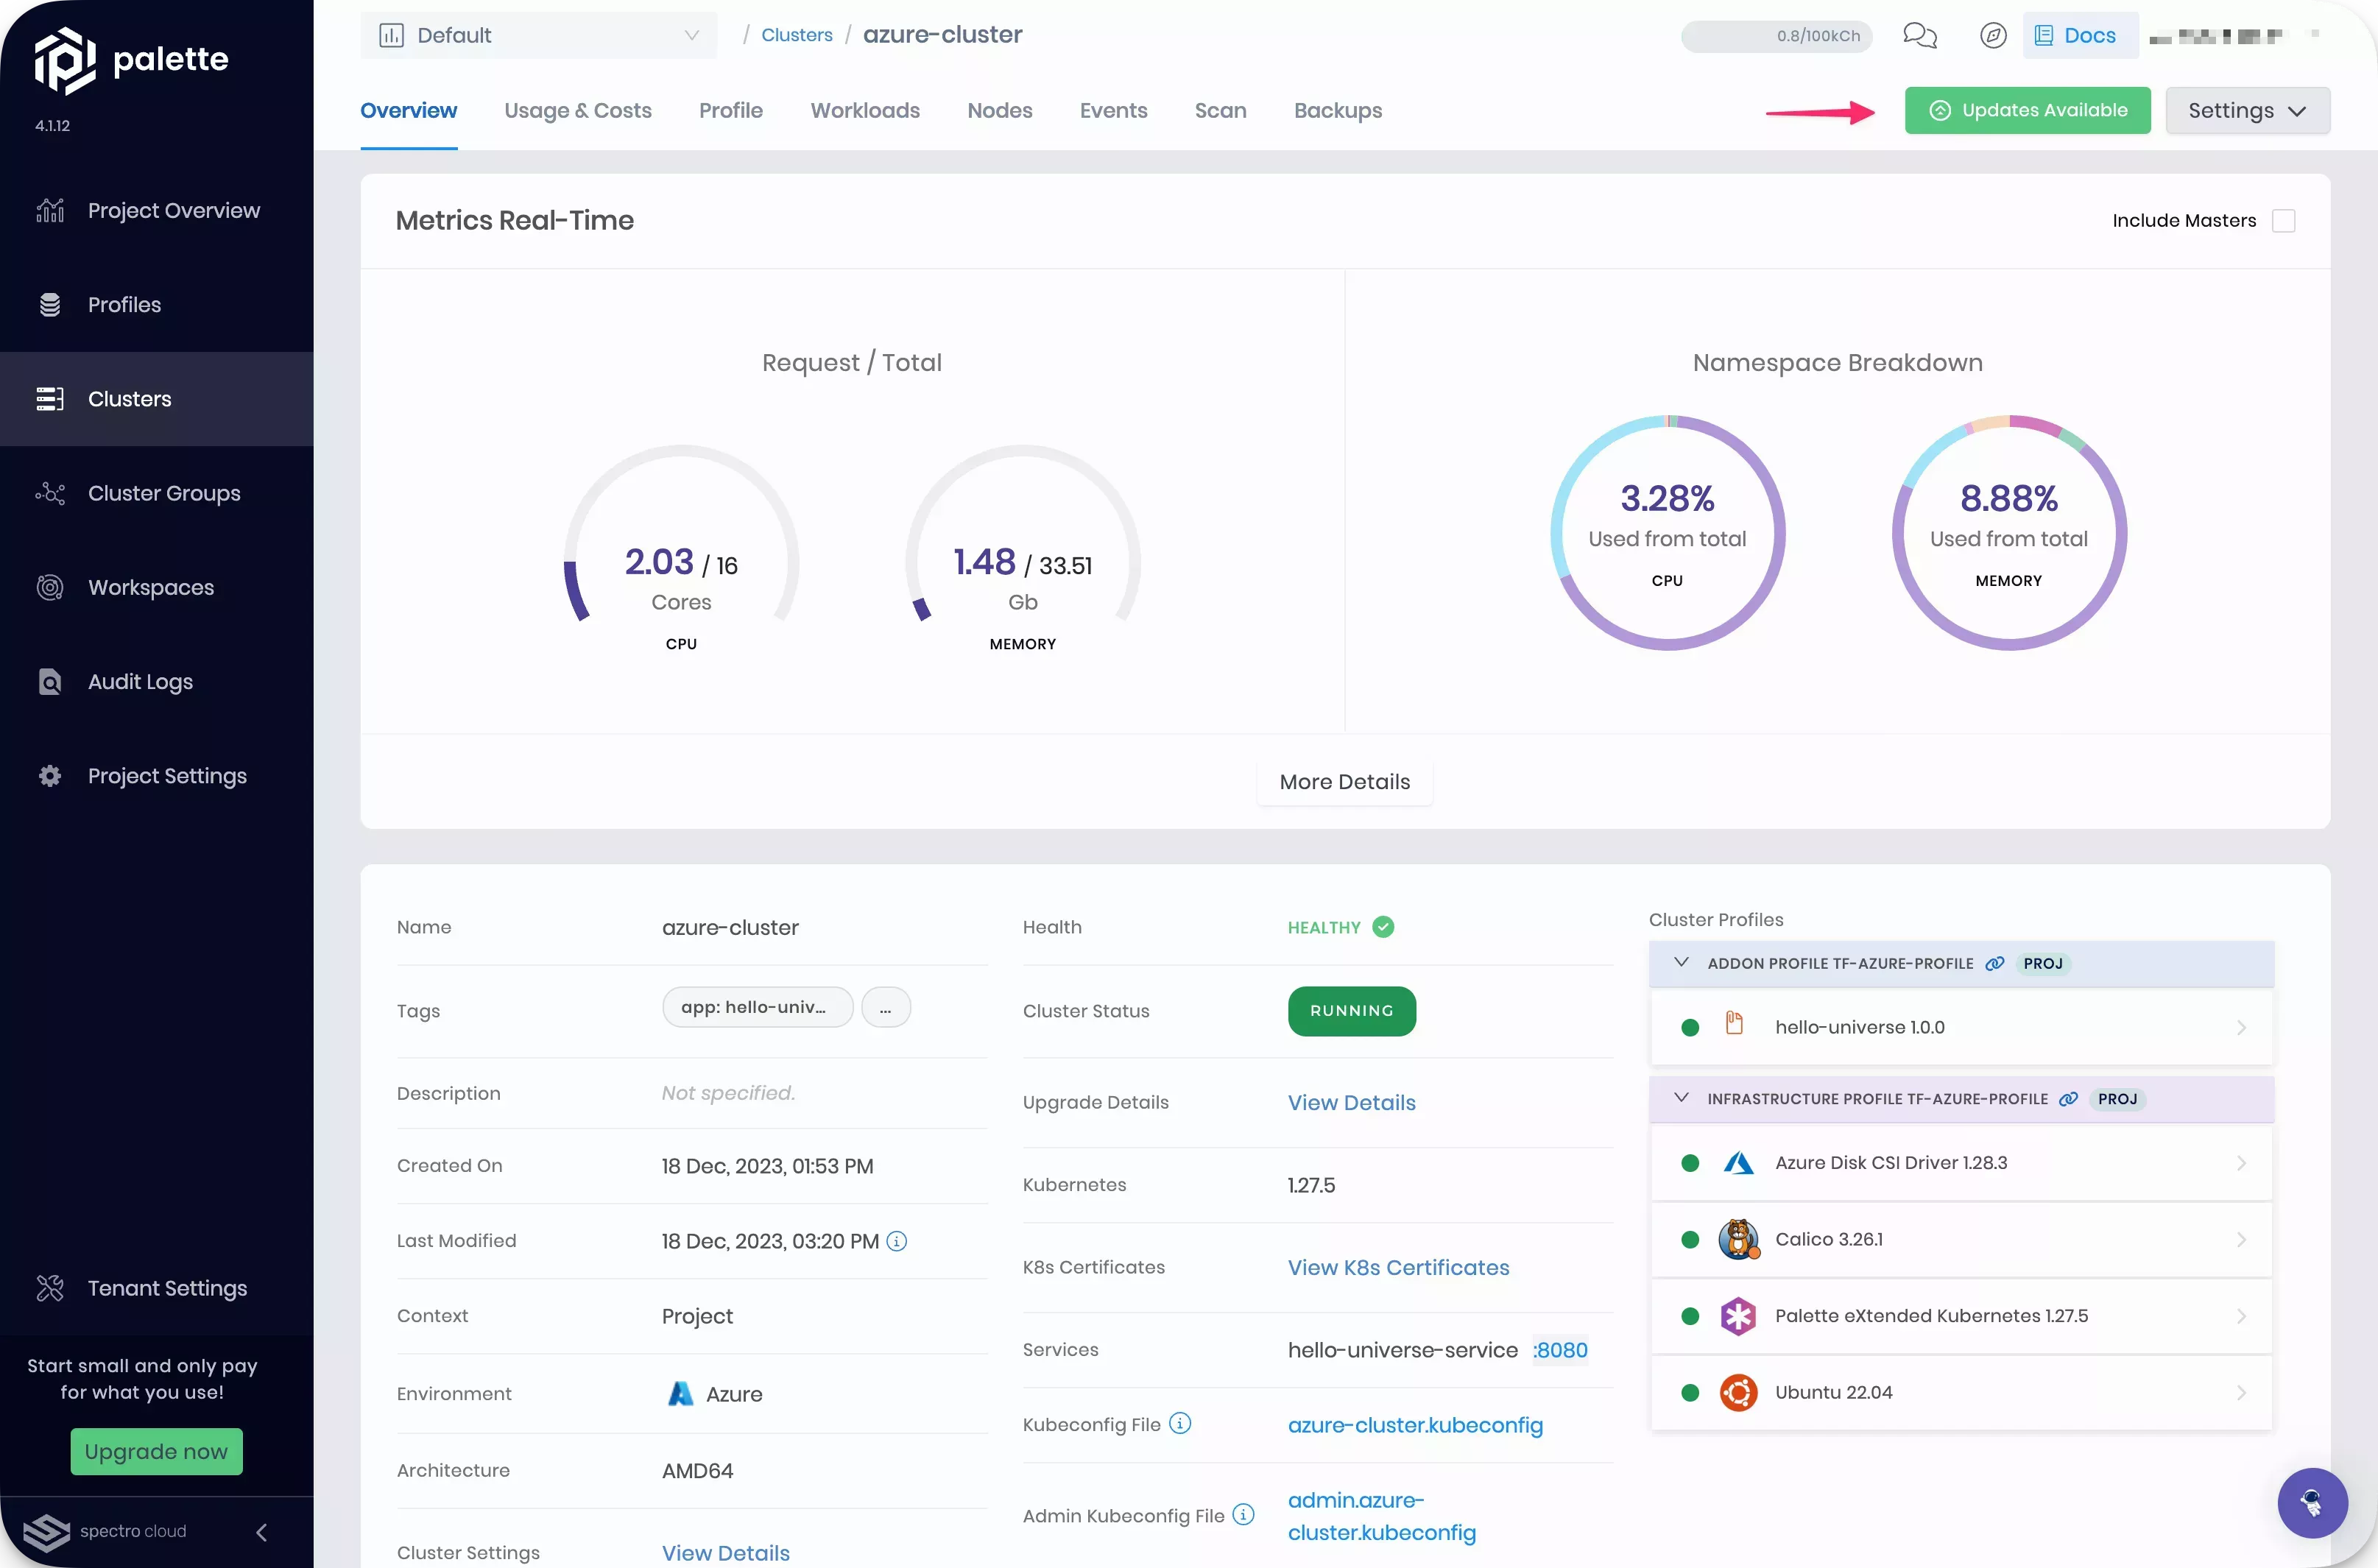
Select this cluster to open its Overview tab. Click on Updates Available to begin the cluster update.
A dialog appears which shows the changes made in this update. Review the changes and ensure the only change is the
replicas field value. The pending update maintains the override you have made and sets the replicas field to 1.
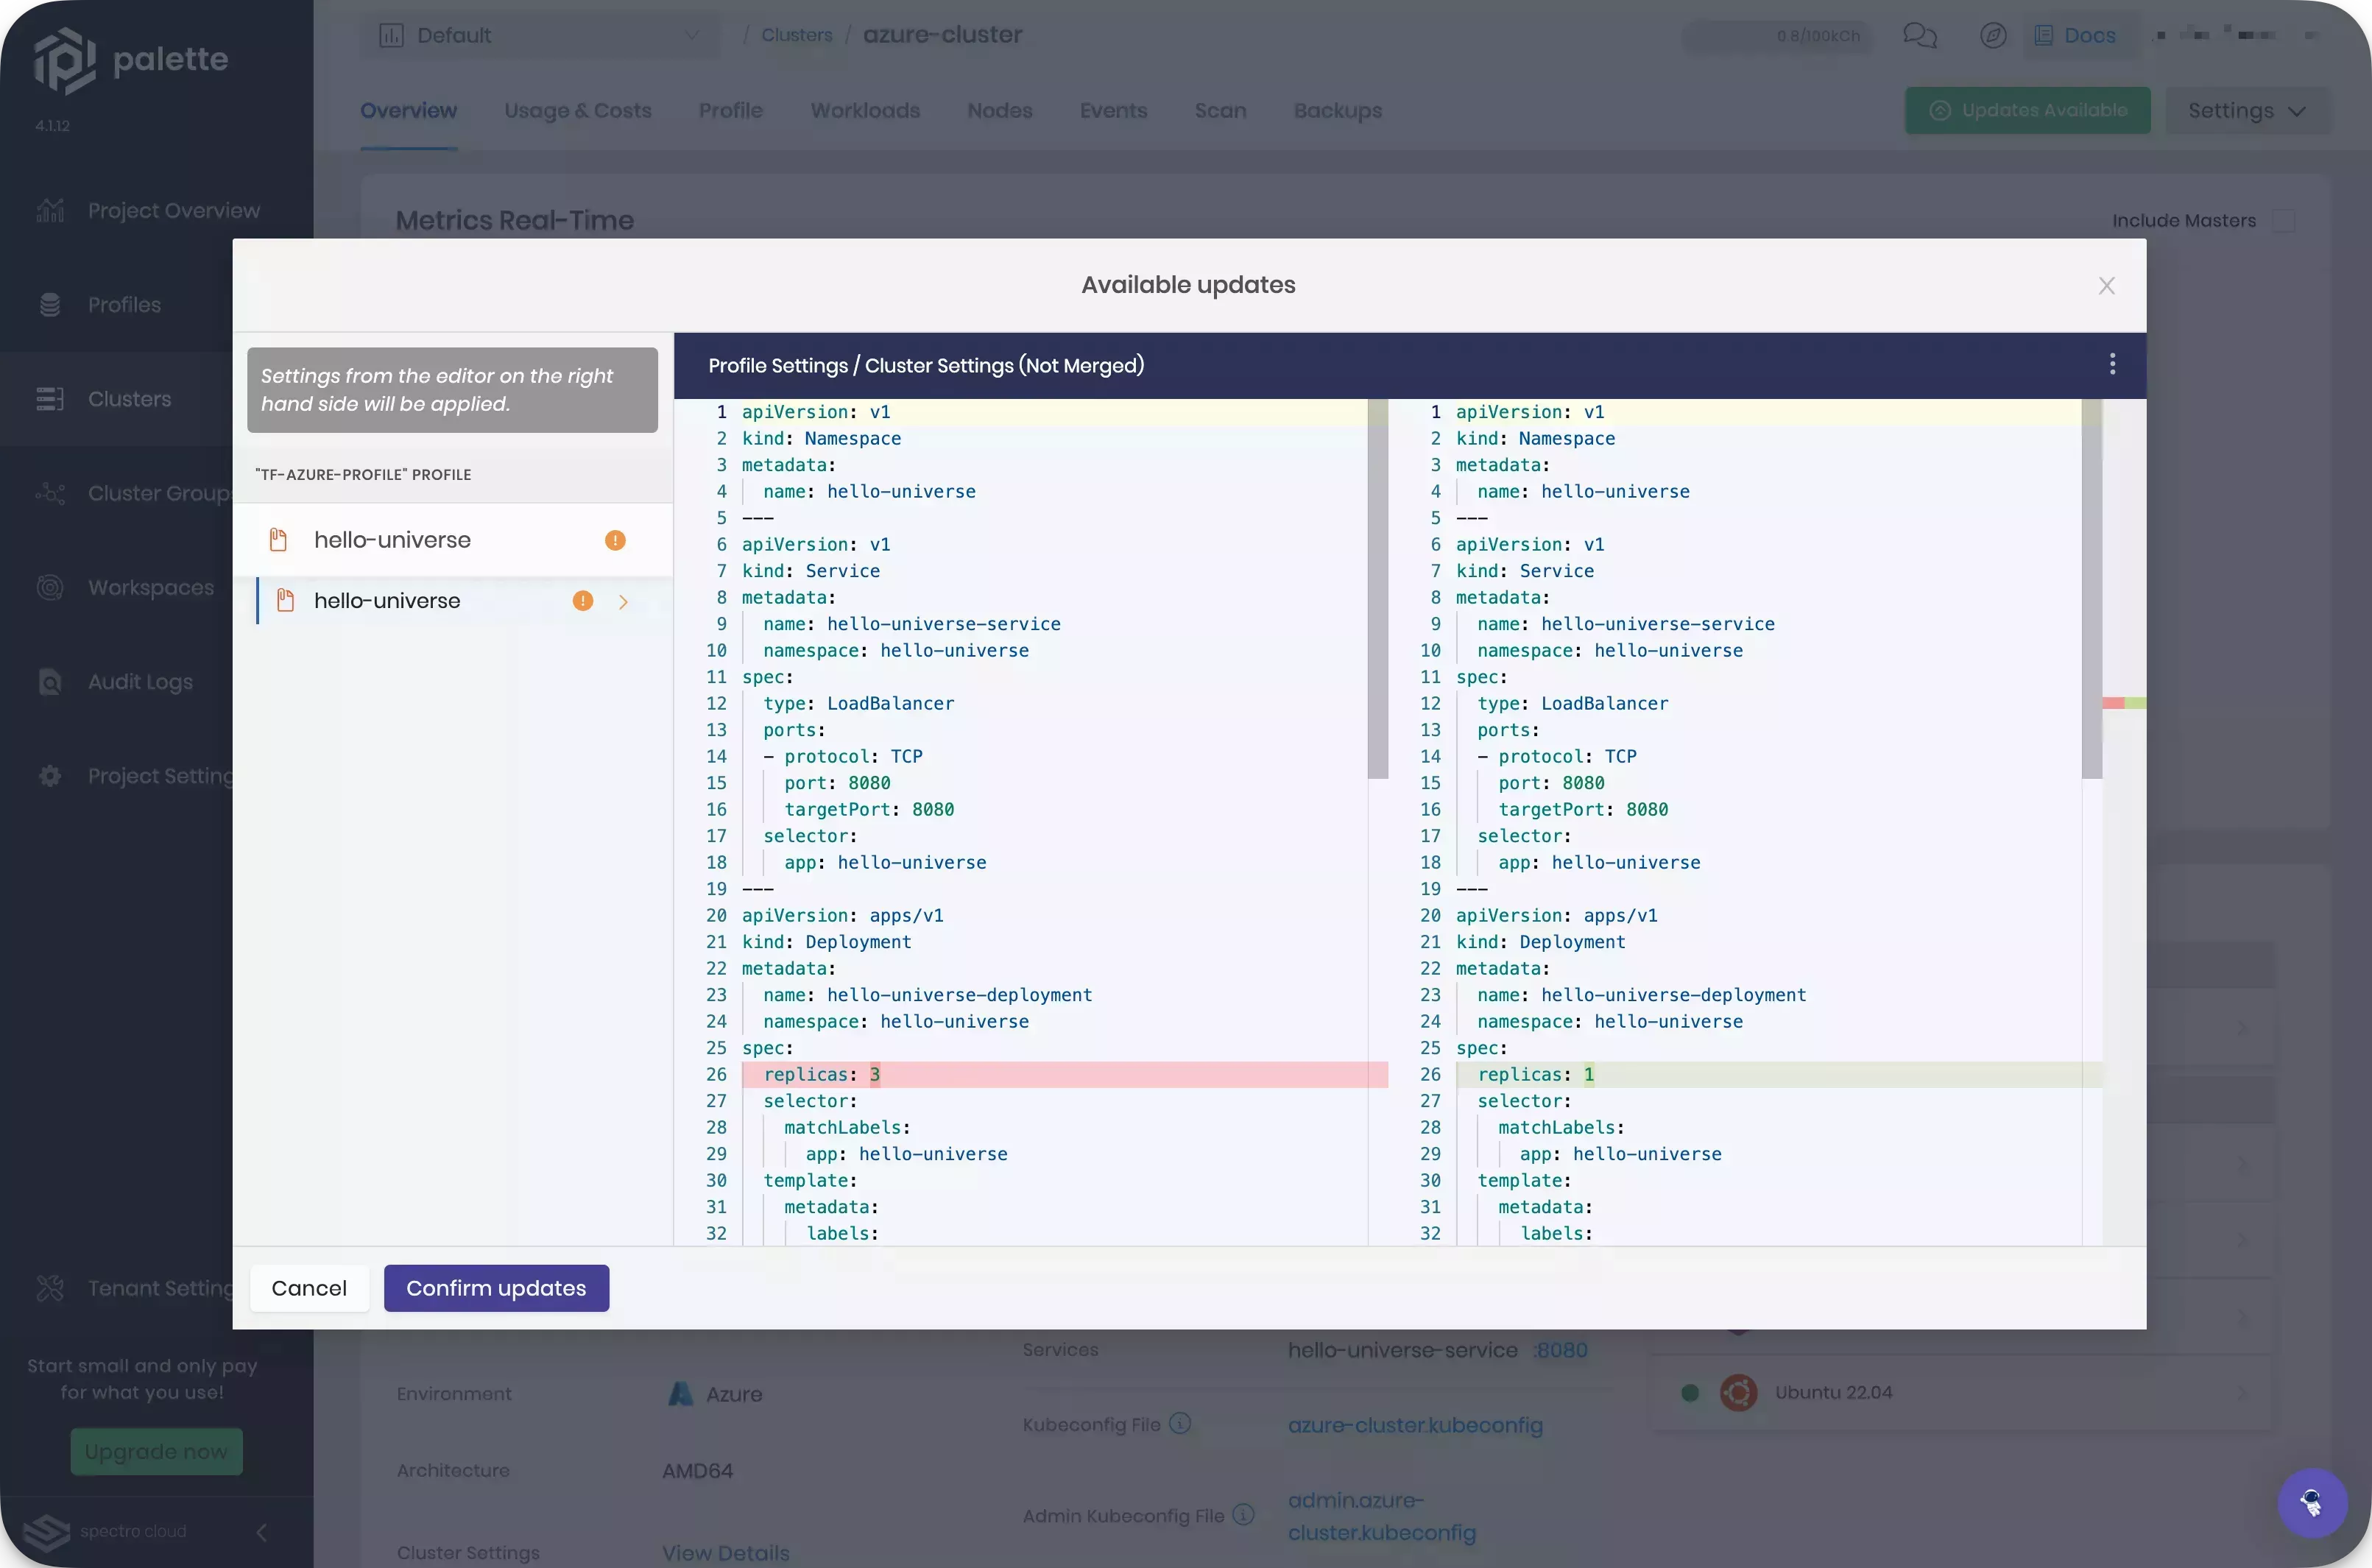
Set the value of replicas to 3 in the right-hand dialog. This removes your cluster override. Click on Confirm
updates once you have finished reviewing your changes.
Palette updates your cluster according to cluster profile specifications. Once these changes are complete, select the Workloads tab. Then, select the hello-universe namespace.
Three replicas of the hello-universe-deployment are available. The cluster profile update is now reflected by your cluster.
Cleanup
Use the following steps to remove all the resources you created for the tutorial.
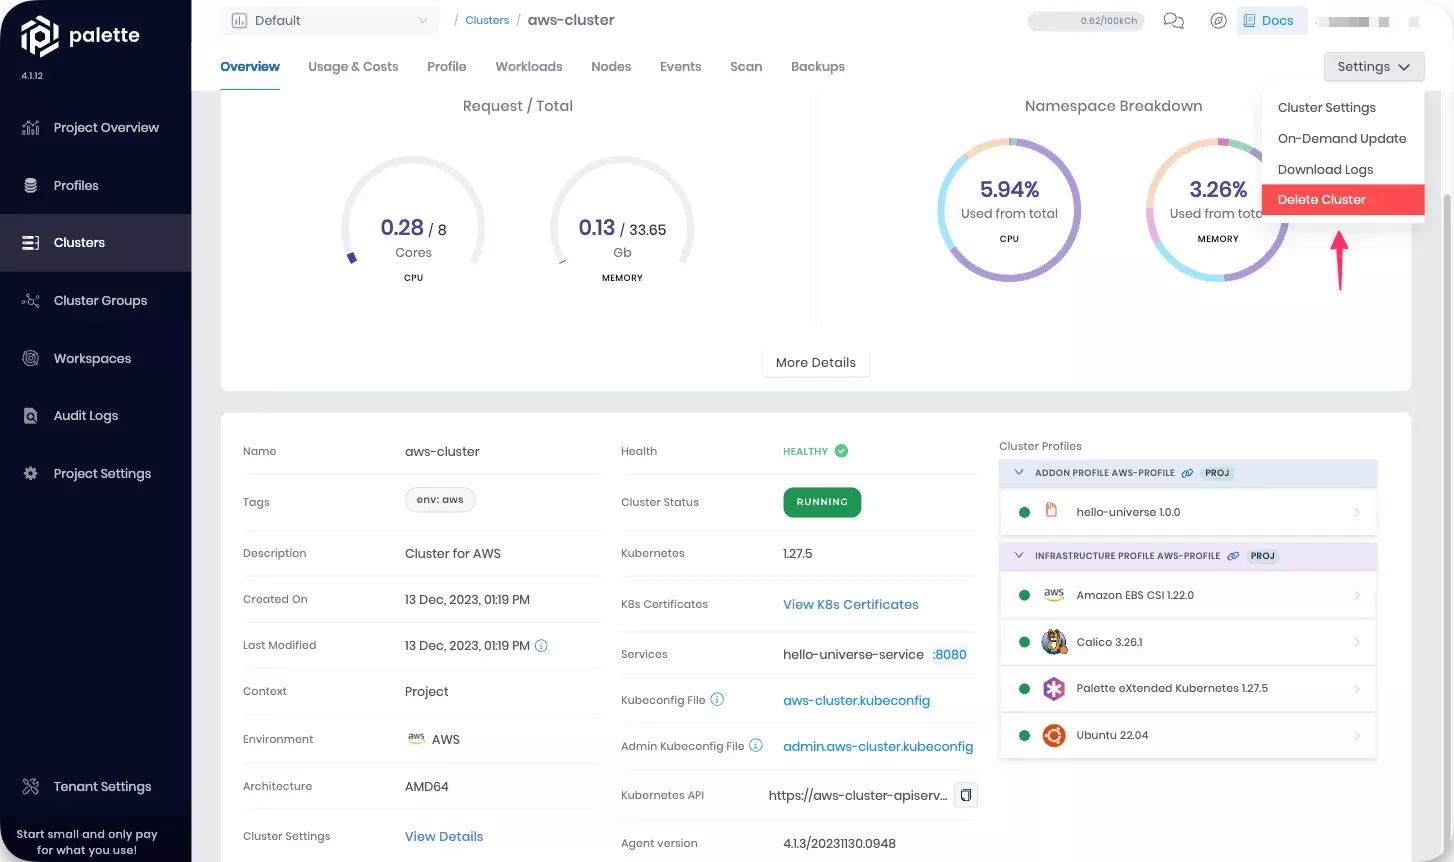
To remove the cluster, navigate to the left Main Menu and click on Clusters. Select the cluster you want to delete to access its details page.
Click on Settings to expand the menu, and select Delete Cluster.
You will be prompted to type in the cluster name to confirm the delete action. Type in the cluster name to proceed with the delete step. The deletion process takes several minutes to complete.
Repeat the same steps for the other cluster.
If a cluster remains in the delete phase for over 15 minutes, it becomes eligible for a force delete. To trigger a force delete, navigate to the cluster’s details page, click on Settings, then select Force Delete Cluster. Palette automatically removes clusters stuck in the cluster deletion phase for over 24 hours.
Once the cluster is deleted, navigate to the left Main Menu and click on Profiles. Find the cluster profile you created and click on the three-dot Menu to display the Delete button. Select Delete and confirm the selection to remove the cluster profile.
Repeat the same steps to the delete the cluster profile named with the pattern [cloud provider]-profile-api.
Wrap-Up
In this tutorial, you created two clusters and cluster profiles. After the clusters deployed to your chosen cloud provider, you updated one cluster profile in through three different methods: create a new cluster profile version, update a cluster profile in place, and cluster profile overrides. After you made your changes, the Hello Universe application functioned as a three-tier application with a REST API backend server.
Cluster profiles provide consistency during the cluster creation process, as well as when maintaining your clusters. They can be versioned to keep a record of previously working cluster states, giving you visibility when updating or rolling back workloads across your environments.
We recommend that you continue to the Terraform Support page to learn about how you can use Palette with Terraform.