Upgrade Airgap Palette Installed on VMware vSphere
This guide takes you through the process of upgrading a self-hosted airgap Palette instance installed on VMware vSphere.
Before upgrading Palette to a new major version, you must first update it to the latest minor version available. Refer to the Supported Upgrade Paths section for details.
If your setup includes a PCG, you must also allow the PCG to upgrade automatically before each major or minor Palette upgrade.
Prerequisites
-
Access to the Palette system console.
-
Access to the Palette airgap support Virtual Machine (VM) that you used for the initial Palette installation.
-
Refer to Access Palette to download the new airgap Palette installation bin.
-
Contact our Support Team at support@spectrocloud.com to learn if the new version of Palette requires a new OS and Kubernetes OVA. If necessary, they will provide you with a link to the OVA, which you will use to upgrade Palette.
-
A diff or text comparison tool of your choice.
Upgrade
If the new version of Palette requires you to update the underlying OS or Kubernetes distribution, proceed with the steps one through four. Otherwise, start at step five.
-
Log in to vCenter.
-
Right-click the cluster or resource group that hosts your self-hosted Palette instance and select Deploy OVF Template.
-
In the Deploy OVF Template wizard, at the Select an OVF template step, enter the link to the new OS and Kubernetes OVA that you received from our support.
Consider the following example for reference.
https://vmwaregoldenimage-console.s3.us-east-2.amazonaws.com/u-2204-0-k-12610-0.ova -
At the Select a name and folder step:
-
In the Virtual machine name field, append the
r_prefix to the prepopulated OVA name and remove the.ovaextension.Consider the following example for reference.
u-2204-0-k-12610-0.ova >>> r_u-2204-0-k-12610-0infoIt is important that you follow this naming convention. Otherwise, Palette will not be able to identify the OS and Kubernetes OVA and you will not be able to upgrade your Palette instance.
-
Under the Select a location for the virtual machine selector, choose the spectro-templates folder you created during installation.
Once the OS and Kubernetes OVA is available in your spectro-templates directory, you can terminate its deployment. Refer to the Deploy an OVF or OVA Template guide for more information on deploying OVAs in vCenter.
tipIf, during the OVA deployment, you encounter an error message stating Unable to retrieve manifest or certificate, refer to this known issue from the VMware knowledge base for a guide on how to resolve it.
-
-
In your terminal, use the following command template to SSH into the Palette airgap support VM. Enter the path to your private SSH key, your username, and the IP or domain of the airgap support VM. The default username is
ubuntu.ssh -identity_file </path/to/private/key> ubuntu@<vm-ip-or-domain>Consider the following command example for reference.
ssh -identity_file /docs/ssh-private-key.pem ubuntu@palette.example.com -
Use the following command to switch to the
rootuser account, which you need to proceed with the upgrade.sudo --login -
Use the following command template to download the new Palette airgap installation bin. Enter the username, password, and the Palette airgap installation URL you received from our support team. In the output file name, replace
<version>with the Palette version you are downloading.curl --user <username>:<password> --output airgap-<version>.bin <url-to-airgap-installation-bin>Consider the following command example for reference.
curl --user <username>:<password> --output airgap-4.2.12.bin https://software.spectrocloud.com/airgap-v4.2.12.bin -
Refer to the Additional Packs page and update the packs you are currently using. You must update each pack separately.
-
Use the following command template to execute the new Palette airgap installation bin.
chmod +x airgap-<version>.bin && ./airgap-<version>.binConsider the following example for reference.
chmod +x airgap-v4.2.13.bin && ./airgap-v4.2.13.bin -
After the Palette airgap binary is verified and uncompressed, it uploads the updates to your existing Palette instance. This step takes some time to complete.
Verifying archive integrity...  100%   MD5 checksums are OK. All good.
Uncompressing Airgap Setup - Version 4.2.13  100%
Setting up CLI
Setting up Manifests
Setting up Packs
...

Setup Completed
Once the airgap binary is executed, you will receive a Setup Completed success message.
-
Log in to the Palette system console.
-
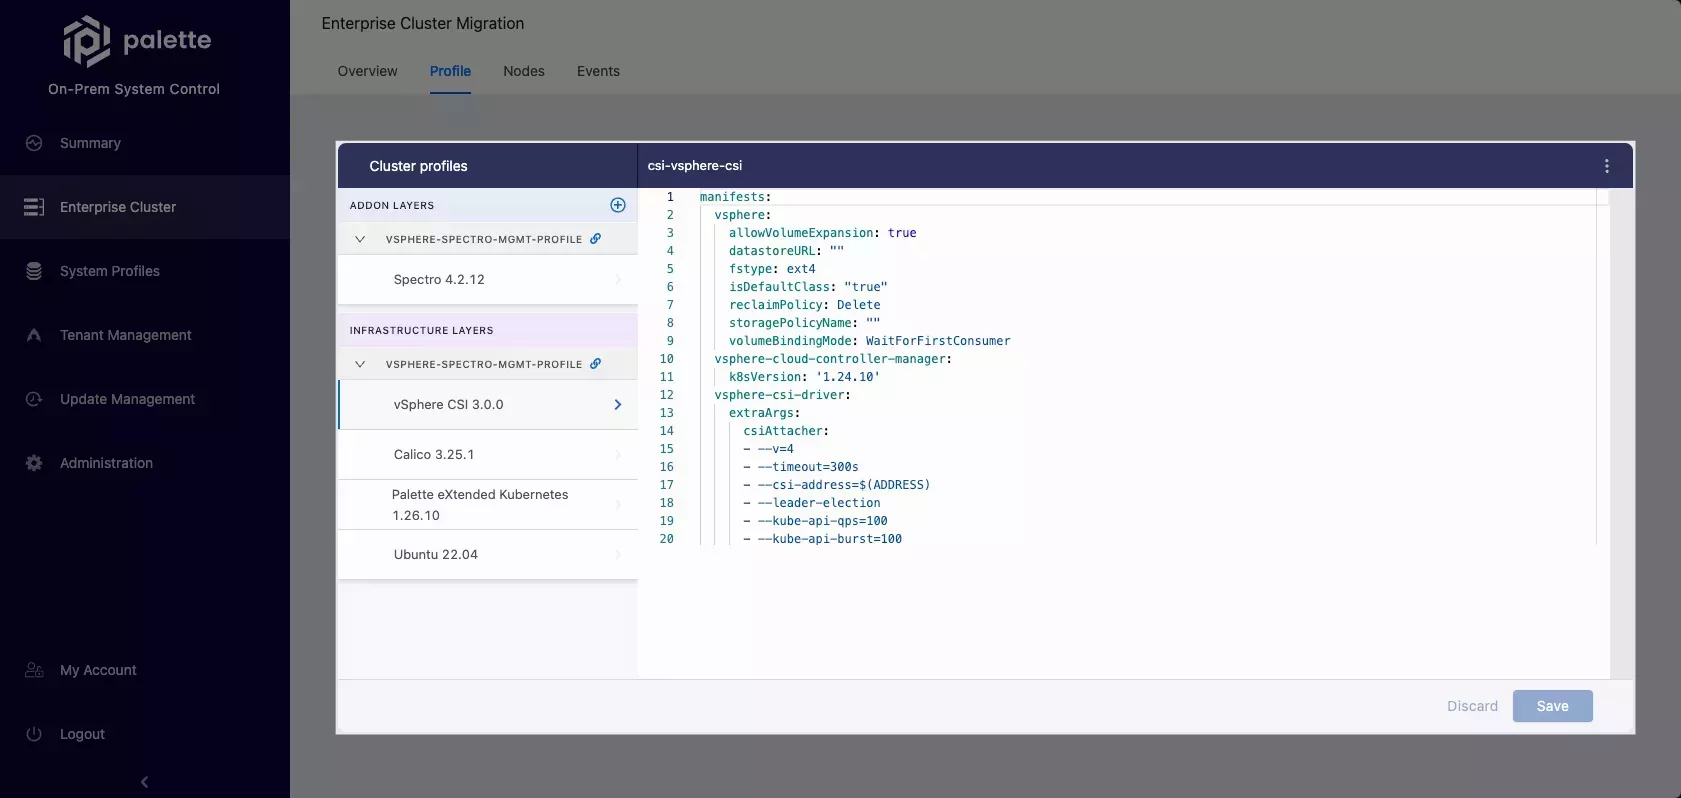
From the left Main Menu, select Enterprise Cluster and then select the Profile tab.
-
Copy the configurations for your CSI, CNI, and Kubernetes layers to an external location for backup.
tipIf your Enterprise Cluster profile has configuration changes or additions, make sure to back up all the customized values to preserve them after the upgrade.
-
From the left Main Menu, select Administration > Pack Registries. Then, next to your spectro-packs registry, select the three-dot Menu > Sync.
Palette initiates a registry sync, which can take up to 30 minutes to complete.
-
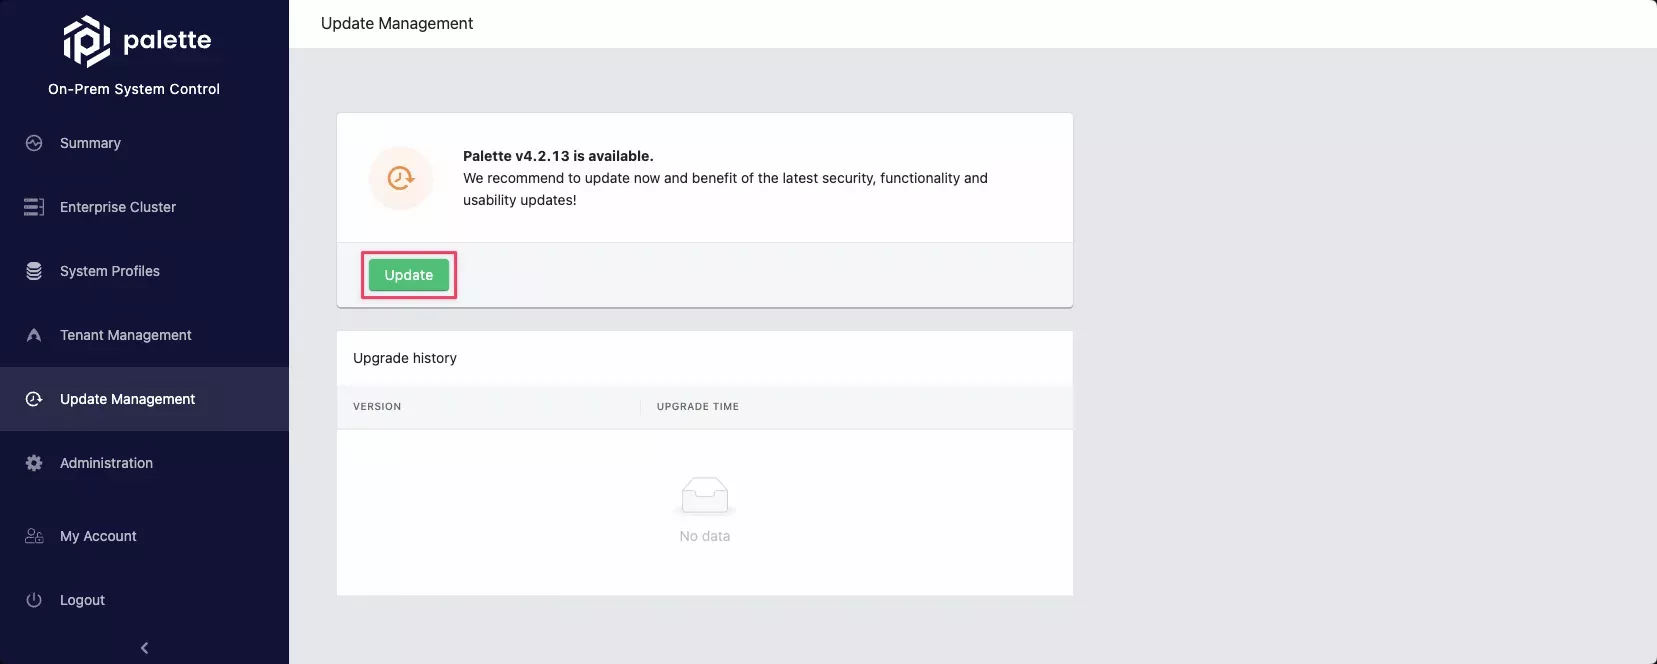
From the left Main Menu, select Update Management. Once the registry sync is done, Palette will prompt you to update to the new version. Click Update.
-
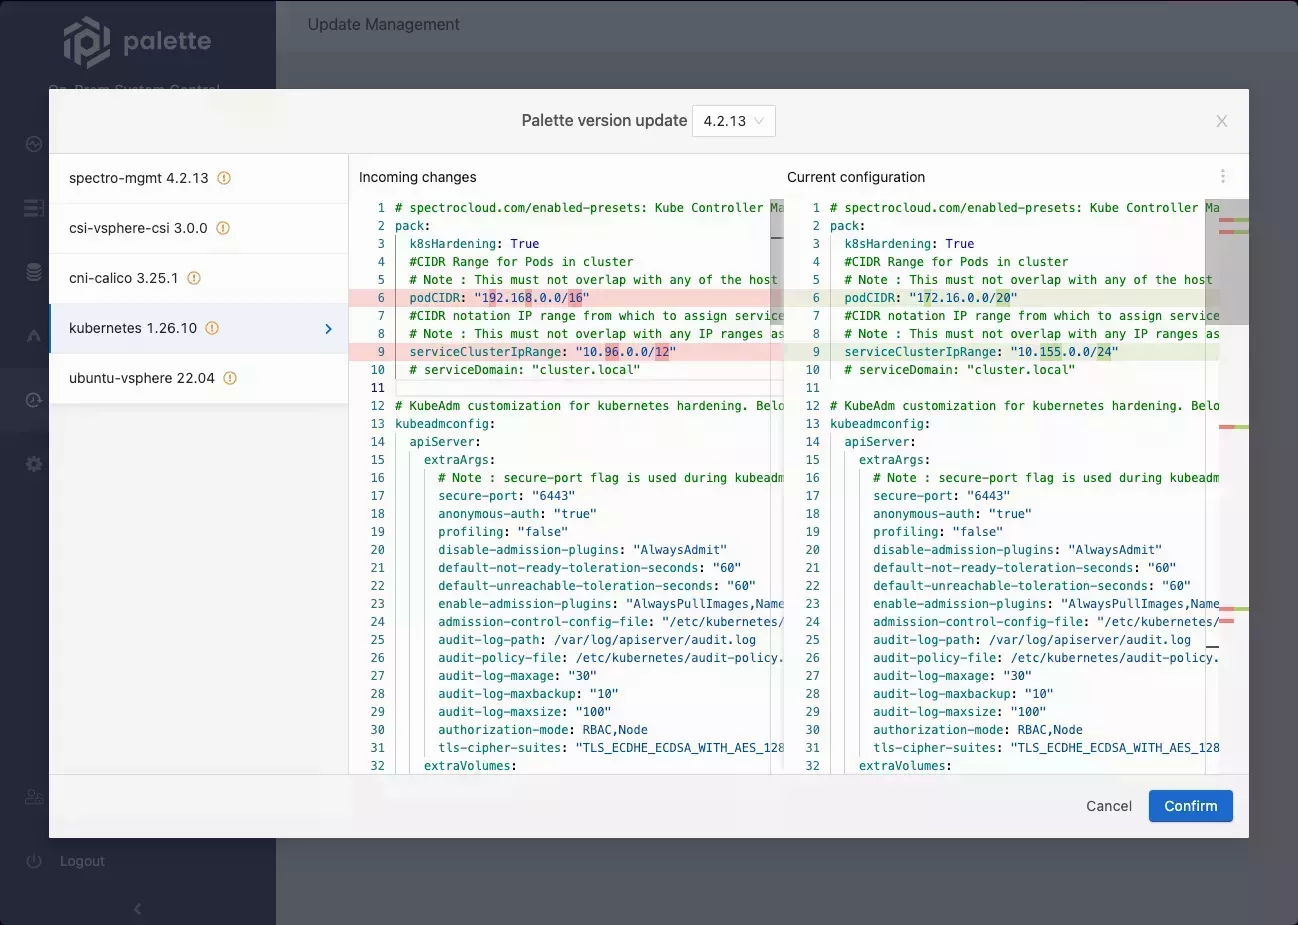
In the Palette version update preview modal, from the left Main Menu, select the Kubernetes layer. The Incoming changes pane displays the changes that the upgrade introduces. The Current configuration pane displays your current layer configuration.
infoTo complete the Palette upgrade, we recommend using an external diff or text comparison tool. Proceed with the following steps once you have the comparison tool available next to the Palette system console.
-
Copy the configurations from both Incoming changes and Current configuration panes to your comparison tool.
-
From your current configuration, transfer only those differences that are custom to your self-hosted Palette instance (for example, the
podCIDRandserviceClusterIpRangevalues). Do not override any other changes or upgrades.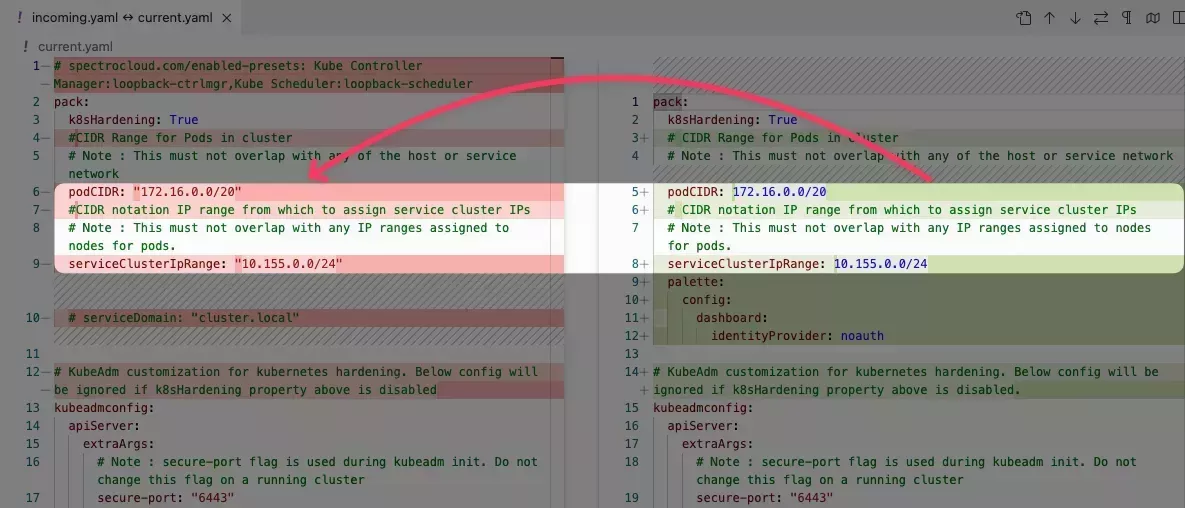
-
After you finish merging the configurations, copy the resulting configuration, and then paste it to the Current configuration pane in the Palette system console.
-
Repeat steps six through eight for each Enterprise Cluster profile layer.
-
In the bottom-right corner of the Palette version update preview modal, select Confirm.
The system console locks for a couple of minutes while the upgrade is applied.
Validate
-
Log in to the Palette system console.
-
On the Summary page, Palette should display messages that state You are using the latest version of Palette and On-prem system console is healthy.