Create a Cluster Profile
Palette offers profile-based management for Kubernetes, enabling consistency, repeatability, and operational efficiency across multiple clusters. A cluster profile allows you to customize the cluster infrastructure stack, allowing you to choose the desired Operating System (OS), Kubernetes, Container Network Interfaces (CNI), Container Storage Interfaces (CSI). You can further customize the stack with add-on application layers. For more information about cluster profile types, refer to Cluster Profiles.
In this tutorial, you create a full profile directly from the Palette dashboard. Then, you add a layer to your cluster profile by using a manifest to deploy a web application. Adding custom manifests to your cluster profile allows you to customize and configure clusters based on specific requirements.
Prerequisites
- Your Palette account role must have the
clusterProfile.createpermission to create a cluster profile. Refer to the Roles and Permissions documentation for more information.
Create a Full Cluster Profile
- AWS
- Azure
- Google Cloud
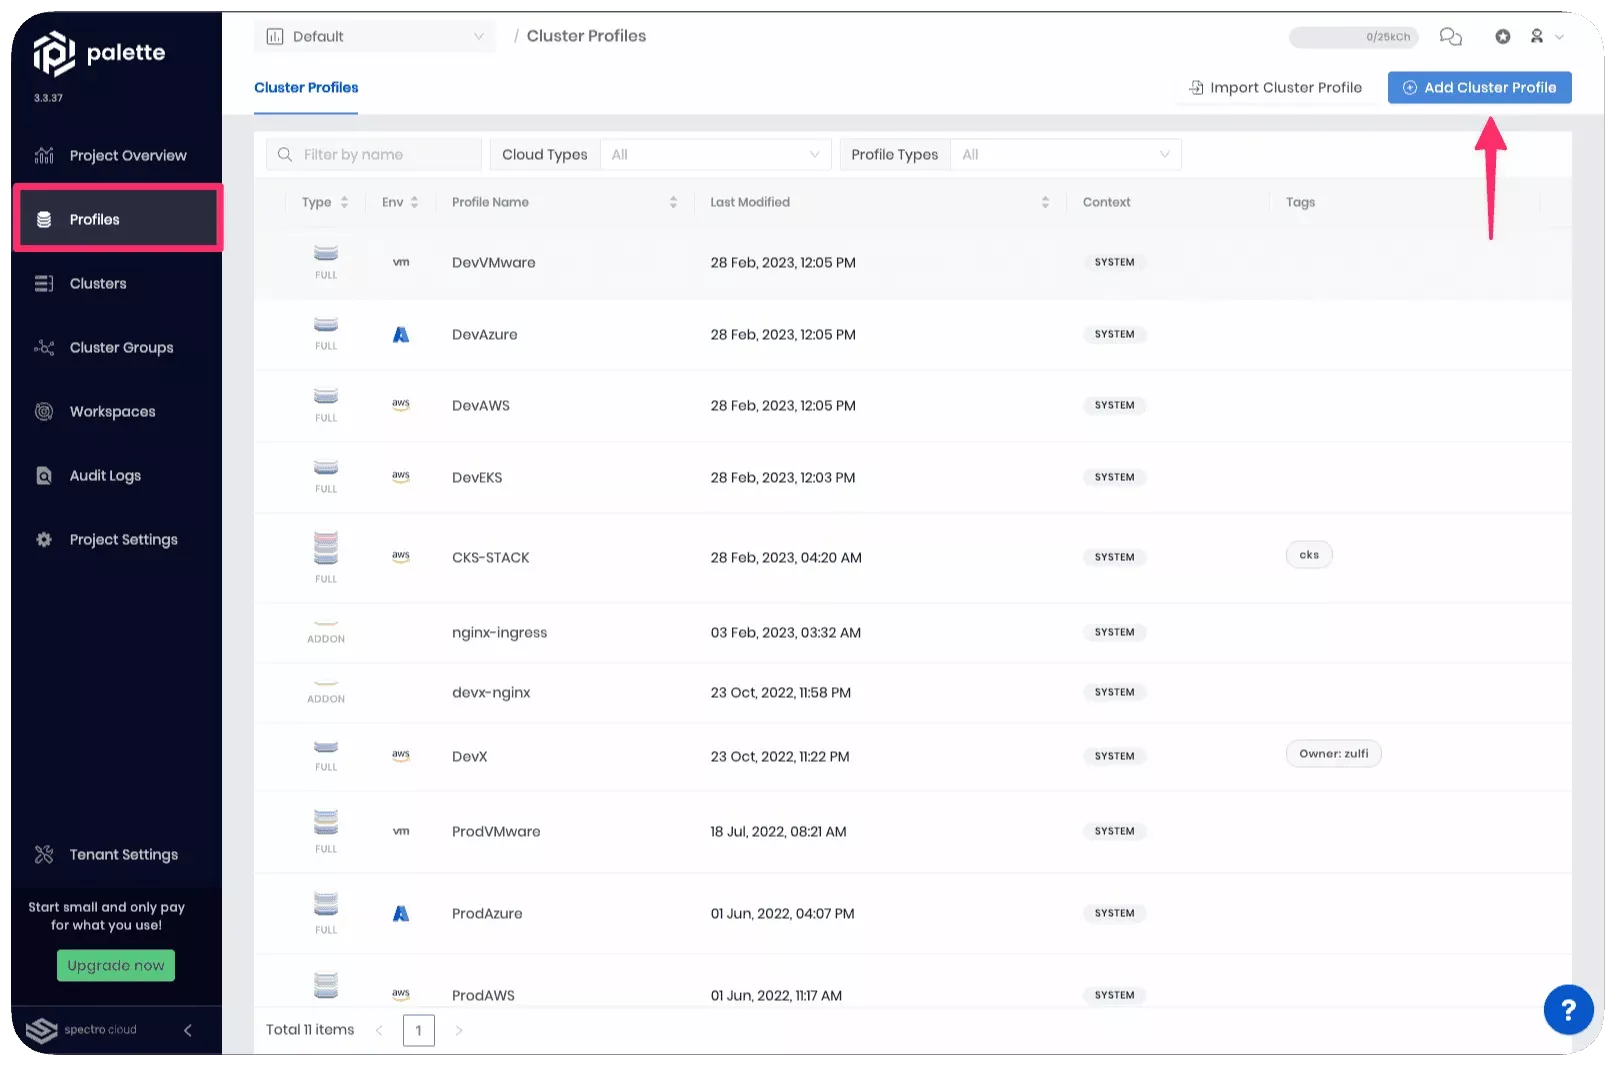
Log in to Palette and navigate to the left Main Menu. Select Profiles to view the cluster profile page. You can view the list of available cluster profiles. To create a cluster profile, click on Add Cluster Profile.
Follow the wizard to create a new profile.
In the Basic Information section, assign the name aws-profile, a brief profile description, select the type as Full, and assign the tag env:aws. You can leave the version empty if you want to. Just be aware that the version defaults to 1.0.0. Click on Next.
Cloud Type allows you to choose the infrastructure provider with which this cluster profile is associated. Select AWS and click on Next.
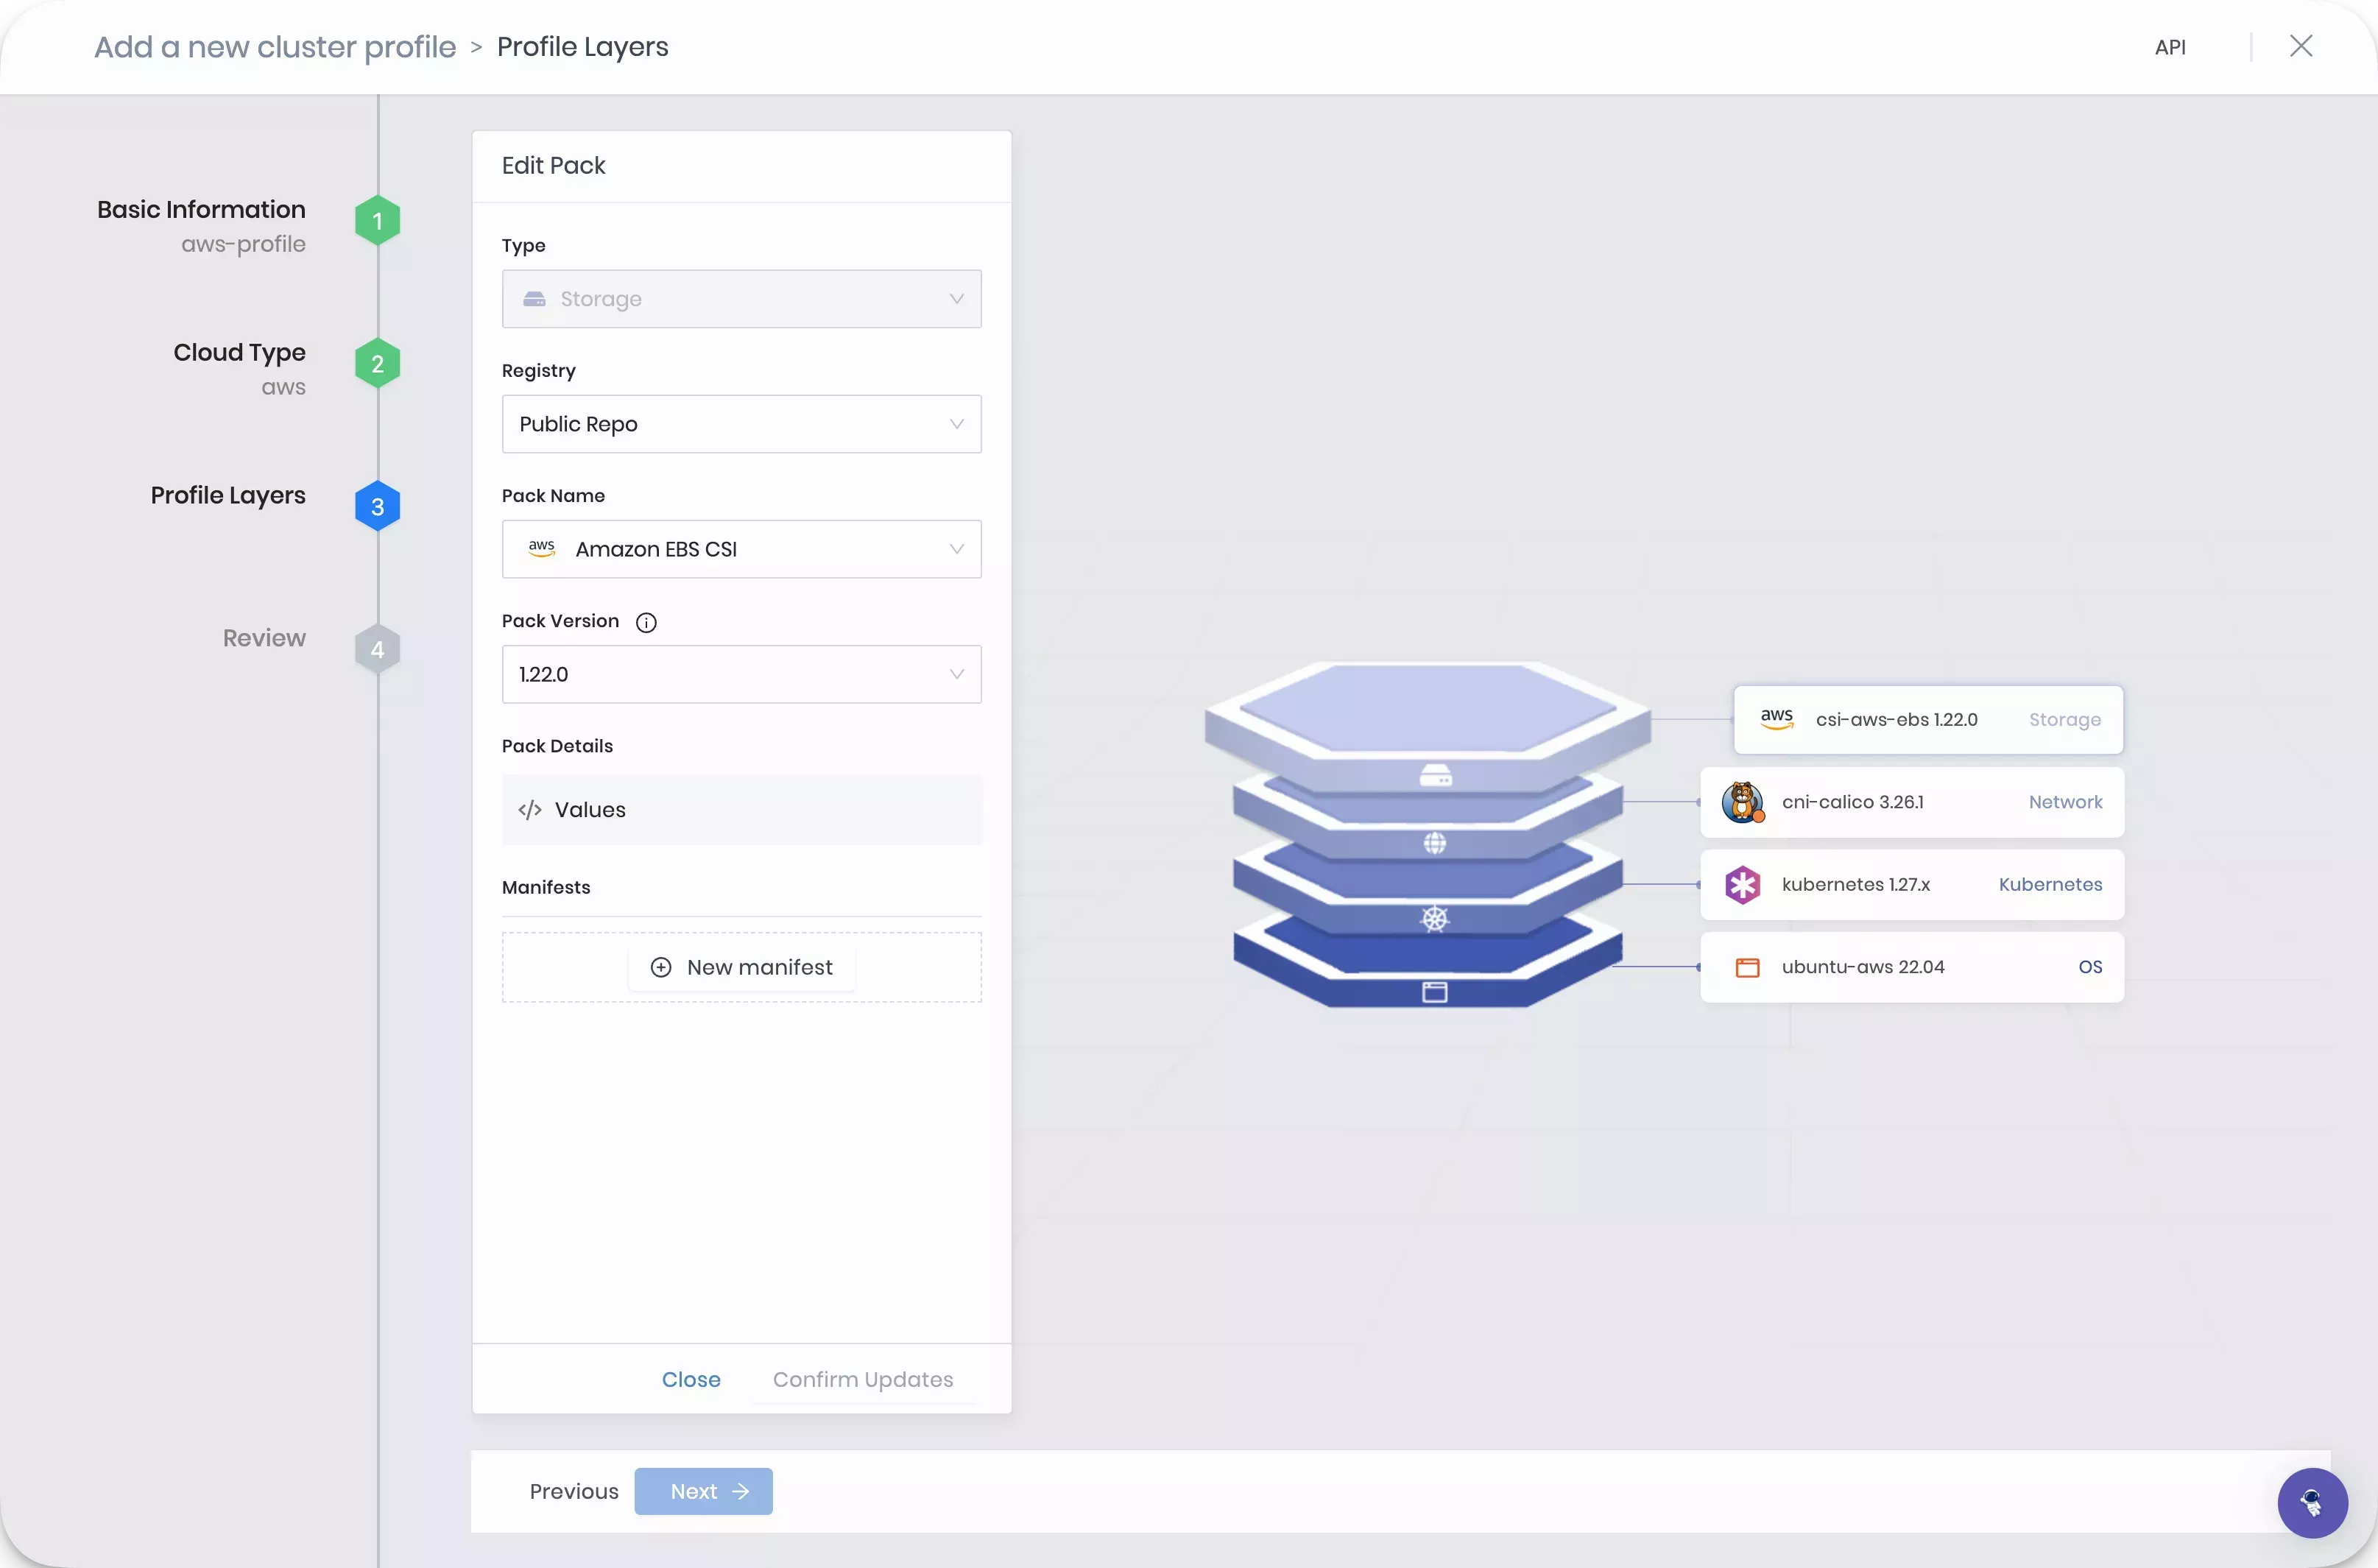
The Profile Layers step is where you specify the packs that compose the profile. There are four required infrastructure packs and several optional add-on packs you can choose from. Every pack requires you to select the Pack Type, Registry, and Pack Name.
For this tutorial, use the following packs:
| Pack Name | Version | Layer |
|---|---|---|
| ubuntu-aws LTS | 22.4.x | Operating System |
| Kubernetes | 1.27.x | Kubernetes |
| cni-calico | 3.26.x | Network |
| csi-aws-ebs | 1.22.x | Storage |
As you fill out the information for each layer, click on Next to proceed to the next layer.
Click on Confirm after you have completed filling out all the core layers.
The review section gives an overview of the cluster profile configuration you selected. Click on Finish Configuration to create the cluster profile.
Log in to Palette and navigate to the left Main Menu. Select Profiles to view the cluster profile page. You can view the list of available cluster profiles. To create a cluster profile, click on Add Cluster Profile.
Follow the wizard to create a new profile.
In the Basic Information section, assign the name azure-profile, a brief profile description, select the type as Full, and assign the tag env:azure. You can leave the version empty if you want to. Just be aware that the version defaults to 1.0.0. Click on Next.
Cloud Type allows you to choose the infrastructure provider with which this cluster profile is associated. Select Azure and click on Next.
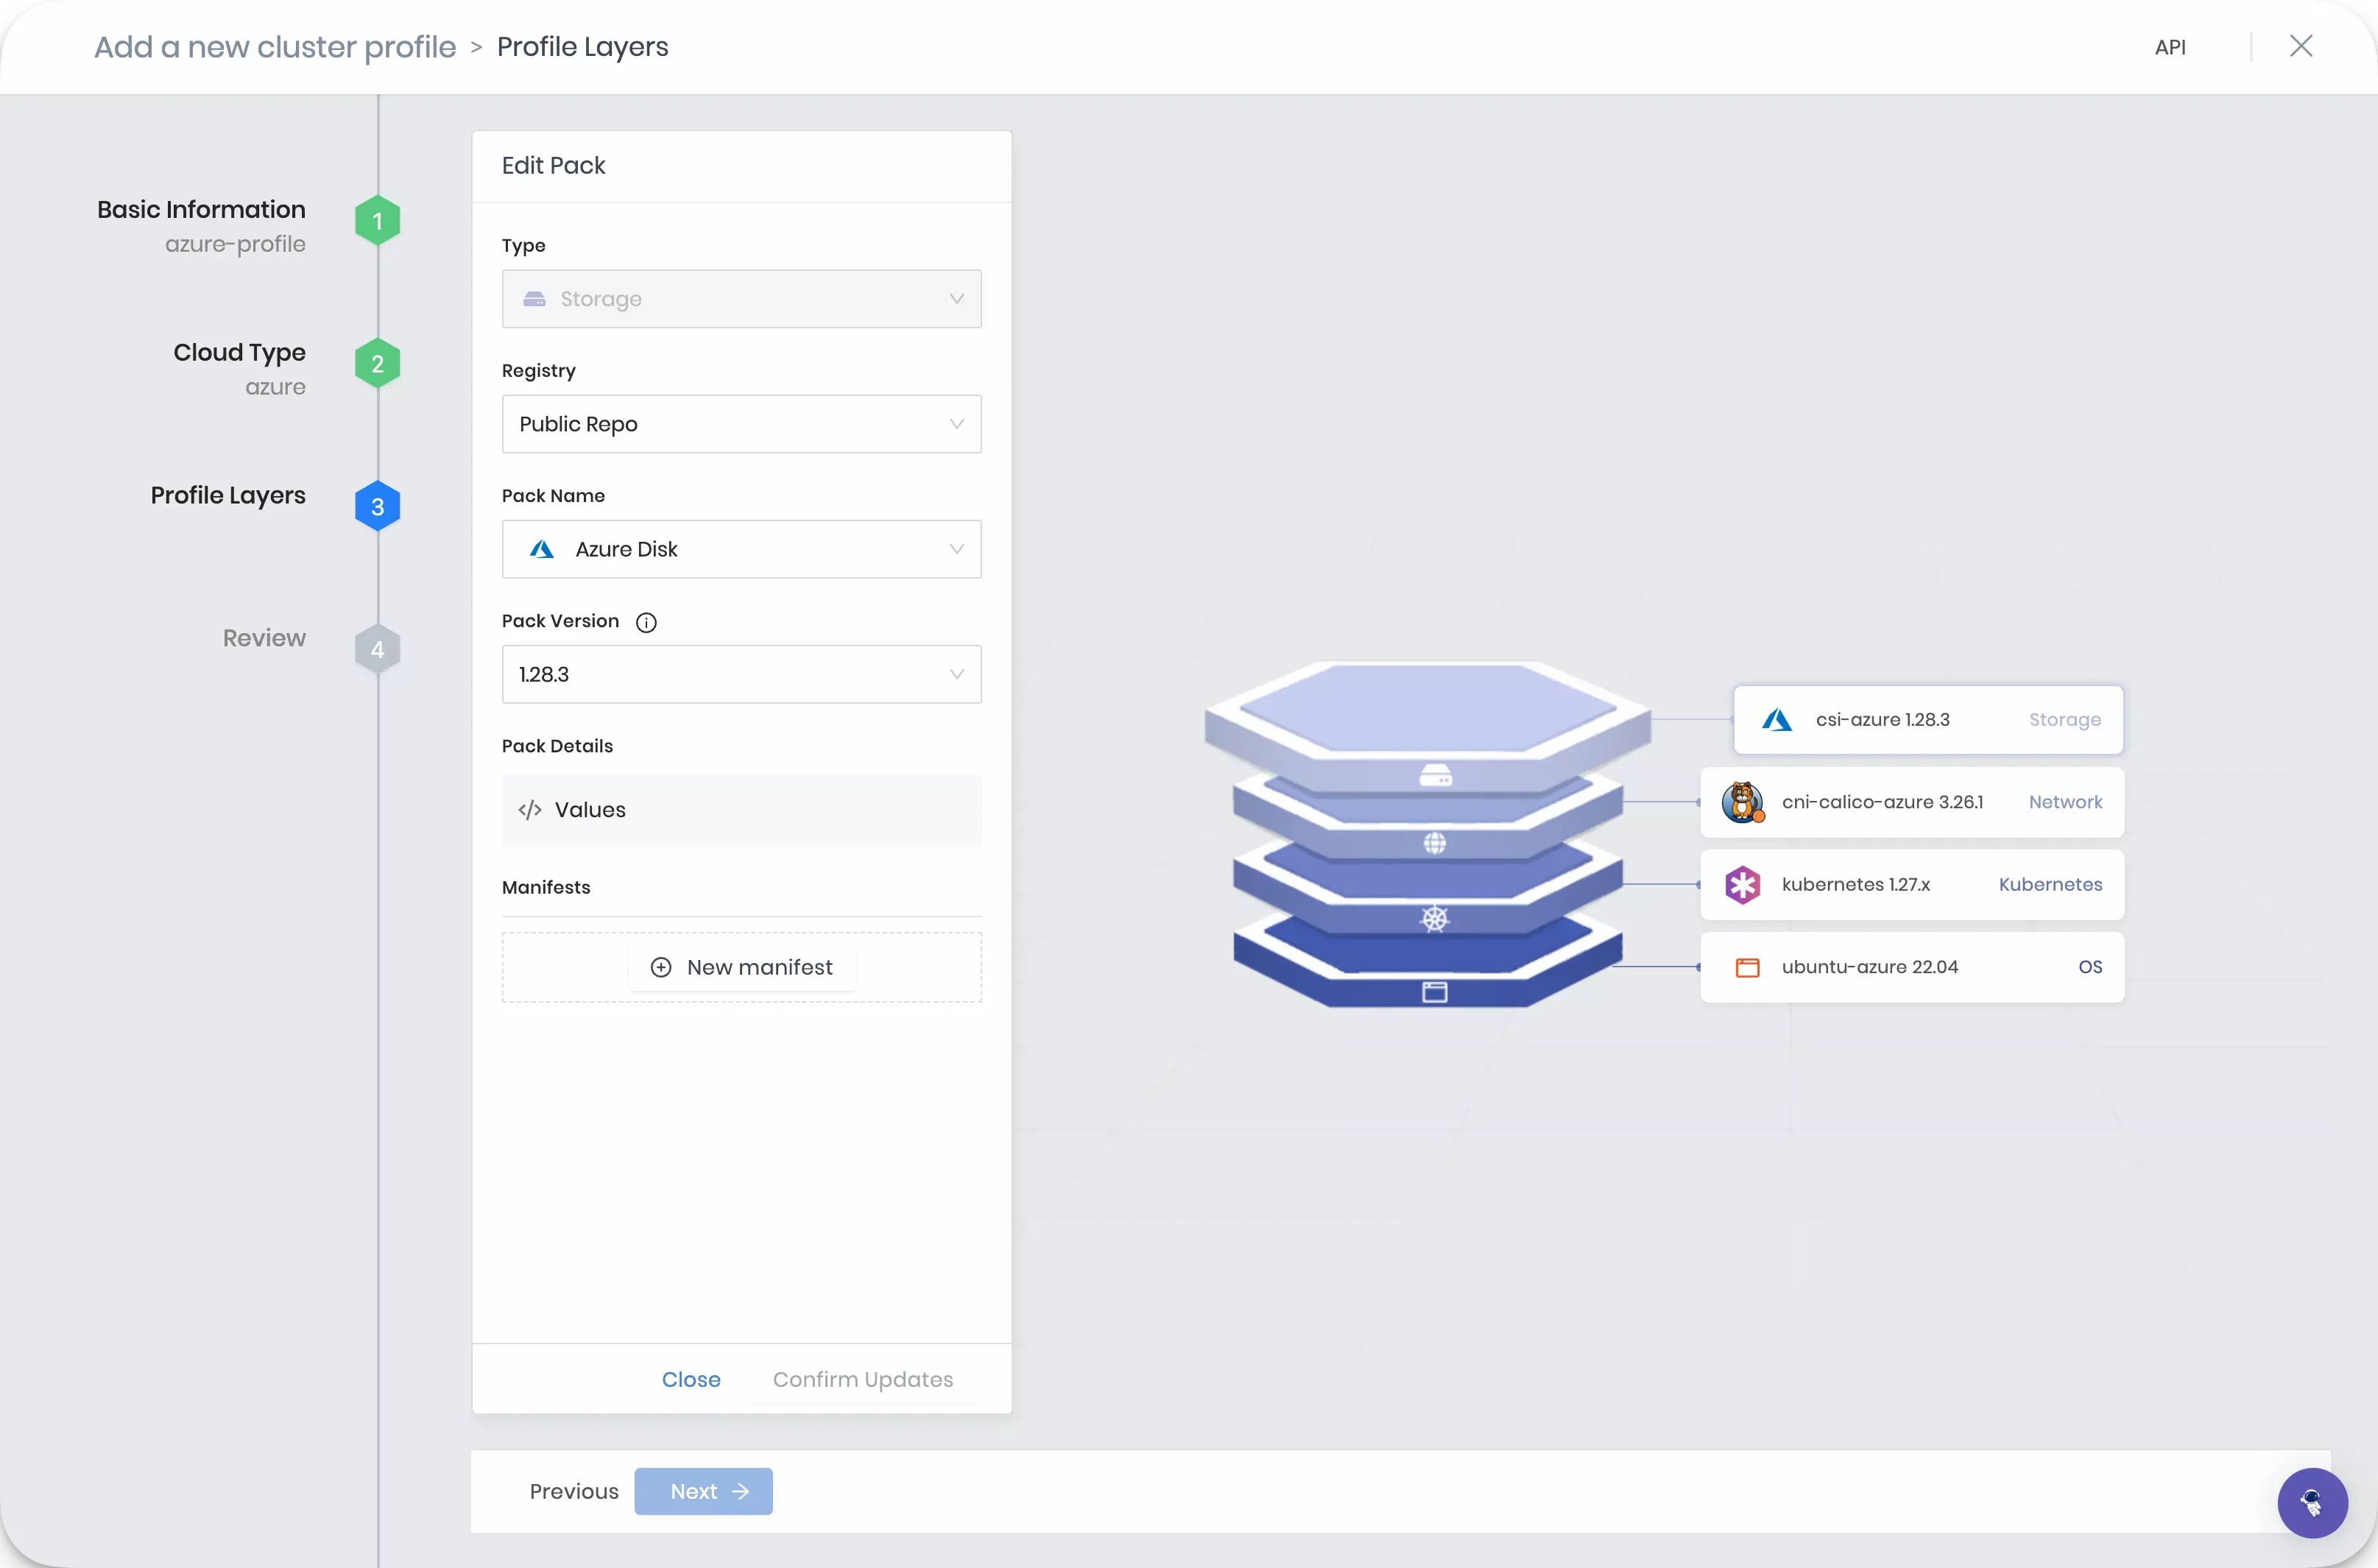
The Profile Layers step is where you specify the packs that compose the profile. There are four required infrastructure packs and several optional add-on packs you can choose from. Every pack requires you to select the Pack Type, Registry, and Pack Name.
For this tutorial, use the following packs:
| Pack Name | Version | Layer |
|---|---|---|
| ubuntu-azure LTS | 22.4.x | Operating System |
| Kubernetes | 1.27.x | Kubernetes |
| cni-calico-azure | 3.26.x | Network |
| Azure Disk | 1.28.x | Storage |
As you fill out the information for each layer, click on Next to proceed to the next layer.
Click on Confirm after you have completed filling out all the core layers.
The review section gives an overview of the cluster profile configuration you selected. Click on Finish Configuration to finish creating the cluster profile.
Log in to Palette and navigate to the left Main Menu. Select Profiles to view the cluster profile page. You can view the list of available cluster profiles. To create a cluster profile, click on Add Cluster Profile.
Follow the wizard to create a new profile.
In the Basic Information section, assign the name gcp-profile, provide a profile description, select the type as Full, and assign the tag env:gcp. You can leave the version empty if you want to. Just be aware that the version defaults to 1.0.0. Click on Next.
Cloud Type allows you to choose the infrastructure provider with which this cluster profile is associated. Select Google Cloud and click on Next.
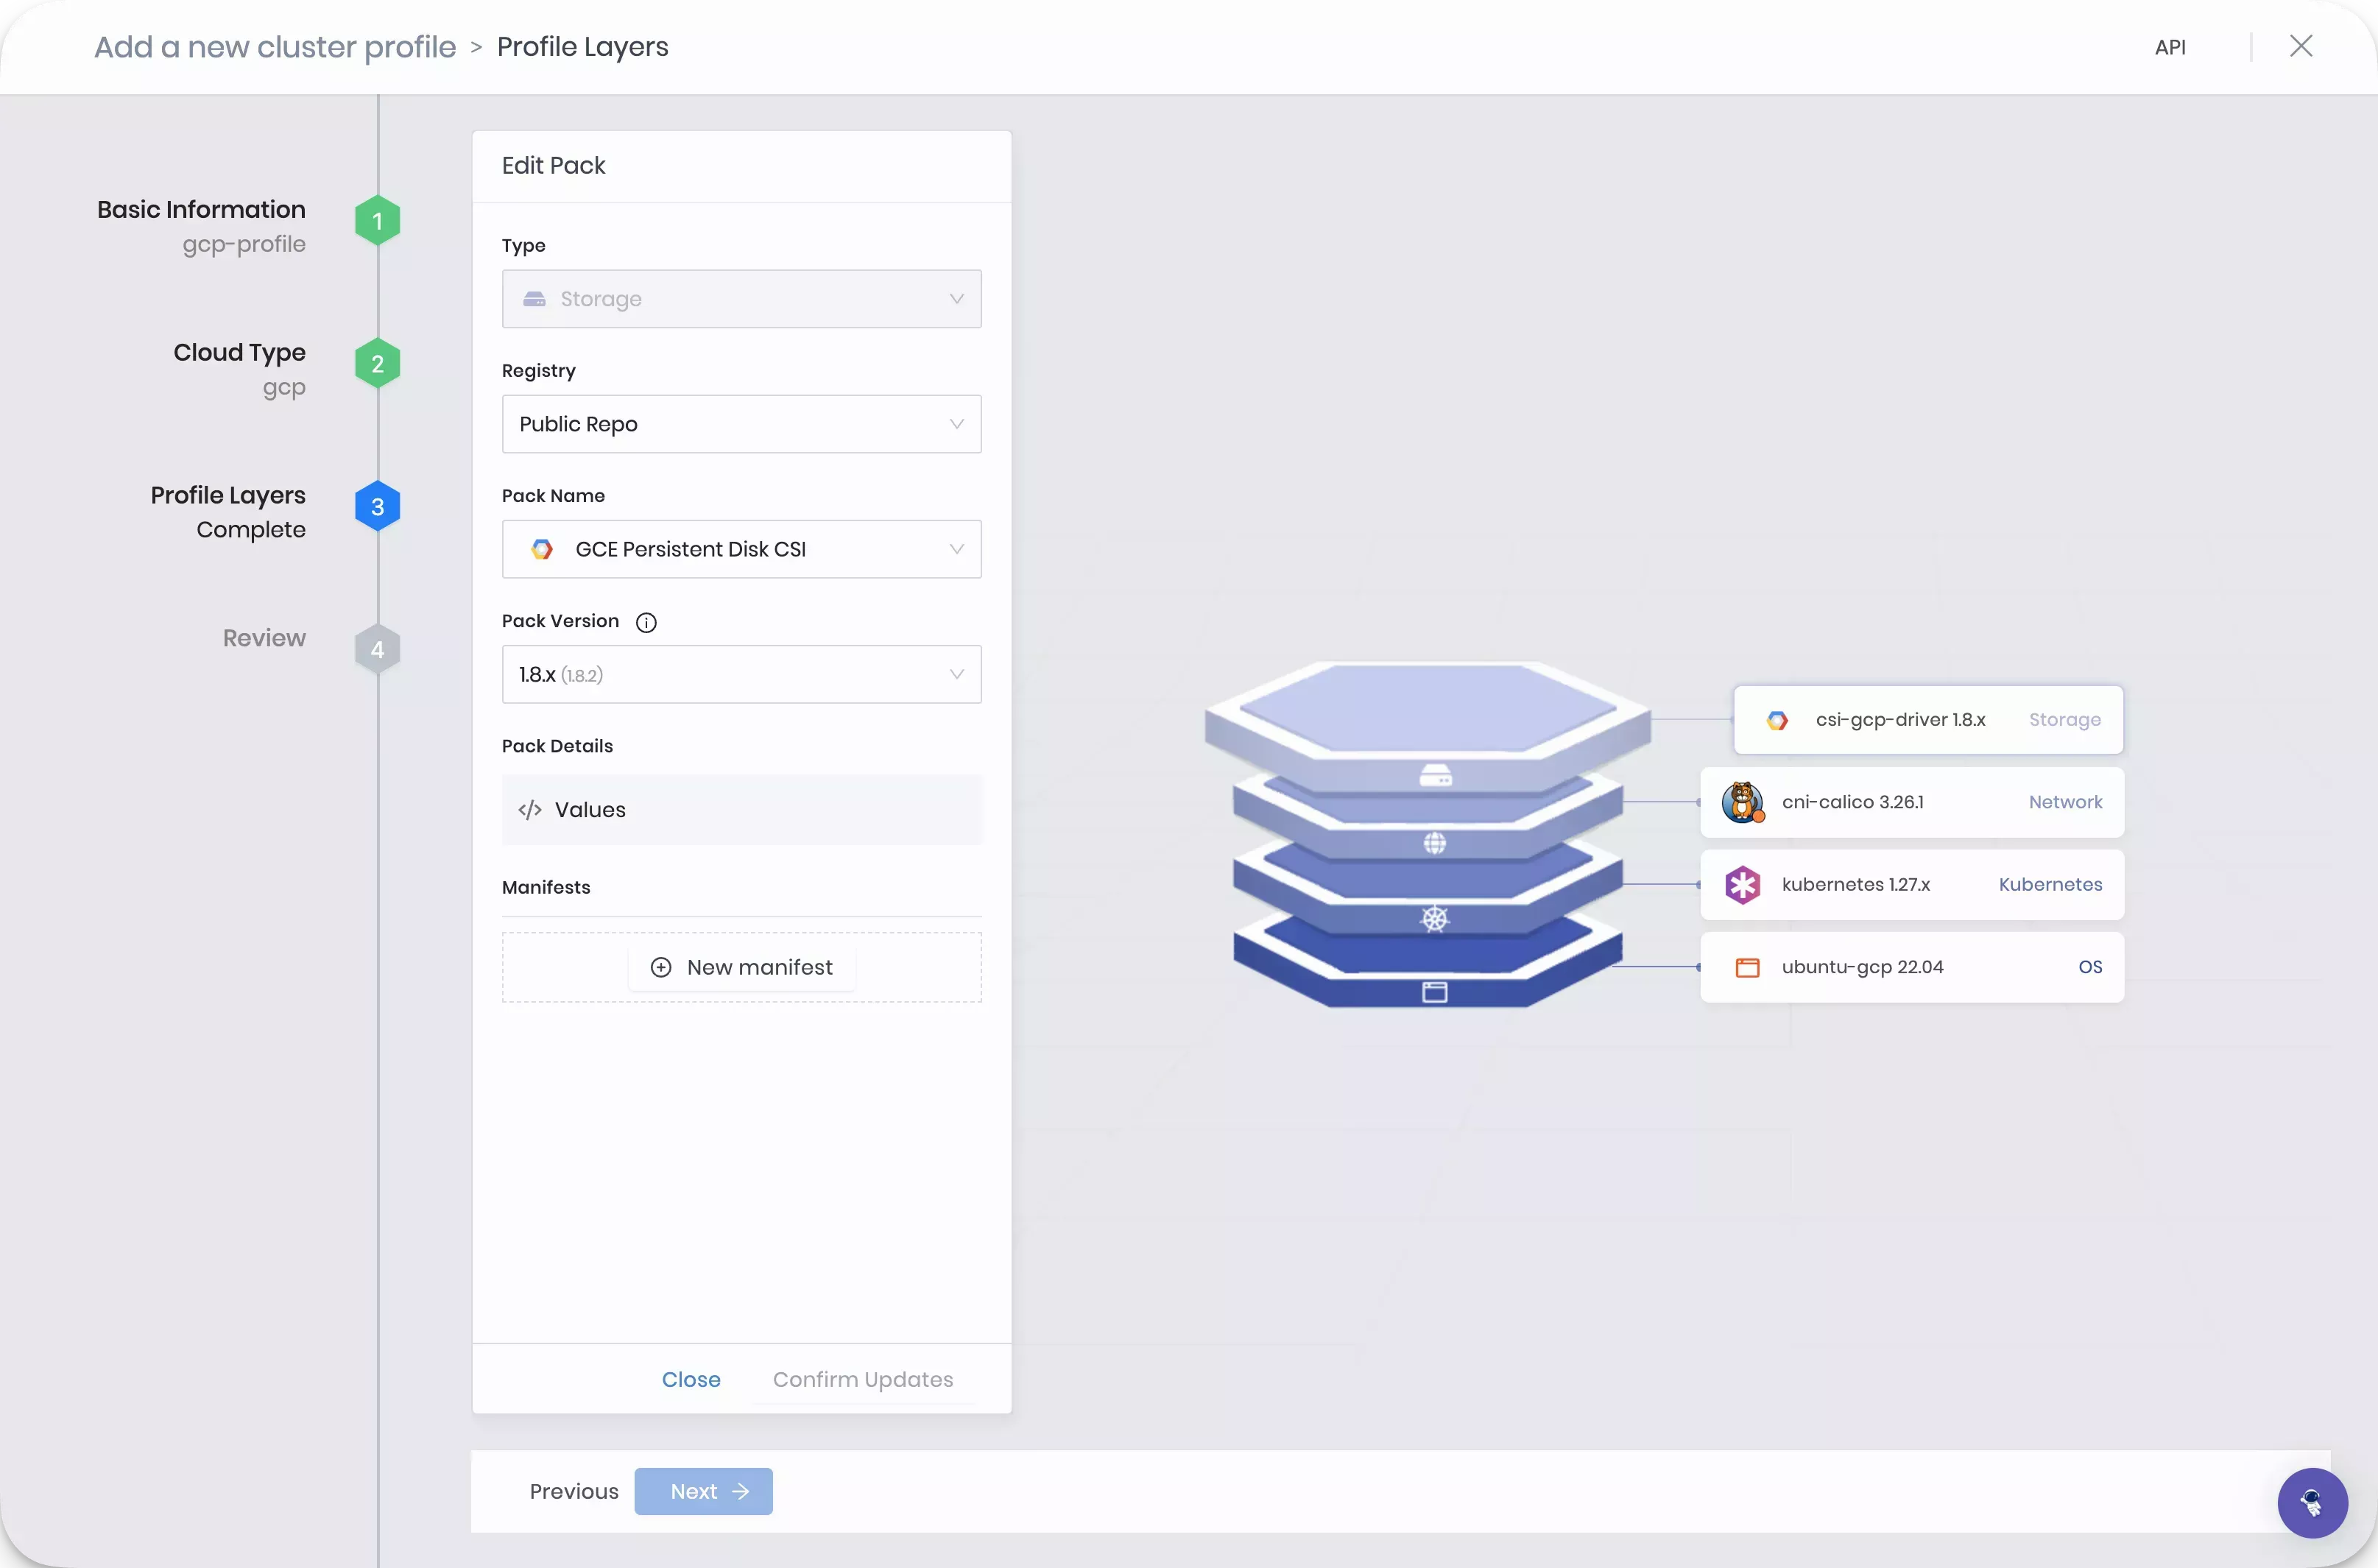
The Profile Layers step is where you specify the packs that compose the profile. There are four required infrastructure packs and several optional add-on packs you can choose from. Every pack requires you to select the Pack Type, Registry, and Pack Name.
For this tutorial, use the following packs:
| Pack Name | Version | Layer |
|---|---|---|
| ubuntu-gcp LTS | 22.4.x | Operating System |
| Kubernetes | 1.27.x | Kubernetes |
| cni-calico | 3.26.x | Network |
| csi-gcp-driver | 1.8.x | Storage |
As you fill out the information for each layer, click on Next to proceed to the next layer.
Click on Confirm after you have completed filling out all the core layers.
The review section gives an overview of the cluster profile configuration you selected. Click on Finish Configuration to create the cluster profile.
Add a Manifest
Navigate to the left Main Menu and select Profiles. Select the cluster profile you created earlier.
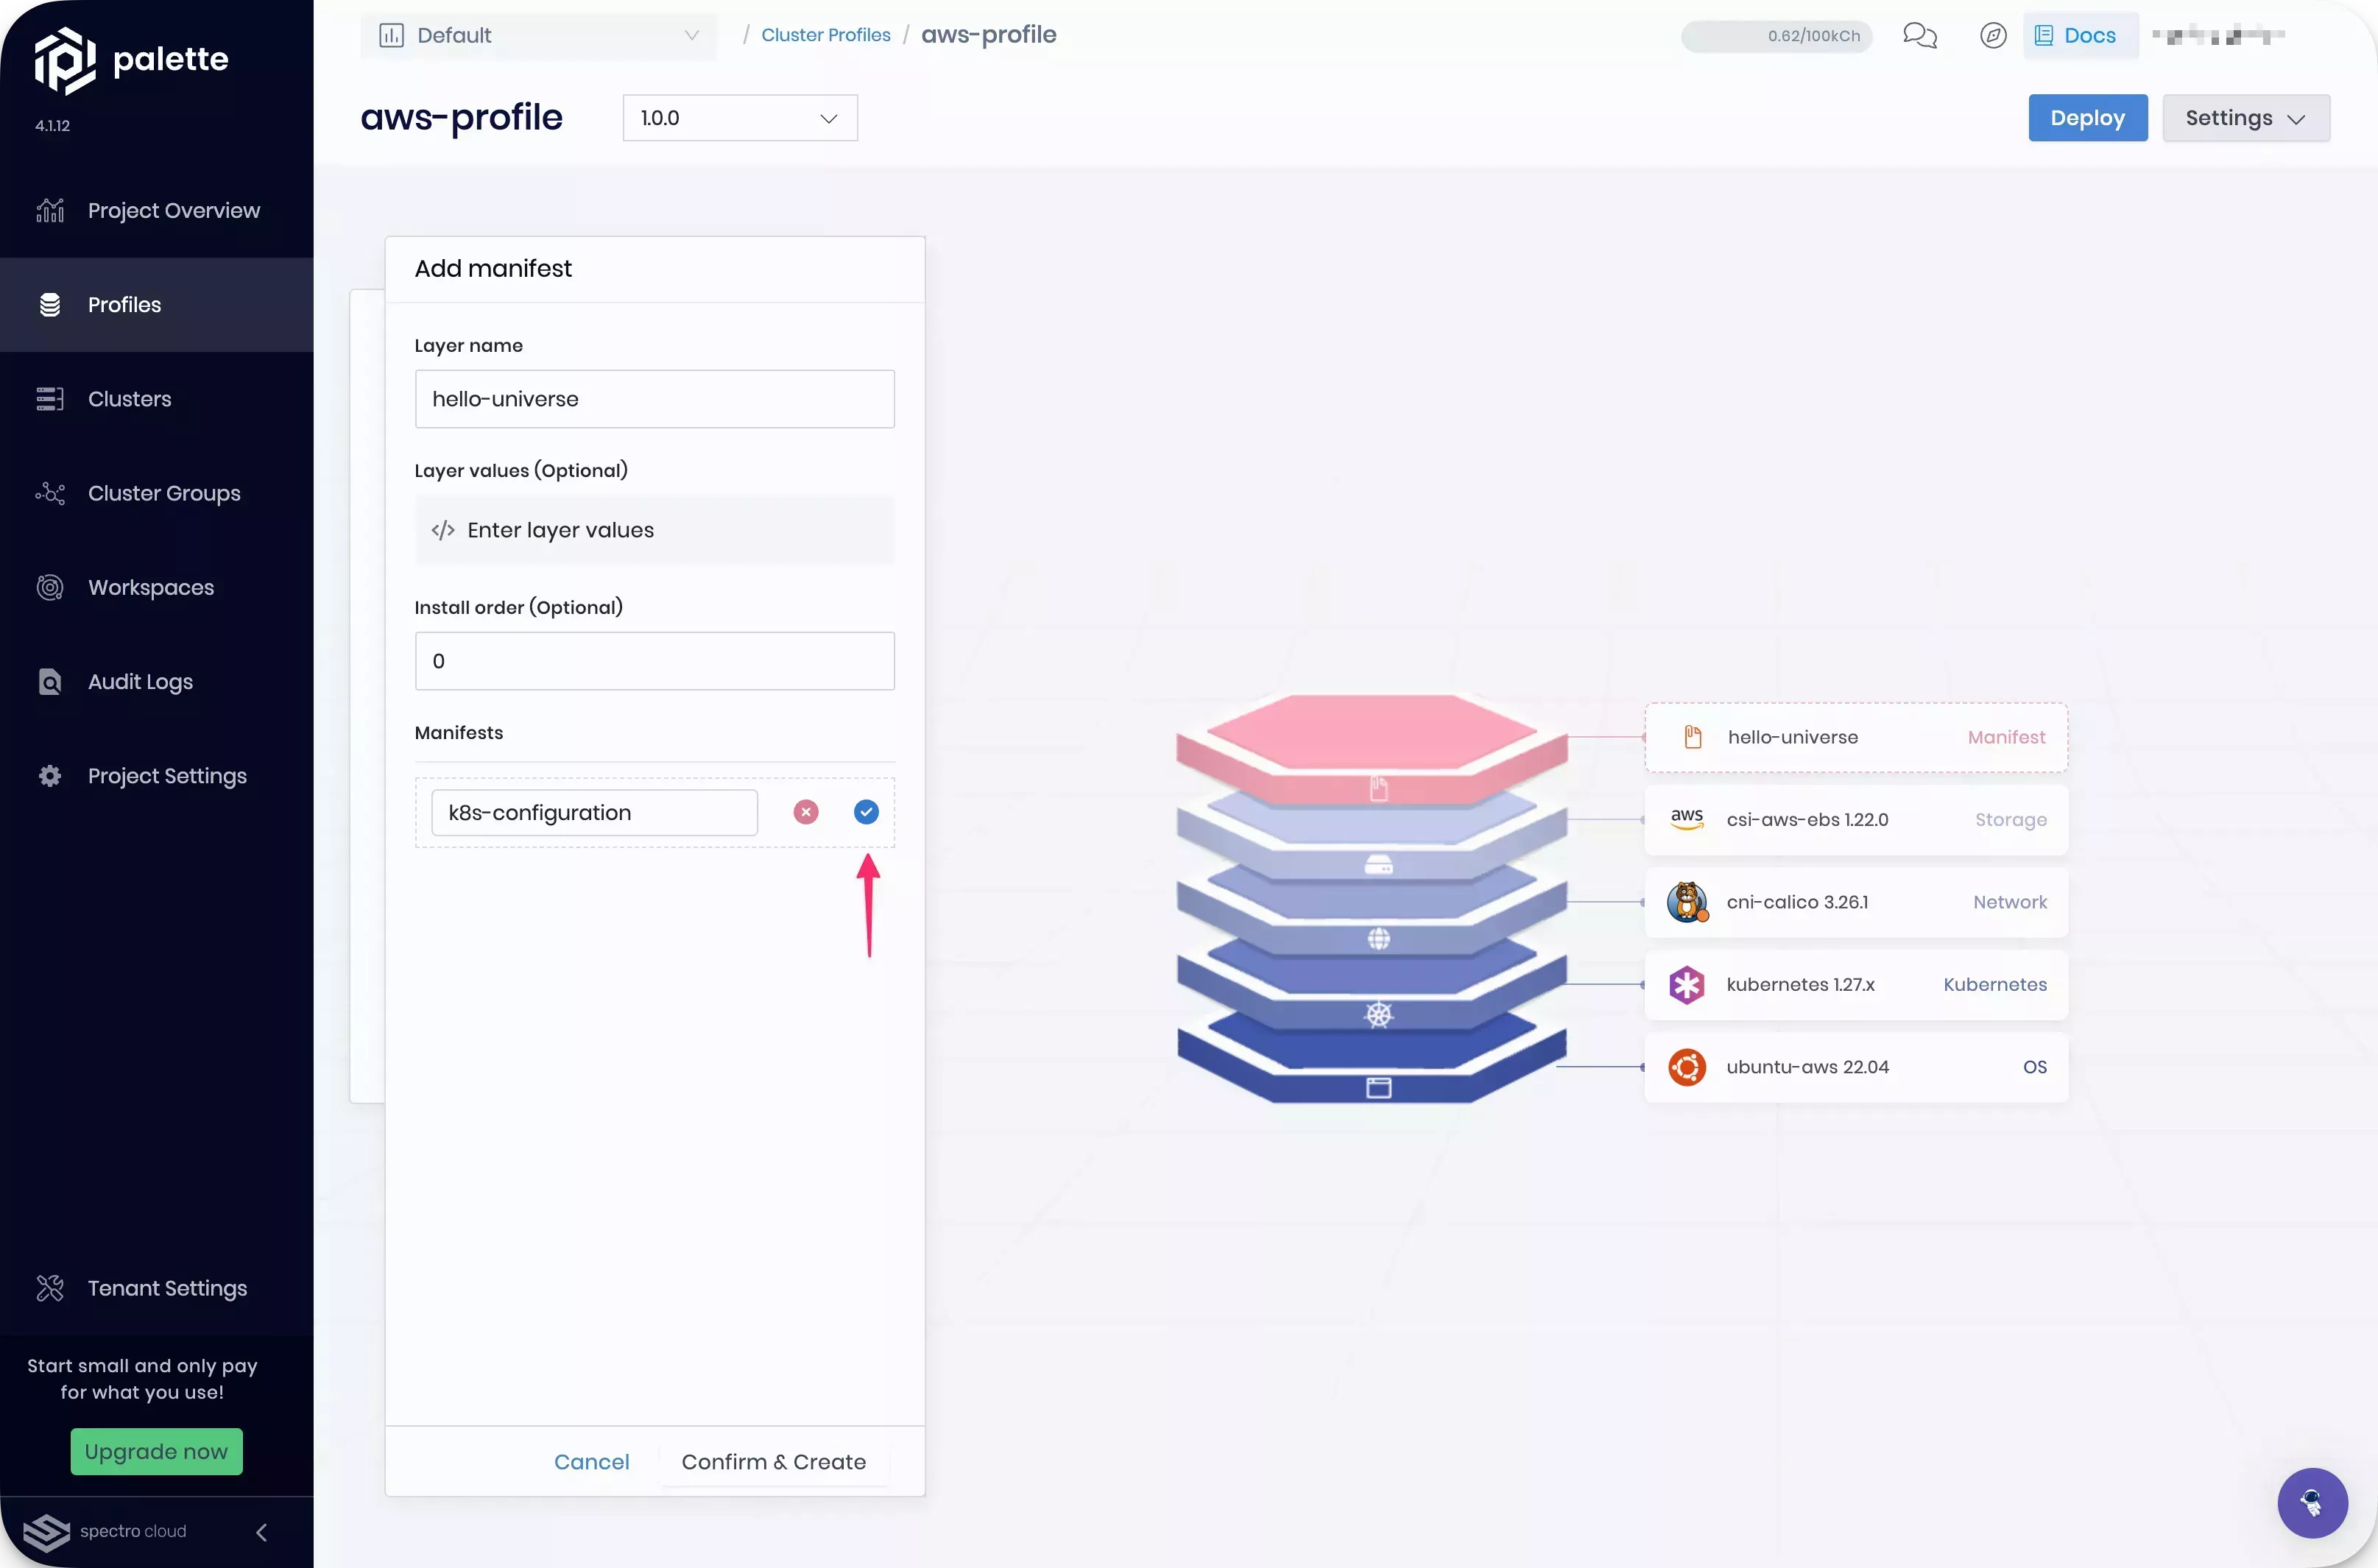
Click on Add Manifest at the top of the page and fill out the following input fields.
- Layer name - The name of the layer. Assign the name application.
- Manifests - Add your manifest by giving it a name and clicking the New Manifest button. Assign a name to the internal manifest and click on the blue button. An empty editor will be displayed on the right side of the screen.
In the manifest editor, insert the following content.
apiVersion: v1
kind: Service
metadata:
  name: hello-universe-service
spec:
  type: LoadBalancer
  ports:
    - protocol: TCP
      port: 8080
      targetPort: 8080
  selector:
    app: hello-universe
---
apiVersion: apps/v1
kind: Deployment
metadata:
  name: hello-universe-deployment
spec:
  replicas: 2
  selector:
    matchLabels:
      app: hello-universe
  template:
    metadata:
      labels:
        app: hello-universe
    spec:
      containers:
        - name: hello-universe
          image: ghcr.io/spectrocloud/hello-universe:1.1.0
          imagePullPolicy: IfNotPresent
          ports:
            - containerPort: 8080
The code snippet you added will deploy the hello-universe application. You may have noticed that the code snippet you added is a Kubernetes configuration. Manifest files are a method you can use to achieve more granular customization of your Kubernetes cluster. You can add any valid Kubernetes configuration to a manifest file.
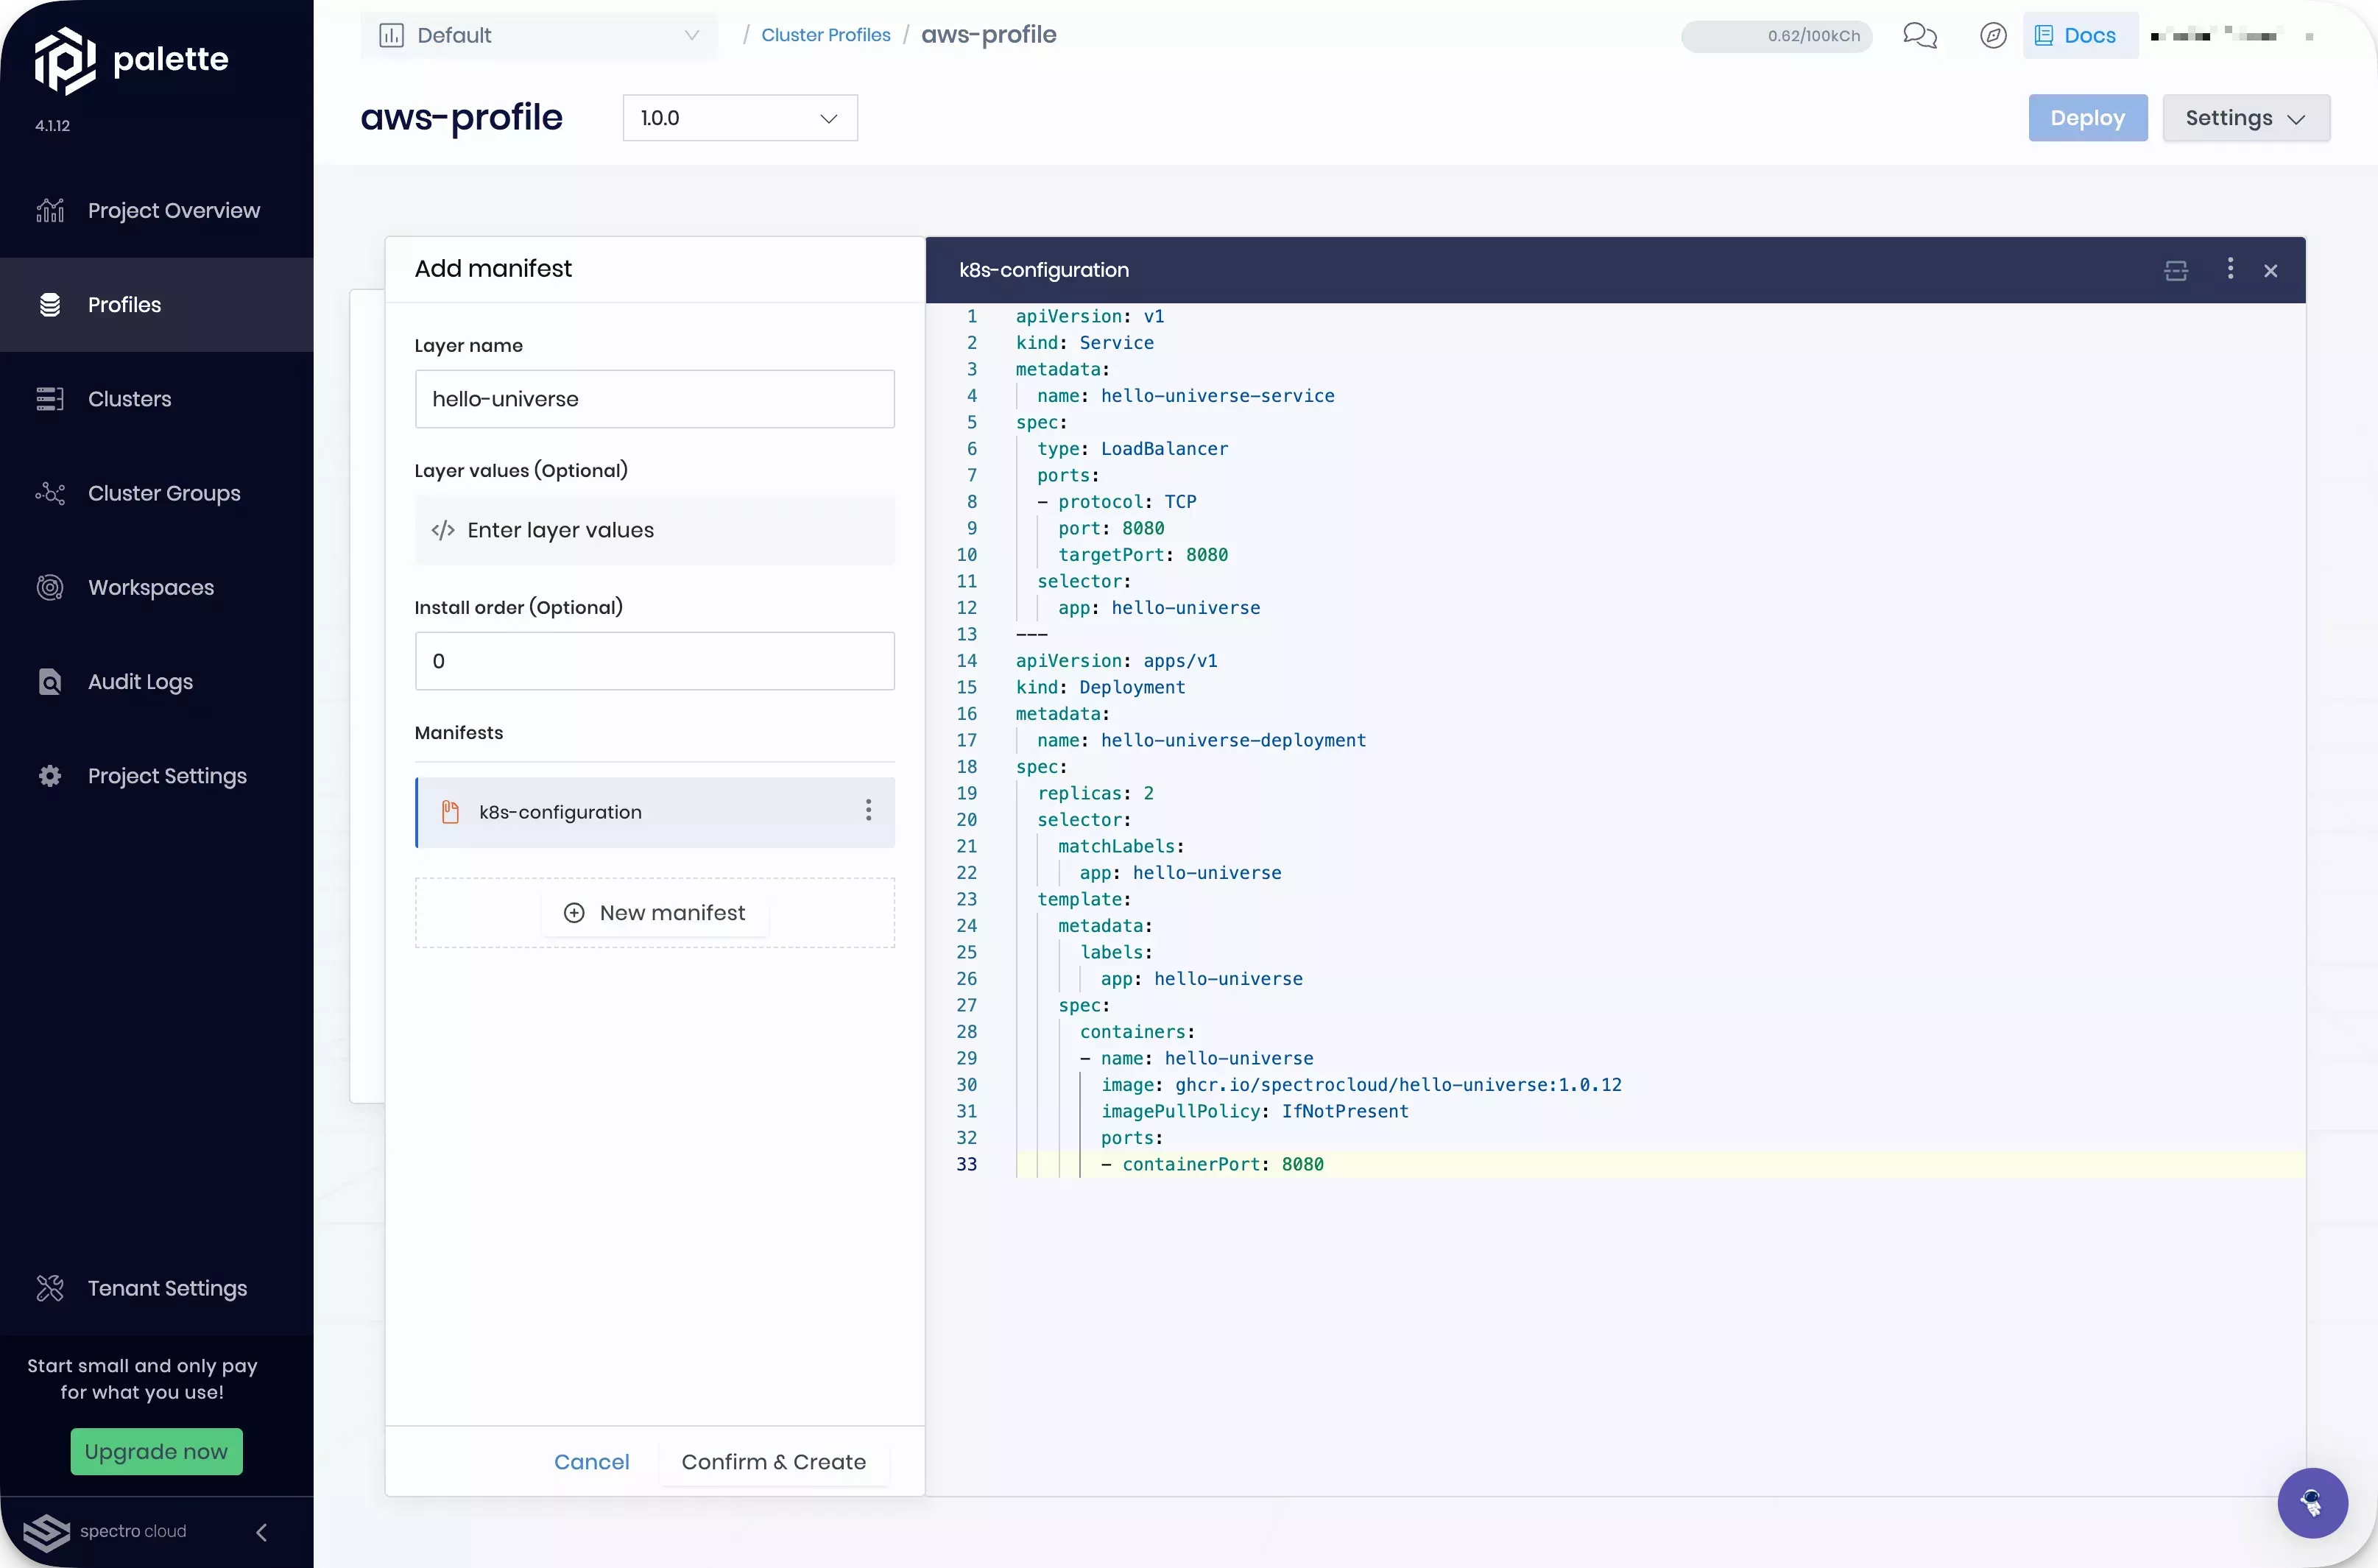
The manifest defines a replica set for the application to simulate a distributed environment with a web application deployed to Kubernetes. The application is assigned a load balancer. Using a load balancer, you can expose a single access point and distribute the workload to both containers.
Click on Confirm & Create to save the manifest. Click on Save Changes to save this new layer to the cluster profile.
Wrap-Up
In this tutorial, you created a cluster profile, which is a template that contains the core layers required to deploy a host cluster using Amazon Web Services (AWS), Microsoft Azure, or Google Cloud Platform (GCP) cloud providers. You added a custom manifest to your profile to deploy a custom workload.
We recommend that you continue to the Deploy a Cluster tutorial to deploy this cluster profile to a host cluster onto your preferred cloud service provider.