Install Palette on VMware
Palette can be installed on VMware vSphere with internet connectivity or in an airgap environment. When you install Palette, a three-node cluster is created. You use the interactive Palette CLI to install Palette on VMware vSphere. Refer to Access Palette for instructions on requesting repository access.
Prerequisites
If you are installing Palette in an airgap environment, ensure you complete all the airgap pre-install steps before proceeding with the installation. Refer to the VMware vSphere Airgap Instructions guide for more information.
-
An AMD64 Linux environment with connectivity to the VMware vSphere environment.
-
Docker or equivalent container runtime installed and available on the Linux host.
-
Palette CLI installed and available. Refer to the Palette CLI Install page for guidance.
-
Review the required VMware vSphere permissions. Ensure you have created the proper custom roles and zone tags.
-
We recommended the following resources for Palette. Refer to the Palette size guidelines for additional sizing information.
-
8 CPUs per VM.
-
16 GB Memory per VM.
-
100 GB Disk Space per VM.
-
-
The following network ports must be accessible for Palette to operate successfully.
-
TCP/443: Inbound to and outbound from the Palette management cluster.
-
TCP/6443: Outbound traffic from the Palette management cluster to the deployed cluster's Kubernetes API server.
-
-
The network IP address range you specify during the installation must not overlap with any existing IP addresses in your environment. The IP address range must also have connectivity to the VMware vSphere environment.
-
Ensure you have an SSL certificate that matches the domain name you will assign to Palette. You will need this to enable HTTPS encryption for Palette. Reach out to your network administrator or security team to obtain the SSL certificate. You need the following files:
-
x509 SSL certificate file in base64 format.
-
x509 SSL certificate key file in base64 format.
-
x509 SSL certificate authority file in base64 format. This file is optional.
-
-
Zone tagging is required for dynamic storage allocation across fault domains when provisioning workloads that require persistent storage. Refer to Zone Tagging for information.
-
Assigned IP addresses for application workload services, such as Load Balancer services.
-
Shared Storage between VMware vSphere hosts.
Self-hosted Palette installations provide a system Private Cloud Gateway (PCG) out-of-the-box and typically do not require a separate, user-installed PCG. However, you can create additional PCGs as needed to support provisioning into remote data centers that do not have a direct incoming connection from the Palette console. To learn how to install a PCG on VMware, check out the VMware guide.
Deployment
The video below demonstrates the installation wizard and the prompts you will encounter. Take a moment to watch the video before you begin the installation process. Make sure to use values that are appropriate for your environment. Use the three-dots Menu in the lower right corner of the video to expand the video to full screen and to change the playback speed.
Use the following steps to install Palette.
-
Log in to your vCenter environment.
-
Create a vSphere VM and Template folder with the name
spectro-templates. Ensure this folder is accessible by the user account you will use to deploy the airgap VerteX installation. -
Use the URL below to import the Operating System and Kubernetes distribution OVA required for the install. Place the OVA in the
spectro-templatesfolder.https://vmwaregoldenimage-console.s3.us-east-2.amazonaws.com/u-2204-0-k-12711-0.ova -
Append an
r_prefix to the OVA name and remove the.ovasuffix after the import. For example, the final output should look liker_u-2204-0-k-12711-0. This naming convention is required for the install process to identify the OVA. Refer to the Supplement Packs page for a list of additional OVAs you can download and upload to your vCenter environment.tipYou can also use the Deploy OVF Template wizard in vSphere to make the OVA available in the
spectro-templatesfolder. Append ther_prefix, and remove the.ovasuffix when assigning a name and target location. You can terminate the deployment after the OVA is available in thespectro-templatesfolder. Refer to the Deploy an OVF or OVA Template guide for more information about deploying an OVA in vCenter. -
Open a terminal window and invoke the Palette CLI by using the
eccommand to install the enterprise cluster. The interactive CLI prompts you for configuration details and then initiates the installation. For more information about theecsubcommand, refer to Palette Commands.palette ec install -
At the Enterprise Cluster Type prompt, choose Palette.
-
Type
yif you want to use Ubuntu Pro. Otherwise, typen. If you choose to use Ubuntu Pro, you will be prompted to enter your Ubuntu Pro token. -
Depending on that type of install of Palette you are using, the Spectro Cloud repository URL value will be different.
- Non-Airgap:
https://saas-repo.console.spectrocloud.com - Airgap: The URL or IP address of the Spectro Cloud Repository that is provided to you by the airgap setup script
infoIf you are using the Palette CLI from inside an airgap support VM, the CLI will automatically detect the airgap environment and prompt you to Use local, air-gapped Spectro Cloud Artifact Repository (SCAR) configuration. Type
yto use the local resources and skip filling in the repository URL and credentials. - Non-Airgap:
-
Enter the repository credentials. Our support team provides the credentials you need to access the public Spectro Cloud repository. Airgap installations, provide the credentials to your private repository provided to you by the airgap setup script .
-
Choose
VMware vSphereas the cloud type. This is the default. -
Type an enterprise cluster name, or use the default value. Your VM instances will use this name as a prefix.
-
When prompted, enter the information listed in each of the following tables.
Environment Configuration
Parameter Description HTTPS Proxy Leave this blank unless you are using an HTTPS Proxy. This setting will be propagated to all EC nodes and all of its target cluster nodes. Example: https://USERNAME:PASSWORD@PROXYIP:PROXYPORT.HTTP Proxy Leave this blank unless you are using an HTTP Proxy. This setting will be propagated to all EC nodes and all of its target cluster nodes. Example: http://USERNAME:PASSWORD@PROXYIP:PROXYPORT.No Proxy You will be prompted to provide a list of local network CIDR addresses, hostnames, and domain names that should be excluded from being a proxy. This setting will be propagated to all the nodes to bypass the proxy server. Example if you have a self-hosted environment: my.company.com,10.10.0.0/16Proxy CA Certificate Filepath The default is blank. You can provide the filepath of a CA certificate on the installer host. If provided, this CA certificate will be copied to each host in the PCG cluster during deployment. The provided path will be used on the PCG cluster hosts. Example: /usr/local/share/ca-certificates/ca.crt.Pod CIDR Enter the CIDR pool IP that will be used to assign IP addresses to pods in the EC cluster. The pod IP addresses should be unique and not overlap with any machine IPs in the environment. Service IP Range Enter the IP address range that will be used to assign IP addresses to services in the EC cluster. The service IP addresses should be unique and not overlap with any machine IPs in the environment. -
Select the tab below that matches your installation type for further guidance.
- Non-Airgap
- Airgap
Select
yto use the Spectro Cloud repository and proceed to the next step.infoIf you are using the Palette CLI from inside an airgap support VM, the CLI will automatically detect the airgap environment and prompt you to Use local, air-gapped Pack Registry? Type
yto use the local resources and skip filling in the OCI registry URL and credentials.Select the OCI registry type and provide the configuration values. Review the following table for more information.
warningFor self-hosted OCI registries, ensure you have the server Certificate Authority (CA) certificate file available on the host where you are using the Palette CLI. You will be prompted to provide the file path to the OCI CA certificate. Failure to provide the OCI CA certificate will result in self-linking errors. Refer to the Self-linking Error troubleshooting guide for more information.
Pack & Image Registry Configuration
Parameter Description Registry Type Specify the type of registry. Allowed values are OCIorOCI ECR. Airgap users, selectOCI.Registry Name Enter the name of the registry. Registry Endpoint Enter the registry endpoint. Airgap users, provide the Spectro Cloud Repository URL or hostname shared by the airgap setup script. Registry Base Path Enter the registry base path. Allow Insecure Connection Bypasses x509 verification. Type nto specify a certificate authority in the follow-up prompt. Airgap user, ensure you selectn.Registry CA certificate filepath Specify the file path to the certificate authority. Use absolute paths. Airgap users, provide the filepath displayed by the aurgap setup script. Registry Username or Registry Access Key Enter the registry username or the access key if using OCI ECR.Registry Password or Registry Secret Key Enter the registry password or the secret key if using OCI ECR.Registry Region Enter the registry region. This option is only available if you are using OCI ECR.ECR Registry Private Type yif the registry is private. Otherwise, typen.Use Public Registry for Images Type yto use a public registry for images. Typento a different registry for images. If you are using another registry for images, you will be prompted to enter the registry URL, base path, username, and password. Airgap users, selectnso that you can specify the values for the OCI registry that contains all the required images.When prompted to Pull images from public registry, type
nand specify the OCI registry configuration values for your image registry. If you are an airgap support VM, the CLI will automatically detect the airgap environment and prompt you to Use local, air-gapped Image Registry? Typeyto use the local resources and skip filling in the OCI registry URL and credentials. Refer to the table above for more information.infoYou will be provided with an opportunity to update the mirror registries values. To exit
vipress theEscapekey and type:wqto save and exit. -
The next set of prompts is for the VMware vSphere account information. Enter the information listed in the following table.
VMware vSphere Account Information
Parameter Description vSphere Endpoint VMware vSphere endpoint. Must be a fully qualified domain name (FQDN) or IP address without a scheme - that is, without an IP protocol, such as https://. Example:vcenter.mycompany.com.vSphere Username VMware vSphere account username. vSphere Password VMware vSphere account password. Allow Insecure Connection Bypasses x509 verification. Type Yif using a VMware vSphere instance with self-signed Transport Layer Security (TLS) certificates. Otherwise, typen.VMware vSphere Cluster Configuration
This information determines where Palette will be deployed in your VMware vSphere environment. The Palette CLI will use the provided VMware credentials to retrieve information from your VMware vSphere environment and present options for you to select from.
Parameter Description Datacenter The installer retrieves the Datacenter automatically. Folder Select the folder that contains the VM instance. Cluster Select the cluster where you want to deploy Palette. Network Select the network where you want to deploy Palette. Resource Pool Select the resource pool where you want to deploy Palette. Datastore Select the datastore where you want to deploy Palette. Fault Domains Configure one or more fault domains by selecting values for these properties: Cluster, Network (with network connectivity), Resource Pool, and Storage Type (Datastore or VM Storage Policy). Note that when configuring the Network, if you are using a distributed switch, choose the network that contains the switch. NTP Servers You can provide a list of Network Time Protocol (NTP) servers. SSH Public Keys Provide any public SSH keys to access your Palette VMs. This option opens up your system's default text editor. Vi is the default text editor for most Linux distributions. To review basic vi commands, check out the vi Commands reference. -
Specify the IP pool configuration. The placement type can be Static or Dynamic Domain Name Server (DDNS). Choosing static placement creates an IP pool from which VMs are assigned IP addresses. Choosing DDNS assigns IP addresses using DNS.
Static Placement Configuration
Parameter Description IP Start range Enter the first address in the EC IP pool range. IP End range Enter the last address in the EC IP pool range. Network Prefix Enter the network prefix for the IP pool range. Valid values are in [0, 32]. Example: 18.Gateway IP Address Enter the IP address of the static IP gateway. Name servers Comma-separated list of DNS name server IP addresses. Name server search suffixes An optional comma-separated list of DNS search domains. -
The last set of prompts are for the vSphere machine and database configuration. Use the following table for guidance.
vSphere Machine Configuration
Parameter Description Small Deploy VM nodes with 8 CPU, 16 GB memory, 60 GB storage. The database specs are 20 GB database with 2 CPU limit and 4 GB memory limit. Medium Deploy VM nodes with 16 CPU, 32 GB memory, 100 GB storage. The database specs are 60 GB database with 4 cpu limit and 8 GB memory limit. Large Deploy VM nodes with 32 CPU, 64 GB memory, 120 GB storage. The database specs are 80 GB database with 8 CPU limit and 16 GB memory limit. Custom Deploy VM nodes with custom CPU, memory, storage, database size, CPU limit, and memory limit. If you specify custom, you will be prompted for the CPU, memory, and storage. Additional vSphere Machine Configuration
Parameter Description Node Affinity Select the node affinity. Enter yto schedule all Palette pods on control plane nodes.The installation process stands up a kind cluster locally that will orchestrate the remainder of the installation. The installation takes some time to complete.
The Palette CLI creates a file named
ec.yamlthat contains the information you provided the wizard, and its location is displayed in the terminal. Credentials and tokens are encrypted in the YAML file.==== Enterprise Cluster config saved ====
Location: :/home/spectro/.palette/ec/ec-20230706150945/ec.yamltipIf an error occurs during installation, remove the
kindcluster that was created and restart the installation. To remove thekindcluster, issue the following command. Replacespectro-mgmt-clusterwith the name of your cluster if you used a different name.kind delete cluster spectro-mgmt-clusterRestart the install process by referencing the
ec.yamlfile that was created during the first installation attempt. For example:palette ec install --config /home/spectro/.palette/ec/ec-20230706150945/ec.yamlWhen the installation is complete, Enterprise Cluster Details that include a URL and default credentials are displayed in the terminal. You will use these to access the Palette system console.
===========================================
==== Enterprise Cluster System Console ====
===========================================
Console URL: https://10.10.100.0/system
Username:    ************
Password:    ************

The first of three Enterprise Cluster nodes is online and will now provision nodes two and three.

It will take another ~30-45 minutes for the installation to complete.

You can monitor its progress via kubectl/k9s or by viewing the System Console.

export KUBECONFIG=/ubuntu/.palette/ec/ec-20231012215923/spectro_mgmt.conf -
Copy the URL to the browser to access the system console. You will be prompted to reset the password.
infoThe first time you visit the Palette system console, a warning message about an untrusted SSL certificate may appear. This is expected, as you have not yet uploaded your SSL certificate to Palette. You can ignore this warning message and proceed.
-
Copy the URL and paste it in your browser's URL field to access the system console. You will be prompted to reset the password.
infoThe first time you visit the Palette VerteX system console, a warning message about an untrusted SSL certificate may appear. This is expected, as you have not yet uploaded your SSL certificate to Palette VerteX. You can ignore this warning message and proceed.
-
Log in to the system console using the credentials provided in the Enterprise Cluster Details output. After login, you will be prompted to create a new password. Enter a new password and save your changes. You will be redirected to the Palette system console.
-
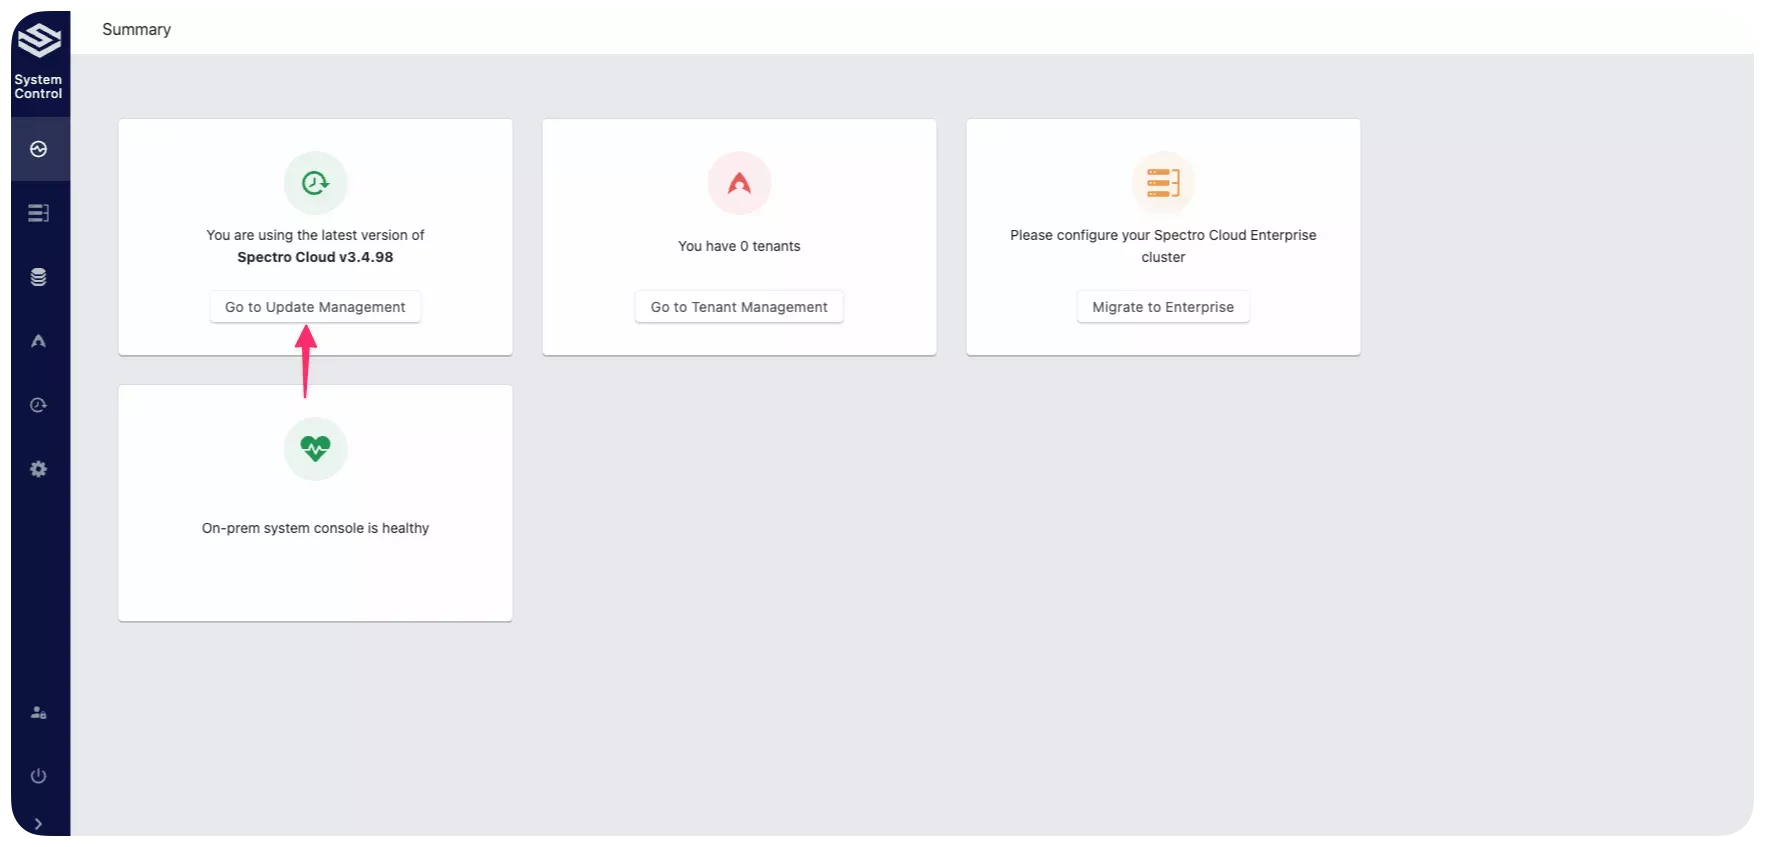
After login, a Summary page is displayed. Palette is installed with a self-signed SSL certificate. To assign a different SSL certificate you must upload the SSL certificate, SSL certificate key, and SSL certificate authority files to Palette. You can upload the files using the Palette system console. Refer to the Configure HTTPS Encryption page for instructions on how to upload the SSL certificate files to Palette.
-
The last step is to start setting up a tenant. To learn how to create a tenant, check out the Tenant Management guide.
Validate
You can verify the installation is successful if you can access the system console using the IP address provided in Enterprise Cluster Details and if the Summary page displays the Go to Tenant Management button.
You can also validate that a three-node Kubernetes cluster is launched and Palette is deployed on it.
-
Log in to the vCenter Server by using vSphere Client.
-
Navigate to your vSphere Datacenter and locate your Palette VM instances. The VMs are prefixed with the name you provided during the installation. For example, if you provided
spectro-mgmt-clusteras the name, the VMs are namedspectro-mgmt-cluster-, followed by a unique set of alphanumeric values. Verify three nodes are available. -
Open a web browser session, and use the IP address provided in Enterprise Cluster Details at the completion of the installation to connect to the Palette system console. Copy the IP address to the address bar and append
/system. -
Log in using your credentials.
-
A Summary page will be displayed that contains a tile with a Go to Tenant Management button. After initial installation, the Summary page shows there are zero tenants.
Next Steps
You have successfully installed Palette in vSphere. Your next steps are to configure Palette for your organization. Start by creating the first tenant to host your users. Refer to Create a Tenant for instructions.
After you create the tenant, you are ready to configure authentication types in tenant settings and create users and teams.