Resource Management
Workspaces give you a unified view of resource consumption in specified namespaces across all clusters in the workspace. Additionally, you can implement resource quotas for the workspace as a whole, or for individual namespaces. The resource quotas are implemented using the native Kubernetes ResourceQuota object. Refer to the Kubernetes documentation to learn more about resource quotas.
Monitor Resource Consumption
Workspaces allow you to view the workloads such as pods, deployments, daemon sets, and stateful sets in the namespaces that comprise the workspace.
In the workspace details page, the landing Namespaces tab give you an overview of how much resources are consumed by each namespace. The CPU and Memory column display the total CPU and memory consumed by the namespaces with the same name in the entire workspace.
You can view more workloads by selecting the corresponding tab. For example, select the Pods tab if you want to monitor pod workloads. Each tab will show you the CPU and memory consumption of the corresponding workload in the entire workspace.
| Resource | Available Information |
|---|---|
| Namespaces | CPU and memory utilization of the namespace in each cluster. |
| Pods | Lists all the pods in a particular namespace with cluster names with detailed health status, age, and resource utilization. |
| Deployments | All deployments in the namespaces included in the workspace and their age, pods, and resource utilization. |
| DaemonSets | All daemon set in the namespaces included in the workspace and their age, pods, and resource utilization. |
| StatefulSets | All the active StatefulSets in the namespaces included in the workspace and their age, pods, replicas, and resource utilization. |
| Jobs | All jobs in the namespaces included in the workspace and their status. |
| CronJobs | All cron jobs in the namespaces included in the workspace and their status. |
| RoleBinding | All role bindings in the namespaces included in the workspace, including the role name and the subject name. |
| ClusterRoleBinding | All cluster role bindings in the clusters included in the workspace. |
Implement Resource Quotas
You can implement resource quotas on an entire workspace or implement them on individual namespaces. Resource quotas are implemented through Kubernetes' native ResourceQuota object. For more information about resource quotas in Kubernetes, refer to Kubernetes documentation.
Prerequisites
-
An active Palette workspace. Refer to Create a Workspace to learn how to create one.
-
You are logged in as a Palette user that has the permission to modify workspaces. For more information, refer to Permissions.
Limitations
- When using GPU Allocation, NVIDIA is the only supported vendor.
Procedure
-
Log in to Palette.
-
In the drop-down Menu at the top of the page, choose the project that has your workspace.
-
On the left Main Menu, click Workspaces.
-
Click on the workspace you want to update.
-
Click Settings in the upper-right corner.
-
Click Namespaces.
-
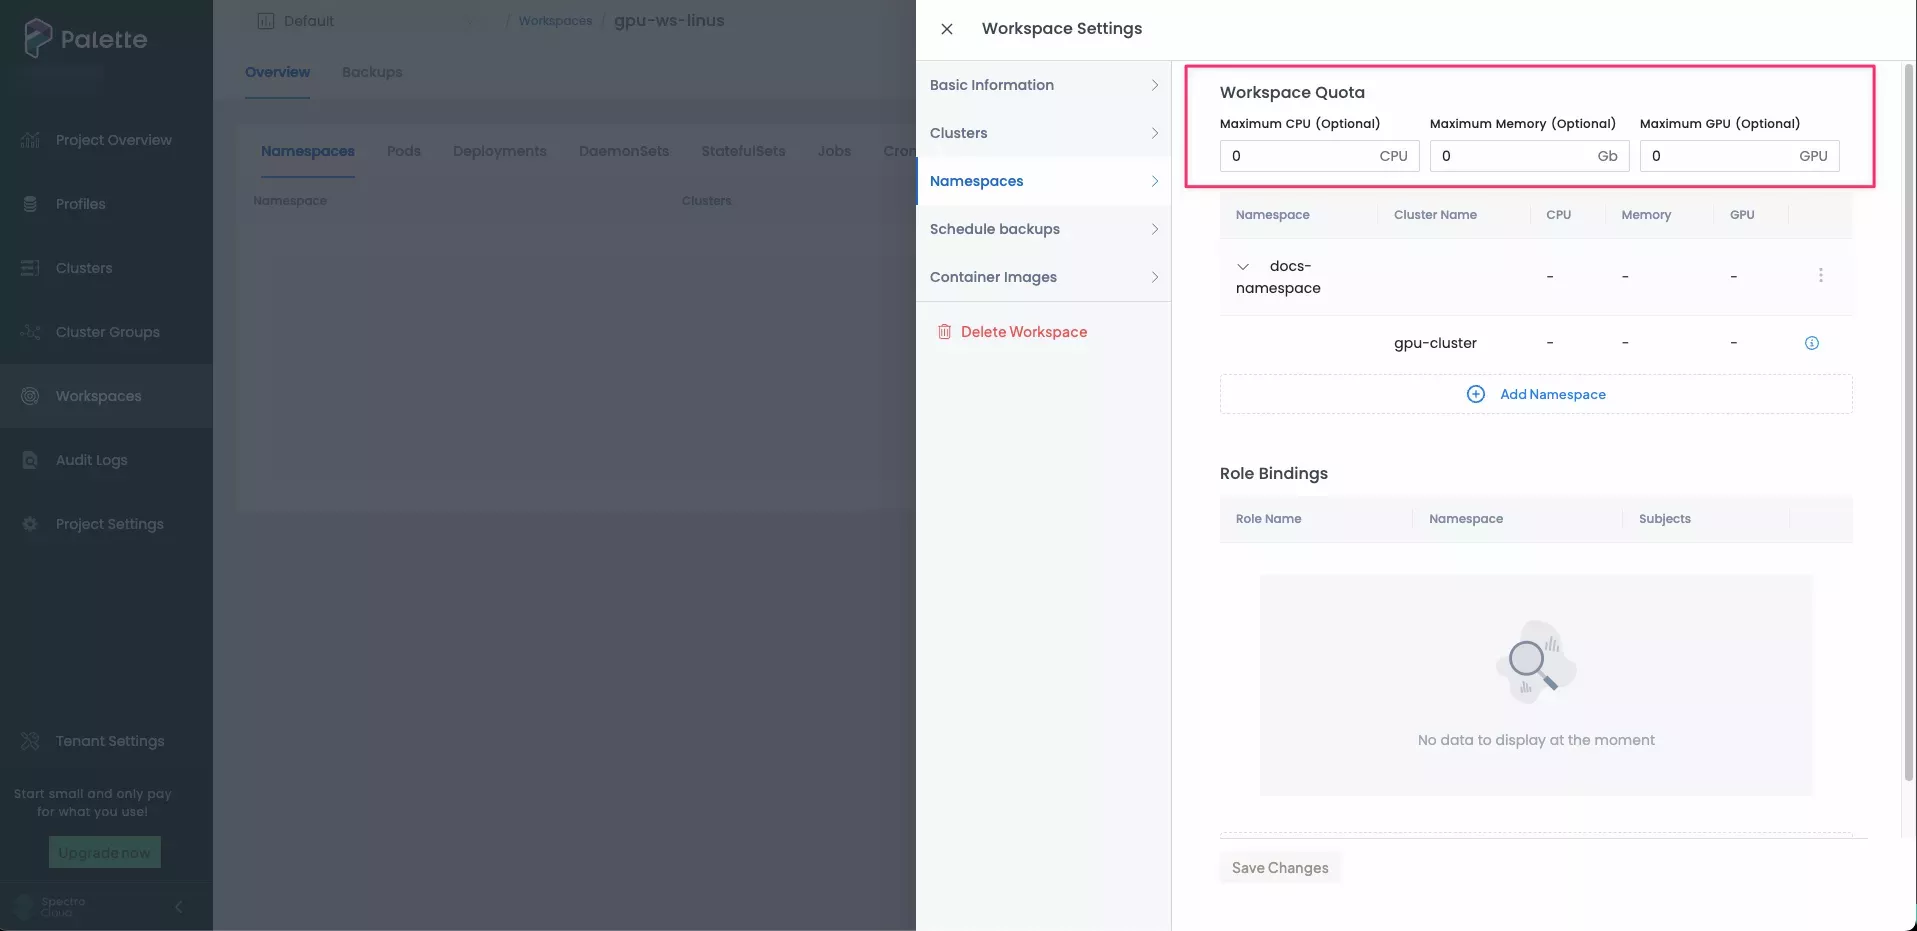
Under Workspace Quota, you can specify the amount of CPU, memory, and GPU that the entire workspace is allowed to consume. The default value is 0, which imposes no limit.

-
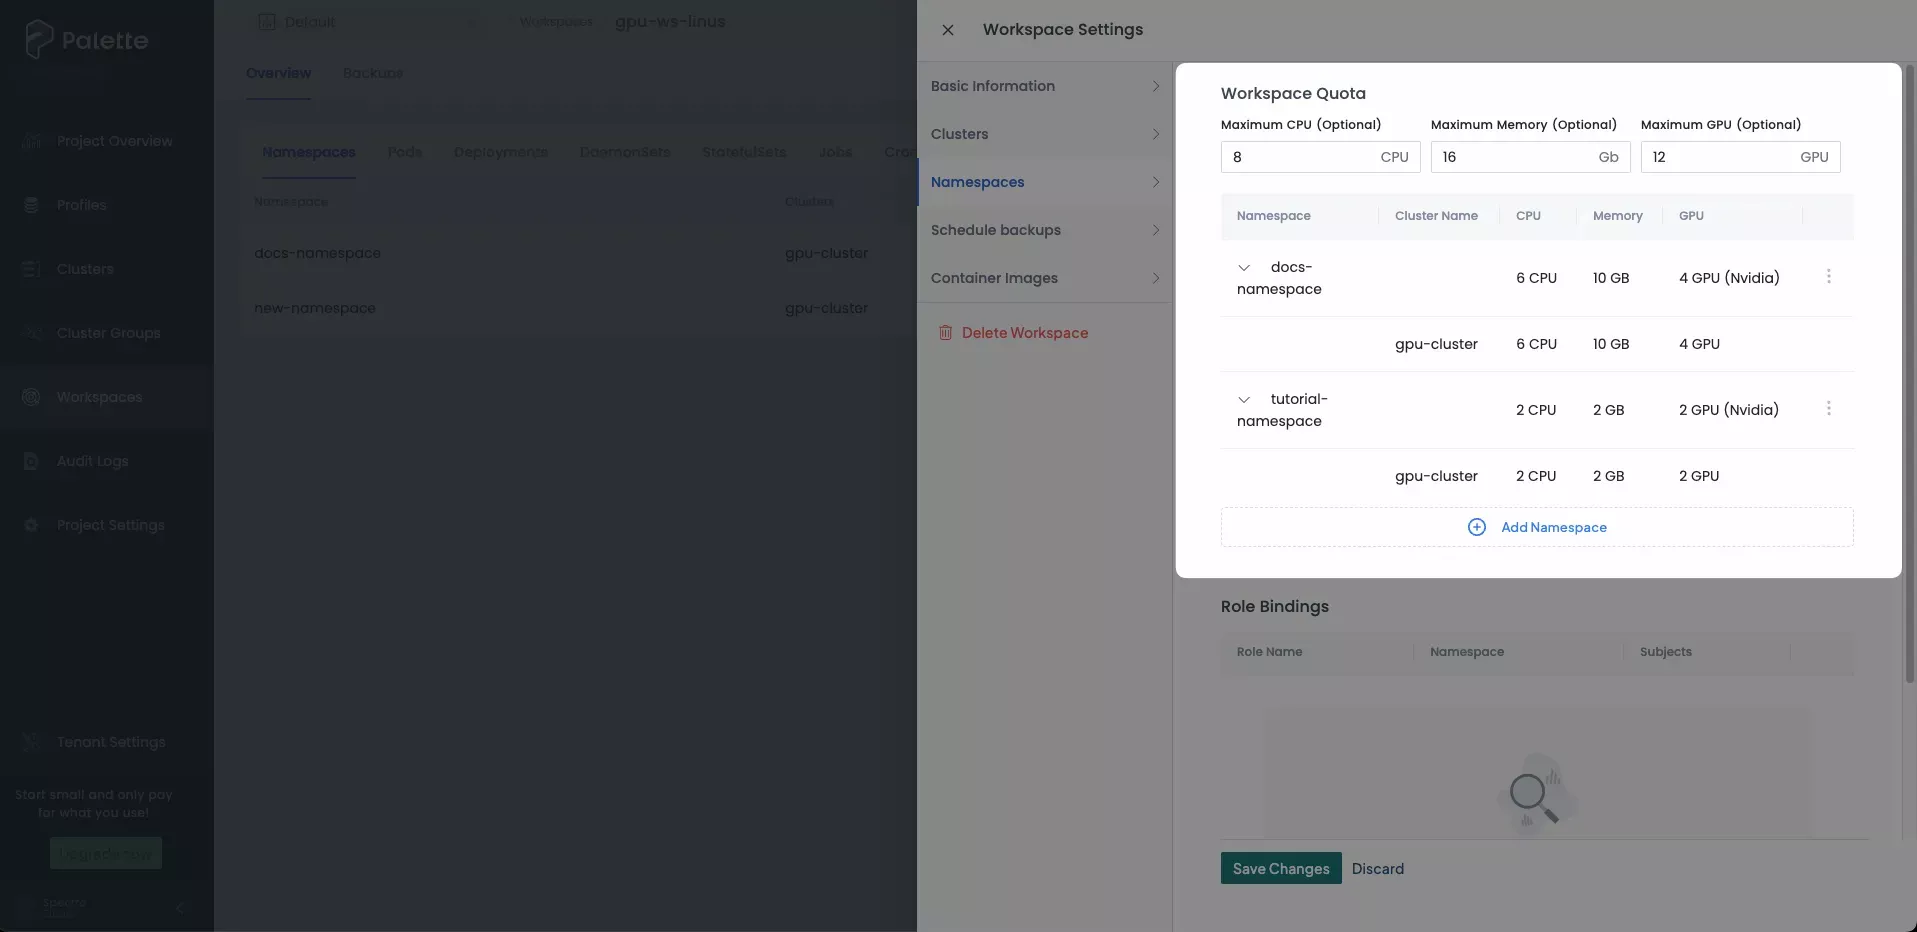
If you want to limit resource use based on namespaces, click on the three-dot menu and select Edit. Enter the desired CPU, memory, and GPU limits in the CPU Allocation, Memory Allocation, and GPU Allocation columns. These will populate the same values in the Cluster Quota. You can alter these to be lower or higher than the Namespace quote as long as the total values are lower than the Workspace Quota.
When using GPU Allocation you must use a whole number and must select the vendor from the dropdown. You must also ensure that the appropriate GPU device plugin is installed and compatible with your nodes to enforce the quota as Palette does not verify GPU vendor selection.
infoAt this time, NVIDIA is the only supported vendor.

By default, the namespace in each cluster has the same resource limit. You can change this and enter the limit on the namespace in one particular cluster. You must ensure that resources configured to individual namespaces do not exceed the workspace quota when added together.
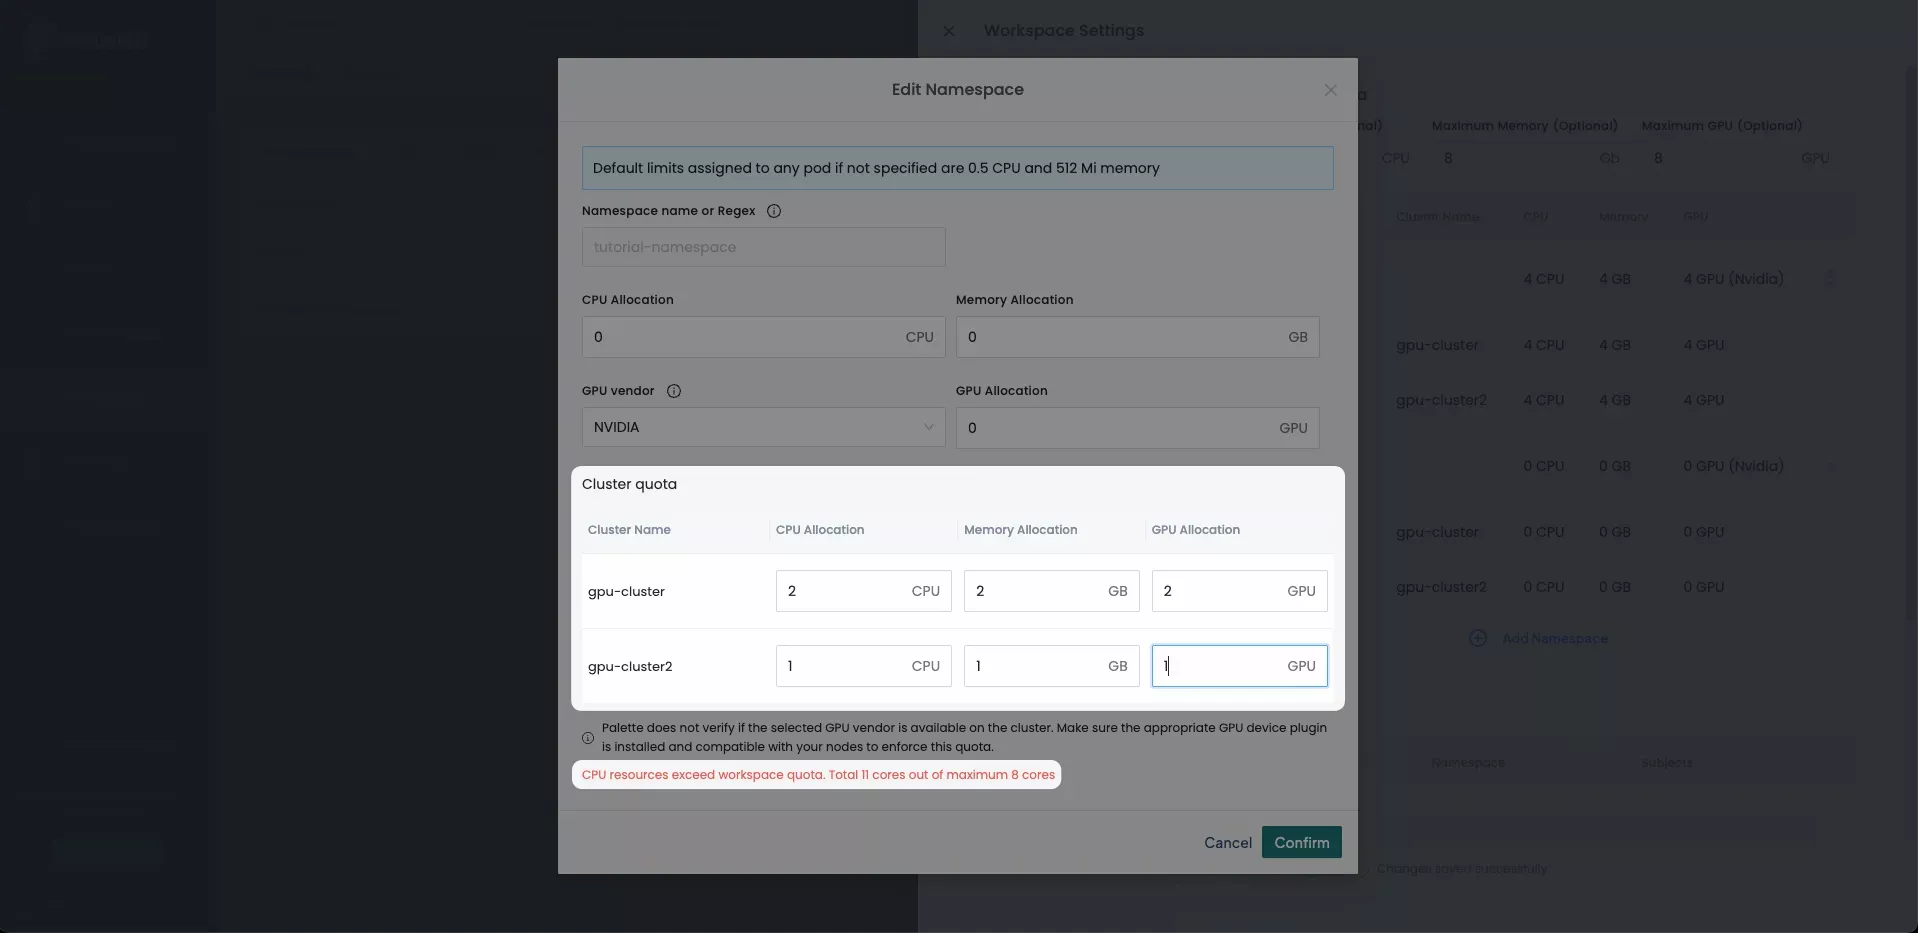
For example, if you have two clusters in the workspace and impose a workspace-level quota of 8 Gi of memory, 8 CPUs, and 8 GPUs; and when each instance of the namespace in each cluster is added together, the total memory, CPU, and GPU quota cannot exceed 8 Gi of memory, 8 CPUs, and 8GPUs.
The following resource quota configuration is not allowed for a workspace with 8 Gi of memory, 8 CPUs, and 8 GPUs because the resource quotas add up to 11 Gi, 11 CPUs, and 11 GPUs.
Cluster 1 Cluster 2 Namespace 1 4 Gi, 4 CPUs, 4 GPUs 4 Gi, 4 CPUs, 4 GPUs Namespace 2 2 Gi, 2 CPU, 2 GPUs 1 Gi, 1 CPU, 1 GPU 
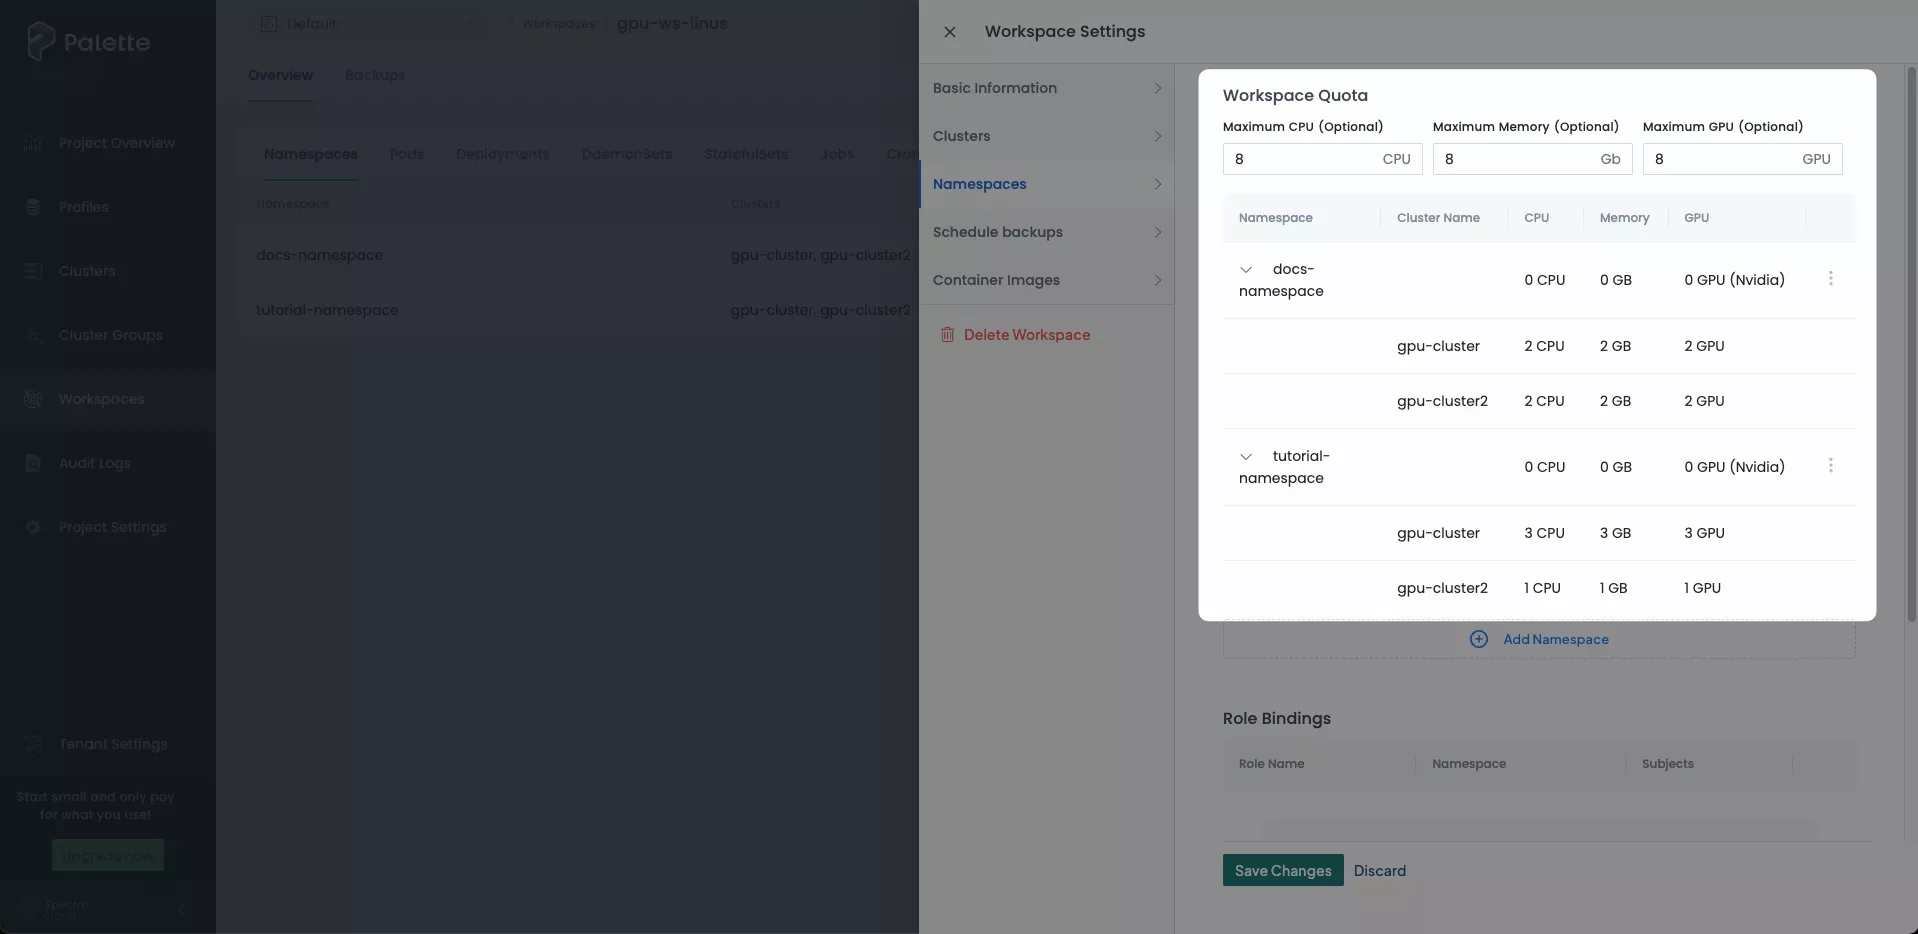
The following resource quota configuration is allowed because the total quota is 8 Gi, 8 CPUs, and 8 GPUs.
Cluster 1 Cluster 2 Namespace 1 2 Gi, 2 CPUs, 2 GPUs 2 Gi, 2 CPUs, 2 GPUs Namespace 2 3 Gi, 3 CPU, 3 GPUs 1 Gi, 1 CPU, 1 GPU 
Validate
-
Connect to a cluster in your workspace using kubectl. For more information, refer to Access Cluster with kubectl.
-
Issue the following command to view the resource quotas created for your cluster. Confirm that the corresponding resource quotas have been created. You may also use the
--namespaceflag to choose a specific namespace to examine.kubectl get resourcequota --all-namespaces