Start Migration Plans
Follow this guide to start migration plans in the VM Migration Assistant.
Limitations
-
You can migrate only VMs hosted in VMware vSphere 7.0 or 8.0.
-
You can migrate only VMs whose operating systems are present in the
virt-v2vsupported guest systems list. Refer to Verified Migrations for a list of operating systems and migration combinations verified by Spectro Cloud. -
If you are migrating more than one VM in the same plan, they must all share the same network.
Start Cold Migration Plans
Prerequisites
-
A cold migration plan created and ready to start. Refer to Create Migration Plans for guidance.
-
One or more VMs hosted in VMware vSphere.
- VMs operating Windows must be shut down at the virtualized OS level.
- The Virtual Machine Migration Assistant pack must be added to your cluster profile. Refer to Create a VM Migration Assistant Cluster Profile for guidance.
- The VM Migration Assistant service console must be accessible from a web browser.
Start Cold Migration
-
From the left Main Menu, select Plans for virtualization.
-
In the top-left corner, use the Namespace drop-down Menu to select your Kubernetes namespace for the migration.
-
Find your plan in the table and click the plan name to view its details.
-
Click Start migration in the top-right corner.
-
Click Start in the pop-up window.
-
Click on the Virtual Machines tab.
-
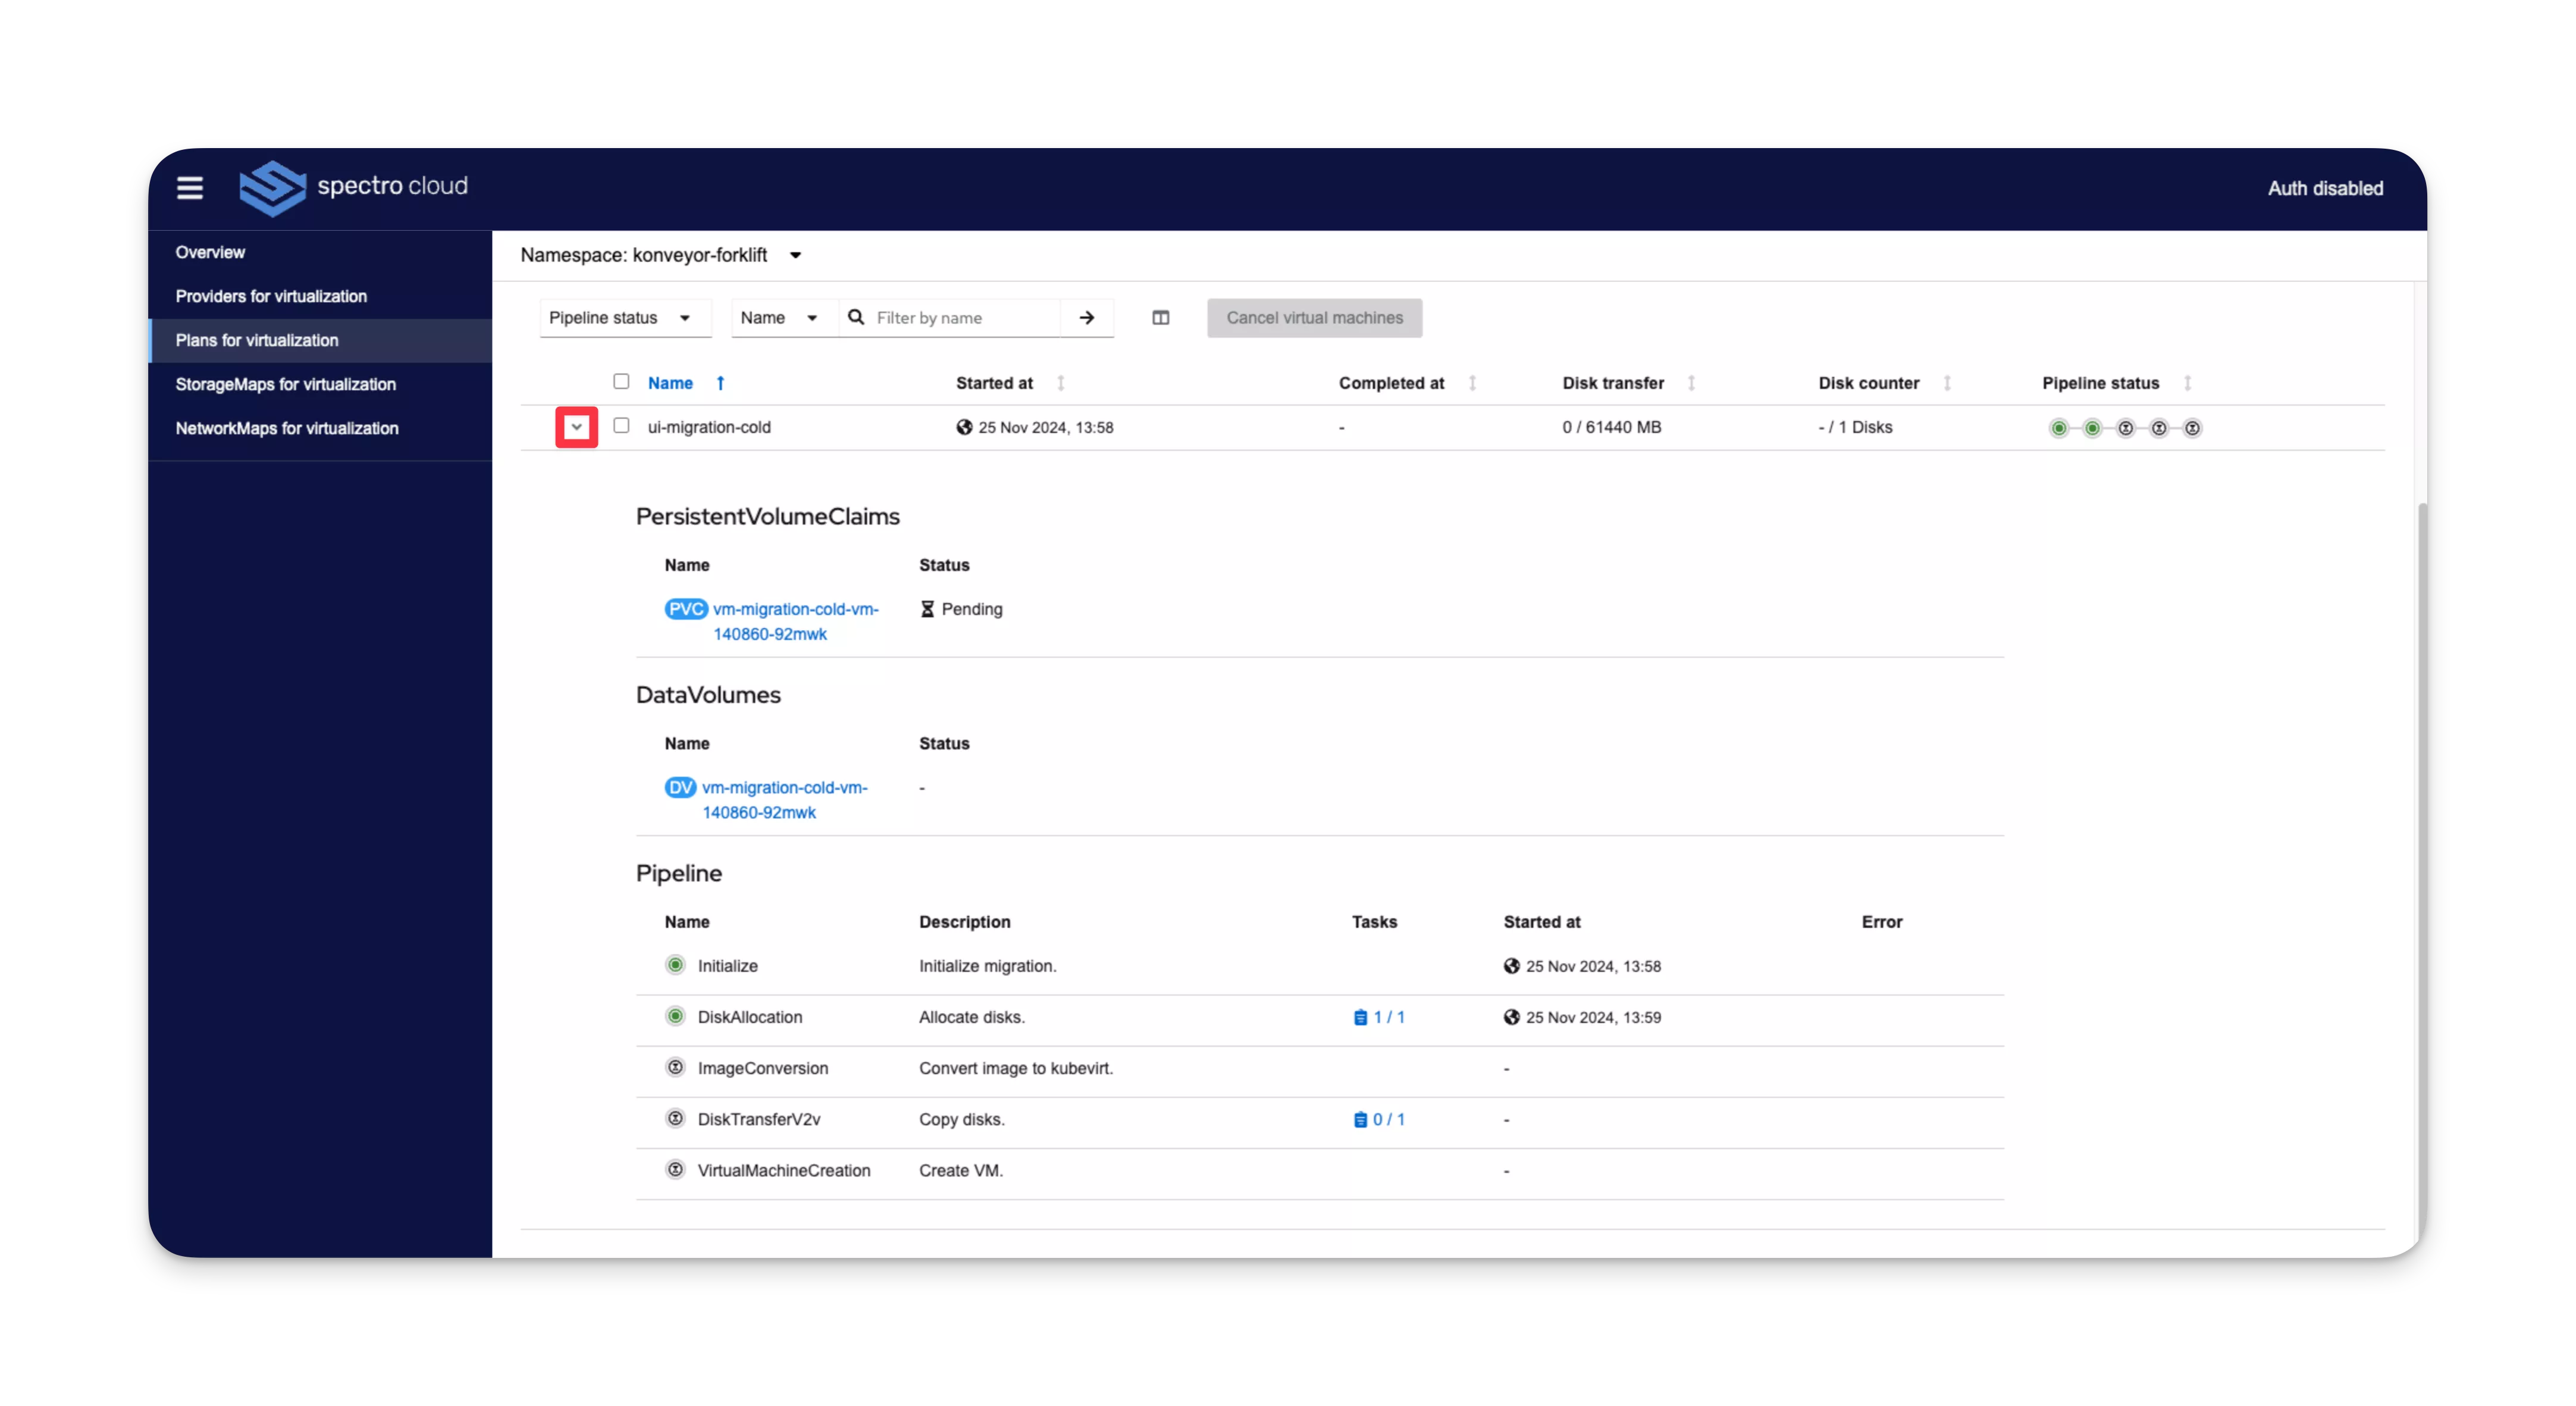
In the table, view the status of the migration for each VM in the Pipeline status column. Each circle represents a stage in the migration. You can click on a circle to view additional details.
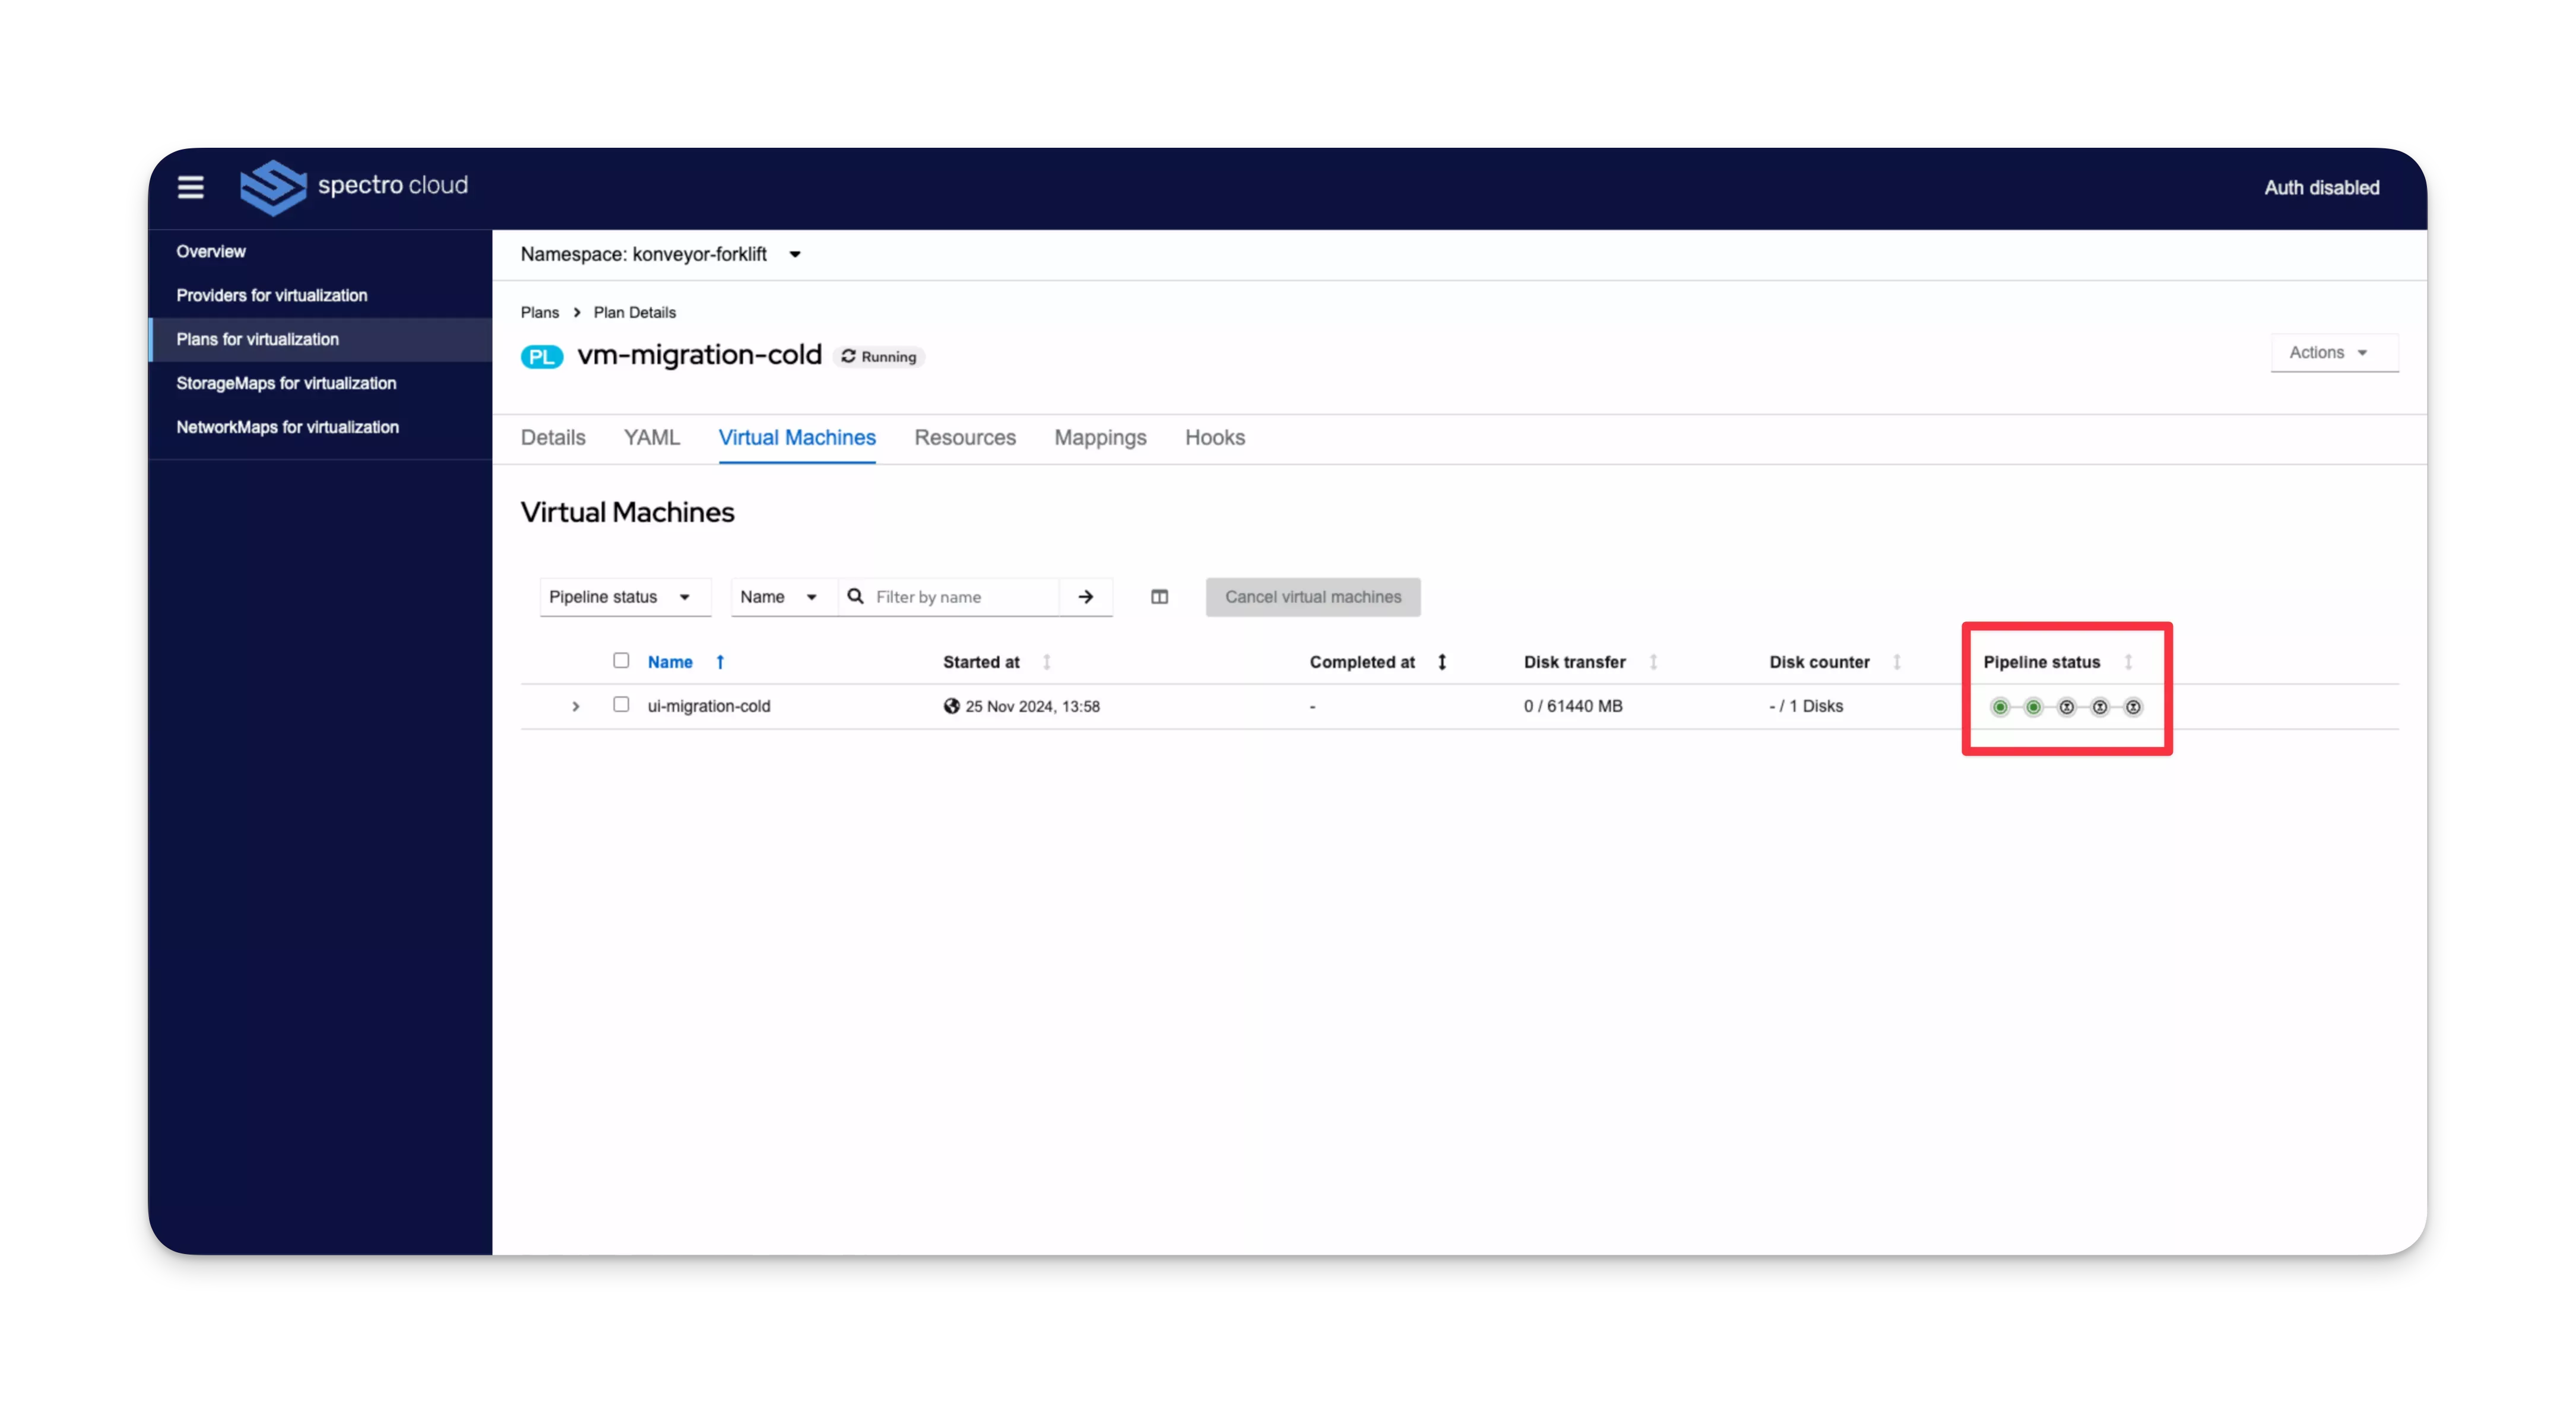
View additional pipeline details by clicking on the > icon next to the VM name.
Validate
-
From the left Main Menu, select Plans for virtualization.
-
In the top-left corner, use the Namespace drop-down Menu to select your Kubernetes namespace for the migration.
-
In the table, click on a plan name to view the plan details.
-
In the Details tab, the plan status displays as Successful.
-
Log in to Palette.
-
From the left Main Menu, select Clusters. Then, choose the VMO cluster that you migrated your VMs to. The Overview tab appears.
-
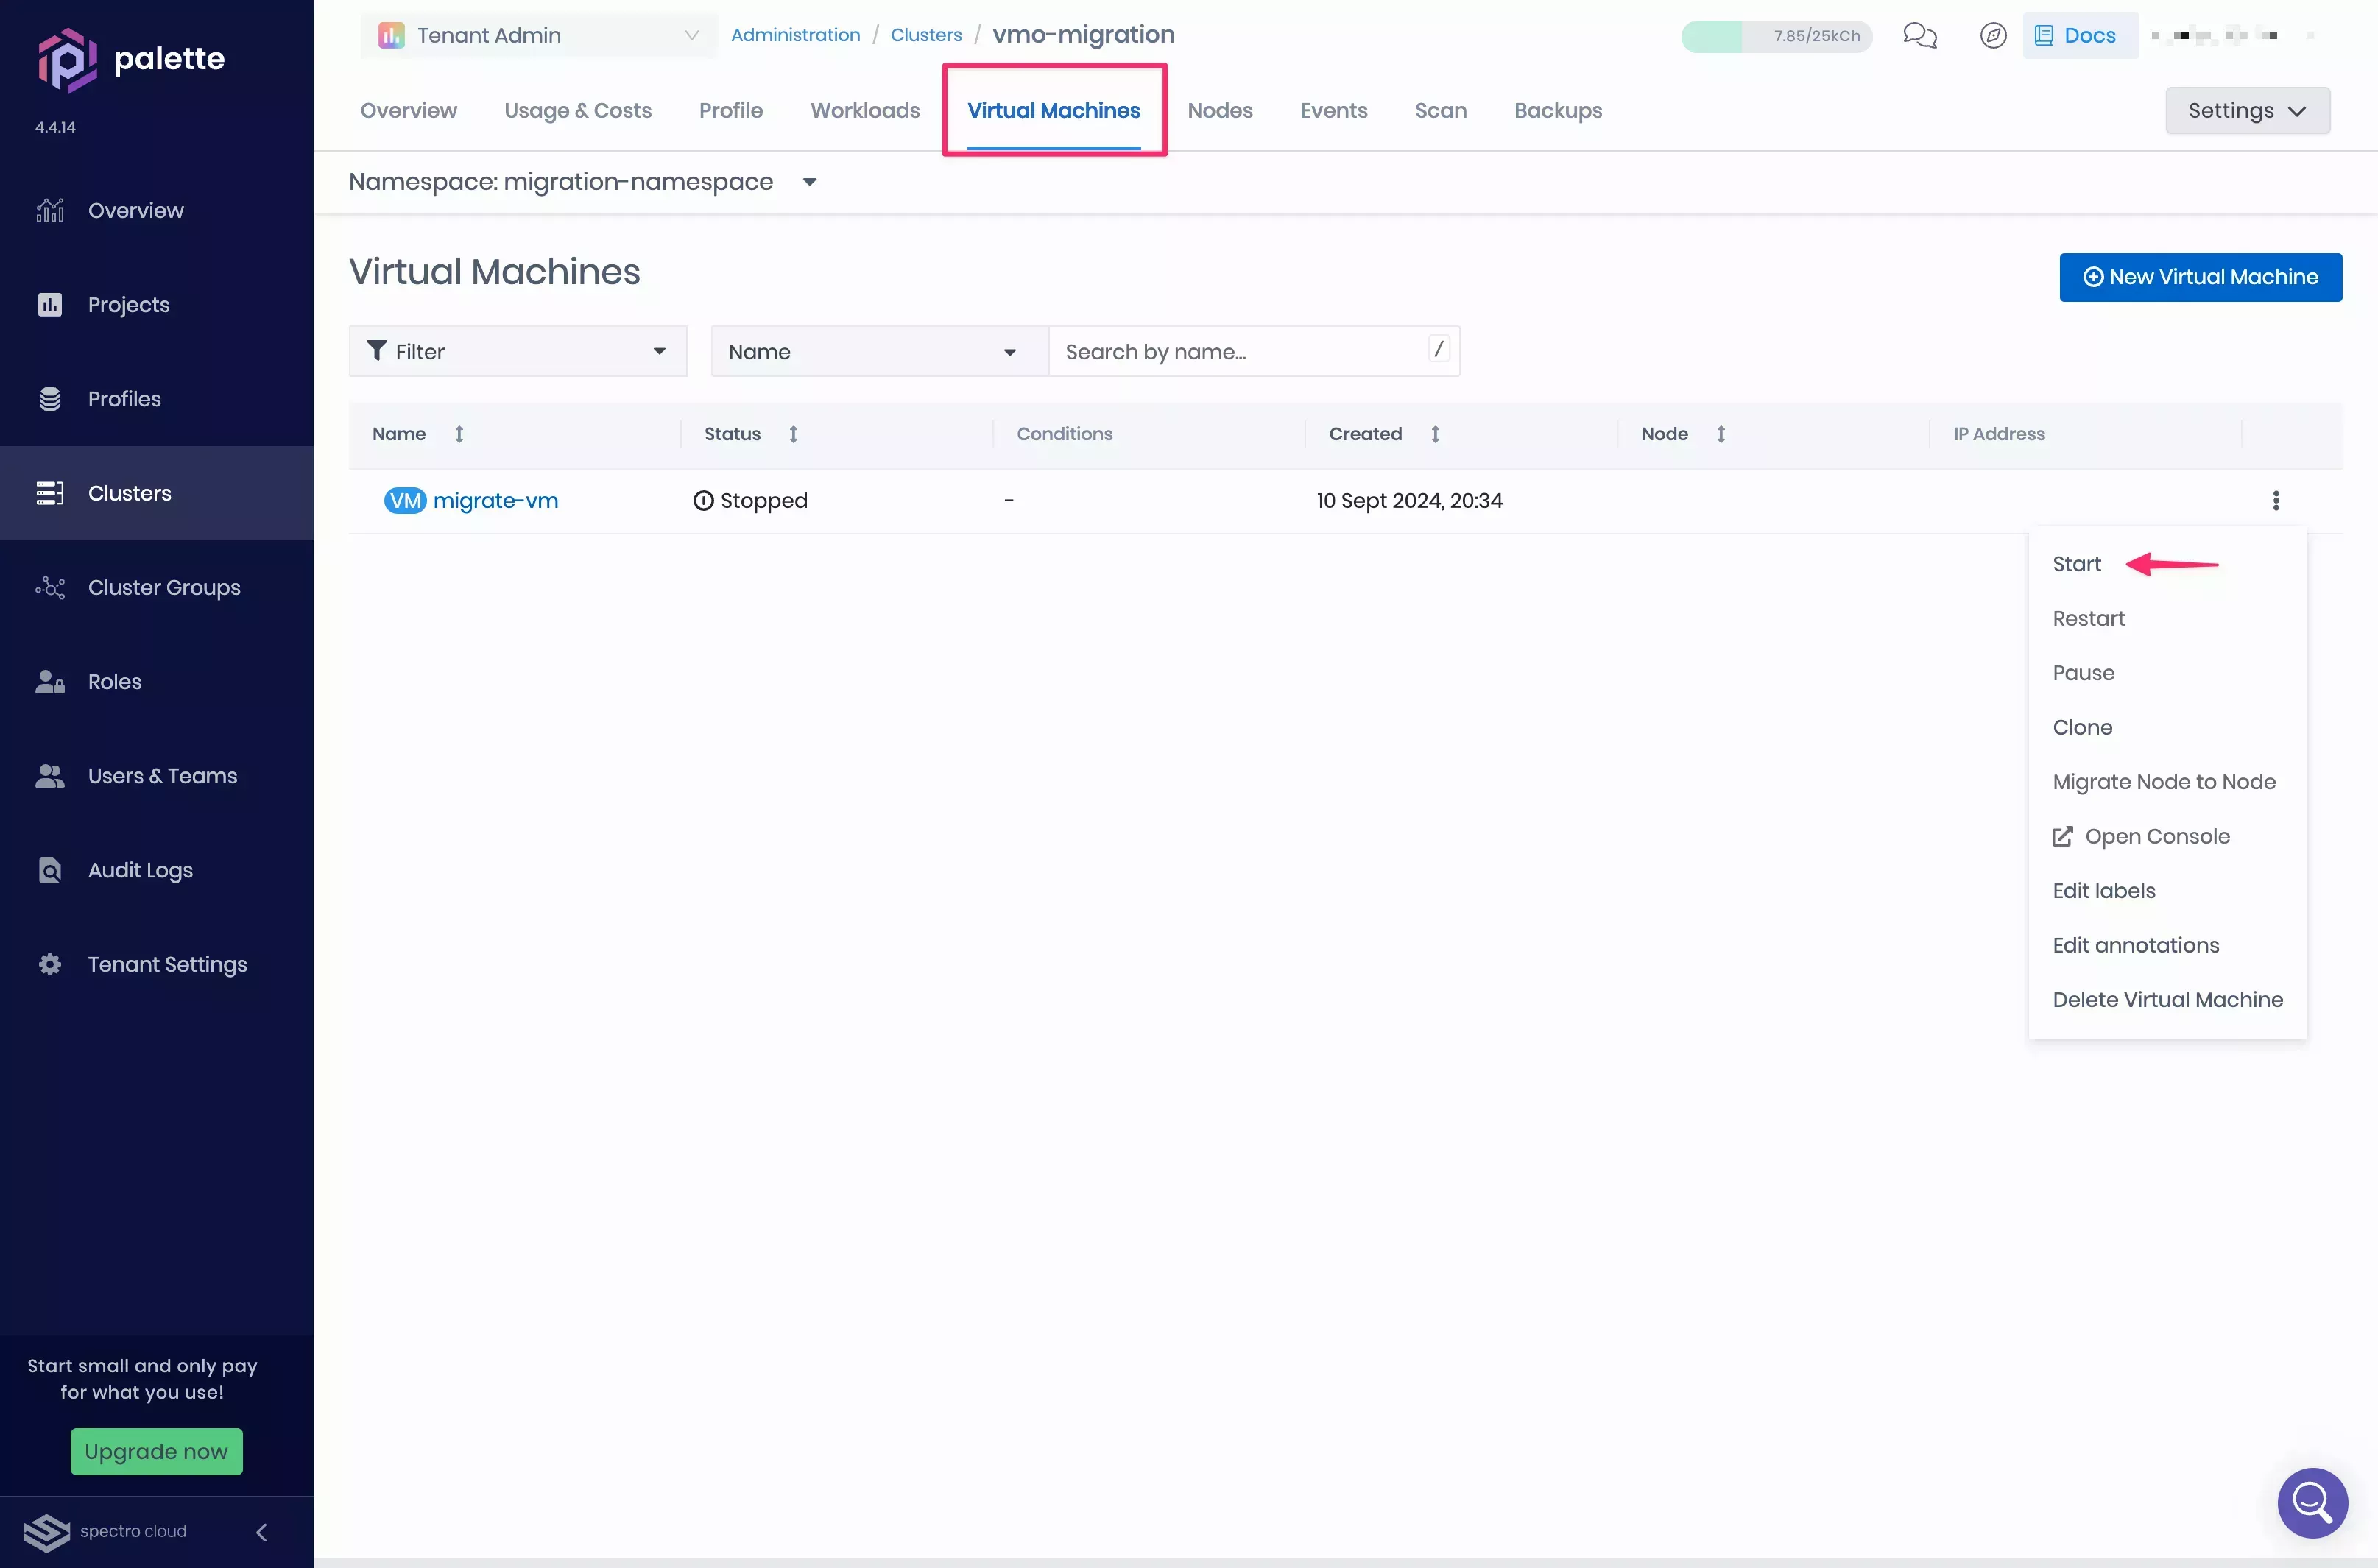
Select the Virtual Machines tab. Then, select your migration namespace from the Namespace drop-down Menu. Your migrated VMs appear.
-
For each migrated VM, click on the three-dot Menu and select Start. Your VMs are now ready to use.
Start Warm Migration Plans
Prerequisites
-
A warm migration plan created and ready to start. Refer to Create Migration Plans for guidance.
-
One or more VMs hosted in VMware vSphere.
-
Changed Block Tracking must be enabled on your VMs.
-
Terminal access to execute kubectl commands on your VMO cluster.
- The Virtual Machine Migration Assistant pack must be added to your cluster profile. Refer to Create a VM Migration Assistant Cluster Profile for guidance.
- The VM Migration Assistant service console must be accessible from a web browser.
Start Warm Migration
-
From the left Main Menu, select Plans for virtualization.
-
In the top-left corner, use the Namespace drop-down Menu to select your Kubernetes namespace for the migration.
-
Find your plan in the table and click the plan name to view its details.
-
Click Start migration in the top-right corner.
-
Click Start in the pop-up window.
-
Click on the Virtual Machines tab.
-
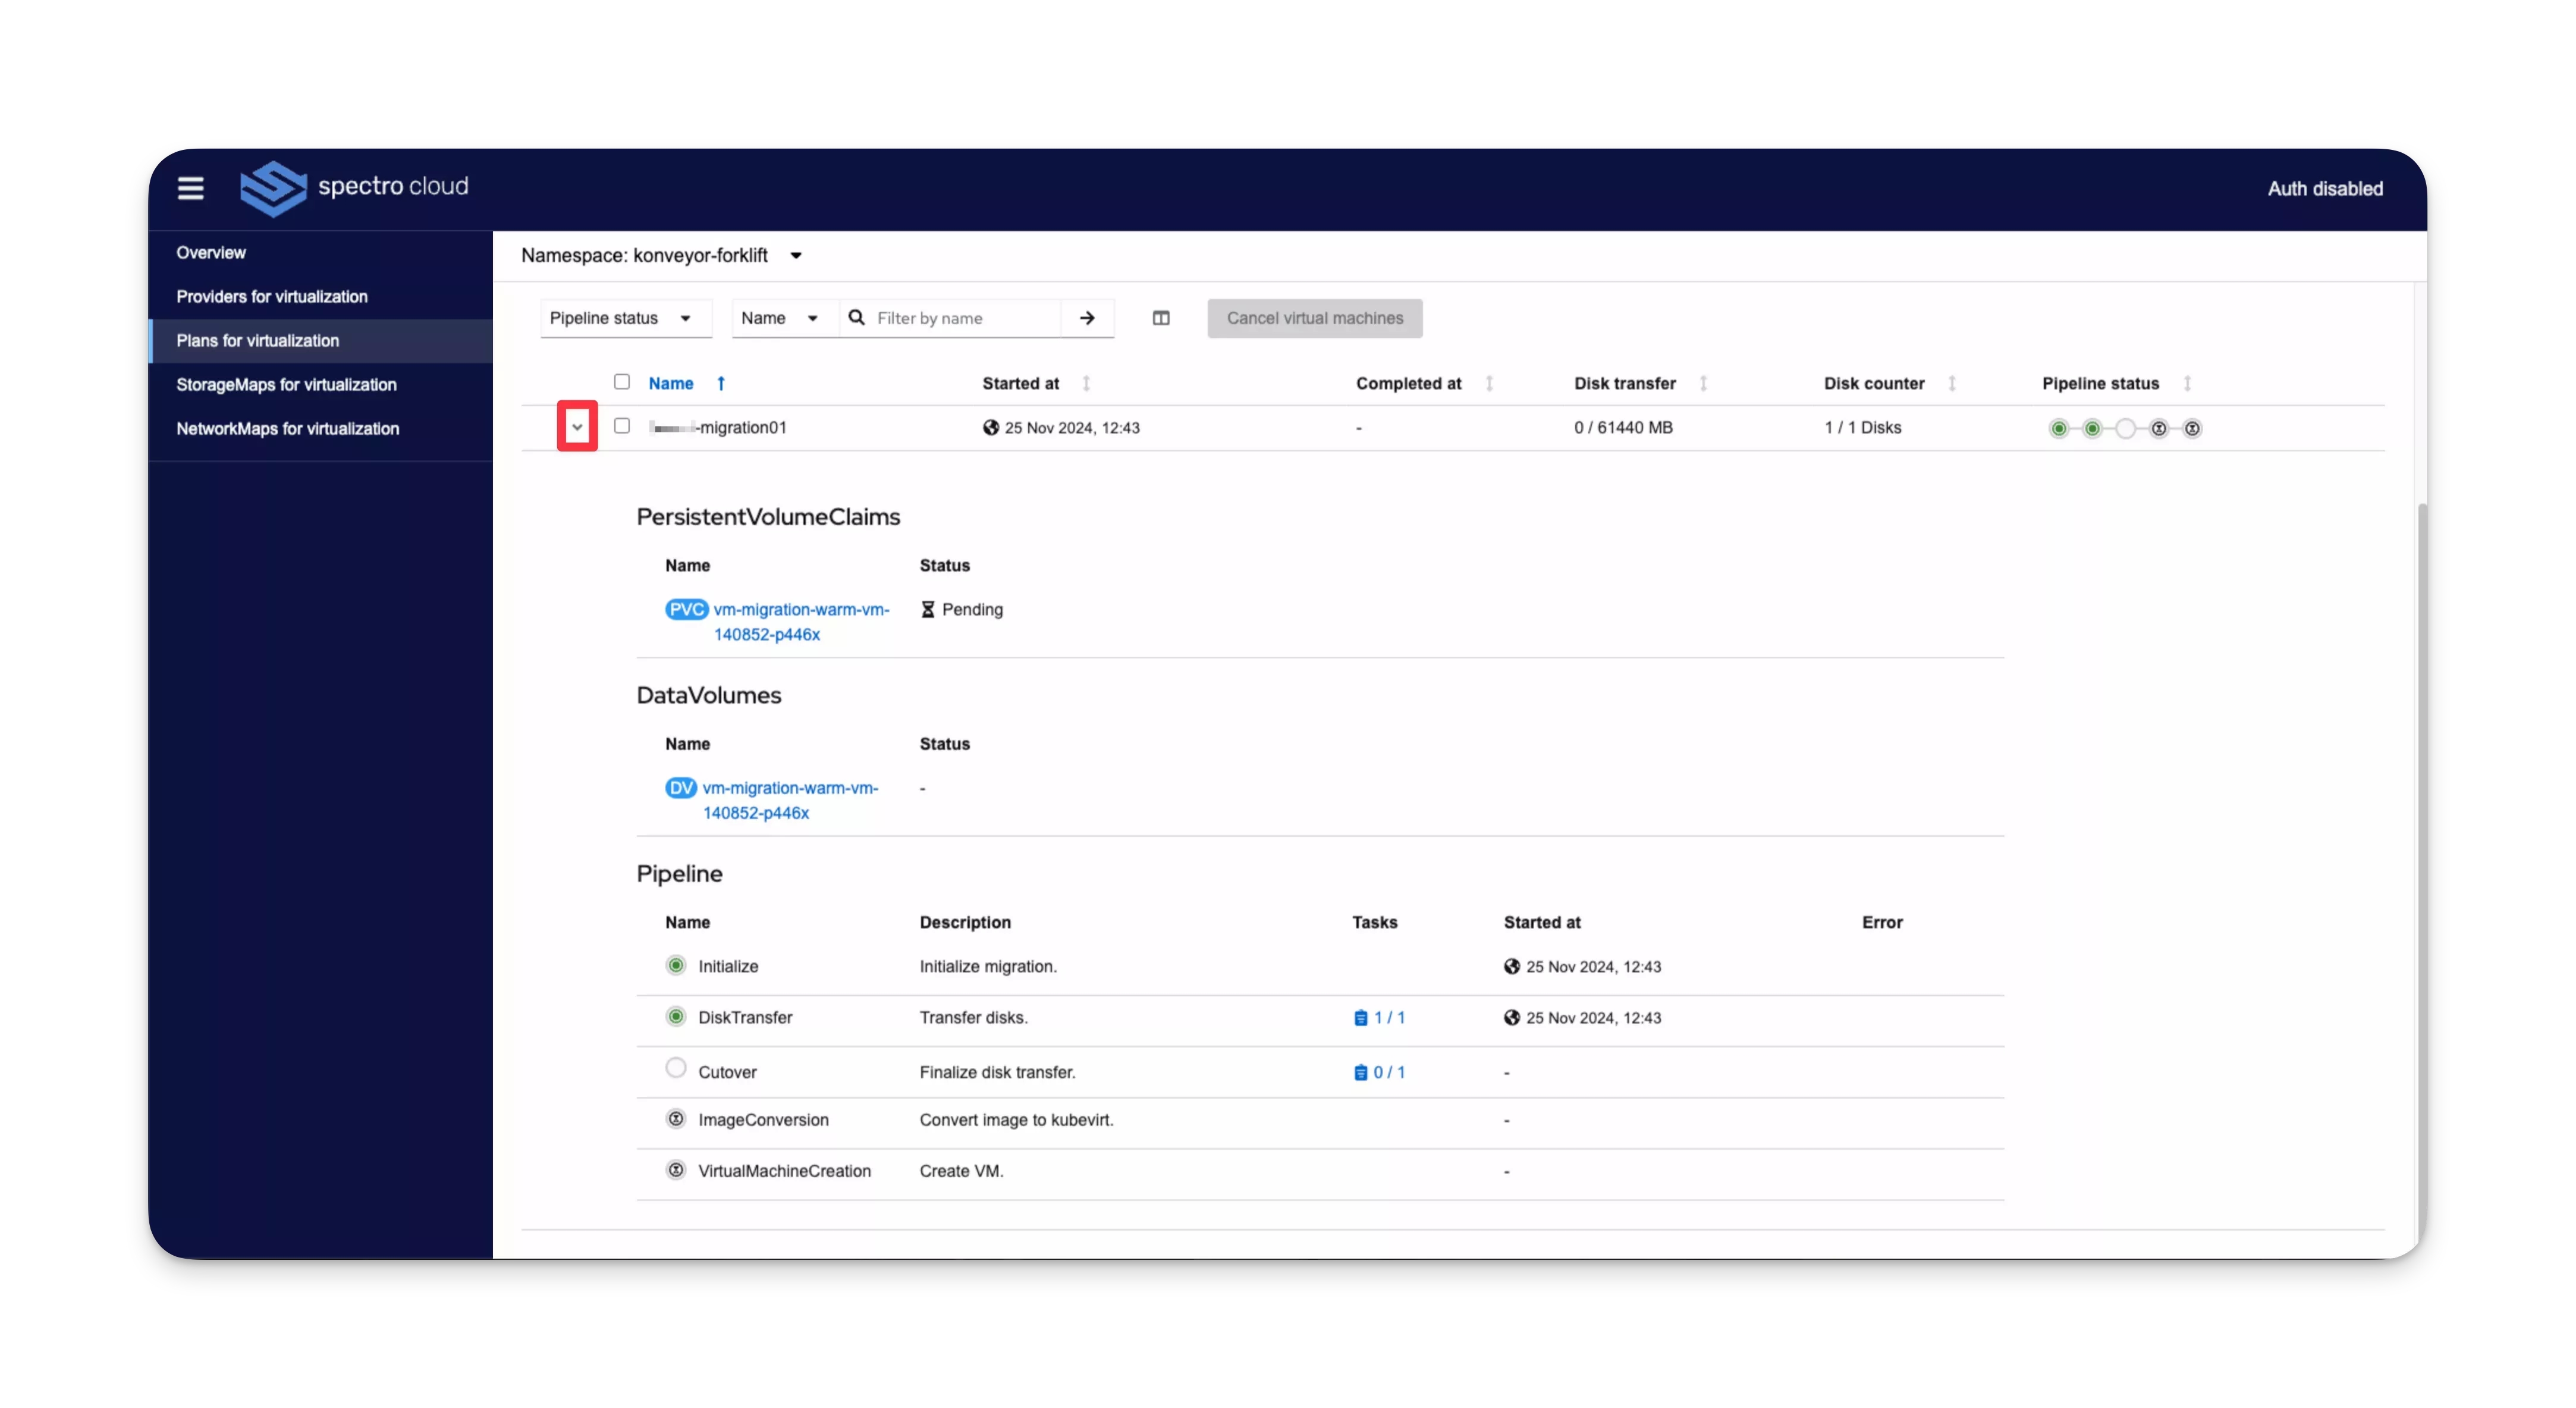
In the table, view the status of the migration for each VM in the Pipeline status column. Each circle represents a stage in the migration. You can click on a circle to view additional details.
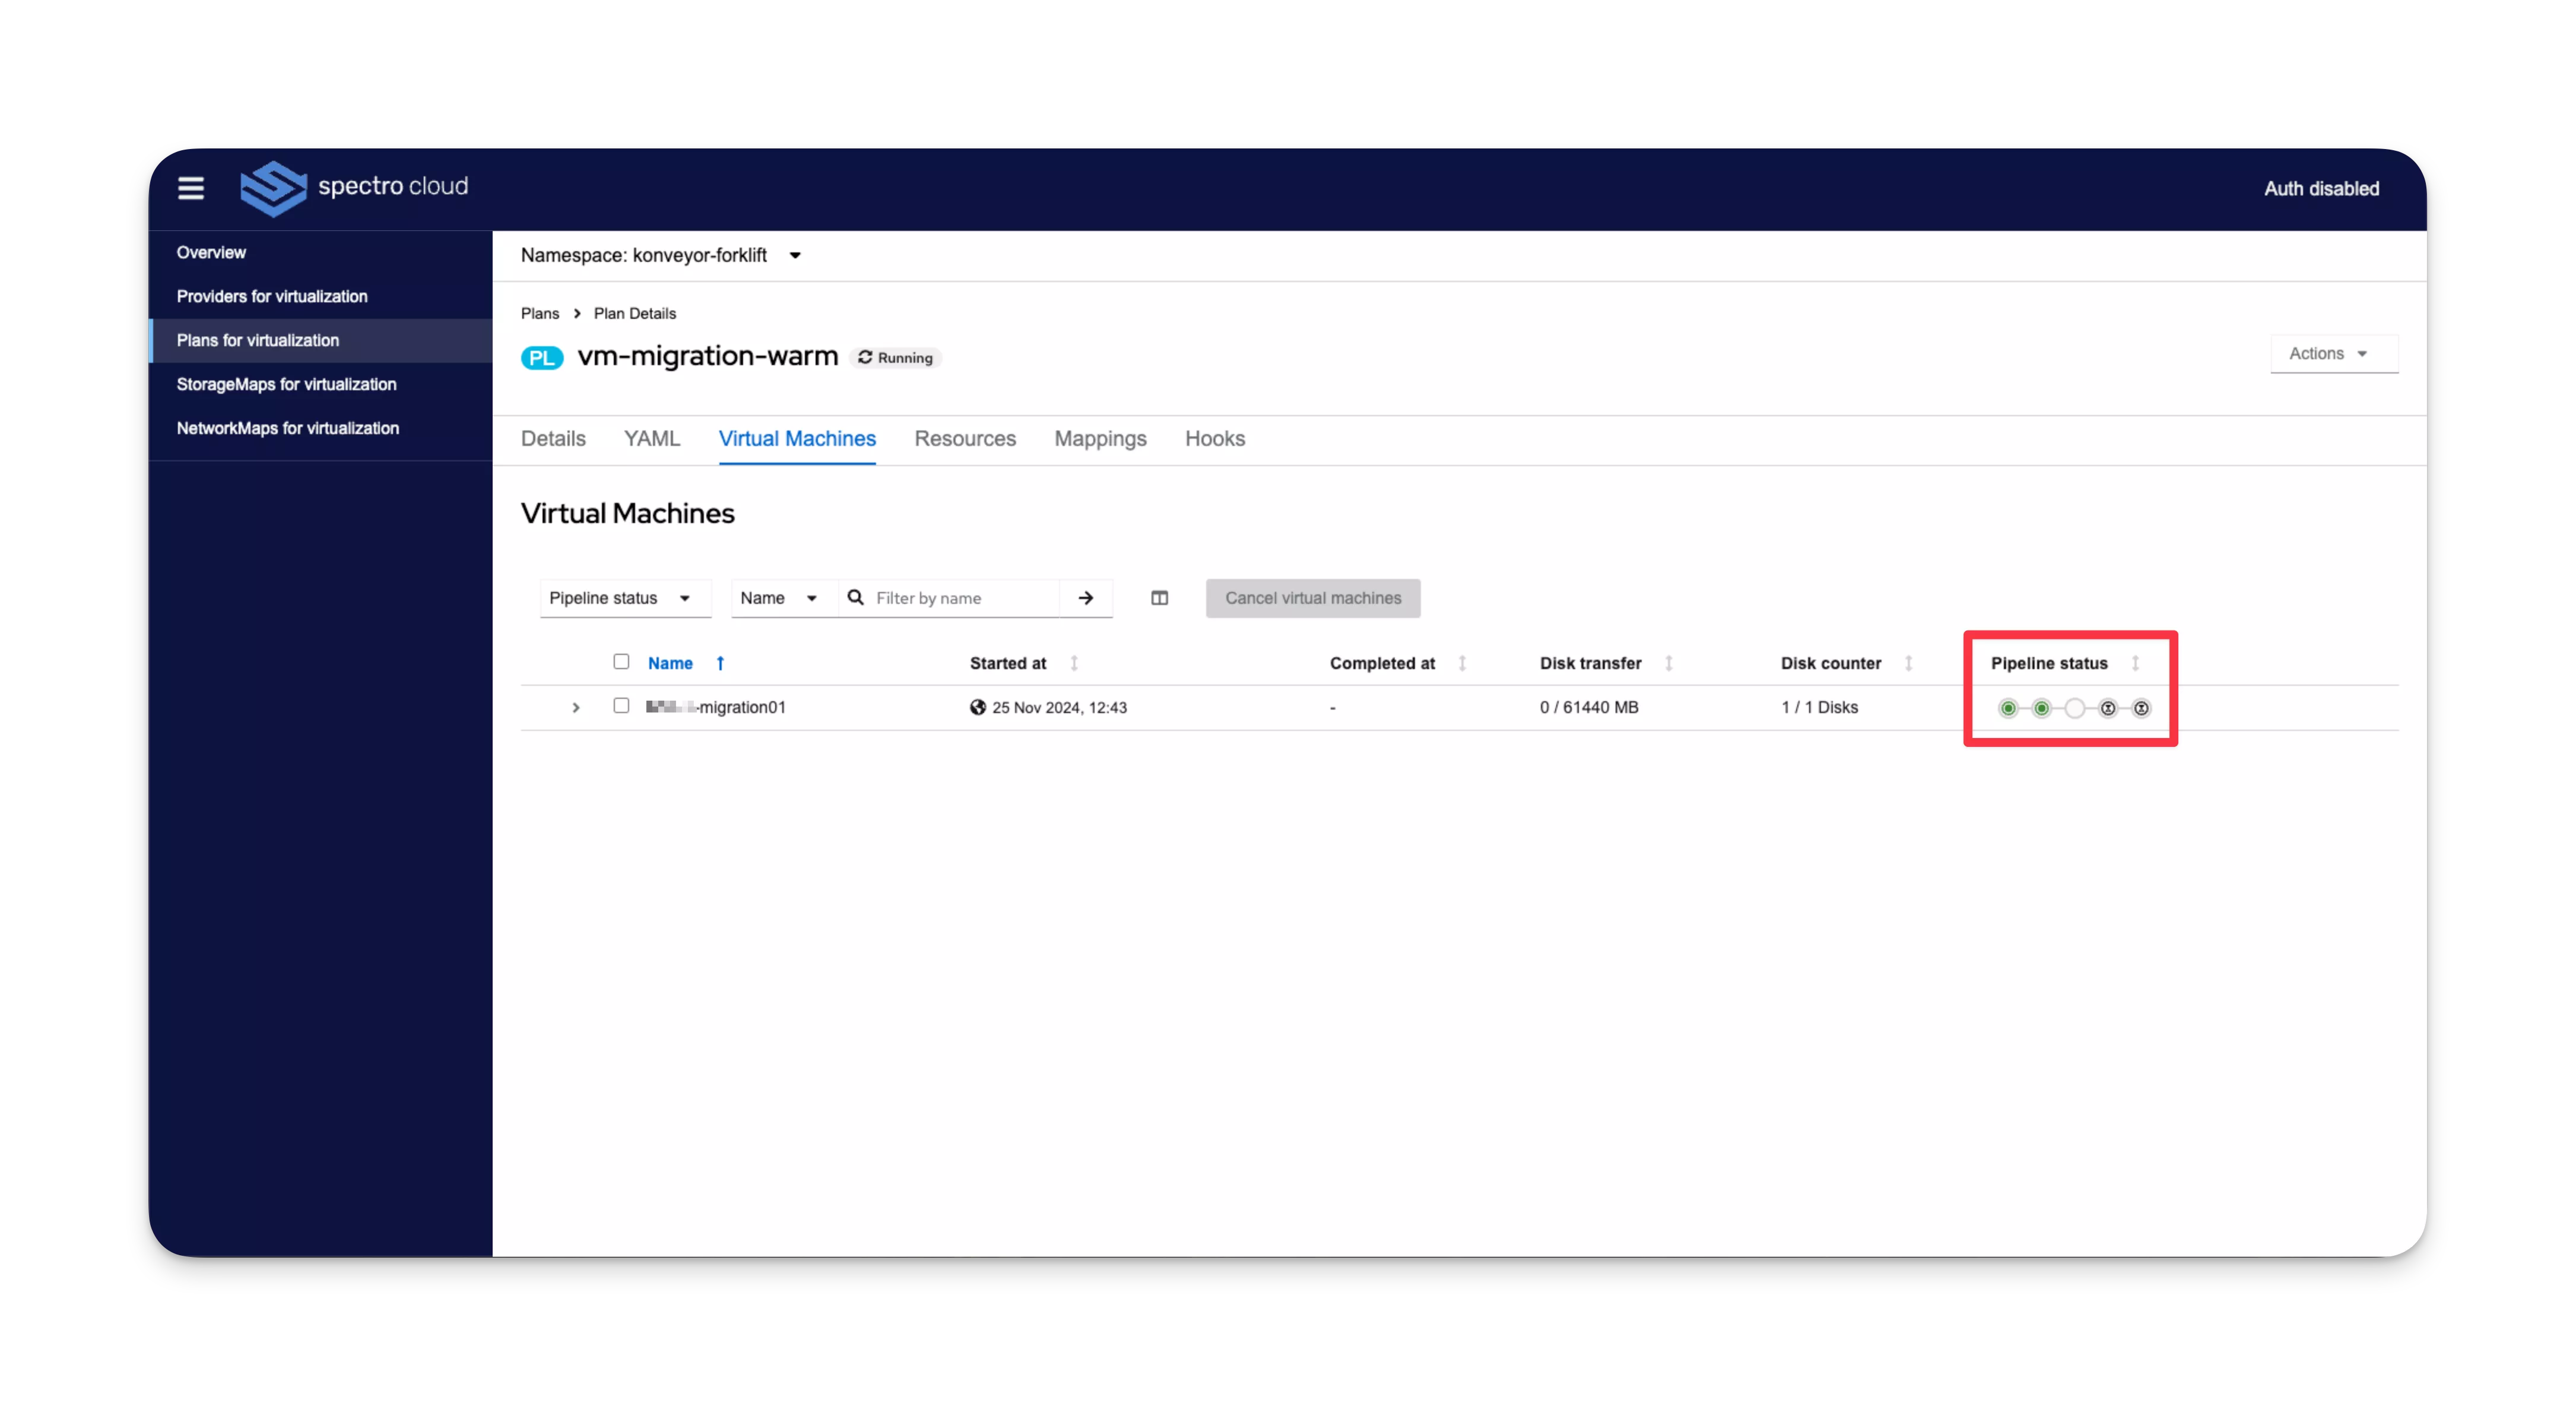
View additional pipeline details by clicking on the > icon next to the VM name.
-
Open a terminal session and configure access to your VMO cluster.
-
Issue the following command to check for datavolumes in your chosen VM migration namespace.
kubectl get datavolume --namespace <myVmMigrationNamespace>Example output.
NAME                                PHASE         PROGRESS   AGE
vm-migration-cold-vm-140860-92mwk  Succeeded     100%       30m
vm-migration-warm-vm-140852-p446x  Importing     75%        20m
The data volume names are uniquely generated using the
<planName>-<vmIdentifier>-<randomSuffix>template. -
Issue the following command to output the data volume details to your terminal.
kubectl describe datavolume <datavolumeName> --namespace <myVmMigrationNamespace>When the status of the volume is paused and awaiting cutover, the warm migration is ready for the final cutover.
Example output
Name:         vm-migration-warm-vm-140852-p446x
Namespace:    konveyor-forklift
Labels:       migration=0ef09f8f-2a96-41cb-ab72-3f7cceb7f7b5
              plan=2e663a0f-2d49-45f1-ac2d-4406d3472da2
              vmID=vm-140852
Annotations:  cdi.kubevirt.io/storage.bind.immediate.requested: true
              cdi.kubevirt.io/storage.deleteAfterCompletion: false
              cdi.kubevirt.io/storage.usePopulator: true
              forklift.konveyor.io/disk-source: [vsanDatastore2] f9564467-a3c8-851c-84ff-0cc47a92e4ca/migration01_2.vmdk
              migration: 0ef09f8f-2a96-41cb-ab72-3f7cceb7f7b5
              plan: 2e663a0f-2d49-45f1-ac2d-4406d3472da2
              vmID: vm-140852
API Version:  cdi.kubevirt.io/v1beta1
Kind:         DataVolume
Metadata:
  Creation Timestamp:  2024-11-25T12:43:50Z
  Generate Name:       vm-migration-warm-vm-140852-
  Generation:          1
  Resource Version:    3534737
  UID:                 83e32262-c480-4609-9029-d14fe69f65d6
Spec:
  Checkpoints:
    Current:   snapshot-140857
    Previous:  snapshot-140856
  Source:
    Vddk:
      Backing File:  [vsanDatastore2] f9564467-a3c8-851c-84ff-0cc47a92e4ca/migration01_2.vmdk
      Secret Ref:    vm-migration-warm-vm-140852-l9qjp
      Thumbprint:    E3:95:23:08:79:A6:6B:2B:B6:82:6F:34:A7:88:85:12:11:47:5D:B2
      URL:           https://vcenter.mycompany.dev/sdk
      Uuid:          4238710f-bdda-6ede-1870-b095b1c5dbd5
  Storage:
    Resources:
      Requests:
        Storage:         60Gi
    Storage Class Name:  spectro-storage-class
Status:
  Claim Name:  vm-migration-warm-vm-140852-p446x
  Conditions:
    Last Heartbeat Time:   2024-11-25T13:43:50Z
    Last Transition Time:  2024-11-25T13:43:50Z
    Message:               Data volume paused after warm sync
    Reason:                ImportPaused
    Status:                True
    Type:                  Paused
    Last Heartbeat Time:   2024-11-25T13:43:50Z
    Last Transition Time:  2024-11-25T13:43:50Z
    Message:               Warm sync completed successfully; awaiting cutover
    Reason:                SyncComplete
    Status:                True
    Type:                  Succeeded
  Progress:
    Current:  59Gi
    Total:    60Gi
Events:
  Type    Reason              Age   From                    Message
  ----    ------              ----  ----                    -------
  Normal  WarmSyncStarted     25m   datavolume-controller   Warm sync started for the VM
  Normal  WarmSyncComplete    10m   datavolume-controller   Warm sync completed; awaiting cutover
Warning Paused 5m datavolume-controller Data volume paused; awaiting migration cutover -
Return to the VM Migration Assistant.
-
On the Virtual Machines tab for your plan, click the Actions drop-down Menu in the top-right corner.
-
Click Cutover.
-
In the pop-up window, click on the calendar icon and select a cutover date in the calendar. Next, click on the clock icon and select a cutover time from the drop-down Menu.
-
Click Set cutover once complete.
When the cutover is initiated, the source VM is powered off, and a final synchronization of remaining disk changes is completed. The target VM is then created and powered on on the destination VMO cluster.
Validate
-
From the left Main Menu, select Plans for virtualization.
-
In the top-left corner, use the Namespace drop-down Menu to select your Kubernetes namespace for the migration.
-
In the table, click on a plan name to view the plan details.
-
In the Details tab, the plan status displays as Successful.
-
Log in to Palette.
-
From the left Main Menu, select Clusters. Then, choose the VMO cluster that you migrated your VMs to. The Overview tab appears.
-
Select the Virtual Machines tab. Then, select your migration namespace from the Namespace drop-down Menu. Your migrated VMs appear with a Running status.