Create a Golden Image
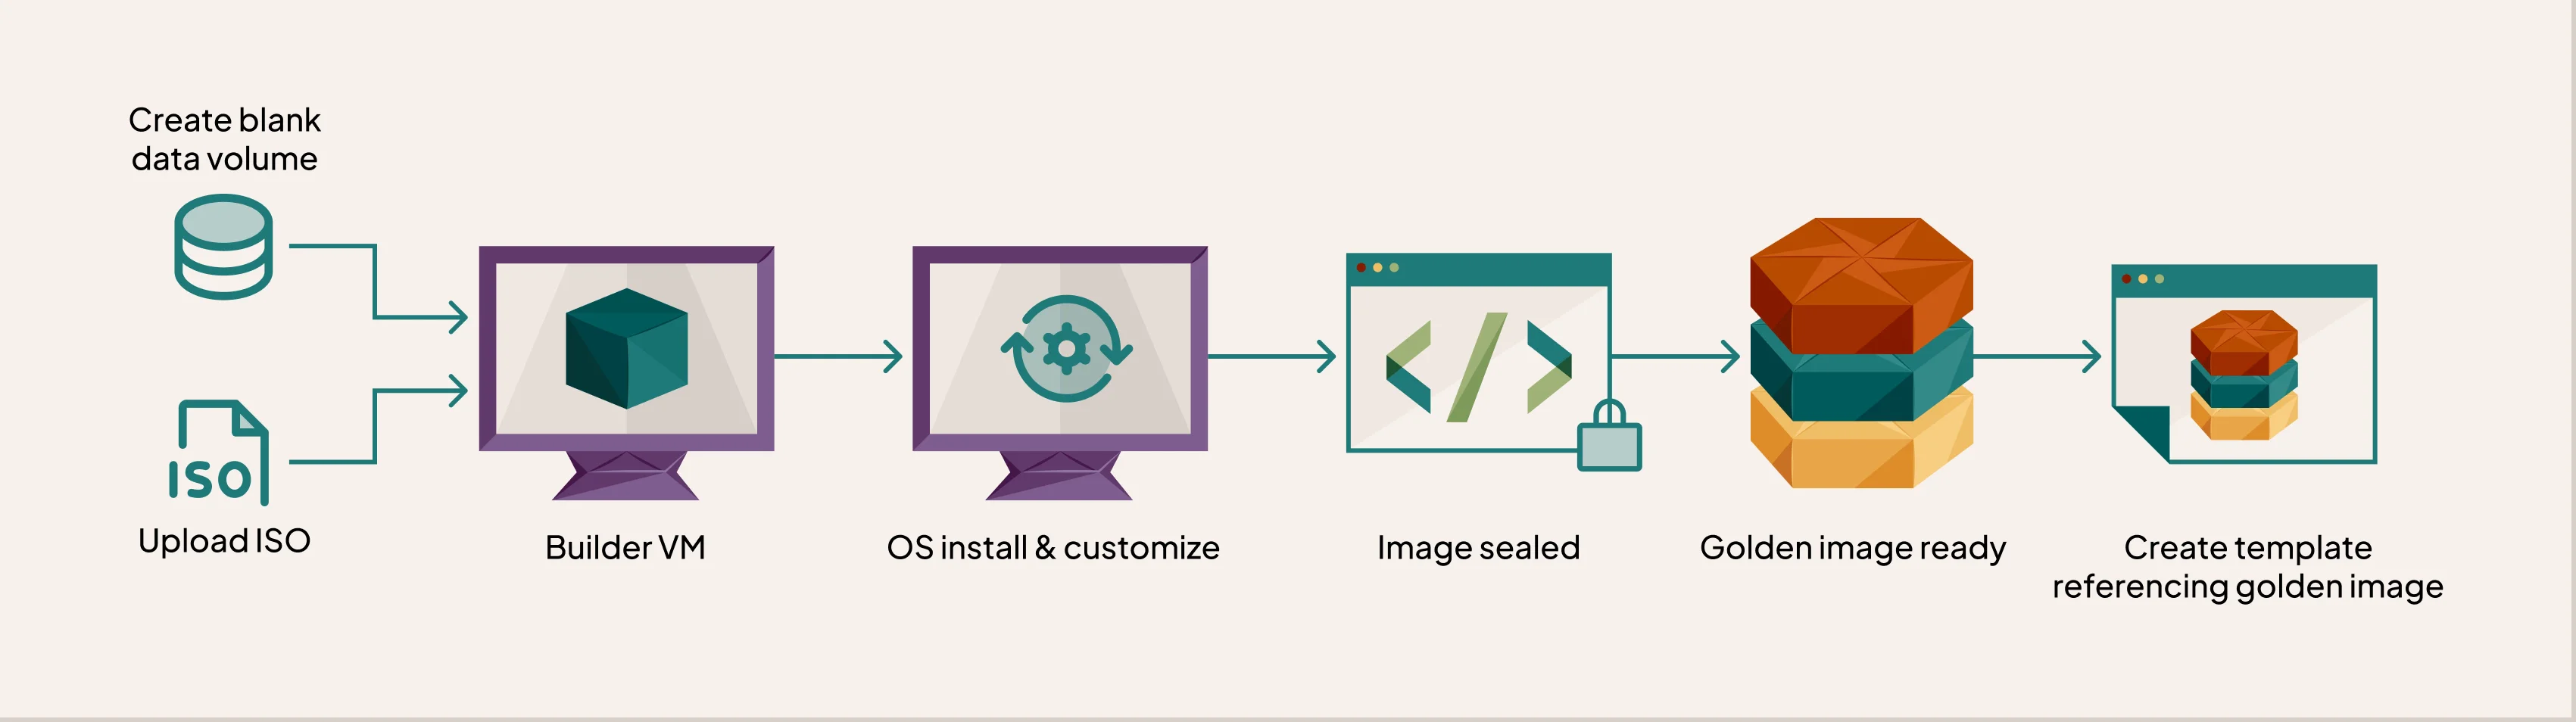
A golden image is a sealed, reusable base system image. Golden images standardize OS installations and create VMs from templates with validated configurations.
Building a golden image involves the following phases:
- Prepare a source DataVolume - upload or create the ISO installer or disk image that the builder VM boots from.
- Build the OS - launch a builder VM and install the operating system.
- Finalize and seal the image - generalize the installed OS into a sealed, reusable image.
- Use the golden image - create templates or VMs from the sealed image.
The following diagram illustrates this workflow.
Prerequisites
- A running PaletteAI VM Launchpad deployment.
- A user account with the platform administrator role.
- A storage class available in the cluster. VM Launchpad includes Piraeus/LINSTOR as the default storage backend, which creates storage classes during cluster deployment. Image upload is blocked until a storage class exists.
- An OS ISO file available as a DataVolume. You can upload the ISO from Infrastructure > Storage or Image Catalog > Golden Images.
- Required packages uploaded under Image Catalog > Packages. For airgap Windows builds, upload
virtio-win.isobefore you build the image. Refer to Windows virtio drivers for more information. - An auto-install script and a seal script. Image Catalog includes built-in scripts, but you can provide your own scripts for custom operating system versions or hardening requirements. Refer to Finalize Templates for more information about auto-install and seal scripts.
Network Considerations
The golden image builder VM uses the pod network with masquerade mode during the build. VM Launchpad serves packages and ISOs to the builder over the pod network. VM Launchpad does not support custom Network Attachment Definition (NAD) networks, such as bridge networks, for the build workflow.
After the build is complete, templates and VMs created from the golden image can use the pod network or a custom NAD.
Prepare a Source DataVolume
Before you build a golden image, prepare the source DataVolume that the builder VM boots from. Use one of the following methods.
- Upload via Image Catalog
- Create from Infrastructure
- Blank DataVolume
Upload an ISO installer or a prebuilt disk image from Image Catalog > Golden Images.
-
Navigate to Image Catalog > Golden Images.
-
Select Upload ISO/Golden Image.
-
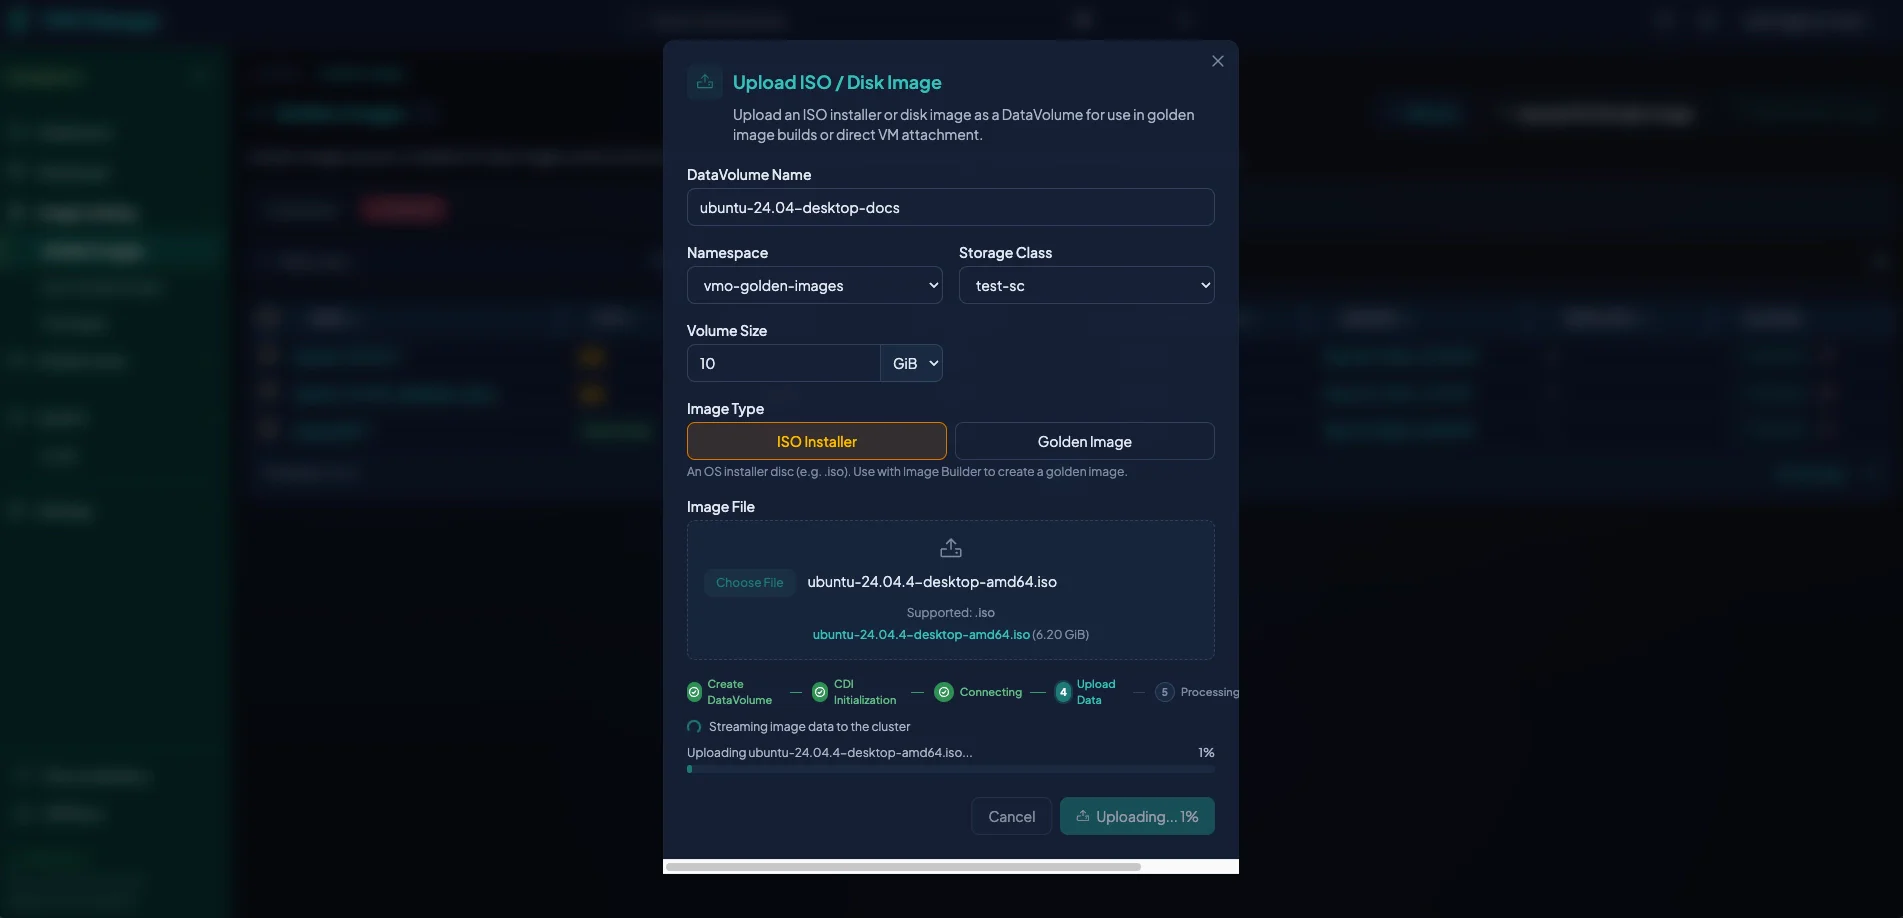
Complete the Upload ISO/Disk Image page and select Upload.
Parameter Description DataVolume Name Enter a unique name for the ISO installer or disk image. Namespace Select the namespace from the drop-down menu. Use vmo-golden-imagesunless your environment uses a different namespace. If your environment does not display the default namespaces, navigate to Infrastructure > Namespaces, and select Add Existing.Storage Class Select the storage class from the drop-down menu. Volume Size Set the DataVolume disk size in GiBorTiB.Image Type Select ISO Installer or Golden Image. A golden image is a prebuilt disk image. Image File Select Choose File or drag and drop the file. ISO installer files use the ISO format. Golden image files use IMG or QCOW2. Large ISO files can take minutes to upload. VM Launchpad displays progress during the upload phase.
Upload an ISO file or fetch one from a URL from Infrastructure > Storage.
-
Navigate to Infrastructure > Storage.
-
Select Create DataVolume.
-
Complete the Source page and select Create.
Parameter Description Source Select the source type for the ISO, such as Upload or URL. Image Leave unchecked when uploading an ISO. Select if you upload a disk image as a boot disk. Name Enter a unique name for the ISO DataVolume. Namespace Select the namespace from the drop-down menu. Use vmo-golden-imagesunless your environment uses a different namespace.Storage Class Select the storage class from the drop-down menu. Size Set the disk size in MiB,GiB, orTiB.Access Mode Select ReadWriteOnce,ReadWriteMany, orReadOnlyMany.Volume Mode Select BlockorFilesystem.Large ISO files may take a few minutes to upload. VM Launchpad displays the upload progress during the create phase.
Create an empty DataVolume from Infrastructure > Storage.
-
Navigate to Infrastructure > Storage.
-
Select Create DataVolume.
-
Complete the Source page and select Next.
Parameter Description Source Select Blank. Name Enter a unique name for the DataVolume image. Namespace Select the namespace from the drop-down menu. Storage Class Select the storage class from the drop-down menu. Size Set the disk size in MiB,GiB, orTiB.Access Mode Select ReadWriteOnce,ReadWriteMany, orReadOnlyMany. For more information on these access modes, refer to Kubernetes Persistent Volumes Access Modes.Volume Mode Select BlockorFilesystem.
Build the OS
-
Navigate to Image Catalog > Golden Images.
-
Select Build Golden Image.
-
Complete the Source page and select Next.
Parameter Description Golden Image Name Enter a unique name for the golden image. This field accepts lowercase letters, numbers, and hyphens. The name must end with a letter or digit. Namespace Select the namespace from the drop-down menu. Use vmo-golden-imagesunless your environment uses a different namespace.Source ISO DataVolume Select the ISO or data volume to use. Disk Size Set the disk size in GiBorTiB.Storage Class Select the storage class from the drop-down menu. For Ubuntu images, use more than 20 GB for the golden image. For Windows images, use at least 50 GB.
-
Complete the Compute page and select Next.
Parameter Description Builder VM CPUs Enter the number of CPUs for the builder VM. Builder VM Memory Set the builder VM memory in MiBorGiB.Networking Open the Networking section, set the NIC name, and select the pod network. To add more NICs, select Add Interface. First Boot Device Select Disk, CD-ROM, or Network (PXE). If you select Disk and the builder VM cannot boot from the primary disk, it uses CD-ROM as the fallback boot location. Second CD-ROM (optional) Attach a second ISO file to access driver files or response files. Install Guest Agent Keep the default setting to automatically install the QEMU guest agent at first boot. -
For Ubuntu builds, 4 vCPUs and 8 GB of memory provide enough resources for the build. Keep Install Guest Agent selected because the QEMU guest agent must run unless your seal script handles the operating system in another way.
-
For Windows builds, use the built-in Windows Server 2022 auto-install script or provide your own
Autounattend.xml. In airgap environments, confirm that the Virtio Windows drivers ISO is uploaded before you start the build.
-
-
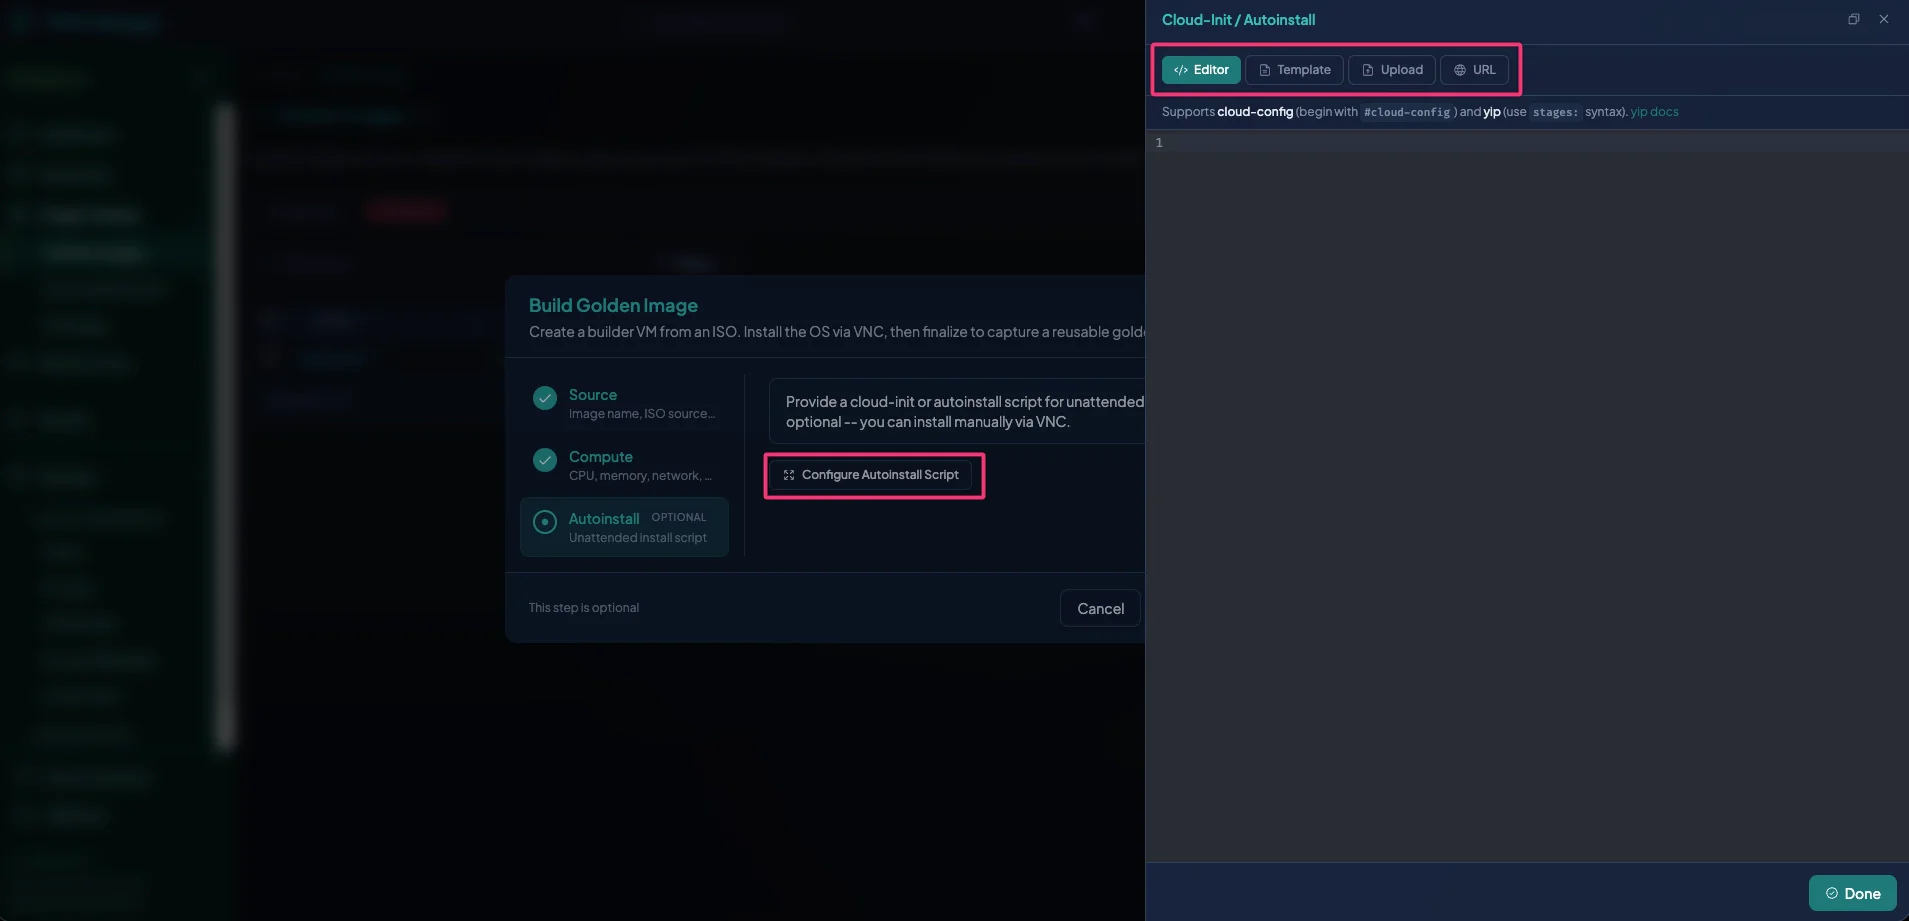
On the Auto-install (Optional) page, select Configure Auto-install Script. You can manually create a customization script using the Editor, use an existing Template, select Upload to upload a script, or provide a URL.
You can also select Use airgap auto-install template to use an airgap version of the auto-install script.
-
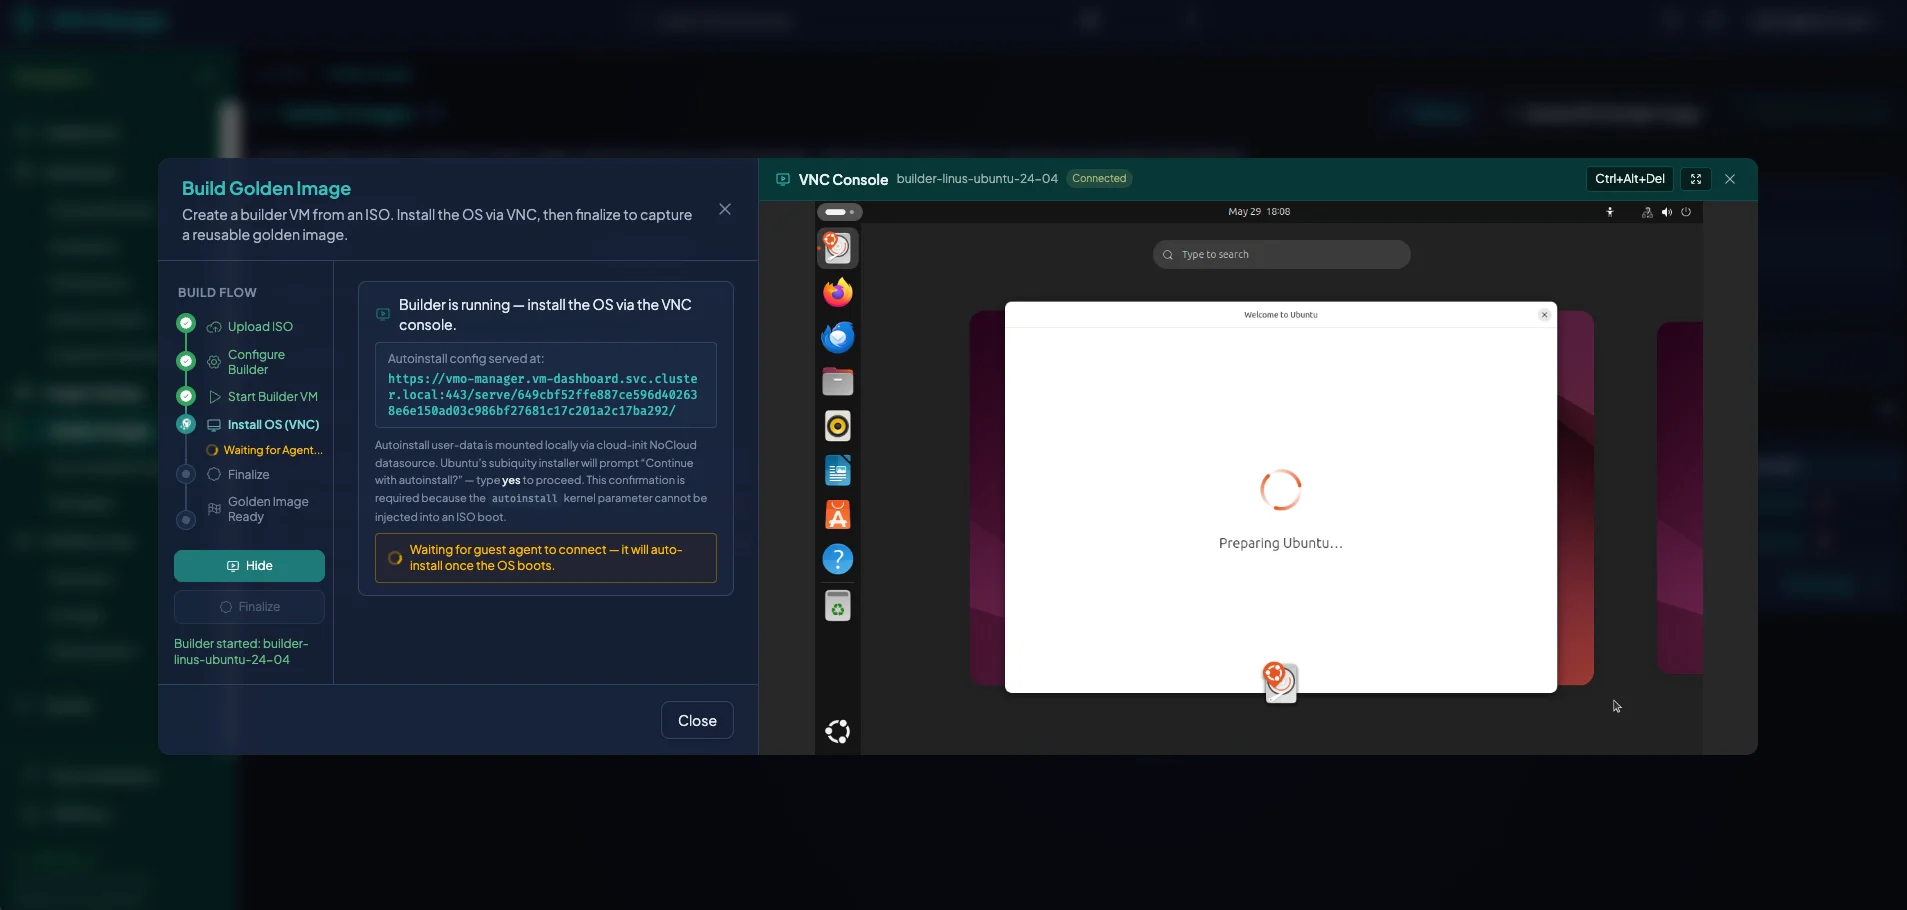
Select Start Builder to begin the build.
-
The builder VM boots from the ISO file, or the network if you configured network boot.
-
For Linux, cloud-init runs the auto-install script. This script typically provides unattended installation answers for
preseed, kickstart, or auto-install workflows. -
For Windows, Autounattend.xml provides unattended installation answers. The Virtio drivers ISO is available as a second CD-ROM for loading drivers during installation.
-
-
The builder process opens a VNC Console so you can complete manual steps. If you select Close, you can continue to view the process or complete more manual steps in the VNC console by selecting Progress > Console. For a larger resolution console, select the Console action.
For some Linux auto-install scripts, the console prompts you to confirm the installation. Type
yeswhen prompted.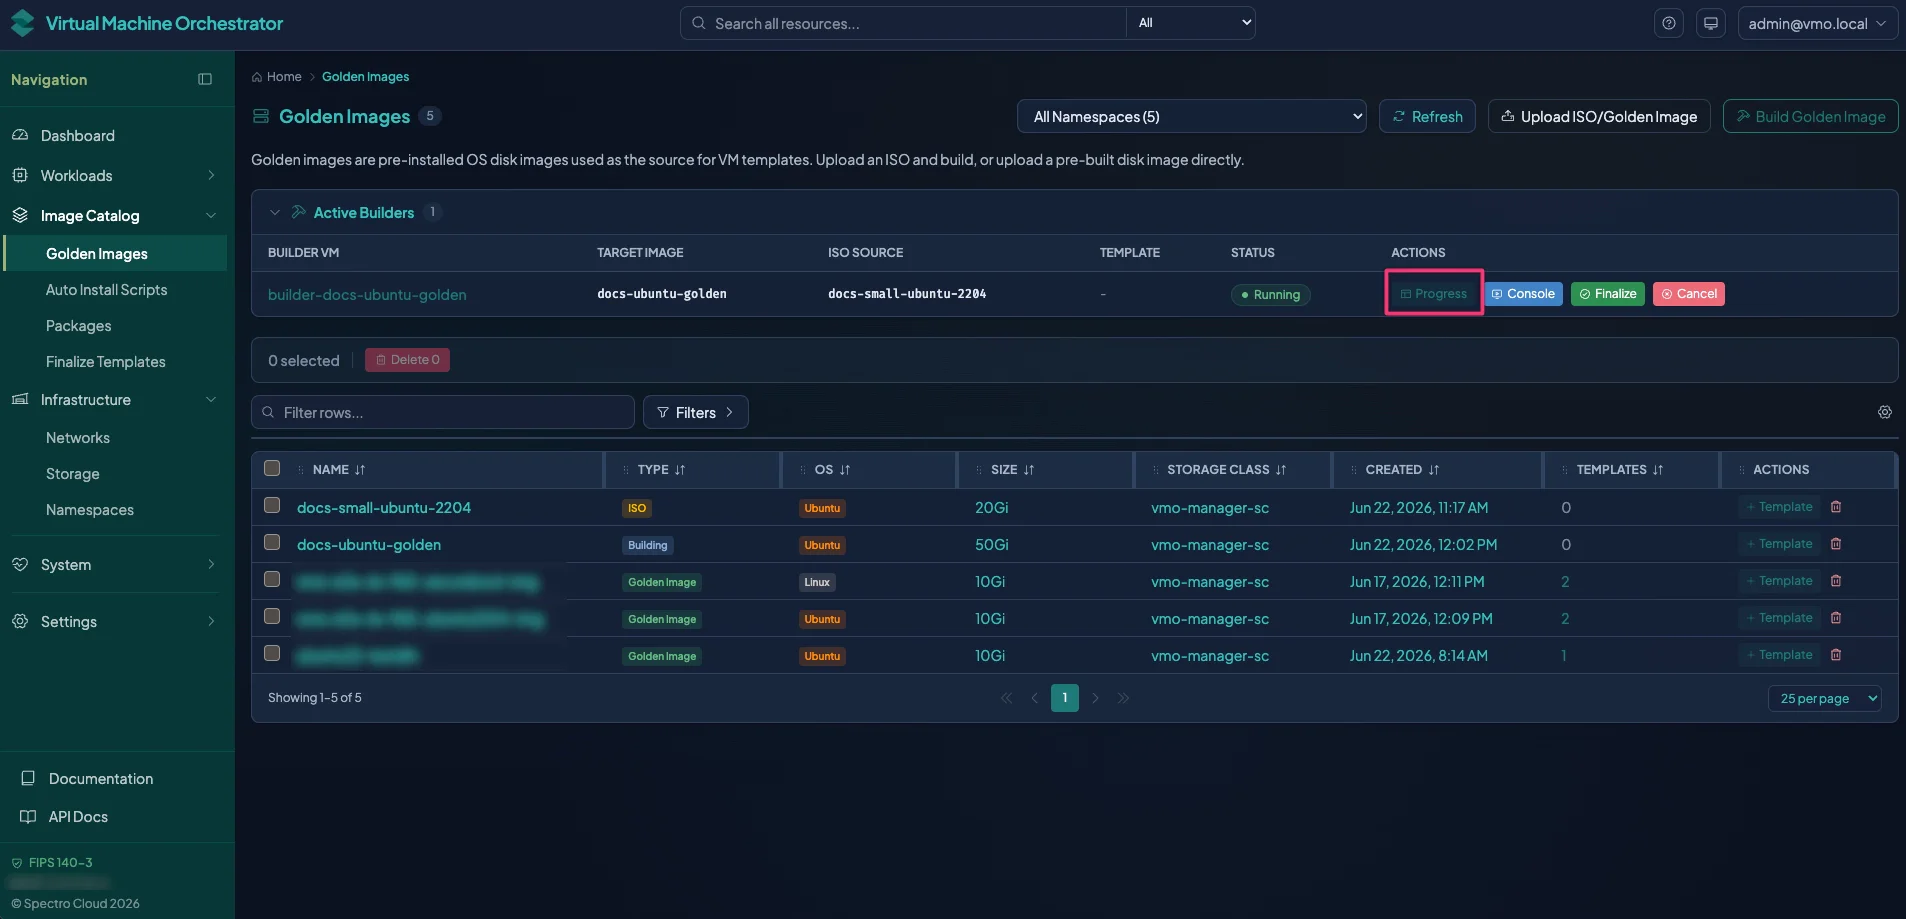
-
Wait for the OS installation to finish and the VM to reboot.
-
Finalize and Seal the Image
-
When the OS is installed and ready, select Finalize on the builder VM.
-
In the Finalize dialog, select a finalization template for the seal script.
-
None stops the VM and keeps the image as-is. The image is not generalized.
-
With Script runs the selected finalization template's seal script to generalize the image. Select the template for your operating system:
-
For Linux, select a template such as Ubuntu / Debian or RHEL / CentOS / Fedora.
-
For Windows, select Windows. This runs
sysprepwith/generalize /oobe /shutdown.
-
-
-
Select Finalize. VM Launchpad completes the following actions:
-
Stops the VM.
-
Ejects the install media.
-
Starts the VM to run the seal script, if you selected one.
-
Waits for the guest agent.
-
Runs the finalization template script with cloud-init or a similar mechanism.
-
Stops the VM again and removes the builder VM.
For more information on using finalization scripts to seal the golden image, refer to finalization templates.
-
-
When the process is complete, the DataVolume is a sealed golden image. The image appears under Image Catalog > Golden Images and as a DataVolume under Infrastructure > Storage.
Next Steps
After you create a golden image, use it as the source for a VM template or create a virtual machine directly from the image.