Initial Configuration of VM Launchpad
This guide walks you through the Getting Started wizard.
Prerequisites
-
A cluster created using PaletteAI VM Launchpad. Refer to Install VM Launchpad for guidance.
-
Credentials to access the VMO Manager UI hosted on your cluster. You can use either Keycloak OIDC credentials or local admin credentials configured during cluster creation.
-
On the Portworx variant, a cluster with three control plane nodes, or one control plane node and three worker nodes.
Initial VM Launchpad Configuration
Complete the following required configuration steps before you create your first VM. The storage steps in the Getting Started wizard depend on the storage backend of your appliance variant.
Open the Getting Started Wizard
-
In your browser, go to
https://<host-ip>:5080. Replace<host-ip>with the IP address of your VM Launchpad host. If you have access to the VM Launchpad host terminal, the Local UI address is displayed on the terminal screen. If you changed the default port, replace5080with your configured Local UI port. -
Log in with the username and password you created during installation.
-
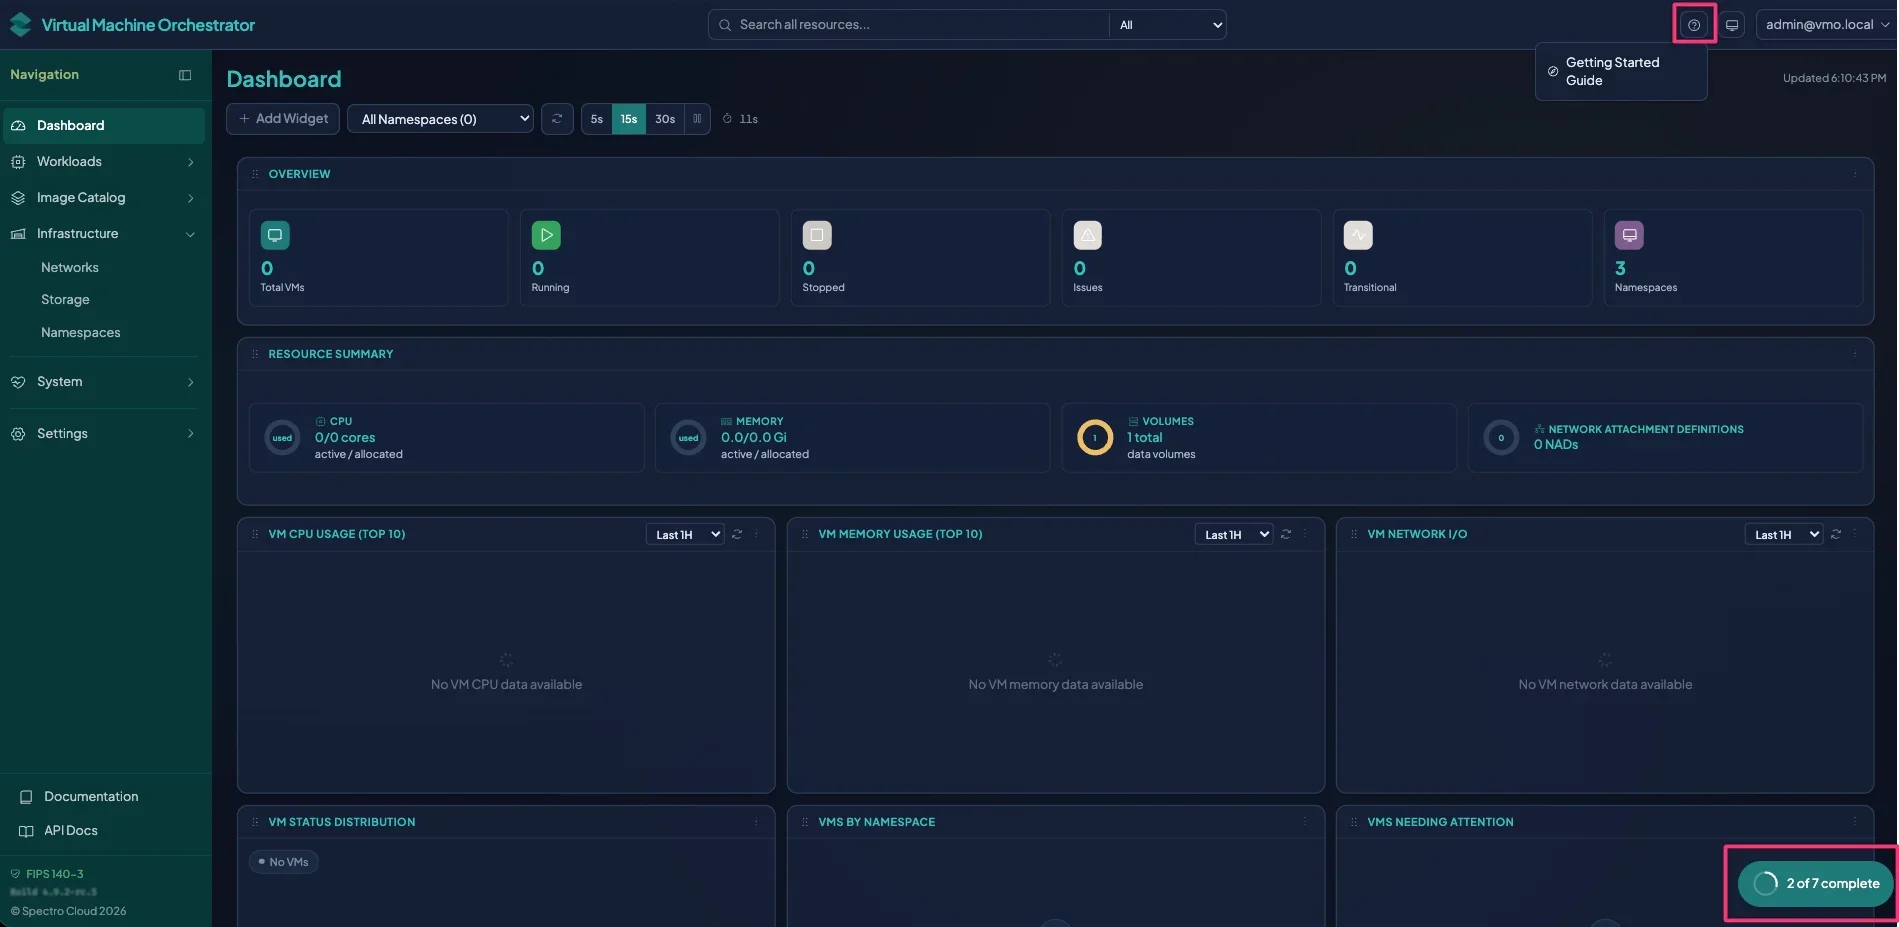
Navigate to the Getting Started pop-up on the right side. If you exited the wizard, select the Getting Started Guide icon in the upper-right corner to reopen it. If the wizard is minimized, it appears in the lower-right corner.
Configure Storage
- Piraeus/LINSTOR
- Portworx
-
Select Set Up a Storage Pool. The appliance creates Set Up a Storage Pool during deployment, so the wizard marks it complete by default.
-
To create more storage pools, select Create Storage Pool, enter the following values, and select Create Storage Pool.
Parameter Description Pool Name Name for the storage pool. Pool Type Select the pool type option to use: LVM Thin,LVM,ZFS,ZFS Thin,File, orFile Thin.Volume Group For LVM ThinorLVM, the Volume Group field defaults todrbd-vg.ZFS Pool For ZFSorZFS Thin, enter the ZFS pool name.Directory For FileorFile Thin, enter the Directory path.Thin Pool Only present for LVM Thinand defaults tothin pool.Host Devices To use host storage, select the appropriate host device. The following image shows the creation of an
LVM Thinstorage pool that uses the local host storage/dev/sdb.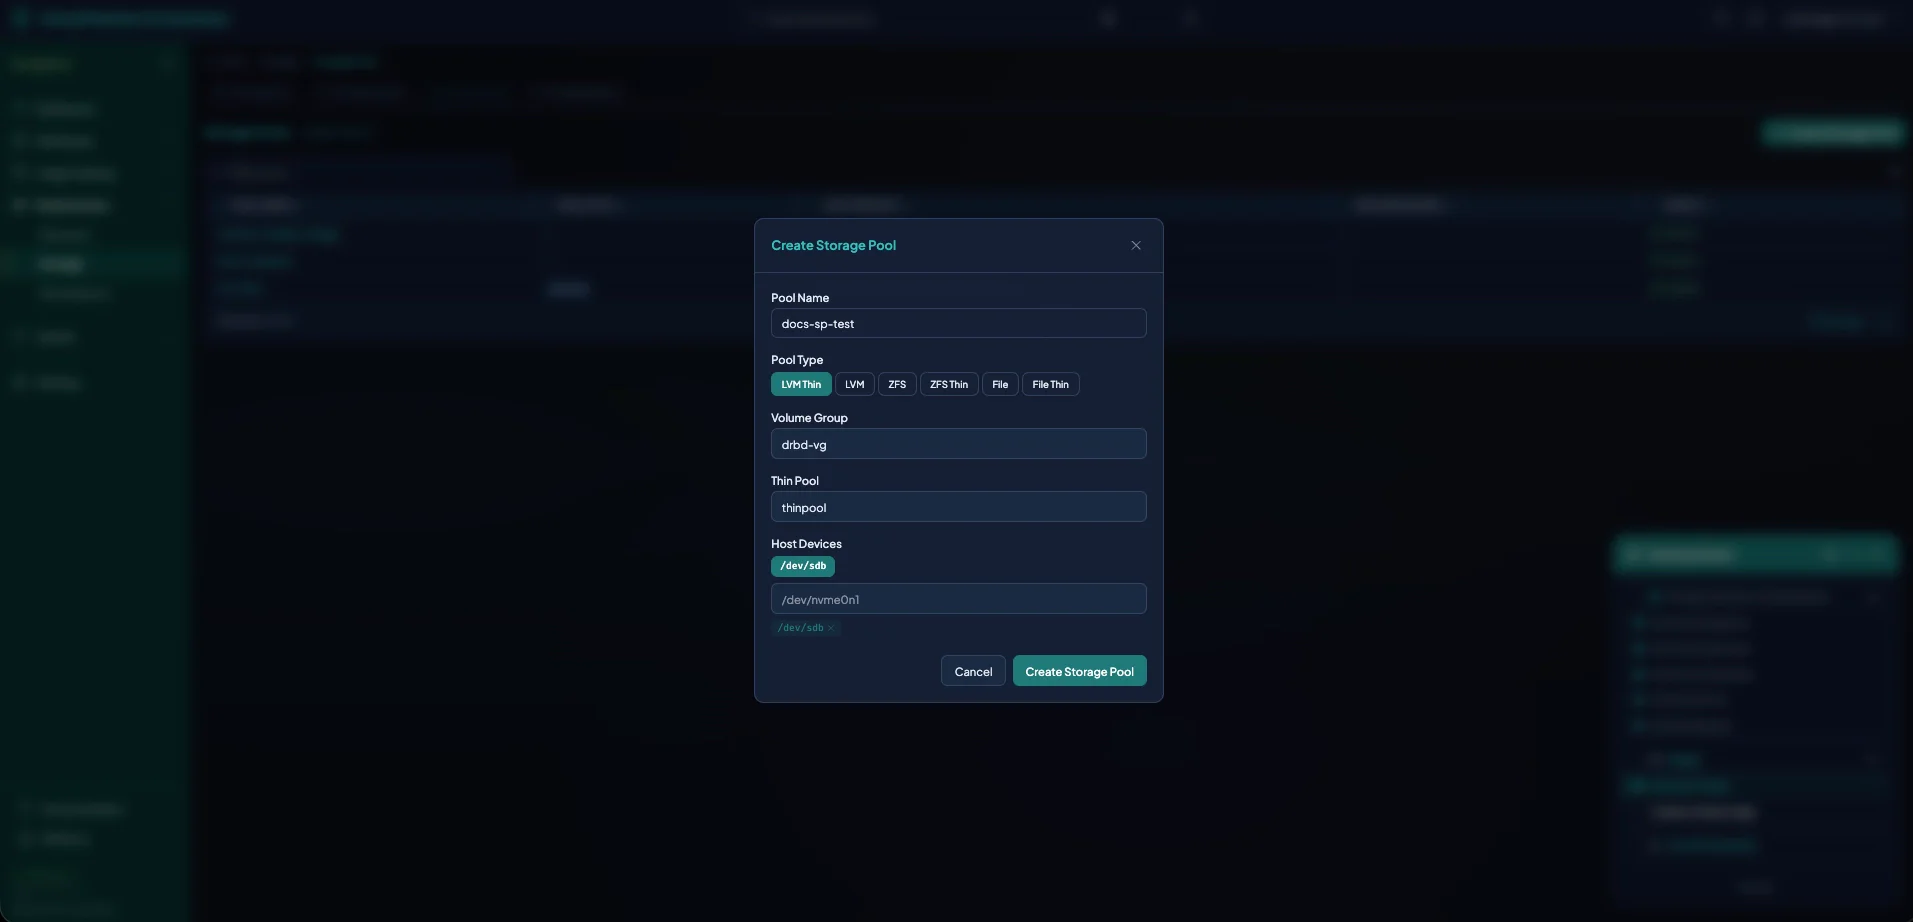
-
Select Review Storage Policy to display the default Piraeus DRBD Performance Tuning storage policy. You can add more policies here.
-
On the Getting Started wizard pop-up, select Set Up a Storage Class.
-
Select Create Storage Class, enter the following values, and select Create Storage Class.
Parameter Description Class Name Name for the storage class. Storage Class Options The storage class enables Allow Expansion and Allow for VMs by default. Select Default Class to make this storage class the default. Reclaim Policy Select the behavior to reclaim storage. Defaults to Delete. You can also selectRetain.Binding Mode Select WaitForFirstConsumerorImmediate.Select a Policy From the drop-down menu, select No Policy (manual parameters) or Piraeus DRBD Performance Tuning (11 parameters). Policies created in step 3 also appear here. Storage Pool From the drop-down menu, select -Select a pool-orlvm-thin. Storage pools created earlier also appear here.
The Portworx variant's Getting Started wizard does not include the Set Up a Storage Pool and Review Storage Policy steps, because Portworx stores VM disks in a Portworx storage cluster instead of LINSTOR storage pools.
On VMware vSphere VMs, set the disks that Portworx uses to non-rotational before you start. Otherwise, the storage cluster does not initialize. Refer to Portworx Storage Cluster Does Not Initialize on VMware vSphere VMs.
-
Select Create a Portworx Storage Cluster. The wizard opens the New Portworx Storage Cluster form.
-
Complete the form, and then select Save in the upper-right corner. For the form fields and the Pure FlashArray settings, refer to Storage Clusters.
warningIf you select Local disks (software-defined), Portworx claims and formats the disks and devices that you select in the Storage section. Confirm that each disk carries nothing you need before you save the storage cluster.
-
From the VMO left main menu, select Infrastructure > Storage > Portworx Storage Clusters, and wait until the Phase of your storage cluster is
Running. Check the Phase even if the Getting Started wizard already shows the step as complete, because Portworx might still be initializing.Phase Description InitializingPortworx is starting. RunningThe storage cluster is ready. Portworx creates its Container Storage Interface (CSI) StorageClasses, such as px-csi-db.DegradedThe installation failed, or you are deleting the storage cluster. If the Phase is
Degradedand you are not deleting the storage cluster, refer to Troubleshooting. -
Return to the Getting Started wizard, and select Set Up a Storage Class.
-
Choose a StorageClass for your VMs. VMs can use only StorageClasses that are enabled for VM workloads.
-
To use a StorageClass that Portworx created, enable it for VM workloads. Refer to Enable a StorageClass for VM Workloads.
-
To create a StorageClass, select Create Storage Class, and then confirm that Allow for VMs is selected. Refer to Create a StorageClass for the fields and the Portworx parameters.
-
Configure Networks and Namespaces
-
Return to the Getting Started wizard, and select Create Networks.
-
On the Network Attachment Definitions page, select Create NAD.
-
On the Create Network Attachment Definition page, enter the following information, and select Create.
Parameter Description Name Name of the NAD. Namespace Namespace for the NAD. The appliance creates the default,virtual-machines, andvmo-golden-imagesnamespaces. To add namespaces, select Create Namespace.Network Type Defaults to Linux Bridge. Other options includemacvlan,ipvlan,SR-IOV, andCustom JSON.Bridge Name Defaults to br0. The appliance createsvirbr0. More bridges may exist on the VM Launchpad node.VLAN Mode Defaults to Accessfor untagged VLAN access. For tagged VLANs, the configuration creates one NAD for each VLAN. SelectTrunkto support more than one VLAN for one NAD.Tagged VLANs Optional. Enter one or more comma-separated VLAN IDs. IPAM Configuration Optional JSON. Generated Config Displays a preview of the NAD JSON. infoIf your environment does not display the default namespaces, navigate to Infrastructure > Namespaces, and select Add Existing.
-
Return to the Getting Started wizard, and select Add Namespaces.
-
By default, the Namespaces page displays three namespaces:
default,virtual-machines, andvmo-golden-images. To create another namespace, select Create Namespace.
Verify
-
Navigate to the Getting Started pop-up.
-
The Storage, Networks, & Namespaces section displays every step crossed out. The section has five steps on the Piraeus/LINSTOR variants and four steps on the Portworx variant.
Next Steps
After you configure VM Launchpad, use the Create Your First VM guide to create your first VM.