Install VMO in Airgap Environments
The Virtual Machine Orchestrator (VMO) pack is available for use in tenants that belong to your airgapped self-hosted instance of Palette and Palette VerteX.
Prerequisites
-
An existing airgap instance of Palette or Palette VerteX. Refer to the Self-Hosted Palette Installation and Palette VerteX Installation guides for more information.
infoIf your environment is configured to use an external proxy, you can use the No Proxy list to exclude any domains or IP addresses. You have the option to set the No Proxy list during the Palette installation flow. This is useful in scenarios where you know the IP addresses you want to exclude before deployment, such as load balancer IP addresses.
-
At least one tenant created for your airgap instance of Palette or Palette VerteX. Refer to Tenant Management for more information.
-
Access to the Palette airgap support Virtual Machine (VM) that you used for the initial Palette installation.
-
Access to the Palette system console.
Enablement
-
In your terminal, use the following command template to SSH into the Palette airgap support VM. Enter the path to your private SSH key, username, and the IP or domain of the airgap support VM. The default username is
ubuntu.ssh -i </path/to/private/key> <username>@<vm-ip-or-domain>Consider the following command example for reference.
ssh -i /docs/ssh-private-key.pem ubuntu@palette.example.com -
Execute the following command to switch to the
rootuser account.sudo --login -
Refer to the Palette Additional Packs page to download and install the airgap-pack-virtual-machine-orchestrator and airgap-pack-spectro-proxy packs. You will need these packs for both Proxied and Direct network configuration.
-
If you are planning to deploy VMs with direct network access, repeat step three to install a load balancer pack of your choice. We recommend installing MetalLB (airgap-pack-lb-metallb), which you can find in Palette Additional Packs.
-
Log in to the Palette system console.
-
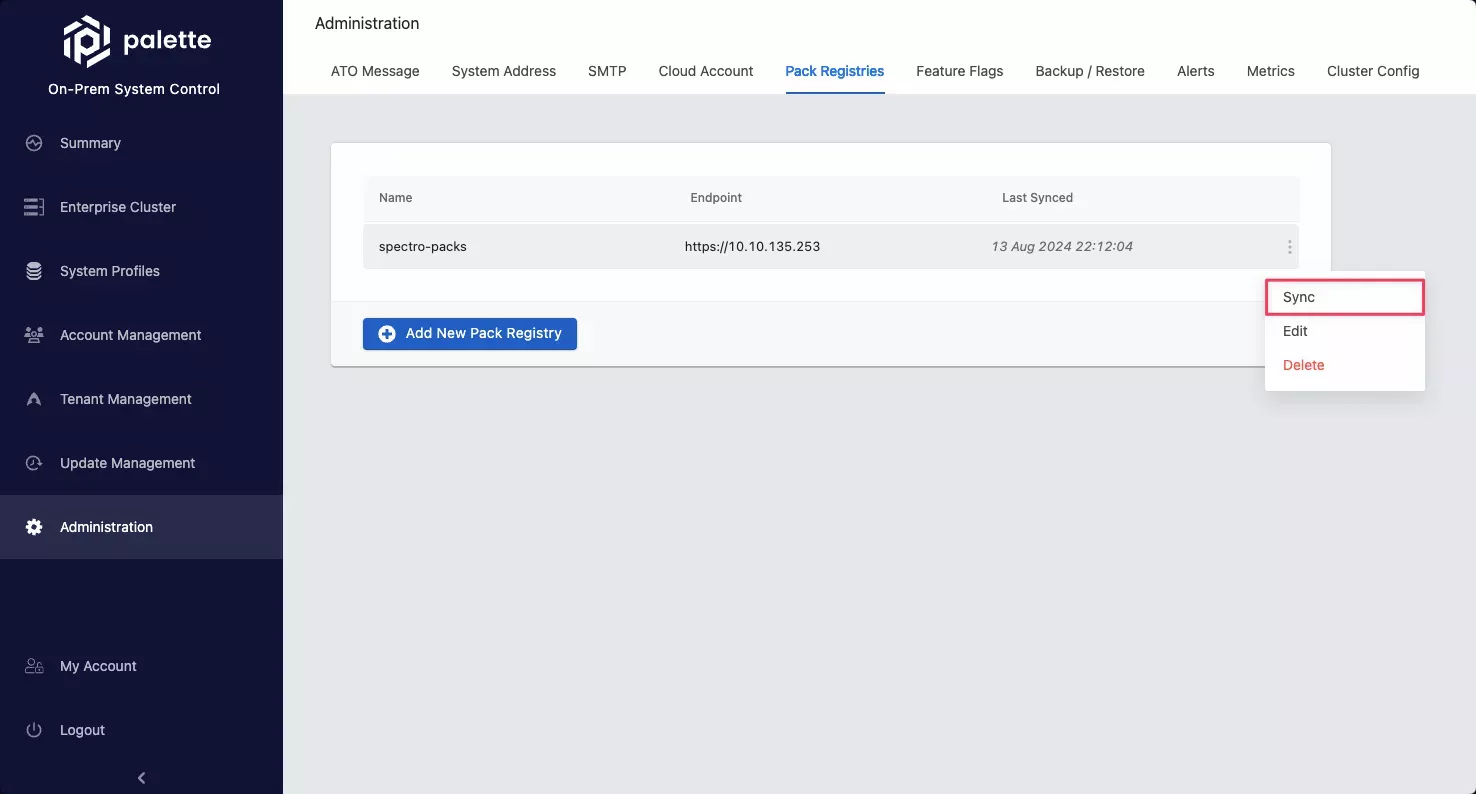
From the left Main Menu, select Administration, and then select the Pack Registries tab.
-
Select the three-dots Menu of spectro-packs and click Sync.

Once the sync is finished, the newly uploaded packs will be available for use in the tenants that belong to your airgapped instance of Palette or Palette VerteX.
Validate
-
Log in to a tenant that belongs to your airgapped instance of Palette or Palette VerteX.
-
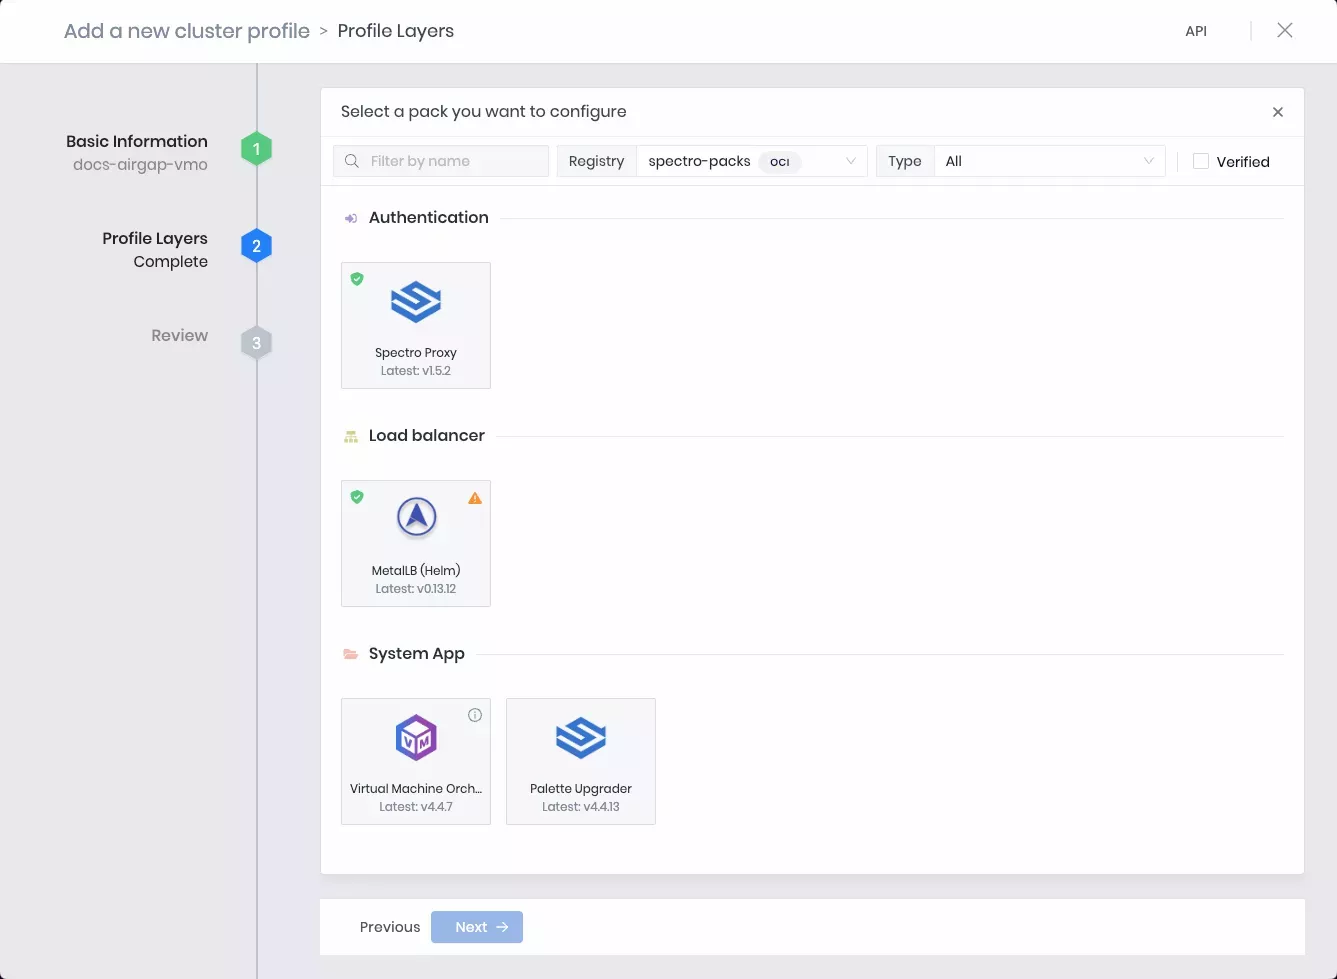
From the left Main Menu, select Profiles and click Add Cluster Profile.
-
Follow the Create a VMO Profile guide to start creating a VMO add-on profile.
-
If the Virtual Machine Orchestrator, Spectro Proxy, and, if applicable, your load balancer packs are available to add to a cluster profile, then the installation is successful.
