Manage CPU and Memory
You can use the KubeVirt CPU Hotplug and KubeVirt Memory Hotplug feature in Palette, which allows the Virtual Machine (VM) to add and remove virtual CPUs and increase or decrease memory while the VM is active. By default, live migration is automatically enabled to apply the changes without rebooting the VM.
Limitations
- CPU and memory hotplug is not currently supported by the ARM64 architecture.
- The current CPU and memory hotplug implementation requires the live migration of the VM workload.
Prerequisites
- A VM deployed and active in Palette.
Manage CPU and Memory
Select the tab that corresponds to the method you want to use to enable CPU or memory hotplug in your VM.
- UI
- YAML
-
Log in to Palette.
-
From the left main menu, select Clusters, and then select the cluster with the VM you want to update.
-
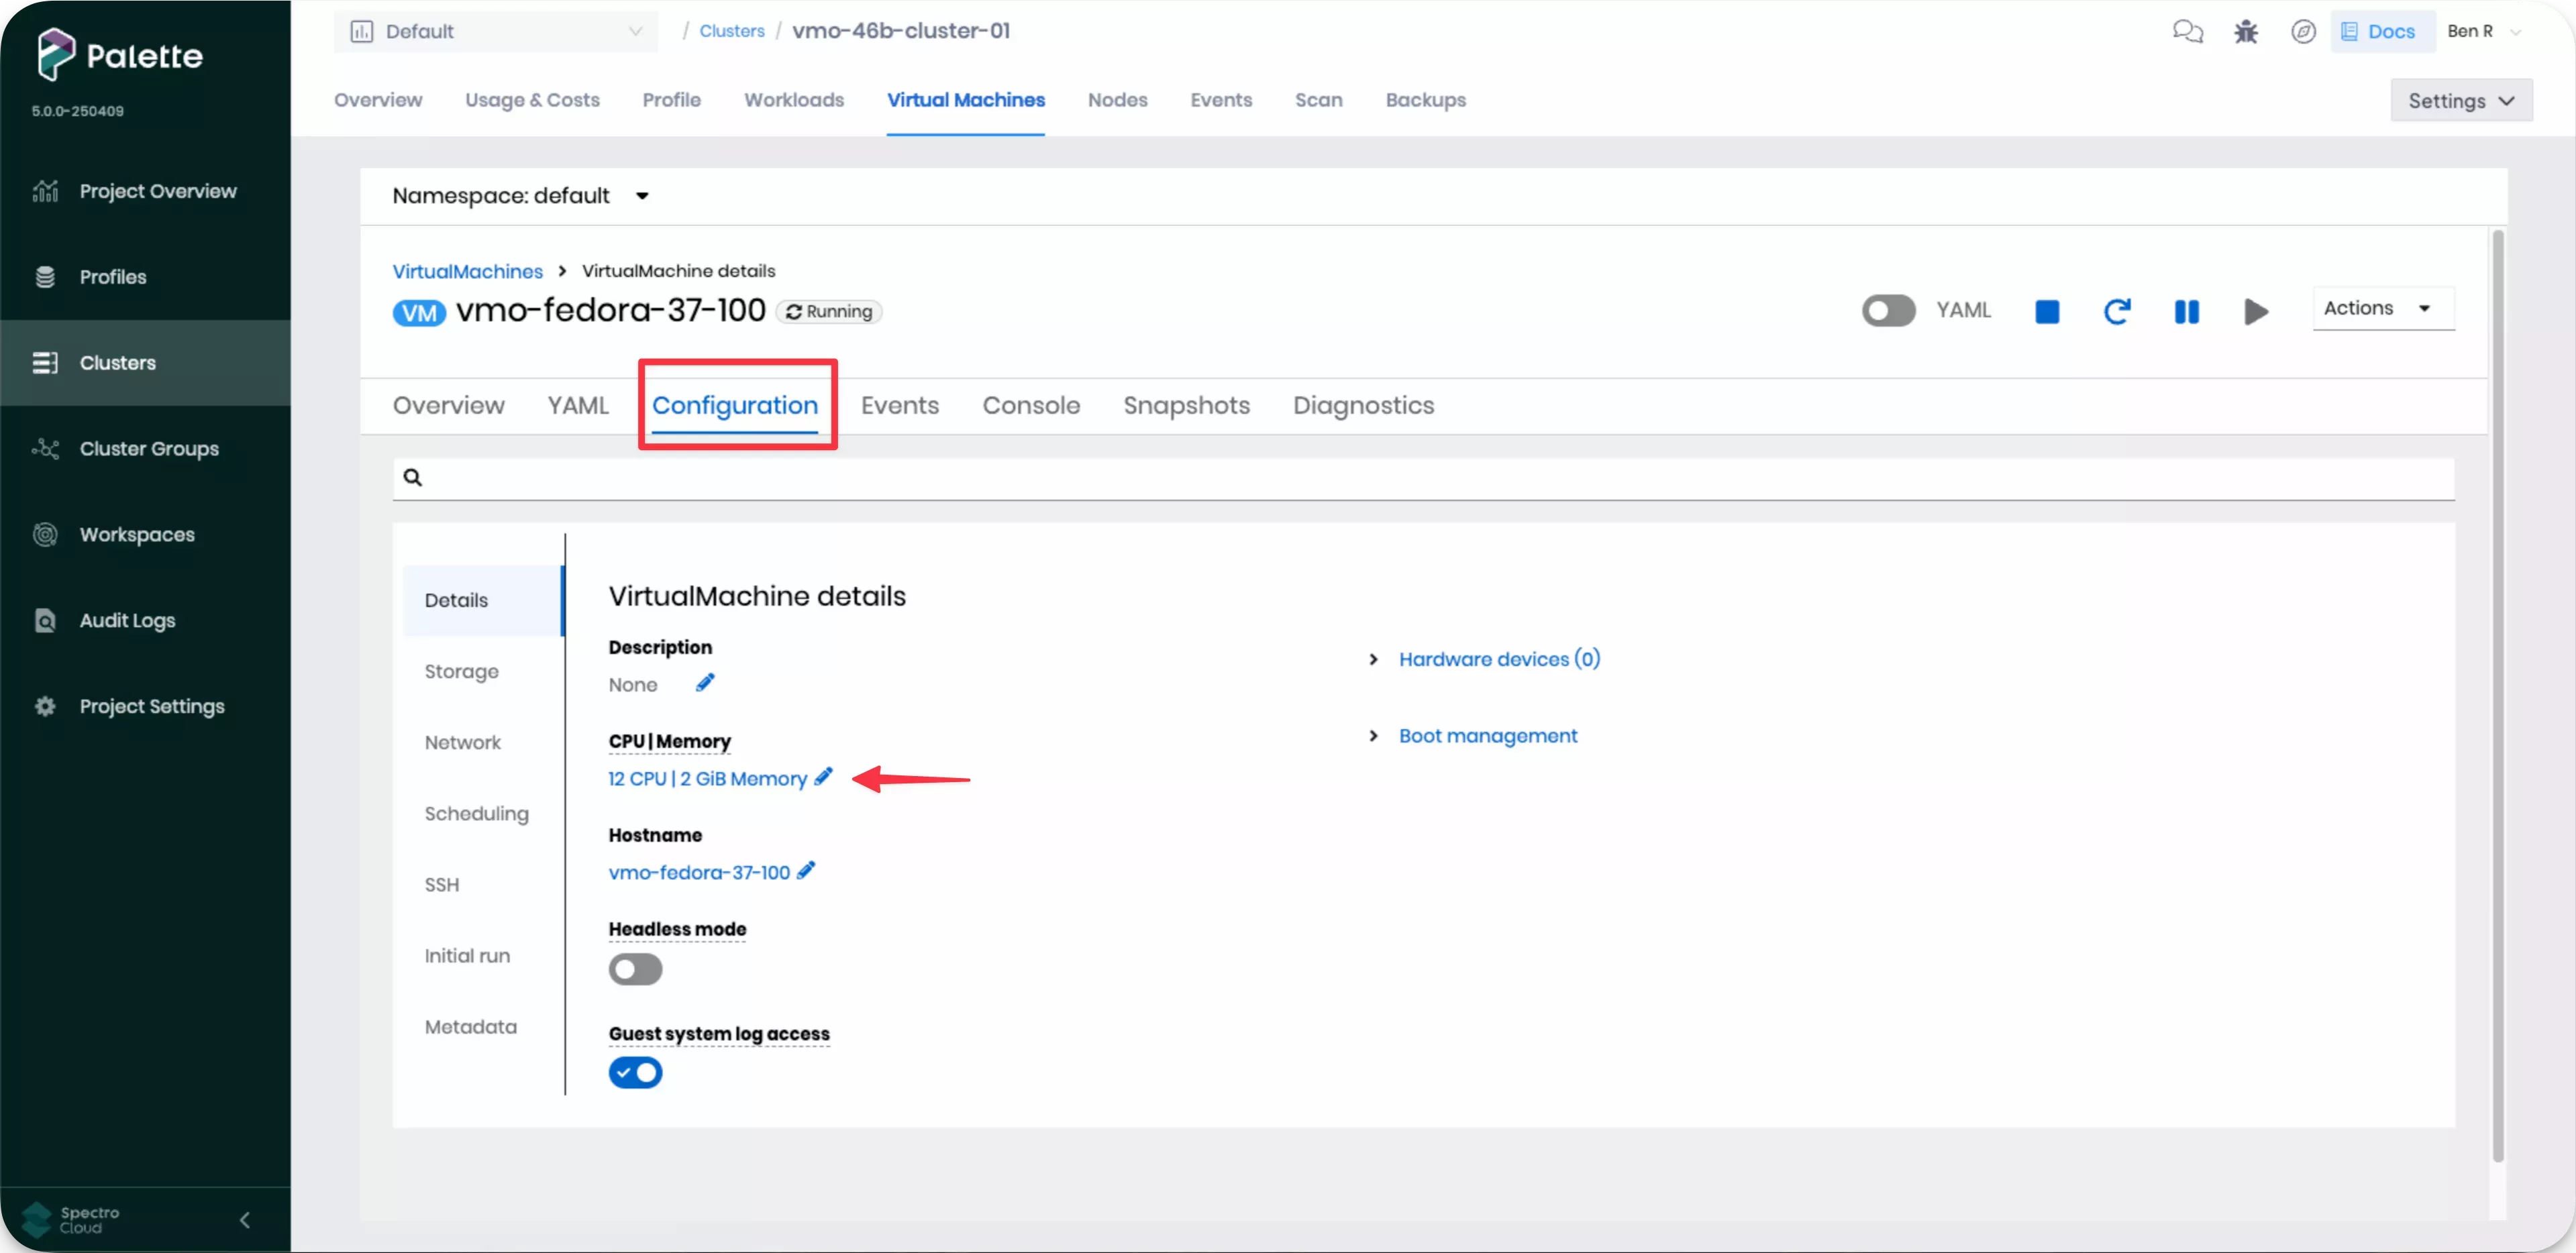
Select the Virtual Machines tab, then select the necessary VM and open its Configuration tab. Click on the pencil icon for CPU|Memory.
-
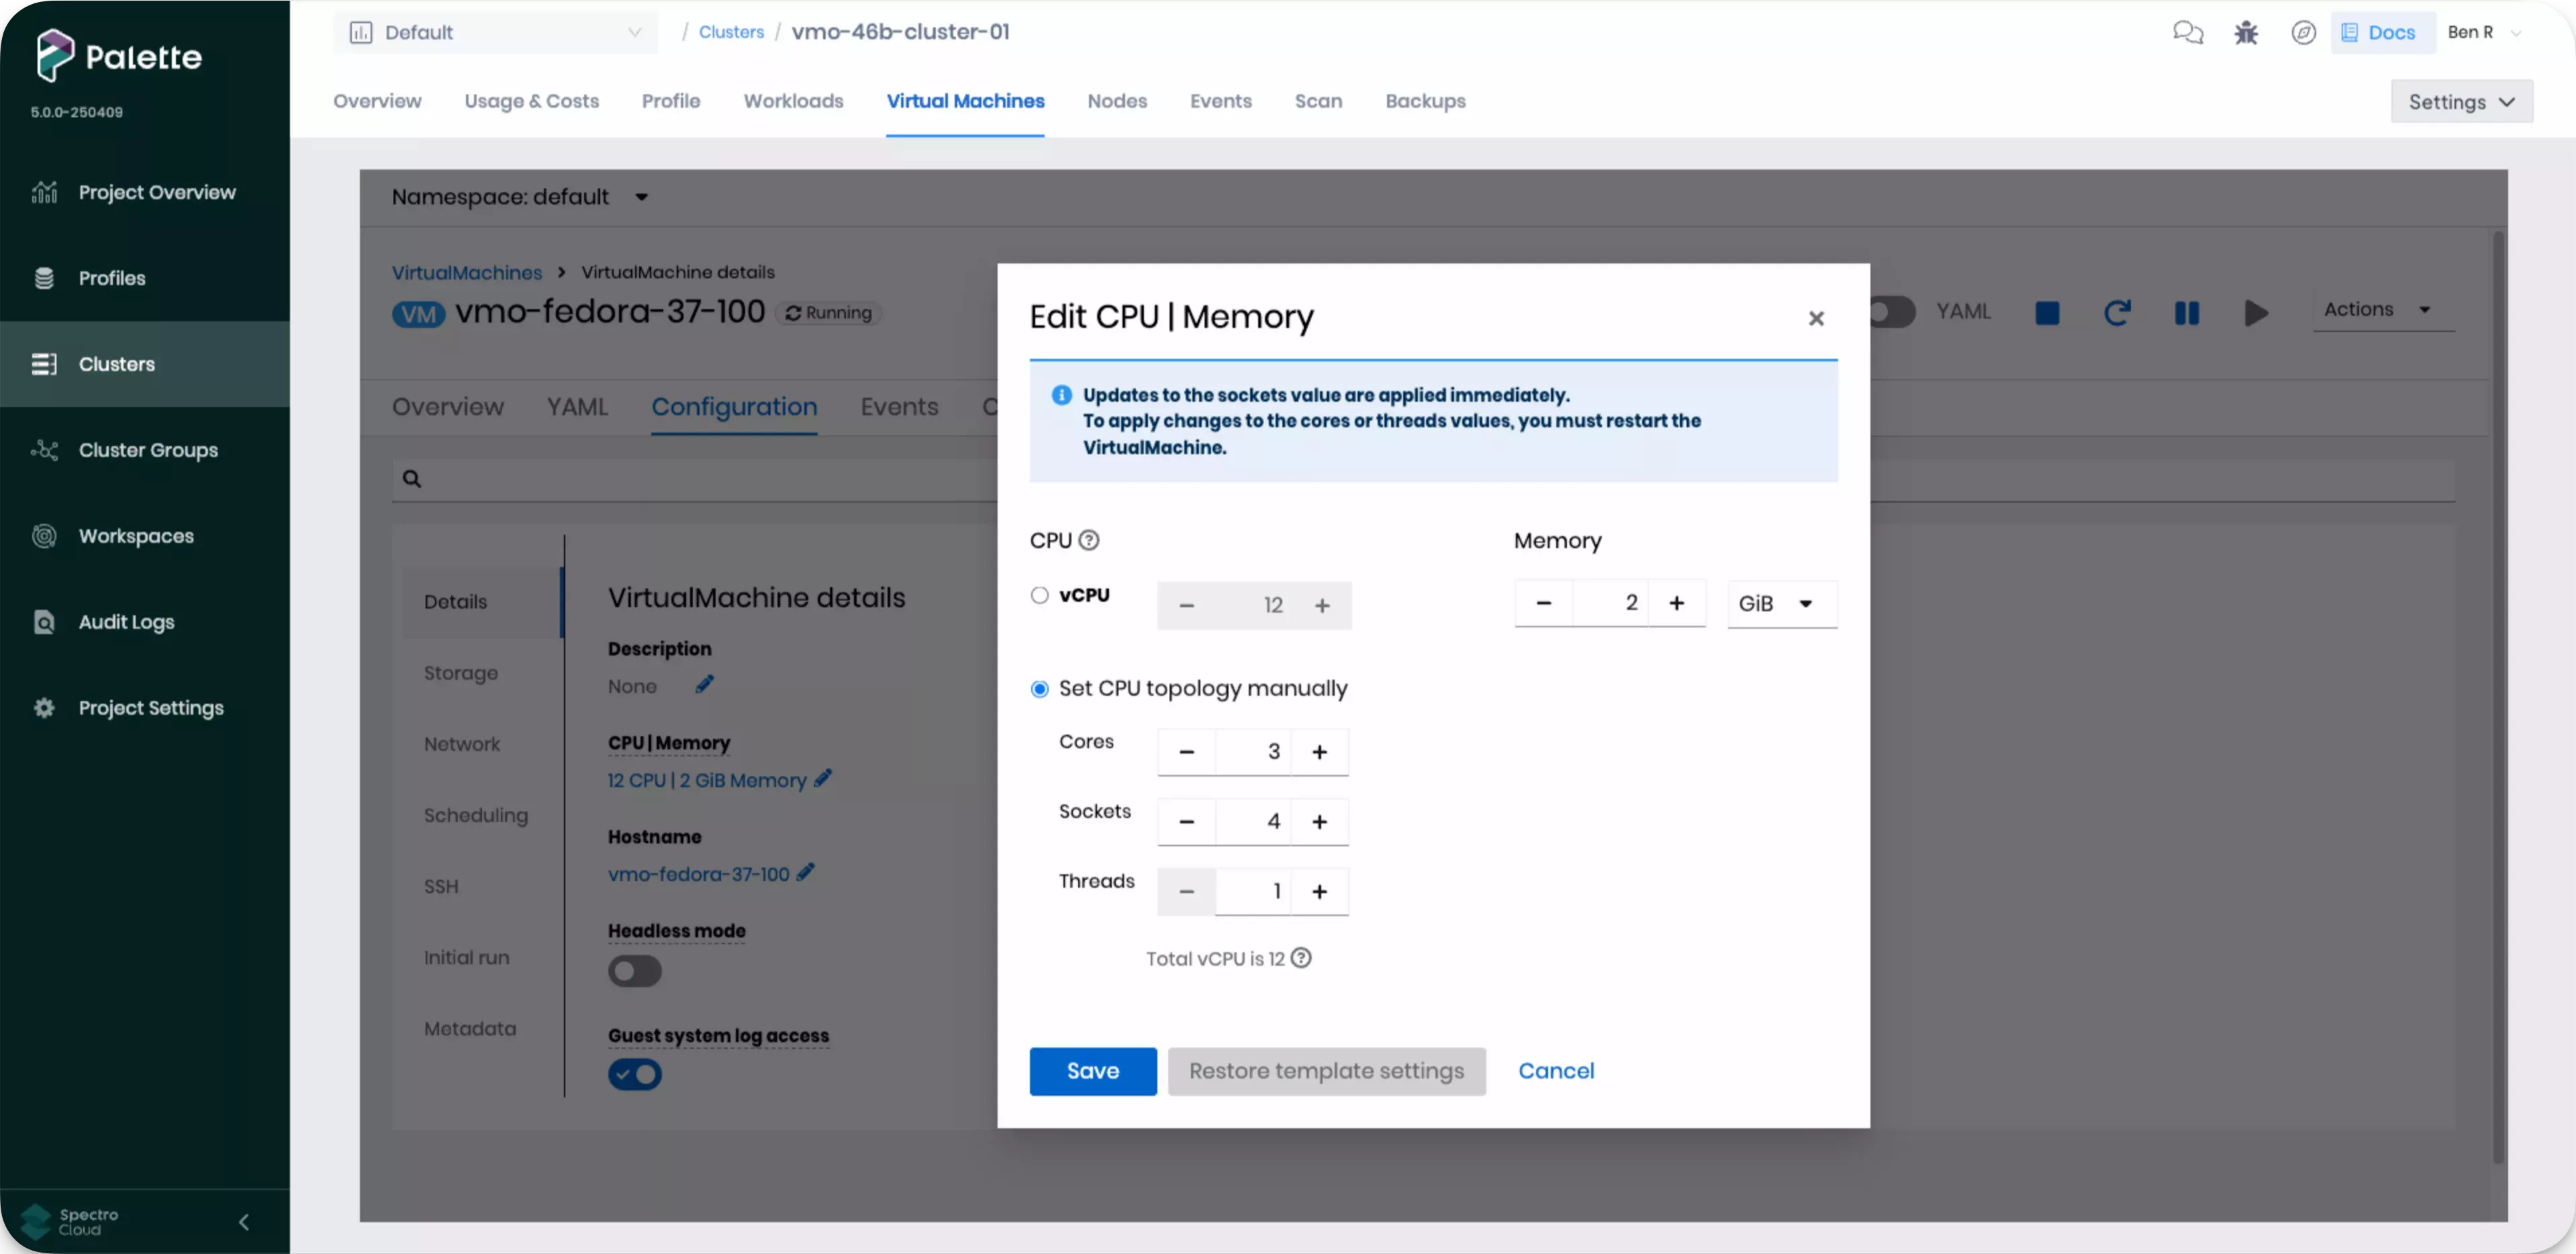
Change the desired CPU sockets under vCPU and memory for the VM. You can also select Set CPU topology manually to configure specific cores, sockets, and threads for the VM.
 warning
You must restart the VM to apply any changes made to Cores or Threads.
-
Select Save.
-
A live migration of the VM occurs automatically if changes have been made to the CPU sockets or memory. If you adjusted the cores or threads, you must restart the VM to apply those changes.
-
Log in to Palette.
-
From the left main menu, select Clusters, and then select the cluster with the VM you want to update.
-
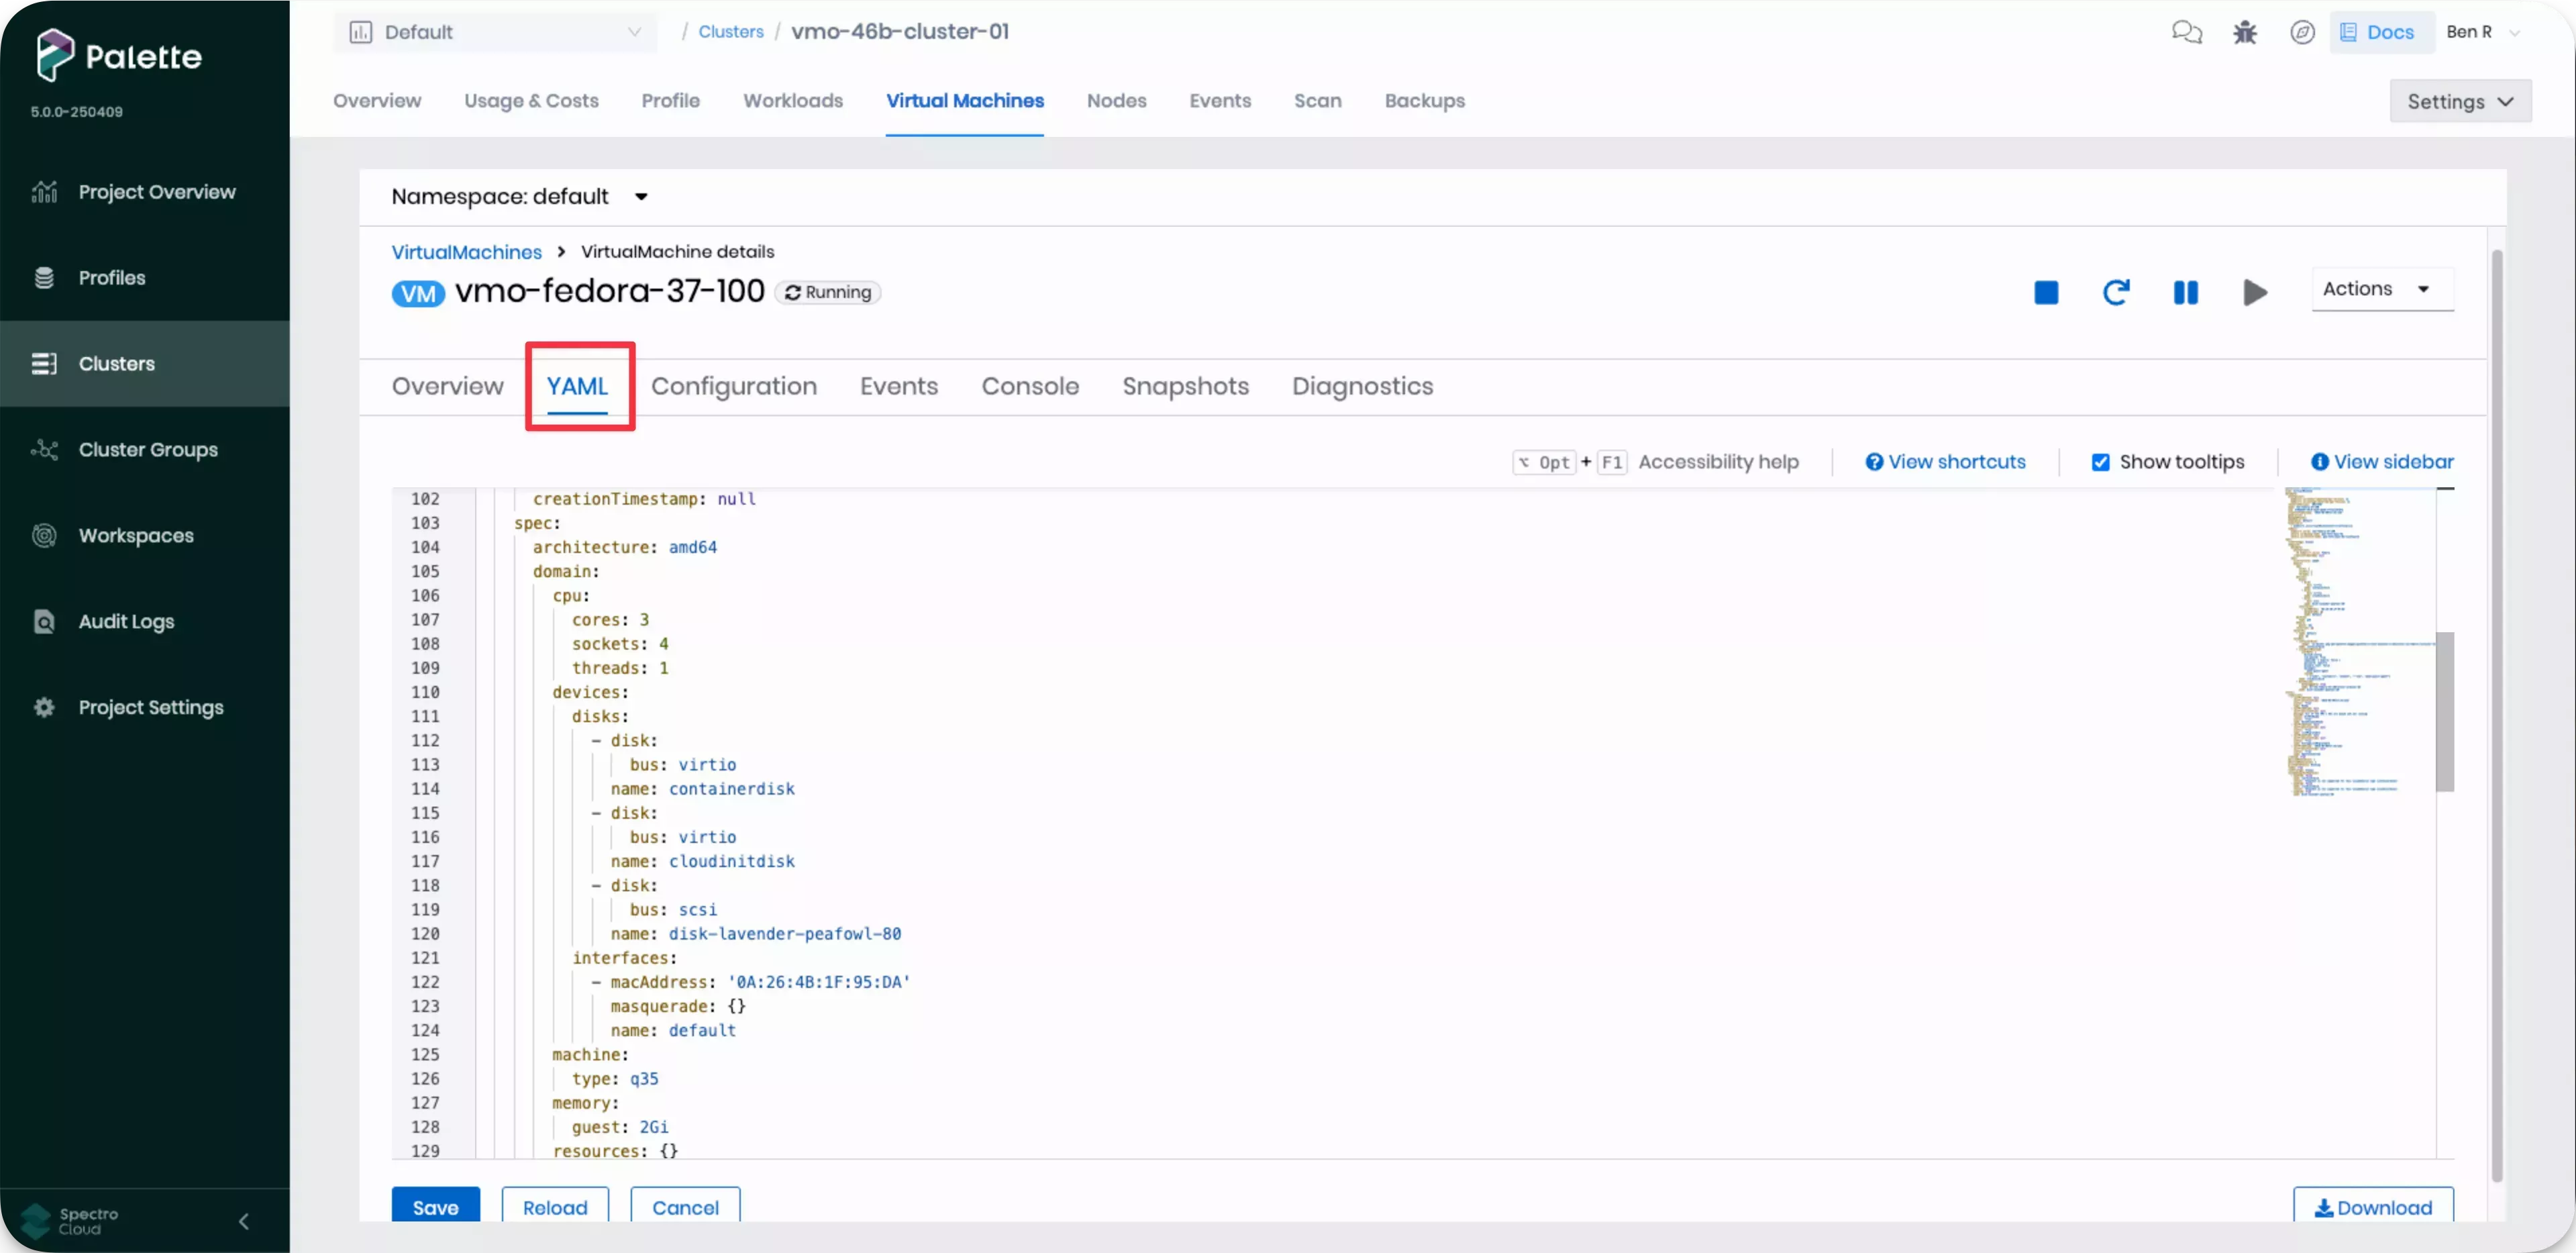
Select the Virtual Machines tab, then select the necessary VM and open its YAML tab.
-
In the VM YAML configuration editor, navigate to the VM object configuration and update the number of CPU cores, sockets, threads, or memory. Consider the following examples for reference.
spec:
  template:
    spec:
      domain:
        cpu:
          cores: 3
          sockets: 4
threads: 1spec:
template:
spec:
domain:
memory:
guest: 2Gi -
In the bottom-left corner, select Save. Palette applies your updates.
-
To track the update process, in the YAML configuration editor, select Reload and monitor for a status update similar to the following example.
status:
  conditions:
    - lastProbeTime: null
      lastTransitionTime: null
      status: "True"
      type: LiveMigratable
    - lastProbeTime: null
      lastTransitionTime: null
      status: "True"
      type: HotVCPUChange
Validate
- UI
- YAML
-
Log in to Palette.
-
From the left main menu, select Clusters, and then select the cluster with the VM you want to update.
-
Select the Virtual Machines tab, then select the necessary VM and open its Console tab.
-
Log in to the VM using the appropriate credentials specified in the YAML template. The provided templates contain the default credentials for the VM in the
cloudInitNoCloud.userDatasection. -
Verify that the VM has the expected number of CPUs or memory size. Use the following commands to verify the number of CPUs, memory size, and number of CPU cores. Keep in mind that the commands may vary based on the OS.
To verify the number of CPUs and cores, issue the following command.
lscpuExample lscpu output...
CPU(s): 12
...
Thread(s) per core: 1
Core(s) per socket: 3
Socket(s): 4
...To verify the memory size, issue the following command.
free --humanExample free outputtotal used free shared buff/cache available
Mem: 2.0Gi 168Mi 1.5Gi 8.0Mi 320Mi 1.7Gi
Swap: 2.0Gi 0B 2.0Gi
-
Log in to Palette.
-
From the left main menu, select Clusters, and then select the cluster with the VM where you enabled the CPU or memory hotplug.
-
Select the Virtual Machines tab, then select the necessary VM and open its YAML tab.
-
In the VM YAML configuration editor, navigate to the VM object and status configurations and verify that they specify the expected number of CPUs or memory size. Consider the following example for reference.
spec:
  template:
    spec:
      domain:
        cpu:
          cores: 3
          sockets: 4
          threads: 1
 ...
 status:
   currentCPUTopology:
     cores: 3
     sockets: 4
     threads: 1