Install Palette VerteX on an IPv6 EKS Cluster
You can install self-hosted Palette VerteX on an Amazon EKS cluster that uses the IPv6 IP address family. In an IPv6 EKS cluster, pods and services receive IPv6 addresses only. You enable IPv6 support through a parameter in the Palette VerteX Helm chart values file.
This guide contains the complete installation procedure. It follows the Install Non-Airgap Self-Hosted Palette VerteX guide and adds the steps that an IPv6 EKS cluster requires.
This guide uses an Amazon EKS cluster that has EKS Auto Mode enabled.
Limitations
-
This guide covers non-airgap installations with Helm. It does not cover airgap installations or the VerteX Management Appliance.
-
Many services outside the cluster, such as some of the registries that Palette VerteX downloads packs and images from, are reachable over IPv4 only. The nodes of the EKS cluster must have an IPv4 route to these services, for example, through a Network Address Translation (NAT) gateway. If the route is missing, pack registry synchronization fails.
-
Amazon EKS does not allow you to change the IP address family of an existing cluster. You cannot convert an existing IPv4 installation to IPv6.
Prerequisites
Do not use a VerteX-managed Kubernetes cluster when installing VerteX. VerteX-managed clusters contain the VerteX agent and VerteX-created Kubernetes resources that will interfere with the installation of VerteX.
IPv6 and Amazon EKS
-
The Helm charts for Palette VerteX 4.10.46 or later.
-
A Virtual Private Cloud (VPC) that has both an IPv4 and an IPv6 Classless Inter-Domain Routing (CIDR) block. The Enable auto-assign IPv6 address setting must be enabled on the private subnets that host the cluster. Refer to Learn about IPv6 addresses to clusters, Pods, and services in the AWS documentation for the complete list of AWS requirements and considerations.
-
An Identity and Access Management (IAM) policy that allows the Amazon VPC Container Network Interface (CNI) plugin to assign IPv6 addresses. Attach the policy to the IAM role that the Amazon VPC CNI add-on uses. This is either a dedicated role for the add-on or the node IAM role of the managed node group that you create after the installation. AWS does not provide a managed policy for the IPv6 IP address family, so you must create the policy. This guide uses the policy name
AmazonEKS_CNI_IPv6_Policy. Refer to Configure Amazon VPC CNI plugin to use IRSA in the AWS documentation for the policy contents and the command to create it. -
The AWS CLI installed and configured with credentials for the AWS account that hosts the cluster.
Kubernetes Cluster
You create the EKS cluster as part of this guide. Ensure that the cluster you create meets the following requirements.
-
We recommend the following resources for Palette VerteX. Refer to our Size Guidelines for additional sizing information.
-
A minimum of three AMD64 (x86_64) nodes. These can be worker nodes or three untainted control plane nodes.
- ARM-based nodes are not supported.
-
8 CPUs per node
-
16 GB of memory per node
-
110 GB of disk space per node
-
-
The following network ports must be accessible:
-
TCP/443 - Inbound and outbound to and from the Palette VerteX management cluster
-
TCP/6443 - Outbound traffic from the Palette VerteX management cluster to the deployed workload cluster's Kubernetes API server.
-
-
The following TLS/SSL certificate files for the domain name you will assign to Palette VerteX. You must enable HTTPS encryption for Palette VerteX. Reach out to your network administrator or security team to obtain these files:
-
x509 TLS/SSL certificate file in base64 format
-
x509 TLS/SSL certificate key file in base64 format
-
x509 TLS/SSL certificate authority file in base64 format
-
-
The Kubernetes cluster must use a Kubernetes version compatible with your Palette VerteX version. Refer to Kubernetes Requirements to locate the required Kubernetes version.
-
Ensure the Kubernetes cluster does not have Cert Manager installed. Palette VerteX requires a unique Cert Manager configuration to be installed as part of the installation process. If Cert Manager is already installed, you must uninstall it before installing Palette VerteX.
-
A Container Storage Interface (CSI) to create persistent volumes, which are used to store persistent data. You may install any CSI that is compatible with your Kubernetes cluster.
-
A StorageClass to manage persistent storage, with the annotation
storageclass.kubernetes.io/is-default-classset totrue. You can set a default storage class in your Kubernetes cluster using the followingkubectlcommand.kubectl patch storageclass <storageclass-name> --patch '{"metadata": {"annotations":{"storageclass.kubernetes.io/is-default-class":"true"}}}'To use a non-default storage class for the Palette VerteX installation, you must set the preferred storage class name in the
vertex/values.yamlfile using themongo.storageClassparameter.
- (FIPS compliance only) The OS and Kubernetes cluster you are installing Palette VerteX onto must be FIPS-compliant. Otherwise, Palette VerteX and its operations will not be FIPS-compliant.
Local Environment
-
Access to the target Kubernetes cluster's kubeconfig file. You must be able to interact with the cluster using
kubectlcommands and have sufficient permissions to install Palette VerteX. We recommend using a role with cluster-admin permissions to install Palette VerteX. -
The following software installed and available:
-
Access to the Palette VerteX Helm charts (
charts.zip). Refer to Access Palette VerteX for instructions on how to request access.
Use Helm client v3.14.0 or later. Older Helm clients do not wait for pre-upgrade hook resources to finish
terminating before recreating them. When you run helm upgrade against the hubble chart with a client earlier than
v3.14.0, the hubble-system namespace can be inadvertently deleted mid-upgrade, which results in loss of MongoDB
data — including tenants and cluster metadata — with no automatic recovery.
The fix for this hook behavior was released in
Helm v3.14.0. Confirm your client version
with helm version before you continue.
- An image pull secret from Spectro Cloud customer support, required to pull images from Spectro Cloud OCI registries. This is not required if you plan to use mirror registries or image swap when pulling images. Refer to Configure Image Pull Secret for Security-Hardened Images for more information.
Other Prerequisites
-
If you are using a self-hosted MongoDB instance, such as MongoDB Atlas, ensure the MongoDB database has a user named
hubblewith the permissionreadWriteAnyDatabase. Refer to the Configure Database Users guide for more information. -
A custom domain and the ability to update DNS records. You will need this to enable HTTPS encryption for Palette VerteX.
-
(Proxy environments only) If you are installing Palette VerteX behind a network proxy server, ensure Palette VerteX has access to the required domains and ports. Refer to Required Domains for more information.
-
(Proxy environments only) If you are installing Palette VerteX behind a network proxy server, ensure you have the network proxy's Certificate Authority (CA) certificate file in the base64 format. You will need this to enable Palette VerteX to communicate with the network proxy server.
Create the EKS Cluster
-
Create an Amazon EKS cluster with the following settings. Configure the remaining settings to match the Kubernetes cluster prerequisites and your environment.
Setting Value EKS Auto Mode Enabled. Kubernetes version A version that your Palette VerteX version supports. The EKS console can preselect a newer version. Refer to Kubernetes Requirements. VPC and Subnets The VPC that has an IPv6 CIDR block, and its private subnets. Cluster IP address family IPv6. Add-ons Amazon EKS Pod Identity Agent, Amazon VPC CNI, CoreDNS, and kube-proxy. Do not select Metrics Server, because Palette VerteX installs its own. Amazon VPC CNI IAM role The IAM role that has the AmazonEKS_CNI_IPv6_Policypolicy attached. If you select Inherit from node instead, attach the policy to the node IAM role of the managed node group that you create in Post-Installation Configuration.warningCreate the managed node group only after the installation completes. If the node group exists during the installation, pods that require persistent volumes, such as the MongoDB pods, can be scheduled on its node. Their volumes are never provisioned, because the Elastic Block Store (EBS) storage driver of EKS Auto Mode runs only on the nodes that EKS Auto Mode manages.
-
Update your kubeconfig file so that you can access the cluster with
kubectl.aws eks update-kubeconfig --region <region> --name <eks-cluster-name>Replace
<region>with the AWS region of the cluster and<eks-cluster-name>with the name of the EKS cluster. -
Create a default StorageClass for the cluster. EKS Auto Mode does not create a StorageClass for you, and the StorageClass must use the
ebs.csi.eks.amazonaws.comprovisioner. Refer to Create a storage class in the AWS documentation for guidance. -
Create a ConfigMap that contains the name of the EKS cluster. Palette VerteX reads the name of its management cluster from this ConfigMap, which is a prerequisite for EKS Pod Identity.
kubectl create configmap palette-global-config \
  --from-literal=managementClusterName="<eks-cluster-name>" \
  --namespace kube-system
Replace
<eks-cluster-name>with the name of the EKS cluster.
Install Palette VerteX
The following instructions are written agnostic to the Kubernetes distribution you are using. Depending on the underlying infrastructure provider and your Kubernetes distribution, you may need to modify the instructions to match your environment. Reach out to our support team if you need assistance.
-
Open a terminal session and navigate to the directory where you downloaded the Palette VerteX install ZIP file provided by our support team. Unzip the file to a directory named
vertex-install.unzip charts.zip -d vertex-install -
Navigate to the
vertex-installdirectory.cd vertex-install
Cert-Manager Helm Chart
-
Open the file
extras/cert-manager/values.yamlusing a text editor of your choice. This example uses Vim.vim extras/cert-manager/values.yaml - If you plan to pull images from Spectro Cloud OCI registries, paste the image pull secret received from your
customer support representative into the
imagePullSecret.dockerConfigJsonfield, and setimagePullSecret.createtotrue. The chart creates the secret only whenimagePullSecret.createistrue. The image pull secret is not required if you plan to use mirror registries or image swap. - Install the Cert-Manager Helm chart.
Use the value that is labeled Docker Configuration JSON (dockerconfigjson) in the message from your customer
support representative. The message also contains a service account key for docker login commands. The service
account key does not work in the imagePullSecret.dockerConfigJson field.
Alternately, if you plan to pull images from a private registry that requires authentication, use the base64-encoded
contents of your config.json containing the registry credentials. Refer to
Helm Configuration Reference for more information.
If you omit the image pull secret during installation, you must provide it through the system console. Refer to Configure Image Pull Secret for Security-Hardened Images for more information.
imagePullSecret:
  # When true, render Secret spectro-image-pull-secret in the cert-manager namespace.
  # Pods automatically reference that pull secret when create is true or the secret already exists.
  create: true
  dockerConfigJson: "abcdEFGhiJKlmnOPQrSTUVwX..." # Used when create is true: base64-encoded dockerconfigjson
helm upgrade --install cert-manager \
  ./extras/cert-manager/cert-manager-*.tgz \
  --namespace cert-manager \
  --create-namespace \
  --values ./extras/cert-manager/values.yaml
Release "cert-manager" does not exist. Installing it now.
NAME: cert-manager
LAST DEPLOYED: Wed Jun 17 12:54:27 2026
NAMESPACE: cert-manager
STATUS: deployed
REVISION: 1
TEST SUITE: None
Spectro Management CRDs Helm Chart
-
Install the Spectro Management CRDs chart. This chart contains Custom Resource Definitions (CRDs) required by Palette VerteX, including Traefik CRDs, and must be installed before the main Palette VerteX Helm chart. When the chart is installed, the custom resource types are registered with the Kubernetes API server; no pods are deployed.
helm upgrade --install spectro-mgmt-crds \
  extras/spectro-mgmt-crds/spectro-mgmt-crds-*.tgz \
  --values extras/spectro-mgmt-crds/values.yaml
Example outputRelease "spectro-mgmt-crds" does not exist. Installing it now.
NAME: spectro-mgmt-crds
LAST DEPLOYED: Wed Jun 17 21:17:39 2026
NAMESPACE: default
STATUS: deployed
REVISION: 1
TEST SUITE: None
VerteX Helm Chart
-
Open the file
vertex/values.yamlusing a text editor of your choice. This example uses Vim.vim vertex/values.yaml - The file
vertex/values.yamlcontains the default values for the Palette VerteX installation parameters. The following table lists the most important parameters to pay attention to. For a complete list of fields and additional information, refer to Helm Configuration Reference for more information. - Save the completed
vertex/values.yamlfile. You can review the following examples of thevertex/values.yamlfile with the required parameters highlighted. - Spectro Cloud OCI Registry / ECR
- Self-Hosted OCI Registry
| Parameter | Description | Type |
|---|---|---|
global.imagePullSecret.dockerConfigJson | If you plan to pull images from Spectro Cloud OCI registries (without mirror registries or image swap configured) or images from private registries that require authentication, paste your image pull secret here. For Spectro Cloud OCI registries, use the value that is labeled Docker Configuration JSON (dockerconfigjson) in the message from your customer support representative, not the service account key. The value must match the image pull secret configured for Cert-Manager. If you omit the image pull secret during installation, you must provide it through the system console. Refer to Configure Image Pull Secret for Security-Hardened Images for more information. | string |
env.rootDomain | The URL name or IP address you will use for the Palette VerteX installation. | string |
ociPackRegistry or ociPackEcrRegistry | The OCI registry credentials for Palette VerteX FIPS packs. These credentials are provided by our support team. If using images from a self-hosted OCI registry instead, leave these sections blank and refer to the Self-Hosted OCI Registries table instead. | object |
ingress.enabled | Whether to install the Traefik ingress controller. Set to false if you already have an ingress controller deployed in the cluster. | boolean |
reachSystem | (Proxy environments only) Set reachSystem.enabled to true and configure the reachSystem.proxySettings parameters to configure Palette VerteX to use a network proxy in your environment | object |
mongo.storageClass | If you do not have a default storage class in your cluster (the annotation "storageclass.kubernetes.io/is-default-class":"true"), enter the name of the storage class to use for your Palette VerteX installation. | string |
Self-Hosted OCI Registries
The following parameters are required if you pull Palette VerteX images from a self-hosted OCI registry instead of a Spectro Cloud OCI registry or AWS ECR.
If you would prefer to keep your image swap values in a separate location, you can use the following table to
complete the extras/image-swap/values.yaml file instead. Otherwise, complete the following fields in vertex/values.yaml.
Use the following command to extract and edit the extras/image-swap/values.yaml file.
tar --extract --verbose --gzip --file extras/image-swap/image-swap-*.tgz --directory extras/
vim extras/image-swap/values.yaml
| Parameter | Description | Type |
|---|---|---|
ociImageRegistry | Configure the registry endpoint, credentials, and mirrorRegistries values. Refer to the Helm Configuration Reference page for parameter descriptions. | object |
ociImageRegistry.mirrorRegistries | A comma-separated list of mirror registries in image swap format that maps public registry paths to your private registry. Refer to the Helm Configuration Reference page for examples. | string |
imageSwapImages | The Image Swap init and webhook images. If you host these images in your OCI registry, replace the image paths with your registry URL and namespace or project. | object |
imageSwapConfig.isEKSCluster | Set to true if you are installing Palette VerteX on an Amazon EKS cluster. Set to false for all other Kubernetes distributions. | boolean |
Include /v2 in your mirror registry endpoints if you are using a
Harbor registry with a proxy cache project.
Harbor proxy cache projects use /v2 as part of their internal URL routing for cached images. For all other
registries, omit /v2, as the container runtime automatically appends /v2 when making API calls.
Including /v2
for non-proxy-cache registries results in a doubled /v2/v2/ path, which causes image pull failures. For example:
docker.io::harbor.example.org/v2/proxy-cache-project/docker.io.
#########################
# Spectro Cloud Palette #
#########################

global:
  imagePullSecret:
    # Provide your own base64 encoded dockerconfigjson value below if using ImagePullSecret for Private registry Authentication
    dockerConfigJson: "abcdEFGhiJKlmnOPQrSTUVwX..." # omitted for brevity

# MongoDB Configuration
mongo:
  # Whether to deploy MongoDB in-cluster (internal == true) or use Mongo Atlas
  internal: true

  # Mongodb URL. Only change if using Mongo Atlas.
  databaseUrl: "mongo-0.mongo.hubble-system.svc.cluster.local,mongo-1.mongo.hubble-system.svc.cluster.local,mongo-2.mongo.hubble-system.svc.cluster.local"
  # Mongo Atlas password, base64 encoded. Only enter if using Mongo Atlas.
  databasePassword: ""

  #No. of mongo replicas to run, default is 3
  replicas: 3
  # The following only apply if mongo.internal == true
  cpuLimit: "2000m"
  memoryLimit: "4Gi"
  pvcSize: "20Gi"
  storageClass: "" # leave empty to use the default storage class

config:
  installationMode: "connected" #values can be connected or airgap.
  isPaletteBaseCluster: false

  # SSO SAML Configuration (Optional for self-hosted type)
  sso:
    saml:
      enabled: false
      acsUrlRoot: "myfirstpalette.spectrocloud.com"
      acsUrlScheme: "https"
      audienceUrl: "https://www.spectrocloud.com"
      entityId: "https://www.spectrocloud.com"
      apiVersion: "v1"

  # Email Configurations. (Optional for self-hosted type)
  email:
    enabled: false
    emailId: "noreply@spectrocloud.com"
    smtpServer: "smtp.gmail.com"
    smtpPort: 587
    insecureSkipVerifyTls: false
    fromEmailId: "noreply@spectrocloud.com"
    password: "" # base64 encoded SMTP password

  env:
    # rootDomain is a DNS record which will be mapped to the ingress controller load balancer
    # E.g., myfirstpalette.spectrocloud.com
    # - Mandatory if ingress.traefik.hostPort == false (LoadBalancer mode)
    # - Optional if ingress.traefik.hostPort == true  (hostPort / appliance mode, leave empty)
    #
    # IMPORTANT: a DNS record must be created separately and it must be a wildcard to account for Organization prefixes
    # E.g., *.myfirstpalette.spectrocloud.com
    rootDomain: "my-domain.docs-test.spectrocloud.com"

  # stableEndpointAccess is used when deploying EKS clusters in Private network type.
  # When your Saas installed instance have connectivity to the private VPC where you want to launch the cluster set the stableEndpointAccess to true
  cluster:
    stableEndpointAccess: false

  #  registry:
  #    endpoint: "" #<Contact Spectro Cloud Sales for More info>
  #    name: "" #<Contact Spectro Cloud Sales for More info>
  #    password: "" #<Contact Spectro Cloud Sales for More info>
  #    username: "" #<Contact Spectro Cloud Sales for More info>
  #    insecureSkipVerify: false
  #    caCert: ""

  #  ociPackRegistry:
  #    endpoint: "" #<Contact Spectro Cloud Sales for More info>
  #    name: "" #<Contact Spectro Cloud Sales for More info>
  #    password: "" #<Contact Spectro Cloud Sales for More info>
  #    username: "" #<Contact Spectro Cloud Sales for More info>
  #    baseContentPath: "" #<Contact Spectro Cloud Sales for More info>
  #    insecureSkipVerify: false
  #    caCert: ""

  ociPackEcrRegistry:
    endpoint: "https://123456789.dkr.ecr.us-east-1.amazonaws.com" #<Contact Spectro Cloud Sales for More info>
    name: "Palette Packs" #<Contact Spectro Cloud Sales for More info>
    accessKey: "**********" #<Contact Spectro Cloud Sales for More info>
    secretKey: "**********" #<Contact Spectro Cloud Sales for More info>
    baseContentPath: "production-fips" #<Contact Spectro Cloud Sales for More info>
    isPrivate: true
    insecureSkipVerify: false
    caCert: ""
    credentialType: ""

  #  ociImageRegistry:
  #    endpoint: "" #<Contact Spectro Cloud Sales for More info>
  #    name: "" #<Contact Spectro Cloud Sales for More info>
  #    password: "" #<Contact Spectro Cloud Sales for More info>
  #    username: "" #<Contact Spectro Cloud Sales for More info>
  #    baseContentPath: "" #<Contact Spectro Cloud Sales for More info>
  #    insecureSkipVerify: false
  #    caCert: ""
  #    mirrorRegistries: ""  # See instructions below.

  # Instruction for mirrorRegistries.
  # ----------------------------------
  # Please provide the registry endpoint for the following registries, separated by double colons (::):
  # docker.io
  # gcr.io
  # ghcr.io
  # k8s.gcr.io
  # registry.k8s.io
  # quay.io
  # For each registry, follow this example format:
  # docker.io::<PLACE_HOLDER_FOR_ENDPOINT>/v2/<DOCKER_IO_ENDPOINT>,gcr.io::<PLACE_HOLDER_FOR_ENDPOINT>/v2/<GCR_IO_ENDPOINT>,ghcr.io::<PLACE_HOLDER_FOR_ENDPOINT>/v2/<GHCR_IO_ENDPOINT>,k8s.gcr.io::<PLACE_HOLDER_FOR_ENDPOINT>/v2/<K8S_IO_ENDPOINT>,registry.k8s.io::<PLACE_HOLDER_FOR_ENDPOINT>/v2/<REGISTRY_K8S_IO_ENDPOINT>,quay.io::<PLACE_HOLDER_FOR_ENDPOINT>/v2/<QUAY_IO_ENDPOINT>,us-docker.pkg.dev::<PLACE_HOLDER_FOR_ENDPOINT>/v2/<US_DOCKER_ENDPOINT>
  # Replace <PLACE_HOLDER_FOR_ENDPOINT> with your actual registry endpoint and <DOCKER_IO_ENDPOINT>, <GCR_IO_ENDPOINT>, <GHCR_IO_ENDPOINT>, <K8S_IO_ENDPOINT>, <REGISTRY_K8S_IO_ENDPOINT>, and <QUAY_IO_ENDPOINT> with the specific endpoint details for each registry.

  imageSwapImages:
    imageSwapInitImage: "us-docker.pkg.dev/palette-images-fips/third-party/thewebroot/imageswap-init:v1.5.3-spectro-4.9.0"
    imageSwapImage: "us-docker.pkg.dev/palette-images-fips/third-party/thewebroot/imageswap:v1.5.3-spectro-4.9.0"

  imageSwapConfig:
    isEKSCluster: true #If the Cluster you are trying to install is EKS cluster set value to true else set to false

grpc:
  external: false
  endpoint: "" #Please provide DNS endpoint with the port eg: msg.spectrocloud.com:443
  annotations: {}
  # AWS example
  # service.beta.kubernetes.io/aws-load-balancer-internal: "true"
  # service.beta.kubernetes.io/aws-load-balancer-backend-protocol: tcp
  # service.beta.kubernetes.io/aws-load-balancer-ssl-ports: "https"

  # Azure example
  # service.beta.kubernetes.io/azure-load-balancer-internal: "true"
  # service.beta.kubernetes.io/azure-dns-label-name: myserviceuniquelabel

  # Static IP for the GRPC load balancer service. If empty, a dynamic IP will be generated.
  grpcStaticIP: ""
  caCertificateBase64: "" #Please provide caCertificate for the grpc server Cert
  serverCrtBase64: ""
  serverKeyBase64: ""
  insecureSkipVerify: false
tunnel:
  preferredServer:
    endpoint: ""
  servers:
    - endpoint: ""
ingress:
  # When enabled the Traefik ingress controller would be installed
  enabled: true

  # Port allocation behaviour based on traefik.hostPort:
  #
  #   traefik.hostPort=false → Traefik: 80/443 (LoadBalancer Service)   -- default behaviour for self-hosted / cloud setups with an external LB.
  #   traefik.hostPort=true  → Traefik: 80/443 (bound to node hostPort) -- appliance / on-prem setup with no external LB.
  traefik:
    # Whether to front the Traefik ingress controller with a cloud
    # load balancer (hostPort == false) or bind directly to node host ports (hostPort == true)
    hostPort: false

  ingress:
    # Default SSL certificate and key for the ingress controller (Optional)
    # A wildcard cert for config.env.rootDomain, e.g., *.myfirstpalette.spectrocloud.com
    # If left blank, a self-signed cert will be generated (when terminating TLS upstream of the ingress controller)
    certificate: ""
    key: ""

    #If ACM is enabled please use grpc as a non internal and bring grpc on different LB. Provide certificate and dns for it.
    annotations: {}
    # AWS example
    # service.beta.kubernetes.io/aws-load-balancer-internal: "true"
    # service.beta.kubernetes.io/aws-load-balancer-backend-protocol: tcp
    # service.beta.kubernetes.io/aws-load-balancer-ssl-cert: <ACM_ARN>
    # service.beta.kubernetes.io/aws-load-balancer-ssl-ports: "https"
    # service.beta.kubernetes.io/aws-load-balancer-proxy-protocol: '*'

    # Azure example
    # service.beta.kubernetes.io/azure-load-balancer-internal: "true"
    # service.beta.kubernetes.io/azure-dns-label-name: myserviceuniquelabel

    # Static IP for the Ingress load balancer service. If empty, a dynamic IP will be generated.
    ingressStaticIP: ""

    # For Service like AWS Load Balancer using https we would want to terminate the HTTPS at Load Balancer.
    terminateHTTPSAtLoadBalancer: false

frps:
  frps:
    enabled: false
    frpHostURL: proxy.sample.spectrocloud.com
    server:
      crt: LS0tLS1CRUdJTiBDRVJU... # omitted for brevity
      key: LS0tLS1CRUdJTiBSU0Eg... # omitted for brevity
    ca:
      crt: LS0tLS1CRUdJTiBDRVJ... # omitted for brevity
    service:
      annotations: {}

ui-system:
  enabled: true
  ui:
    nocUI:
      enable: true
      mapBoxAccessToken: "" # Leave Empty to use Default Access Token from Palette
      mapBoxStyledLayerID: "" # Leave Empty to use Default Style Layer ID

reachSystem:
  enabled: false
  proxySettings:
    http_proxy: ""
    https_proxy: ""
    no_proxy: ""
    ca_crt_path: "" # Set the 'ca_crt_path' parameter to the location of the certificate file on each node. This file should contain the Proxy CA Certificate, in case the Proxy being used requires a certificate.
  scheduleOnControlPlane: true
#########################
# Spectro Cloud Palette #
#########################

global:
  imagePullSecret:
    # Provide your own base64 encoded dockerconfigjson value below if using ImagePullSecret for Private registry Authentication
    dockerConfigJson: "abcdEFGhiJKlmnOPQrSTUVwX..." # omitted for brevity

# MongoDB Configuration
mongo:
  # Whether to deploy MongoDB in-cluster (internal == true) or use Mongo Atlas
  internal: true

  # Mongodb URL. Only change if using Mongo Atlas.
  databaseUrl: "mongo-0.mongo.hubble-system.svc.cluster.local,mongo-1.mongo.hubble-system.svc.cluster.local,mongo-2.mongo.hubble-system.svc.cluster.local"
  # Mongo Atlas password, base64 encoded. Only enter if using Mongo Atlas.
  databasePassword: ""

  #No. of mongo replicas to run, default is 3
  replicas: 3
  # The following only apply if mongo.internal == true
  cpuLimit: "2000m"
  memoryLimit: "4Gi"
  pvcSize: "20Gi"
  storageClass: "" # leave empty to use the default storage class

config:
  installationMode: "connected" #values can be connected or airgap.
  isPaletteBaseCluster: false

  # SSO SAML Configuration (Optional for self-hosted type)
  sso:
    saml:
      enabled: false
      acsUrlRoot: "myfirstpalette.spectrocloud.com"
      acsUrlScheme: "https"
      audienceUrl: "https://www.spectrocloud.com"
      entityId: "https://www.spectrocloud.com"
      apiVersion: "v1"

  # Email Configurations. (Optional for self-hosted type)
  email:
    enabled: false
    emailId: "noreply@spectrocloud.com"
    smtpServer: "smtp.gmail.com"
    smtpPort: 587
    insecureSkipVerifyTls: false
    fromEmailId: "noreply@spectrocloud.com"
    password: "" # base64 encoded SMTP password

  env:
    # rootDomain is a DNS record which will be mapped to the ingress controller load balancer
    # E.g., myfirstpalette.spectrocloud.com
    # - Mandatory if ingress.traefik.hostPort == false (LoadBalancer mode)
    # - Optional if ingress.traefik.hostPort == true  (hostPort / appliance mode, leave empty)
    #
    # IMPORTANT: a DNS record must be created separately and it must be a wildcard to account for Organization prefixes
    # E.g., *.myfirstpalette.spectrocloud.com
    rootDomain: "my-domain.docs-test.spectrocloud.com"

  # stableEndpointAccess is used when deploying EKS clusters in Private network type.
  # When your Saas installed instance have connectivity to the private VPC where you want to launch the cluster set the stableEndpointAccess to true
  cluster:
    stableEndpointAccess: false

  #  registry:
  #    endpoint: "" #<Contact Spectro Cloud Sales for More info>
  #    name: "" #<Contact Spectro Cloud Sales for More info>
  #    password: "" #<Contact Spectro Cloud Sales for More info>
  #    username: "" #<Contact Spectro Cloud Sales for More info>
  #    insecureSkipVerify: false
  #    caCert: ""

   ociPackRegistry:
     endpoint: "example.harbor.org" #<Contact Spectro Cloud Sales for More info>
     name: "Packs OCI" #<Contact Spectro Cloud Sales for More info>
     password: "**************" #<Contact Spectro Cloud Sales for More info>
     username: "**************" #<Contact Spectro Cloud Sales for More info>
     baseContentPath: "spectro-packs" #<Contact Spectro Cloud Sales for More info>
     insecureSkipVerify: false
     caCert: ""

#  ociPackEcrRegistry:
#    endpoint: "" #<Contact Spectro Cloud Sales for More info>
#    name: "" #<Contact Spectro Cloud Sales for More info>
#    accessKey: "" #<Contact Spectro Cloud Sales for More info>
#    secretKey: "" #<Contact Spectro Cloud Sales for More info>
#    baseContentPath: "" #<Contact Spectro Cloud Sales for More info>
#    isPrivate: true
#    insecureSkipVerify: false
#    caCert: ""

   ociImageRegistry:
     endpoint: "example.harbor.org" #<Contact Spectro Cloud Sales for More info>
     name: "Images OCI" #<Contact Spectro Cloud Sales for More info>
     password: "**************" #<Contact Spectro Cloud Sales for More info>
     username: "**************" #<Contact Spectro Cloud Sales for More info>
     baseContentPath: "spectro-images" #<Contact Spectro Cloud Sales for More info>
     insecureSkipVerify: false
     caCert: ""
     mirrorRegistries: "docker.io::harbor.example.org/project/docker.io,gcr.io::harbor.example.org/project/gcr.io"  # See instructions below.

  # Instruction for mirrorRegistries.
  # ----------------------------------
  # Please provide the registry endpoint for the following registries, separated by double colons (::):
  # docker.io
  # gcr.io
  # ghcr.io
  # k8s.gcr.io
  # registry.k8s.io
  # quay.io
  # For each registry, follow this example format:
  # docker.io::<PLACE_HOLDER_FOR_ENDPOINT>/v2/<DOCKER_IO_ENDPOINT>,gcr.io::<PLACE_HOLDER_FOR_ENDPOINT>/v2/<GCR_IO_ENDPOINT>,ghcr.io::<PLACE_HOLDER_FOR_ENDPOINT>/v2/<GHCR_IO_ENDPOINT>,k8s.gcr.io::<PLACE_HOLDER_FOR_ENDPOINT>/v2/<K8S_IO_ENDPOINT>,registry.k8s.io::<PLACE_HOLDER_FOR_ENDPOINT>/v2/<REGISTRY_K8S_IO_ENDPOINT>,quay.io::<PLACE_HOLDER_FOR_ENDPOINT>/v2/<QUAY_IO_ENDPOINT>,us-docker.pkg.dev::<PLACE_HOLDER_FOR_ENDPOINT>/v2/<US_DOCKER_ENDPOINT>
  # Replace <PLACE_HOLDER_FOR_ENDPOINT> with your actual registry endpoint and <DOCKER_IO_ENDPOINT>, <GCR_IO_ENDPOINT>, <GHCR_IO_ENDPOINT>, <K8S_IO_ENDPOINT>, <REGISTRY_K8S_IO_ENDPOINT>, and <QUAY_IO_ENDPOINT> with the specific endpoint details for each registry.

  imageSwapImages:
    imageSwapInitImage: "harbor.example.org/project/us-docker.pkg.dev/palette-images-fips/third-party/thewebroot/imageswap-init:v1.5.3-spectro-4.9.0"
    imageSwapImage: "harbor.example.org/project/us-docker.pkg.dev/palette-images-fips/third-party/thewebroot/imageswap:v1.5.3-spectro-4.9.0"

  imageSwapConfig:
    isEKSCluster: true #If the Cluster you are trying to install is EKS cluster set value to true else set to false

grpc:
  external: false
  endpoint: "" #Please provide DNS endpoint with the port eg: msg.spectrocloud.com:443
  annotations: {}
  # AWS example
  # service.beta.kubernetes.io/aws-load-balancer-internal: "true"
  # service.beta.kubernetes.io/aws-load-balancer-backend-protocol: tcp
  # service.beta.kubernetes.io/aws-load-balancer-ssl-ports: "https"

  # Azure example
  # service.beta.kubernetes.io/azure-load-balancer-internal: "true"
  # service.beta.kubernetes.io/azure-dns-label-name: myserviceuniquelabel

  # Static IP for the GRPC load balancer service. If empty, a dynamic IP will be generated.
  grpcStaticIP: ""
  caCertificateBase64: "" #Please provide caCertificate for the grpc server Cert
  serverCrtBase64: ""
  serverKeyBase64: ""
  insecureSkipVerify: false
tunnel:
  preferredServer:
    endpoint: ""
  servers:
    - endpoint: ""
ingress:
  # When enabled the Traefik ingress controller would be installed
  enabled: true

  # Port allocation behaviour based on traefik.hostPort:
  #
  #   traefik.hostPort=false → Traefik: 80/443 (LoadBalancer Service)   -- default behaviour for self-hosted / cloud setups with an external LB.
  #   traefik.hostPort=true  → Traefik: 80/443 (bound to node hostPort) -- appliance / on-prem setup with no external LB.
  traefik:
    # Whether to front the Traefik ingress controller with a cloud
    # load balancer (hostPort == false) or bind directly to node host ports (hostPort == true)
    hostPort: false

  ingress:
    # Default SSL certificate and key for the ingress controller (Optional)
    # A wildcard cert for config.env.rootDomain, e.g., *.myfirstpalette.spectrocloud.com
    # If left blank, a self-signed cert will be generated (when terminating TLS upstream of the ingress controller)
    certificate: ""
    key: ""

    #If ACM is enabled please use grpc as a non internal and bring grpc on different LB. Provide certificate and dns for it.
    annotations: {}
    # AWS example
    # service.beta.kubernetes.io/aws-load-balancer-internal: "true"
    # service.beta.kubernetes.io/aws-load-balancer-backend-protocol: tcp
    # service.beta.kubernetes.io/aws-load-balancer-ssl-cert: <ACM_ARN>
    # service.beta.kubernetes.io/aws-load-balancer-ssl-ports: "https"
    # service.beta.kubernetes.io/aws-load-balancer-proxy-protocol: '*'

    # Azure example
    # service.beta.kubernetes.io/azure-load-balancer-internal: "true"
    # service.beta.kubernetes.io/azure-dns-label-name: myserviceuniquelabel

    # Static IP for the Ingress load balancer service. If empty, a dynamic IP will be generated.
    ingressStaticIP: ""

    # For Service like AWS Load Balancer using https we would want to terminate the HTTPS at Load Balancer.
    terminateHTTPSAtLoadBalancer: false

frps:
  frps:
    enabled: false
    frpHostURL: proxy.sample.spectrocloud.com
    server:
      crt: LS0tLS1CRUdJTiBDRVJU... # omitted for brevity
      key: LS0tLS1CRUdJTiBSU0Eg... # omitted for brevity
    ca:
      crt: LS0tLS1CRUdJTiBDRVJ... # omitted for brevity
    service:
      annotations: {}

ui-system:
  enabled: true
  ui:
    nocUI:
      enable: true
      mapBoxAccessToken: "" # Leave Empty to use Default Access Token from Palette
      mapBoxStyledLayerID: "" # Leave Empty to use Default Style Layer ID

reachSystem:
  enabled: false
  proxySettings:
    http_proxy: ""
    https_proxy: ""
    no_proxy: ""
    ca_crt_path: "" # Set the 'ca_crt_path' parameter to the location of the certificate file on each node. This file should contain the Proxy CA Certificate, in case the Proxy being used requires a certificate.
  scheduleOnControlPlane: true
IPv6 Settings
-
In the
vertex/values.yamlfile, configure the following IPv6 settings. Save the file when you are done. For more information about theglobal.ipFamilyparameters, refer to the IP Family section of the Helm Configuration Reference.Parameter Value Description global.ipFamily.enableIPv6truePalette VerteX services listen on IPv6 addresses. global.ipFamily.serviceIpFamilyPolicy""Keep the default empty value. The services of an IPv6 EKS cluster use one IP family and receive IPv6 addresses without a policy. Do not use RequireDualStack, because it prevents the ingress and gRPC services from being created on this cluster.ingress.ingress.annotationsservice.beta.kubernetes.io/aws-load-balancer-ip-address-type: dualstackThe ingress load balancer accepts both IPv4 and IPv6 traffic. grpc.annotationsservice.beta.kubernetes.io/aws-load-balancer-ip-address-type: dualstackThe gRPC load balancer accepts both IPv4 and IPv6 traffic. Add this annotation only if you set grpc.externaltotrue.global:
ipFamily:
enableIPv6: true
serviceIpFamilyPolicy: ""
grpc:
annotations:
service.beta.kubernetes.io/aws-load-balancer-ip-address-type: dualstack
ingress:
ingress:
annotations:
service.beta.kubernetes.io/aws-load-balancer-ip-address-type: dualstack
Image Swap Helm Chart
-
(Self-hosted OCI registry only) If you plan to use image swap for self-hosted OCI registries, install the Image Swap Helm chart. Image swap rewrites pod image references to pull from your mirror registry. Palette VerteX ignores the
mirrorRegistriesconfiguration unless the Image Swap chart is installed. Choose the correct command based on whether you added your image swap values tovertex/values.yamlorextras/image-swap/values.yaml.- vertex/values.yaml
- image-swap/values.yaml
helm upgrade --values vertex/values.yaml \
  image-swap extras/image-swap/image-swap-*.tgz --install
helm upgrade --values extras/image-swap/values.yaml \
image-swap extras/image-swap/image-swap-*.tgz --installExample outputRelease "image-swap" does not exist. Installing it now.
NAME: image-swap
LAST DEPLOYED: Wed Jun 17 14:44:13 2026
NAMESPACE: default
STATUS: deployed
REVISION: 1
TEST SUITE: None
Reach System Helm Chart
-
(Proxy environments only) If you are installing Palette VerteX in an environment where a network proxy must be configured for Palette VerteX to access the internet, install the Reach System chart using the following command.
warningEnsure you set
reach-system.enabledtotrueand configurereach-system.proxySettingsinvertex/values.yamlas well.helm upgrade --values vertex/values.yaml \
reach-system extras/reach-system/reach-system-*.tgz --installExample outputRelease "reach-system" does not exist. Installing it now.
NAME: reach-system
LAST DEPLOYED: Fri Jan 30 18:40:57 2026
NAMESPACE: default
STATUS: deployed
REVISION: 1
TEST SUITE: NoneUpdate containerd to use proxy configurations
If your Kubernetes cluster is behind a network proxy, ensure the containerd service is configured to use proxy settings. You can do this by updating the containerd configuration file on each node in the cluster. The configuration file is typically located at
/etc/systemd/system/containerd.service.d/http-proxy.conf. The following example shows configured proxy settings. Replace the values with your proxy settings. Ask your network administrator for guidance.[Service]
Environment="HTTP_PROXY=http://example.com:9090"
Environment="HTTPS_PROXY=http://example.com:9090"
Environment="NO_PROXY=127.0.0.1,localhost,100.64.0.0/17,192.168.0.0/16,172.16.0.0/12,10.0.0.0/8,,.cluster.local"
Installation
-
Install the Palette VerteX Helm Chart using the following command.
helm upgrade --values vertex/values.yaml \
  hubble vertex/spectro-mgmt-plane-*.tgz --install
Example outputRelease "hubble" does not exist. Installing it now.
NAME: hubble
LAST DEPLOYED: Wed Jun 17 21:41:31 2026
NAMESPACE: default
STATUS: deployed
REVISION: 1
TEST SUITE: None - Track the installation process using the command below. Palette VerteX is ready when the deployments in the namespaces
cp-system,hubble-system,ingress-traefik,jet-system, andui-systemreach the Ready state. - Create a DNS CNAME record that is mapped to the Palette VerteX
traefik-ingress-controllerload balancer. You can use the following command to retrieve the load balancer IP address. If you need assistance creating the DNS record, contact your network administrator. - Use the custom domain name or the IP address of the load balancer to visit the Palette VerteX system console. To access the
system console, open a web browser and paste the custom domain URL or the IP address of the load balancer in the address bar, and append the value
/system. - Log in to the system console using the following default credentials. Refer to password requirements guide for more information.
- After logging in, a summary page is displayed. Palette VerteX is installed with a self-signed TLS/SSL certificate. To assign a different TLS/SSL certificate, you must upload the SSL certificate, TLS/SSL certificate key, and TLS/SSL certificate authority files to Palette VerteX. You can upload the files using the Palette VerteX system console. Refer to Configure HTTPS Encryption for more information.
The Traefik ingress controller, which is installed by default beginning with Palette VerteX version 4.8.47,
configures the non-root security context NET_BIND_SERVICE Linux capability in the Traefik DaemonSet. This
capability is not supported on deprecated Amazon Linux 2 (AL2) nodes, resulting in a CrashLoopBackOff state on
traefik-ingress-controller pods. Refer to our
Troubleshooting - Traefik Ingress Controller Pods Crash on Amazon Linux 2 Nodes
guide for the workaround.
kubectl get pods --all-namespaces --watch
For a more user-friendly experience, use the open source tool k9s to monitor the installation process.
kubectl get service traefik-ingress-controller --namespace ingress-traefik \
  --output jsonpath='{.status.loadBalancer.ingress[0].hostname}'
If Palette VerteX has only one tenant and you use local accounts with Single Sign-On (SSO) disabled, you can access
Palette VerteX using the IP address or any domain name that resolves to that IP. However, once you enable SSO, users
must log in using the tenant-specific subdomain. For example, if you create a tenant named tenant1 and the domain
name you assigned to Palette VerteX is vertex.example.com, the tenant URL will be tenant1.vertex.example.com. We recommend you create an additional wildcard DNS record to map all tenant URLs to the Palette VerteX load balancer.
For example, *.vertex.example.com.
The first time you visit the Palette VerteX system console, a warning message about a not-trusted TLS/SSL certificate may appear. This is expected, as you still need to upload your TLS/SSL certificate to Palette VerteX. You can ignore this warning message and proceed.
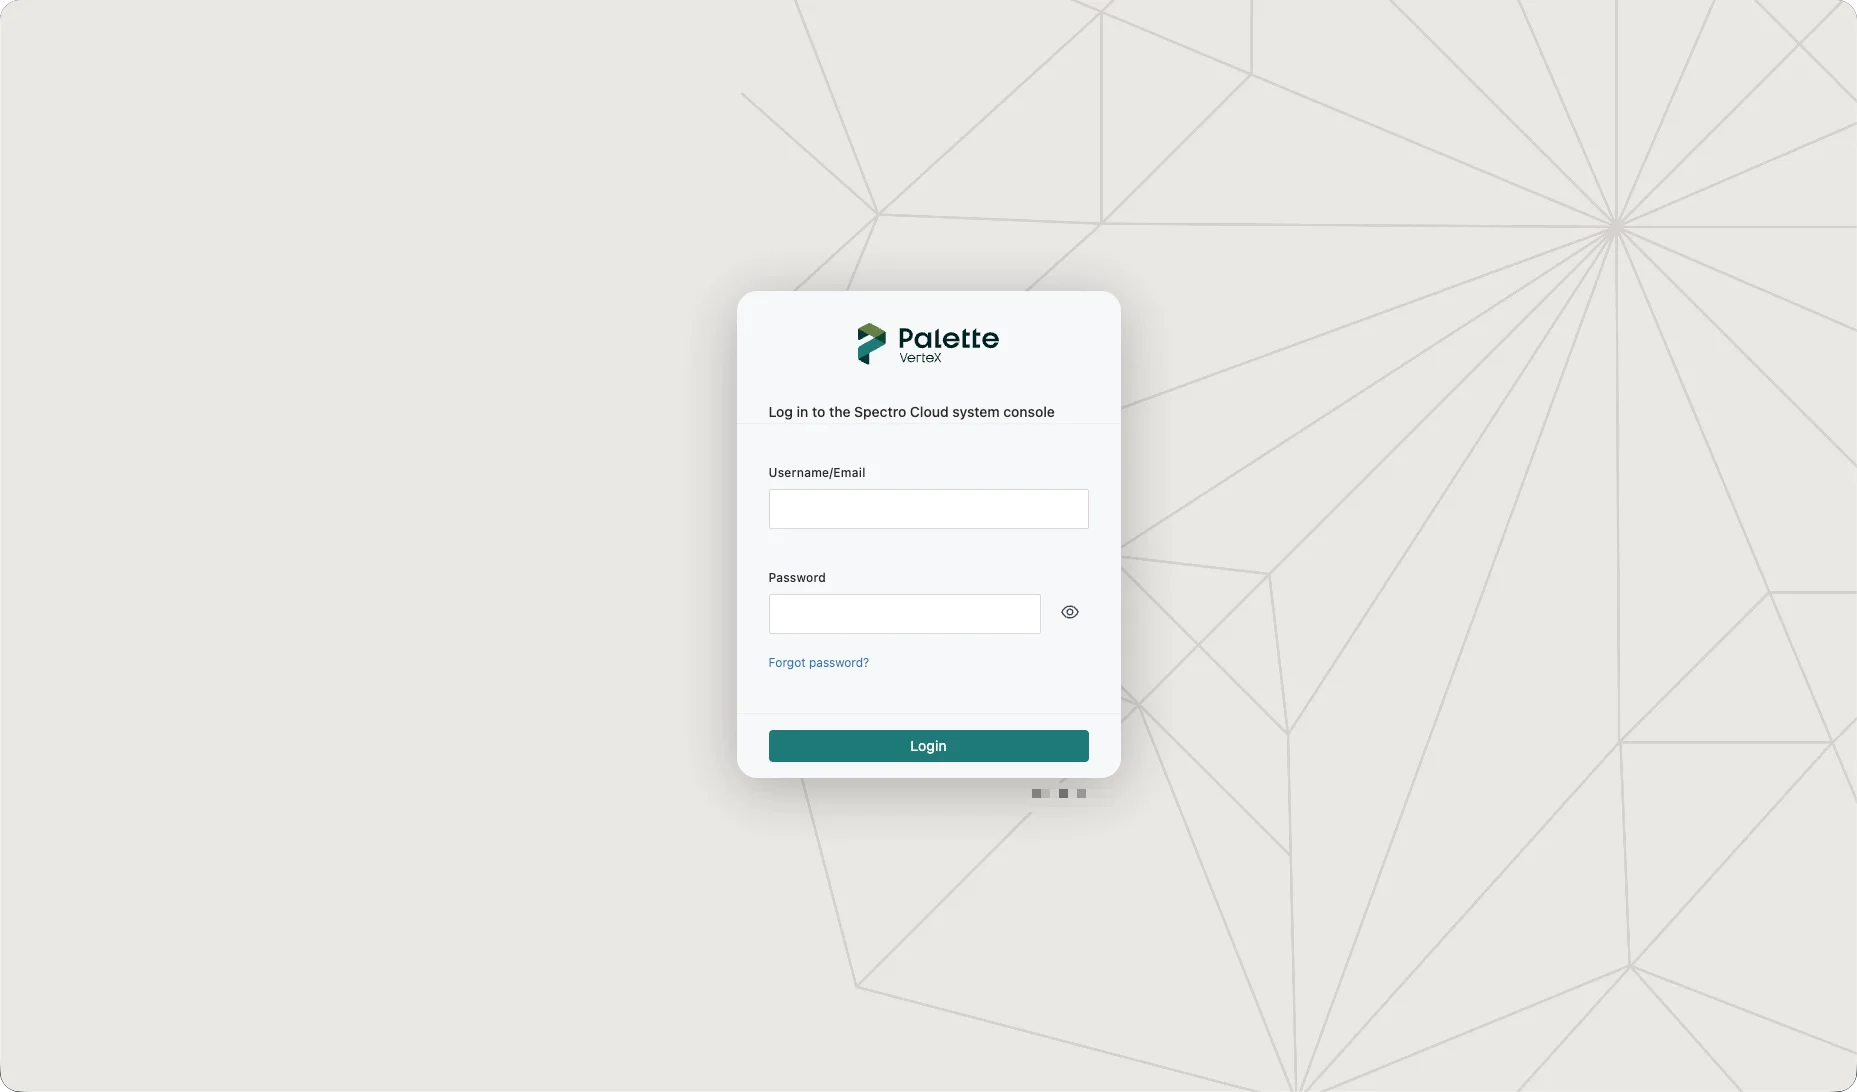
| Parameter | Value |
|---|---|
| Username | admin |
| Password | admin |
After logging in, you must create a new password. Once you create your password, you are redirected to the Palette VerteX
system console. Use the username admin and your new password to log in to the system console. You can create
additional system administrator accounts and assign roles to users in the system console. Refer to
Account Management for more information.
If you plan to deploy host clusters into different networks, you may require a reverse proxy. Check out the Configure Reverse Proxy guide for more information.
You now have a self-hosted instance of Palette VerteX installed in a Kubernetes cluster. Make sure you retain the values.yaml
file, as you can refer to it for future upgrades.
Post-Installation Configuration
-
Create a managed node group in the EKS cluster with the following settings. The
cluster-management-agentpod of Palette VerteX cannot be scheduled on nodes that EKS Auto Mode manages.Setting Value Node IAM role A node IAM role for the node group. If the Amazon VPC CNI add-on inherits its permissions from the node, the role must have the AmazonEKS_CNI_IPv6_Policypolicy attached.AMI type Amazon Linux 2023 Instance type t3.mediumDesired size 1Minimum size 1Maximum size 2Subnets The private subnets of the VPC. -
(Optional) If you plan to deploy clusters with EKS Pod Identity, complete the steps in the EKS Pod Identity section of the Register and Manage AWS Accounts guide.
Validate
Use the following steps to validate your Palette VerteX installation.
- UI
- Terminal
-
Open up a web browser and navigate to the Palette VerteX system console. To access the system console, open a web browser and paste the
env.rootDomainvalue you provided in the address bar and append the value/system. You can also use the IP address of the load balancer. -
Log in using the default credentials. After logging in, you are prompted to create a new password. Enter a new password and save your changes. You are redirected to the Palette VerteX system console.
-
Open a terminal session with access to the cluster you installed Palette VerteX on.
-
Verify all pods in all namespaces are running.
kubectl get pods --all-namespacesExample outputNAMESPACE NAME READY STATUS RESTARTS AGE
cert-manager cert-manager-5fb779d887-mz2vb 1/1 Running 0 8m46s
cert-manager cert-manager-cainjector-764f9646d4-7nhpq 1/1 Running 0 8m46s
cert-manager cert-manager-webhook-85b8dbdddd-fkn6z 1/1 Running 0 8m46s
cp-system spectro-cp-ui-5dffbcdc78-gk8st 1/1 Running 0 7m14s
hubble-system auth-7f4c7ff9c-2clwp 1/1 Running 0 6m8s
hubble-system auth-7f4c7ff9c-j84bt 1/1 Running 0 6m7s
hubble-system cloud-8f8467c95-9r8bp 1/1 Running 0 6m7s
hubble-system cloud-8f8467c95-pvcv4 1/1 Running 0 6m8s
hubble-system configserver-5bc8f9fdcb-mbt66 1/1 Running 0 6m8s
hubble-system event-5fbf6b7f44-bmzdk 1/1 Running 0 6m8s
hubble-system event-5fbf6b7f44-cxc58 1/1 Running 0 6m7s
hubble-system event-5fbf6b7f44-zhr9h 1/1 Running 0 6m7s
hubble-system foreq-8487bf9bbf-847vj 1/1 Running 0 6m7s
hubble-system hashboard-66f957cfdf-k48wn 1/1 Running 0 6m7s
hubble-system hashboard-66f957cfdf-pddx7 1/1 Running 0 6m6s
hubble-system hutil-7cc6975bb5-5mhjp 1/1 Running 0 6m6s
hubble-system hutil-7cc6975bb5-jwzr5 1/1 Running 0 6m7s
hubble-system memstore-7d59d65f67-j8lls 1/1 Running 0 6m6s
hubble-system mgmt-54fb5f487d-dj2tz 1/1 Running 0 7m14s
hubble-system mongo-0 2/2 Running 0 6m33s
hubble-system mongo-1 2/2 Running 0 5m47s
hubble-system mongo-2 2/2 Running 0 4m57s
hubble-system mongodb-key-manager-helm-k6294 0/1 Completed 0 7m15s
hubble-system msgbroker-0 1/1 Running 0 7m15s
hubble-system msgbroker-1 1/1 Running 0 6m43s
hubble-system oci-proxy-78cd749dc9-jfs86 1/1 Running 0 6m6s
hubble-system reloader-reloader-55d78d877b-7tnkq 1/1 Running 0 6m6s
hubble-system specman-0 1/1 Running 0 6m2s
hubble-system spectro-tunnel-74d559dd65-hlwch 1/1 Running 0 6m5s
hubble-system spectrocluster-6885954988-knrfq 1/1 Running 0 6m5s
hubble-system spectrocluster-6885954988-pb6pr 1/1 Running 0 6m5s
hubble-system spectrocluster-6885954988-xcvk9 1/1 Running 0 6m5s
hubble-system spectrocluster-jobs-7dc76bf6c7-pjc7l 1/1 Running 0 6m5s
hubble-system spectrocluster-reconciler-dcfd55ff5-gnfjg 1/1 Running 0 6m4s
hubble-system spectroclusterop-58966f7f54-grznt 1/1 Running 0 6m4s
hubble-system spectroclusterop-58966f7f54-jj9m6 1/1 Running 0 6m4s
hubble-system spectrossh-589d975d4d-82vm2 1/1 Running 0 6m4s
hubble-system system-d48fdbc9-ffzq9 1/1 Running 0 6m8s
hubble-system system-d48fdbc9-sztrr 1/1 Running 0 6m8s
hubble-system timeseries-f465b4c99-8h8c7 1/1 Running 0 6m4s
hubble-system timeseries-f465b4c99-jlzlj 1/1 Running 0 6m3s
hubble-system timeseries-f465b4c99-z27d8 1/1 Running 0 6m3s
hubble-system user-697c6f8bf-fgwtp 1/1 Running 0 6m3s
hubble-system user-697c6f8bf-wcqxk 1/1 Running 0 6m3s
ingress-traefik traefik-ingress-controller-5dctd 1/1 Running 0 7m15s
ingress-traefik traefik-ingress-controller-tx6st 1/1 Running 0 7m16s
ingress-traefik traefik-ingress-controller-zf25w 1/1 Running 0 7m16s
jet-system jet-796fc87c5d-vpvtz 1/1 Running 0 4m1s
kube-system aws-node-8xqnx 2/2 Running 0 121m
kube-system aws-node-gtr64 2/2 Running 0 121m
kube-system aws-node-h7pdv 2/2 Running 0 121m
kube-system coredns-566b9b9d-hck47 1/1 Running 0 129m
kube-system coredns-566b9b9d-jpnrs 1/1 Running 0 129m
kube-system ebs-csi-controller-7dfbb6bd58-nwcjl 6/6 Running 0 113m
kube-system ebs-csi-controller-7dfbb6bd58-w8kxz 6/6 Running 0 113m
kube-system ebs-csi-node-9r6fk 3/3 Running 0 113m
kube-system ebs-csi-node-vp744 3/3 Running 0 113m
kube-system ebs-csi-node-xb69v 3/3 Running 0 113m
kube-system kube-proxy-59qgr 1/1 Running 0 121m
kube-system kube-proxy-krrzd 1/1 Running 0 121m
kube-system kube-proxy-lbsgp 1/1 Running 0 121m
ui-system spectro-ui-56749c5f84-98m89 1/1 Running 0 7m15s -
Verify the
hubblerelease is deployed.helm status hubbleExample outputNAME: hubble
LAST DEPLOYED: Thu Jun 18 18:33:18 2026
NAMESPACE: default
STATUS: deployed
REVISION: 1
TEST SUITE: None
To confirm that the installation uses IPv6, list the pods with their IP addresses, and verify that the IP column
contains IPv6 addresses.
kubectl get pods --all-namespaces --output wide
NAMESPACE         NAME                               READY   STATUS    RESTARTS   AGE     IP                         NODE
cert-manager      cert-manager-7f6bd8d487-x8vtp      1/1     Running   0          104m    2001:db8:1:b702:f221::3    ip-192-0-2-10.ec2.internal
cp-system         spectro-cp-ui-6d75b76877-5k2jd     1/1     Running   0          59m     2001:db8:1:b702:f221::14   ip-192-0-2-10.ec2.internal
hubble-system     auth-6c85bbfdd-6b6q8               1/1     Running   0          29m     2001:db8:1:b703:797::2     i-0123456789abcdef1
hubble-system     configserver-6c445ff6d7-7t5r7      1/1     Running   0          27m     2001:db8:1:b702:28d1::d    i-0123456789abcdef2
hubble-system     mongo-0                            2/2     Running   0          28m     2001:db8:1:b703:797::b     i-0123456789abcdef1
ingress-traefik   traefik-ingress-controller-82fj9   1/1     Running   0          30m     2001:db8:1:b702:28d1::     i-0123456789abcdef2
ui-system         spectro-ui-7649f56cfd-gdb5s        1/1     Running   0          59m     2001:db8:1:b702:f221::17   ip-192-0-2-10.ec2.internal
...
Next Steps
Now that you have installed Palette VerteX, you can either create a tenant to host your users and set up your clusters, or you can activate your installation.
Beginning with version 4.6.32, once you install Palette VerteX, you have 30 days to activate it; versions older than 4.6.32 do not need to be activated. During the 30-day trial period, you can use Palette VerteX without any restrictions. After 30 days, you can continue to use Palette VerteX, but you cannot deploy additional clusters or perform any day-2 operations on existing clusters until Palette VerteX is activated. Each installation of Palette VerteX must be activated separately. We recommend activating Palette VerteX as soon as possible to avoid any disruptions.
To deploy workload clusters that use the IPv6 IP address family, refer to
Deploy an IPv6 EKS Cluster. Keep the IPv6 settings in
your values.yaml file when you upgrade Palette VerteX.