Enable SSO with a Custom Certificate Authority
A custom Certificate Authority (CA) refers to a certificate authority that is not part of the standard public CA ecosystem but is instead managed internally within an organization. This guide explains how you can enable Palette SSO with a custom CA certificate.
Prerequisites
-
Palette account with Tenant Admin access.
-
For SSO to work correctly with Palette, you must enable HTTPS and configure TLS in your identity provider.
-
Existing SSO configuration with an SSO provider supported in Palette. Refer to SAML and OIDC SSO Setup for links to provider-specific guides.
-
Custom CA x509 certificate in the Privacy-Enhanced Mail (PEM) format issued by the SSO provider configured in Palette.
Enable SSO with Custom CA
-
Log in to Palette as a Tenant Admin.
-
From the left Main Menu, select Tenant Settings.
-
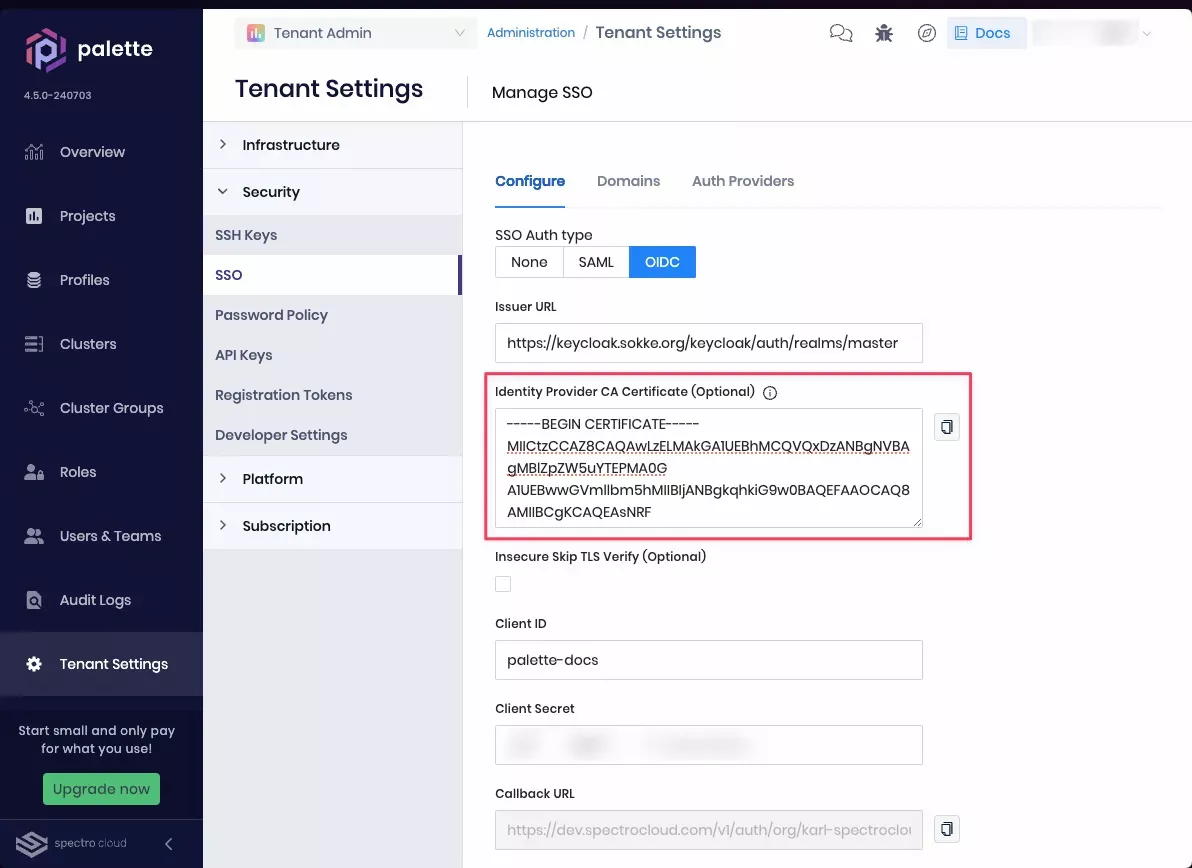
From the Tenant Menu, select SSO and, on the Configure tab, under SSO Auth type, select OIDC.
-
In the Identity Provider CA Certificate field, enter your custom CA x509 certificate in the PEM format.

-
Optionally, select the Insecure Skip TLS Verify checkbox to skip the TLS verification.
infoYou cannot skip TLS verification for Palette VerteX instances. With Palette VerteX, you must provide a valid custom CA certificate.
-
At the bottom of the page, select Enable and, in the Cluster Update Confirmation modal, select Continue to confirm your changes.
Validate
-
Log in to Palette and follow the steps to sign in with your SSO provider.
-
If you have successfully logged in to Palette, then the custom CA certificate works as expected.