Deploy Edge Cluster
This is the final tutorial in the Local Palette Edge Management series. It teaches you how to deploy an Edge Kubernetes cluster to a locally managed Edge device using the provider images, Edge host, cluster profile, and cluster definition created in the previous tutorials.
You will learn how to select the desired cluster definition, assign the registered Edge host to the cluster, and verify the deployment was successful by accessing the demo application included in the cluster profile, Hello Universe.

Prerequisites
- You have completed the Build Edge Artifacts tutorial and pushed the provider images to a registry.
- You have completed the Prepare Edge Host tutorial and have a registered Edge host in Palette.
- You have completed the Create Edge Cluster Profile tutorial and have an Edge cluster profile created in Palette.
- You have completed the Build Cluster Definition tutorial and have a cluster definition downloaded and accessible.
- You have a DHCP-enabled network with one available IP address on the same network as the Edge host. You will use this IP as the cluster's Virtual IP (VIP) address.
Deploy Edge Cluster
Log in to Local UI (https://<ip-of-edge:5080) with the username and password you defined in the
Prepare User Data tutorial.
From the left main menu, select Cluster, then click Create Cluster.
Enter local-edge-cluster in the Cluster name field, and click Next to proceed.
On the Cluster Profile page, click the upload button to browse and upload the cluster definition TGZ file.
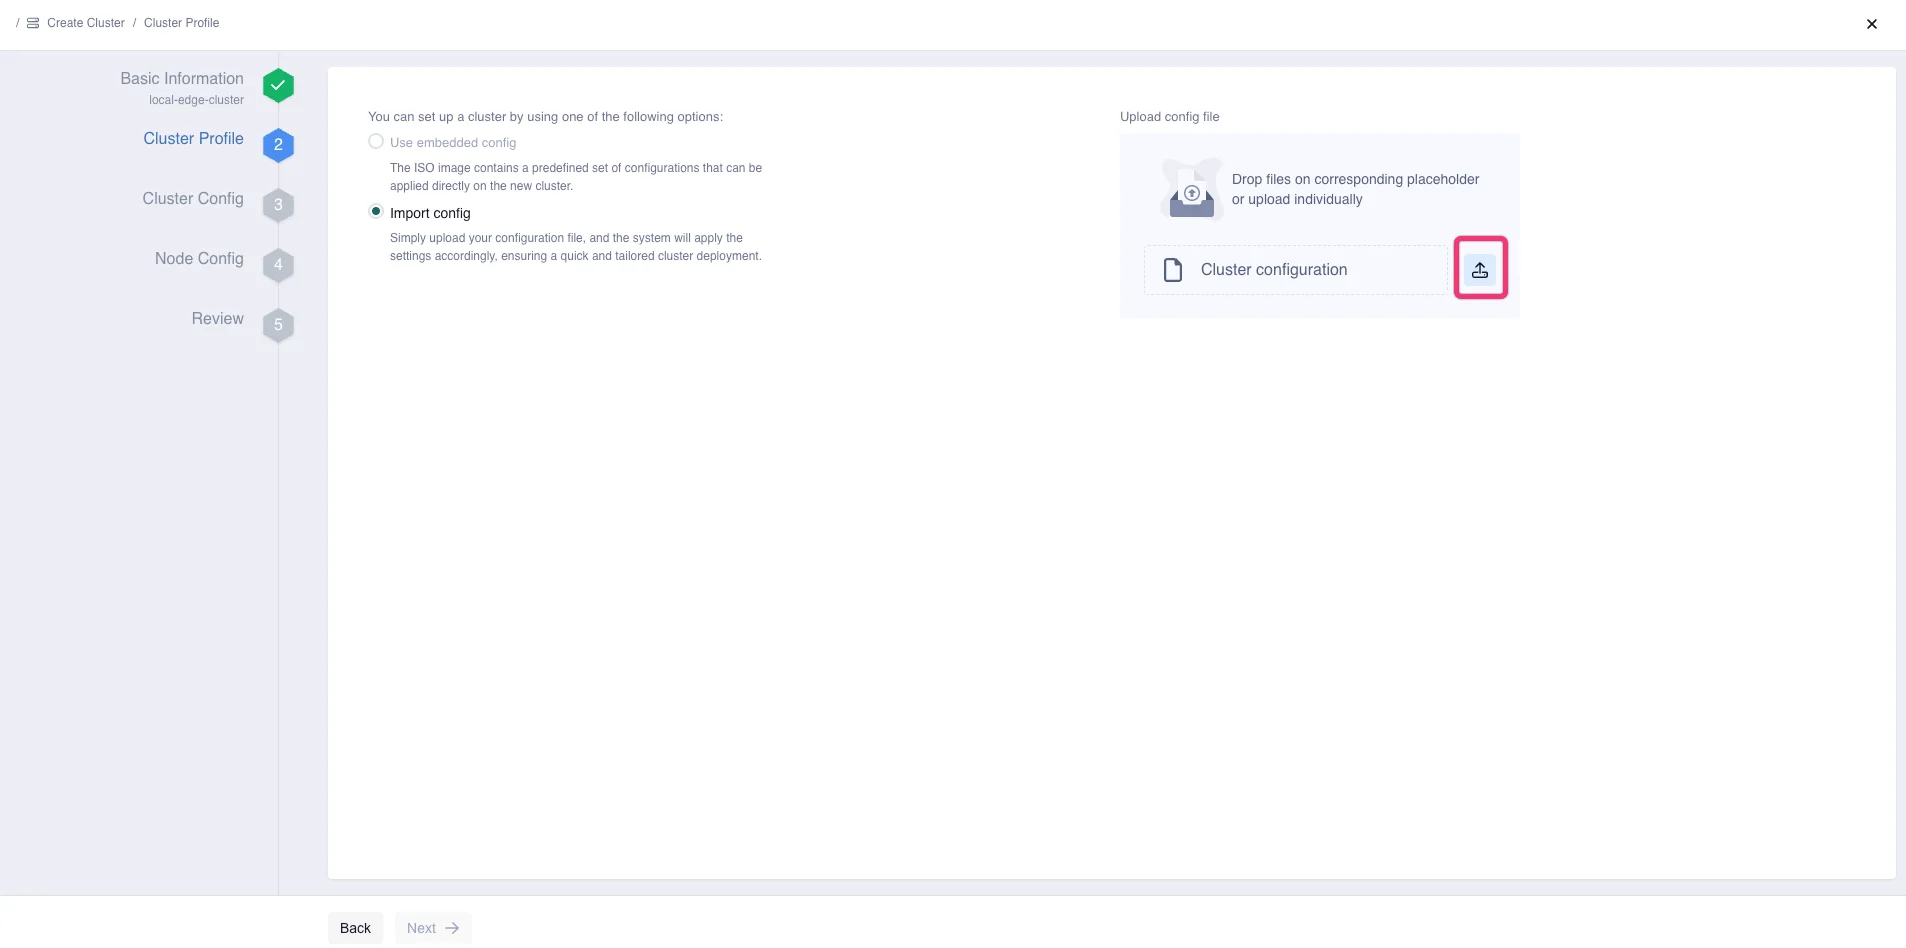
Verify that the Imported Applications preview matches the list of packs selected when completing the Edge Cluster Profile tutorial.

Click Next to proceed.
We recommend enabling the overlay network configuration when using DHCP-enabled networks to ensure stable IP addresses for the cluster. However, for education purposes, this tutorial does not use the overlay network. For production use or detailed configuration instructions, refer to the Enable Overlay Network guide.
On the Cluster Config page, enter the Virtual IP Address (VIP) value . The following image displays the Cluster Config page with the Network Time Protocol (NTP) and Virtual IP Address values provided.

You can use the nmap tool to scan your network and check which IP addresses are in
use. Issue the following command in your terminal, replacing the example CIDR 192.168.0.0/24 with your network's CIDR.
sudo nmap -sn 192.168.0.0/24
The output displays the IP addresses that are currently in use on your network.
Optionally, you can also select the SSH keys to access the cluster's nodes and specify the Network Time Protocol (NTP) server list.
Palette Edge supports two sources for Network Time Protocol (NTP) configuration:
- Per-host configuration through installer
user-dataor the local TUI - Cluster-wide configuration through cluster settings
Per-host NTP values can differ between hosts. For example, one host may use <ntp-val-1> while another uses <ntp-val-2>.
Cluster settings do not display previously configured per-host NTP values. They only display the cluster-wide configuration.
When a Day-2 cluster settings update modifies NTP configuration, the new values are applied to all hosts in the cluster and overwrite any existing per-host TUI or user-data configuration.
This separation allows deployments where hosts temporarily require different NTP sources before cluster-wide standardization is applied.
Click Next to continue.
In the Node Config section, provide the following details for the control plane pool. This tutorial deploys a single-node Edge cluster with no worker pool.
| Field | Value |
|---|---|
| Node pool name | control-plane-pool |
| Allow worker capability | Yes |
| Additional Labels (Optional) | None |
| Taints (Optional) | None |
| Pool Configuration > Add Edge Hosts | Select the Edge host configured in the Prepare Edge Host tutorial to become the node of your cluster. |
The following image shows the Edge host selection in the control plane pool.

Optionally, you can specify which Network Interface Card (NIC) to use for the Edge device by selecting Auto under NIC Name and choosing the NIC.
Next, select Remove to delete the worker pool and click Review to proceed with the deployment.
The Review section allows you to review the cluster configuration. If everything looks correct, select Deploy Cluster.
After you create the cluster, the Palette Edge host agent pulls the provider images you built in the Build Edge Artifacts tutorial and starts the installation process.
The cluster deployment may take 15 to 30 minutes, depending on the host and cluster configuration. The Edge Host will also reboot multiple times, which will require you to log in and refresh the screen to display the latest info.
You can track the installation progress in Edge Local UI. From the left menu, select Cluster to monitor the process on the Overview page. The Events tab provides detailed logs.
Validate
Log in to the Local UI, and select Cluster to open its Overview tab.
Confirm that your cluster displays a Running status and is listed as Healthy.

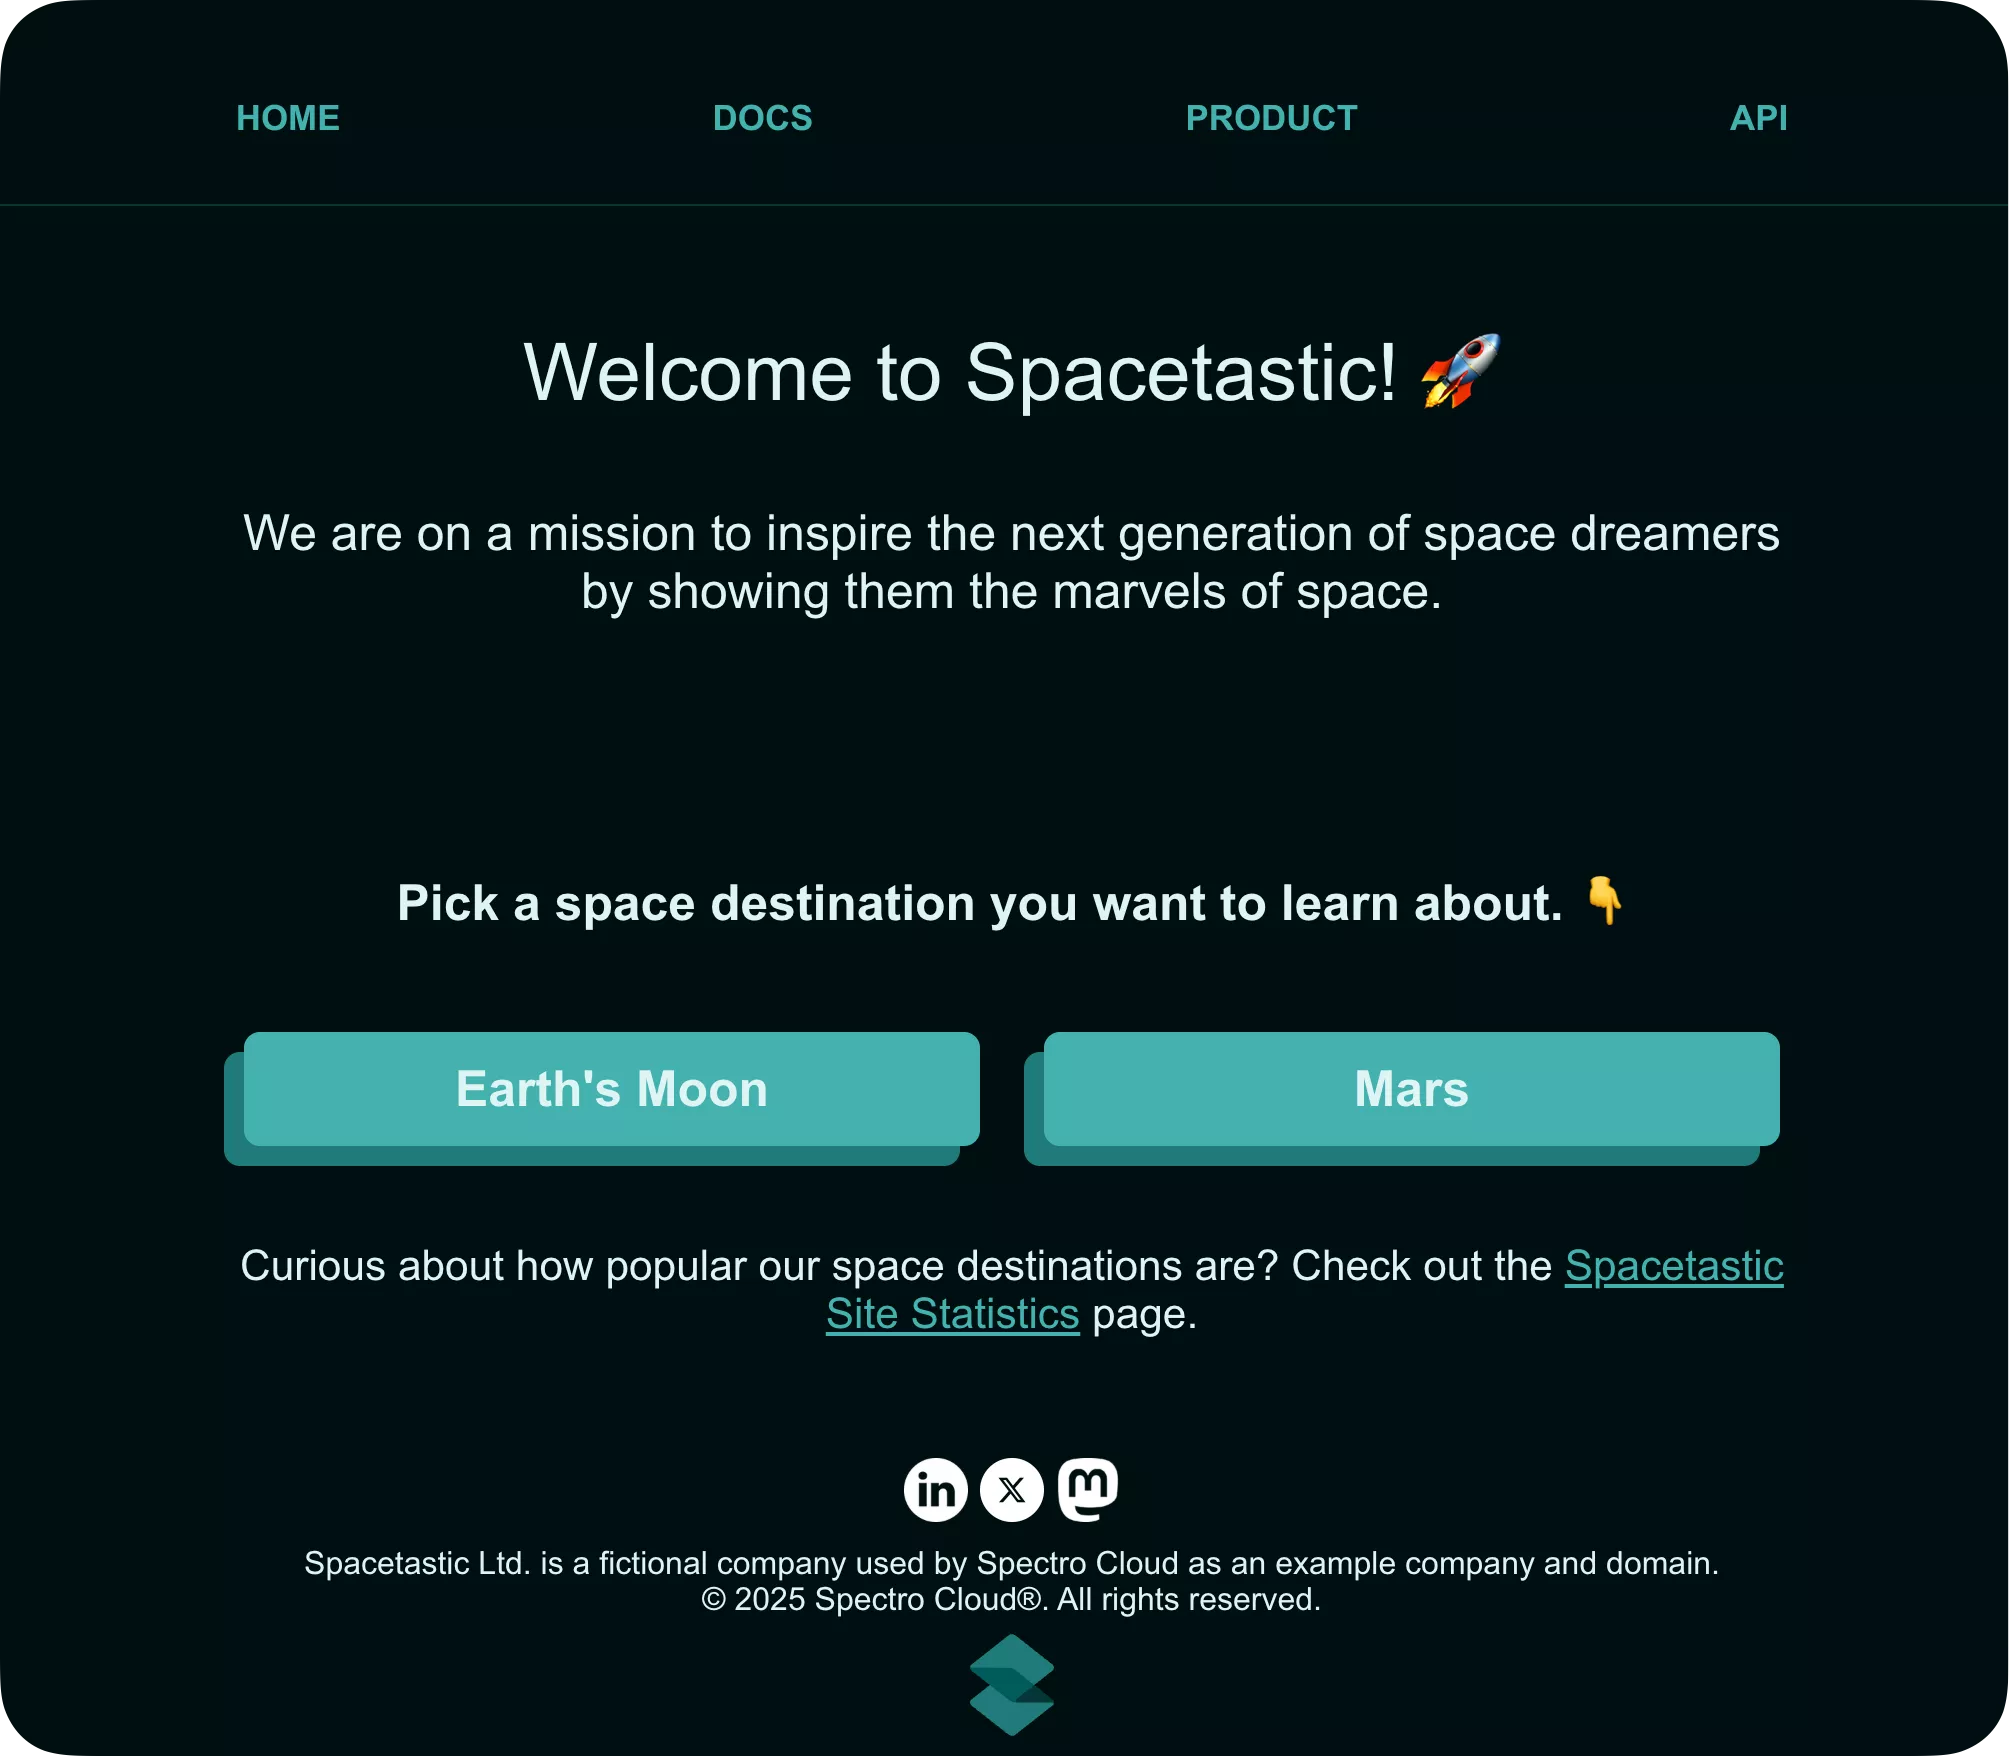
When the Hello Universe application is deployed and ready for network traffic, the Edge Local UI exposes the service URL in the Services section. Click the URL on port :8080 to access the application's landing page.

Welcome to the Spacetastic astronomy education platform. Feel free to explore the pages to learn more about space. The statistics page offers information on visitor counts for your deployed cluster.
When the Harbor application is deployed and ready for network traffic, the Edge Local UI exposes the service URL in the
Services section. Click the URL on port :30003 to access the application's landing page. You can log in to
Harbor using the user admin and the password you set in the Create Edge Profile.

Clean Up
You have successfully provisioned an Edge cluster with a three-tier demo application and Harbor registry. Use the following steps to remove the resources created during this tutorial series.
Cluster and Cluster Profile
To remove the Edge cluster, log in to Edge Local UI and select Cluster from the left main menu. Select Delete Cluster from the Actions drop-down.

Select Confirm on the confirmation window. This process may take several minutes to complete and will reboot the Edge device multiple times.
Once complete, log in to the Edge Local UI to verify the cluster and cluster profile are removed by navigating to Cluster from the left main menu.
Edge Host
- VM Host
- Bare Metal Host
If you used a VirtualBox VM as the Edge host, open the VirtualBox application on your host machine to delete the VM.
Right-click the edge-vm VM and select Stop. Then, click Power Off to turn the machine off.
Next, right-click the VM again and select Remove. Select Delete the virtual machine and virtual hard disks to delete the VM and its hard disk, and click Remove.
If you used a physical device as the Edge host, you can reset it to its post-initial setup state. This removes all workloads, content, and cluster definitions from the Edge host.
To reset the Edge host, SSH into it and issue the following command.
grub2-editenv /oem/grubenv set next_entry=statereset
Next, reboot the host.
sudo reboot
Refer to Reset Host via Terminal for more information about Edge host resetting.
Edge Artifacts
Open a terminal window on the machine you used to build the artifacts in the
Build Edge Artifacts tutorial and navigate to the CanvOS repository.
Delete the Edge Installer ISO image and its checksum by issuing the following commands.
rm build/palette-local-edge-installer.iso
rm build/palette-local-edge-installer.iso.sha256
Next, delete the provider images both locally and from the registry where you pushed them. Issue the following command
to delete them locally, replacing <registry-name> with the name of your registry.
docker rmi <registry-name>/ubuntu:k3s-1.32.3-v4.8.8-local-edge
docker rmi <registry-name>/ubuntu:k3s-1.32.3-v4.8.8-local-edge_linux_amd64
Wrap-up
In this tutorial, you learned how to deploy a single-node Edge cluster along with a demo application, using the Edge host, cluster profile, and artifacts prepared in earlier tutorials from this series. This deployment completes the Local Palette Edge Getting Started tutorial series.
We encourage you to check out the Additional Capabilities section to explore other Palette functionalities, and the Edge documentation section to learn more about Palette Edge.
🧑🚀 Catch up with Spacetastic
After going through the steps in the tutorial, Kai is confident in locally managed Palette Edge's capabilities.
"What have you found out, Kai?" says Meera walking over to Kai's desk.
"It was surprisingly simple to deploy and connect these Edge devices remotely, even if they are not managed directly by Palette," says Kai with a enthusiastic nod. "In fact, it feels no different than when we deployed our clusters to the cloud. Even our security is covered through pack updates and scanning capabilities. Relying on this kind of tooling is invaluable to security-conscious engineers like us."
"Excellent! These capabilities will be great for expanding our existing systems at Spacetastic," says Meera with a big grin.
"I'm so glad that we found a platform that can support everyone!" says Kai. "There is so much more to explore though. I will keep reading through the Getting Started section and find out what additional capabilities Palette provides."
"Good thinking, Kai," says Meera, nodding. "We should maximize all of Palette's features now that we have implemented it in production. We've got big ideas and goals on our company roadmap, so let's find out how Palette can help us deliver them."