Standardize Cluster Provisioning and Maintenance with Cluster Templates using the Palette UI
When you manage many Kubernetes clusters, configuring and upgrading them one by one does not scale. You need a way to apply the same configuration and upgrade rules across multiple clusters.
Palette supports this workflow with cluster templates. Cluster templates let you reuse a cluster configuration, control when upgrades happen, and apply changes to multiple clusters at once.
Cluster templates combine a cluster profile and one or more cluster template policies.
- Cluster profiles define what a cluster runs. They contain the software stack and infrastructure configuration.
- Cluster template policies define how clusters created from a template are managed throughout their lifecycle, including when upgrades can run.
Cluster profiles can include cluster profile variables, which let you reuse the same profile while changing specific values per cluster, such as the worker node instance size or the number of application replicas.
A maintenance policy is one example of a cluster template policy. Maintenance policies define a maintenance window that controls when upgrades can run. Currently, maintenance policies are the only supported cluster template policy type in Palette.

When you create clusters from the same template, they inherit the same base configuration and the same governance rules. For example, you can create development and production clusters from a single template. Both clusters run the same software stack and follow the same upgrade policy. You can assign different profile variable values to handle environment-specific requirements.
In this tutorial, you will:
- Create a cluster profile, a cluster template policy, and a cluster template that uses them together
- Deploy two clusters (development and production) from the same template
- Use cluster profile variables to apply environment-specific settings
- Update the template and upgrade both clusters
You will complete this tutorial using the Palette UI. You will import a cluster profile, create a cluster template with a maintenance policy, and deploy clusters from it.
Prerequisites
- A Palette account with permissions to create cluster profiles, cluster template policies, cluster templates, and clusters.
- A cloud account registered in Palette. Refer to AWS, Azure, GCP, or VMware to get started.
- Ensure that the Palette Community Registry is available in your Palette environment.
- kubectl installed locally. Use the Kubernetes Install Tools page for further guidance.
All commands and expected outputs use AWS as the example. Azure users follow the same steps with Azure-specific resource names in the output.
Import a Cluster Profile
In this section, you will import a cluster profile into Palette. This profile will be used to deploy two clusters: a development cluster running fewer application replicas and a production cluster running more.
- AWS
- Azure
| Pack Type | Pack Name | Version |
|---|---|---|
| OS | ubuntu-aws | 22.04 |
| Kubernetes | kubernetes | 1.35.2 |
| Network | cni-calico | 3.31.4 |
| Storage | csi-aws-ebs | 1.59.0 |
| App Services | hello-universe | 1.3.0 |
| Pack Type | Pack Name | Version |
|---|---|---|
| OS | ubuntu-azure | 22.04 |
| Kubernetes | kubernetes | 1.35.2 |
| Network | cni-calico-azure | 3.31.4 |
| Storage | csi-azure | 1.31.2 |
| App Services | hello-universe | 1.3.0 |
The hello-universe pack declares an app_replicas
cluster profile variable.
This variable has no value in the profile itself. A cluster template assigns a value for each cluster it manages. This
allows a development cluster and a production cluster to share the same profile while running different replica counts.
The variable is marked required, so no cluster can be deployed without a value.
Log in to Palette. From the left main menu, select Profiles and click Import Cluster Profile.
In the slide drawer that opens, paste the following JSON snippet for your cloud provider.
- AWS
- Azure
{
  "metadata": {
    "name": "cluster-template-profile-aws",
    "description": "Cluster profile for the cluster templates tutorial",
    "labels": {}
  },
  "spec": {
    "version": "1.0.0",
    "template": {
      "type": "cluster",
      "cloudType": "aws",
      "packs": [
        {
          "name": "ubuntu-aws",
          "type": "spectro",
          "layer": "os",
          "version": "22.04",
          "tag": "22.04",
          "values": "",
          "registry": {
            "metadata": { "name": "Public Repo", "kind": "oci", "isPrivate": false, "providerType": "pack" }
          }
        },
        {
          "name": "kubernetes",
          "type": "spectro",
          "layer": "k8s",
          "version": "1.35.2",
          "tag": "1.35.2",
          "values": "",
          "registry": {
            "metadata": { "name": "Public Repo", "kind": "oci", "isPrivate": false, "providerType": "pack" }
          }
        },
        {
          "name": "cni-calico",
          "type": "spectro",
          "layer": "cni",
          "version": "3.31.4",
          "tag": "3.31.4",
          "values": "",
          "registry": {
            "metadata": { "name": "Public Repo", "kind": "oci", "isPrivate": false, "providerType": "pack" }
          }
        },
        {
          "name": "csi-aws-ebs",
          "type": "spectro",
          "layer": "csi",
          "version": "1.59.0",
          "tag": "1.59.0",
          "values": "",
          "registry": {
            "metadata": { "name": "Public Repo", "kind": "oci", "isPrivate": false, "providerType": "pack" }
          }
        },
        {
          "name": "hello-universe",
          "type": "oci",
          "layer": "addon",
          "version": "1.3.0",
          "tag": "1.3.0",
          "values": "pack:\n  content:\n    images:\n      - image: ghcr.io/spectrocloud/hello-universe:1.3.0\n\nmanifests:\n  hello-universe:\n    images:\n      hellouniverse: ghcr.io/spectrocloud/hello-universe:1.3.0\n    apiEnabled: false\n    namespace: hello-universe\n    port: 8080\n    replicas: \"{{.spectro.var.app_replicas}}\"",
          "registry": {
            "metadata": {
              "name": "Palette Community Registry",
              "kind": "oci",
              "isPrivate": true,
              "providerType": "pack"
            }
          }
        }
      ]
    },
    "variables": [
      {
        "name": "app_replicas",
        "displayName": "Hello Universe Replicas",
        "format": "number",
        "description": "Number of replicas for the hello-universe workload",
        "defaultValue": "1",
        "required": true,
        "isSensitive": false,
        "isHidden": false,
        "immutable": false
      }
    ]
  }
}
{
  "metadata": {
    "name": "cluster-template-profile-azure",
    "description": "Cluster profile for the cluster templates tutorial",
    "labels": {}
  },
  "spec": {
    "version": "1.0.0",
    "template": {
      "type": "cluster",
      "cloudType": "azure",
      "packs": [
        {
          "name": "ubuntu-azure",
          "type": "spectro",
          "layer": "os",
          "version": "22.04",
          "tag": "22.04",
          "values": "",
          "registry": {
            "metadata": { "name": "Public Repo", "kind": "oci", "isPrivate": false, "providerType": "pack" }
          }
        },
        {
          "name": "kubernetes",
          "type": "spectro",
          "layer": "k8s",
          "version": "1.35.2",
          "tag": "1.35.2",
          "values": "",
          "registry": {
            "metadata": { "name": "Public Repo", "kind": "oci", "isPrivate": false, "providerType": "pack" }
          }
        },
        {
          "name": "cni-calico-azure",
          "type": "spectro",
          "layer": "cni",
          "version": "3.31.4",
          "tag": "3.31.4",
          "values": "",
          "registry": {
            "metadata": { "name": "Public Repo", "kind": "oci", "isPrivate": false, "providerType": "pack" }
          }
        },
        {
          "name": "csi-azure",
          "type": "spectro",
          "layer": "csi",
          "version": "1.31.2",
          "tag": "1.31.2",
          "values": "",
          "registry": {
            "metadata": { "name": "Public Repo", "kind": "oci", "isPrivate": false, "providerType": "pack" }
          }
        },
        {
          "name": "hello-universe",
          "type": "oci",
          "layer": "addon",
          "version": "1.3.0",
          "tag": "1.3.0",
          "values": "pack:\n  content:\n    images:\n      - image: ghcr.io/spectrocloud/hello-universe:1.3.0\n\nmanifests:\n  hello-universe:\n    images:\n      hellouniverse: ghcr.io/spectrocloud/hello-universe:1.3.0\n    apiEnabled: false\n    namespace: hello-universe\n    port: 8080\n    replicas: \"{{.spectro.var.app_replicas}}\"",
          "registry": {
            "metadata": {
              "name": "Palette Community Registry",
              "kind": "oci",
              "isPrivate": true,
              "providerType": "pack"
            }
          }
        }
      ]
    },
    "variables": [
      {
        "name": "app_replicas",
        "displayName": "Hello Universe Replicas",
        "format": "number",
        "description": "Number of replicas for the hello-universe workload",
        "defaultValue": "1",
        "required": true,
        "isSensitive": false,
        "isHidden": false,
        "immutable": false
      }
    ]
  }
}
Click Validate. Palette displays a Validated successfully message. Click Confirm. The cluster profile is created.
Create a Maintenance Policy
A cluster template policy governs how Palette manages the lifecycle of clusters attached to a template. You will use a maintenance policy, which defines a recurring upgrade window.
Create a maintenance policy with a weekly Sunday midnight schedule and a four-hour upgrade window.
From the left main menu, select Cluster Configurations.
From the top-right of the Policies tab, select Create Policy > Maintenance Policy.
In the Name field, enter cluster-template-policy.
Select Add Schedule to open the schedule drawer.
In the Name field, enter weekly-sunday.
From the Schedule drop-down menu, select Every week on Sunday at midnight.
Set the Upgrade window to 4 hours.
Select Confirm, then Next, then Finalize.
The policy appears in the Policies list and is ready to attach to a cluster template.
Create a Cluster Template
A cluster template links a cluster profile and maintenance policy.
Create a cluster template and attach the profile and policy you created in the previous steps.
From the left main menu, select Cluster Configurations.
Select the Templates tab and select Create Template.
Select AWS IaaS and select Start AWS IaaS Configuration.
In the Name field, enter cluster-template-aws. Select Next Step.
Select the plus icon next to Maintenance Policy. In the Select a policy side drawer, locate and select
cluster-template-policy. Select Confirm.
Select the plus icon next to Linked Profiles. In the Select a profile drawer, select
cluster-template-profile-aws. Select Confirm.
From the version drop-down menu, confirm version 1.0.0 is selected.
Select Next Step, review the configuration, and select Finalize.
The template appears in the Templates list and is ready to deploy clusters from.
Deploy Clusters from the Template
Deploy a development cluster and a production cluster from cluster-template-aws, using profile variables to apply
environment-specific replica counts.
Deploy a Development Cluster from the Template
The development environment requires fewer replicas, so assign app_replicas, displayed as Hello Universe Replicas
in the UI, a value of 1. Once that value is set, deploy a cluster from the cluster-template-aws cluster template.
From the left main menu, select Clusters > Add New Cluster. Select AWS IaaS > Start AWS IaaS Configuration.
On the Basic Information page, enter dev-cluster-aws as the cluster name. Select the Cloud Account value, and
then select Next.
On the Setup Type page, select Cluster Template and Select Cluster Template. Select cluster-template-aws,
and then select Confirm.
On the Cluster Template page, confirm that cluster-template-policy appears under Maintenance Policy and
cluster-template-profile-aws appears under Linked Profiles. Select Next.
On the Cluster Profile page, select Next.
On the Profile Config page, set Hello Universe Replicas to 1. Select Next.
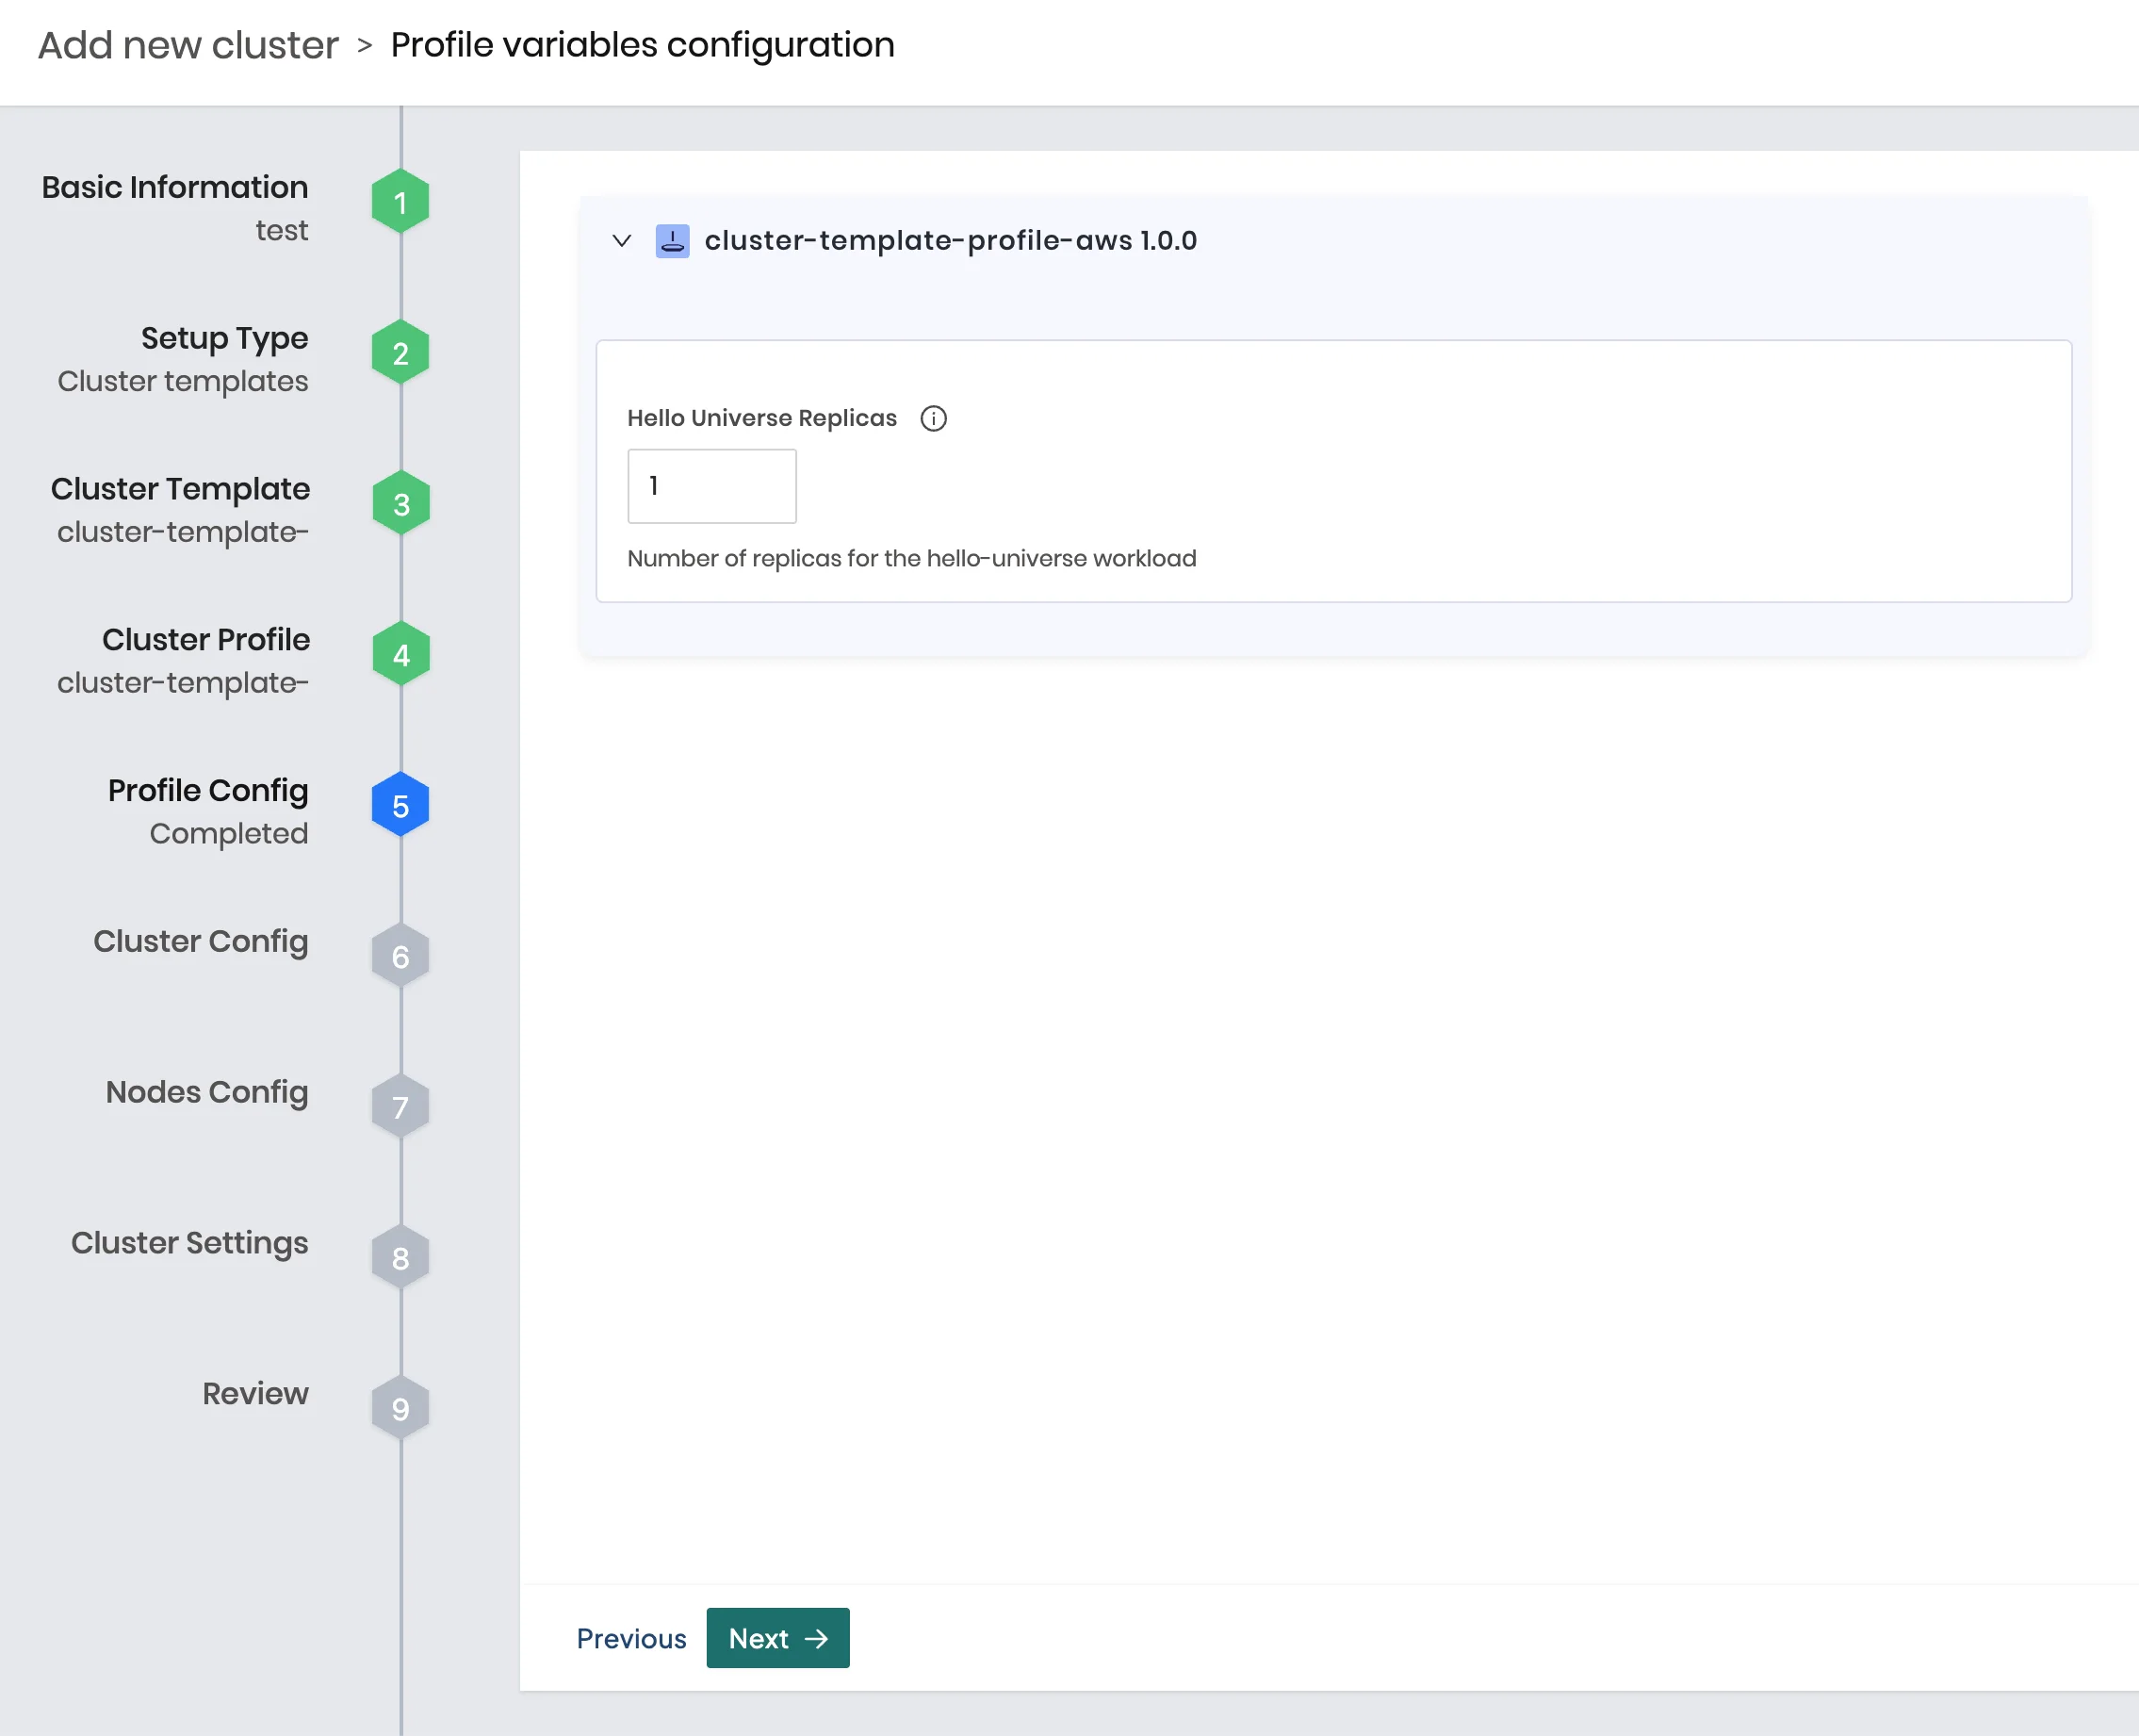
On the Cluster Config page, select the Region and SSH Key Pair Name. Select Next.
In Nodes Config, under CONTROL-PLANE-POOL CONFIGURATION > Cloud Configuration, select General purpose > m4.2xlarge as the Instance Type. Select Availability zones if required by your cloud region.
In Nodes Config, under WORKER-POOL-CONFIGURATION > Cloud Configuration, select General purpose > m4.2xlarge as the Instance Type. Select Availability zones if required by your cloud region. Select Next.

On the Cluster Settings page, under Cluster Timezone, set the Cluster time zone to Etc/GMT. Select Validate, then Finish Configuration.
The cluster deployment may take 15 to 30 minutes. From the left main menu, select Clusters to monitor progress. Once
dev-cluster-aws has a Running status, select it and go to the Profile tab. Confirm it is using
cluster-template-profile-aws and that Hello Universe Replicas is set to 1.
Deploy a Production Cluster from the Template
The production environment requires more replicas than development, so assign app_replicas, displayed as Hello
Universe Replicas in the UI, a value of 2. Once that value is set, deploy a production cluster from the
cluster-template-aws cluster template.
Follow the same steps as the development deployment, with two key differences.
On the Basic Information page, enter prod-cluster-aws as the cluster name.
On the Profile Config page, set Hello Universe Replicas to 2.
The cluster deployment may take 15 to 30 minutes. From the left main menu, select Clusters to monitor progress. Once
prod-cluster-aws has a Running status, select it and go to the Profile tab. Confirm it is using
cluster-template-profile-aws and that Hello Universe Replicas is set to 2.
Validate the Deployments
From the left main menu, select Clusters, and then select dev-cluster-aws.
When the application is deployed and ready for network traffic, indicated in the Services field, Palette exposes the service URL. Open the URL for port :8080 to launch the Hello Universe application.
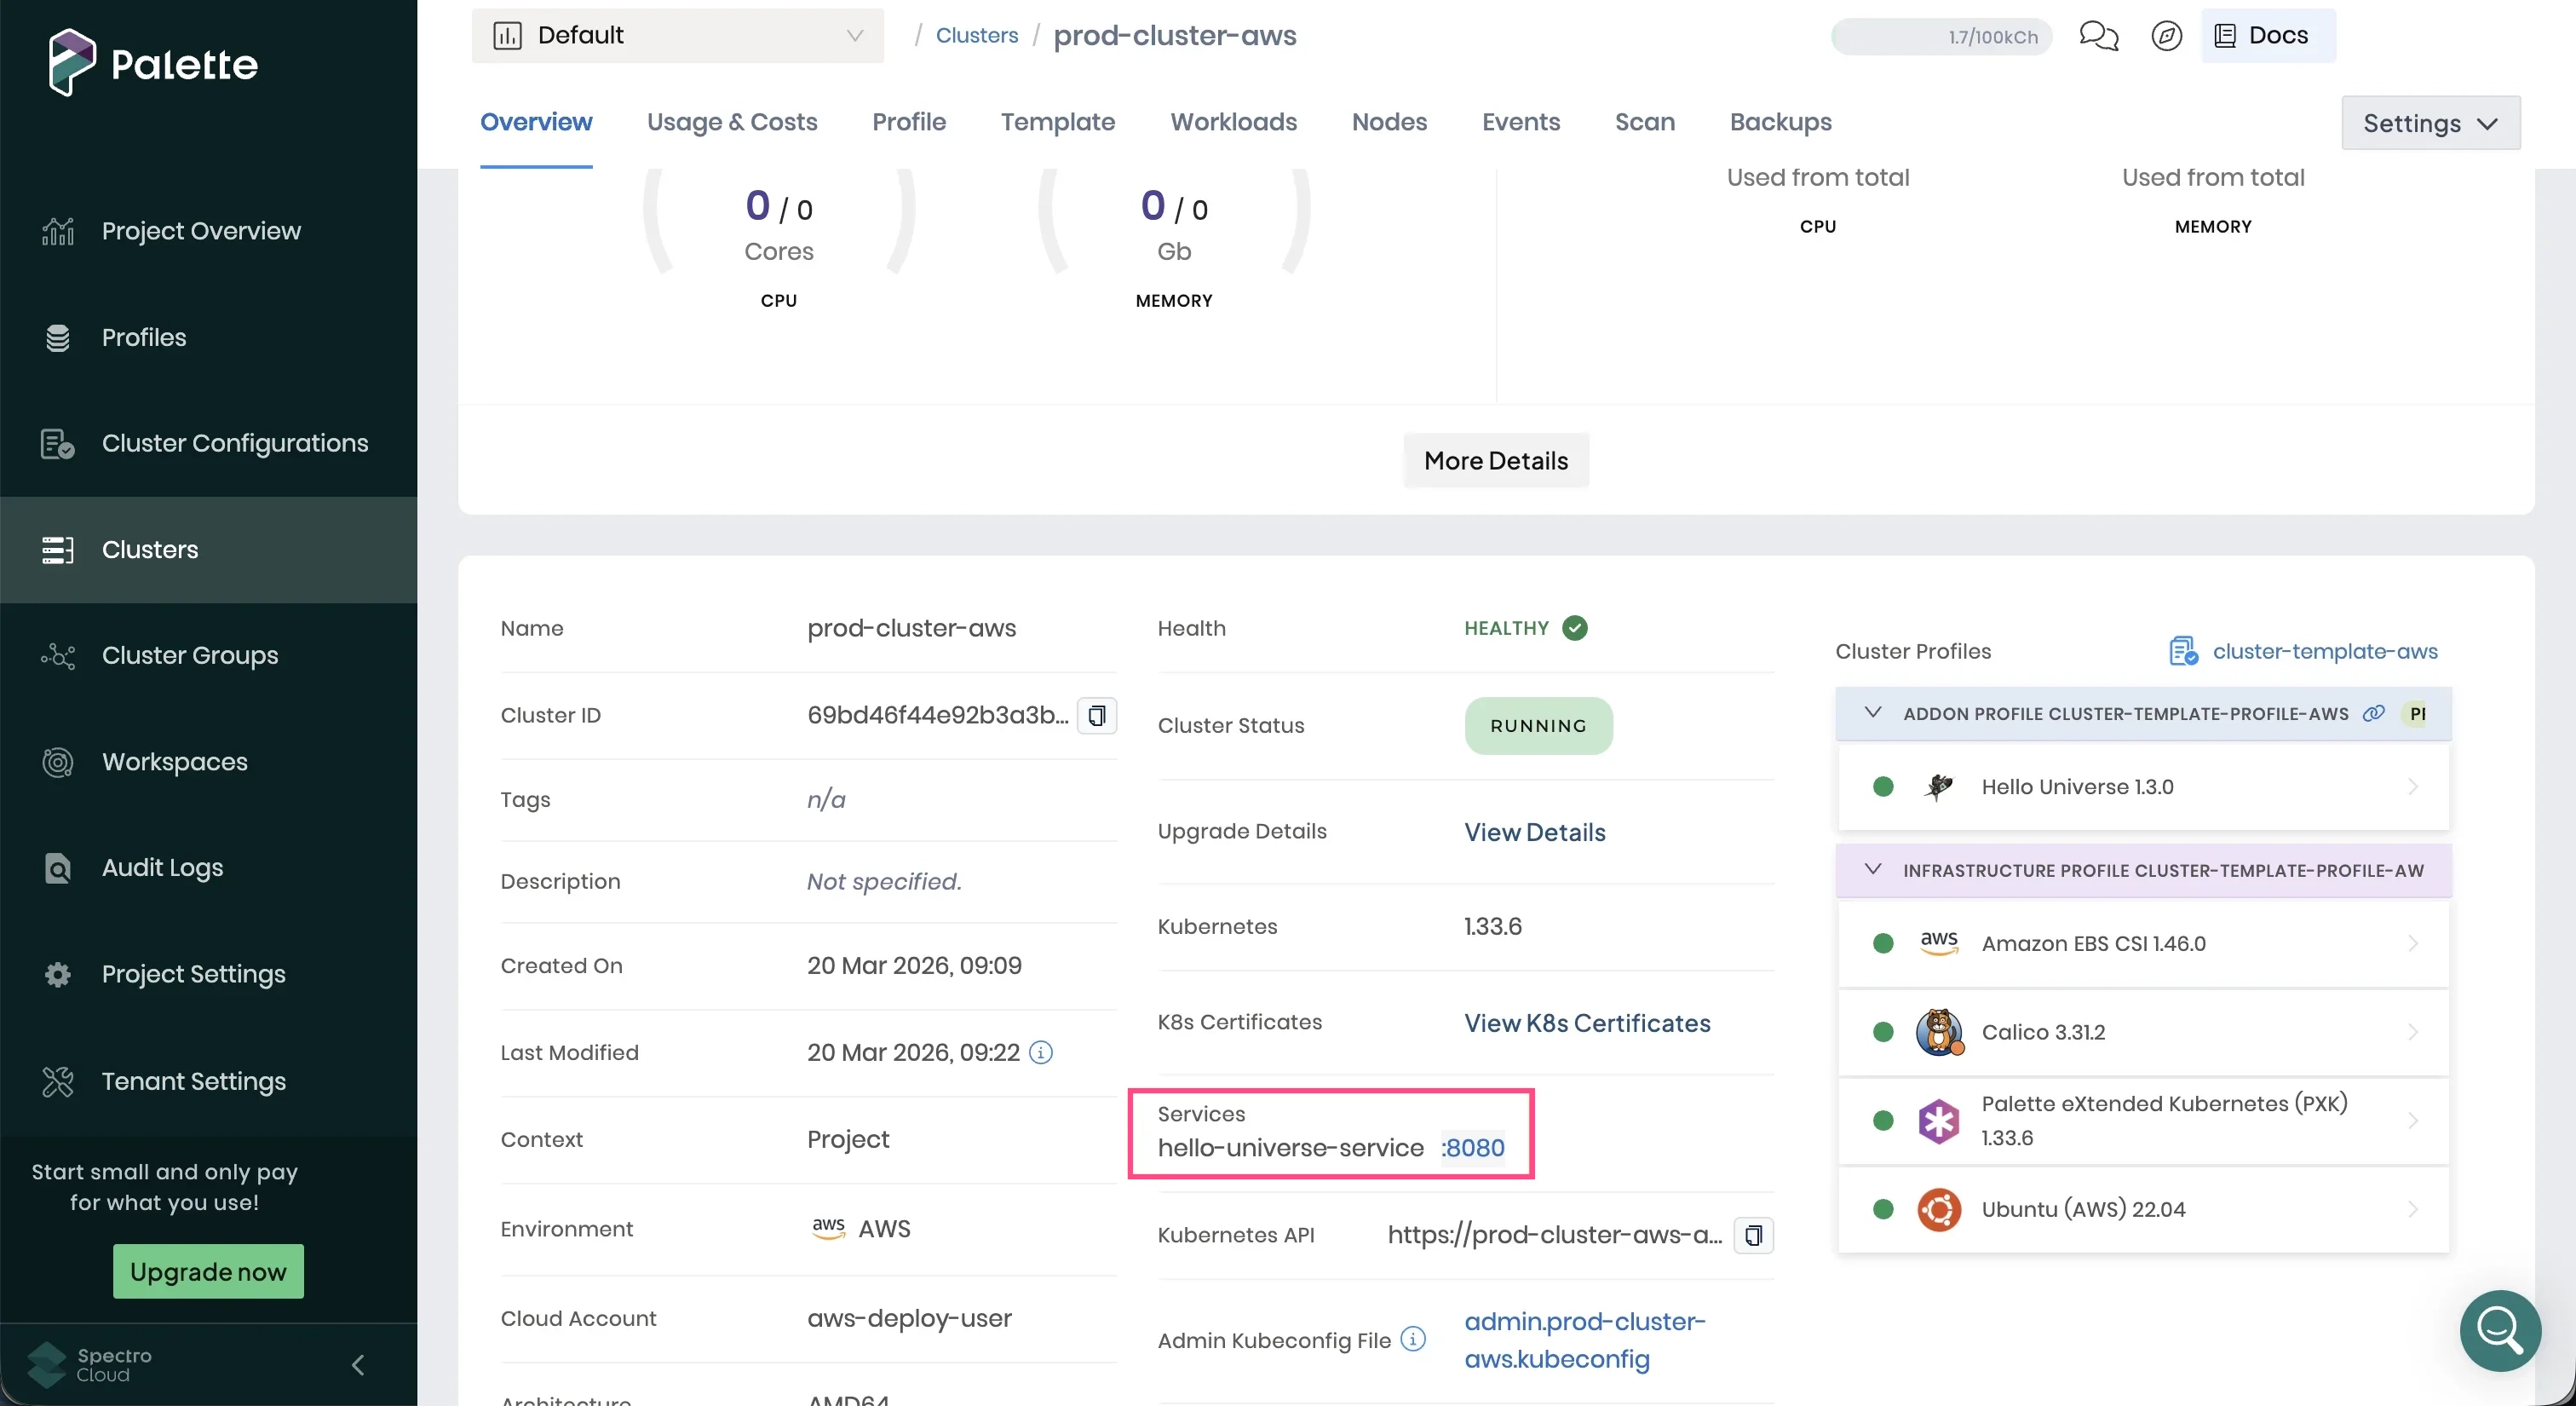
It can take up to three minutes for DNS to properly resolve the public load balancer URL. We recommend waiting a few moments before opening the service URL to prevent the browser from caching an unresolved DNS request.
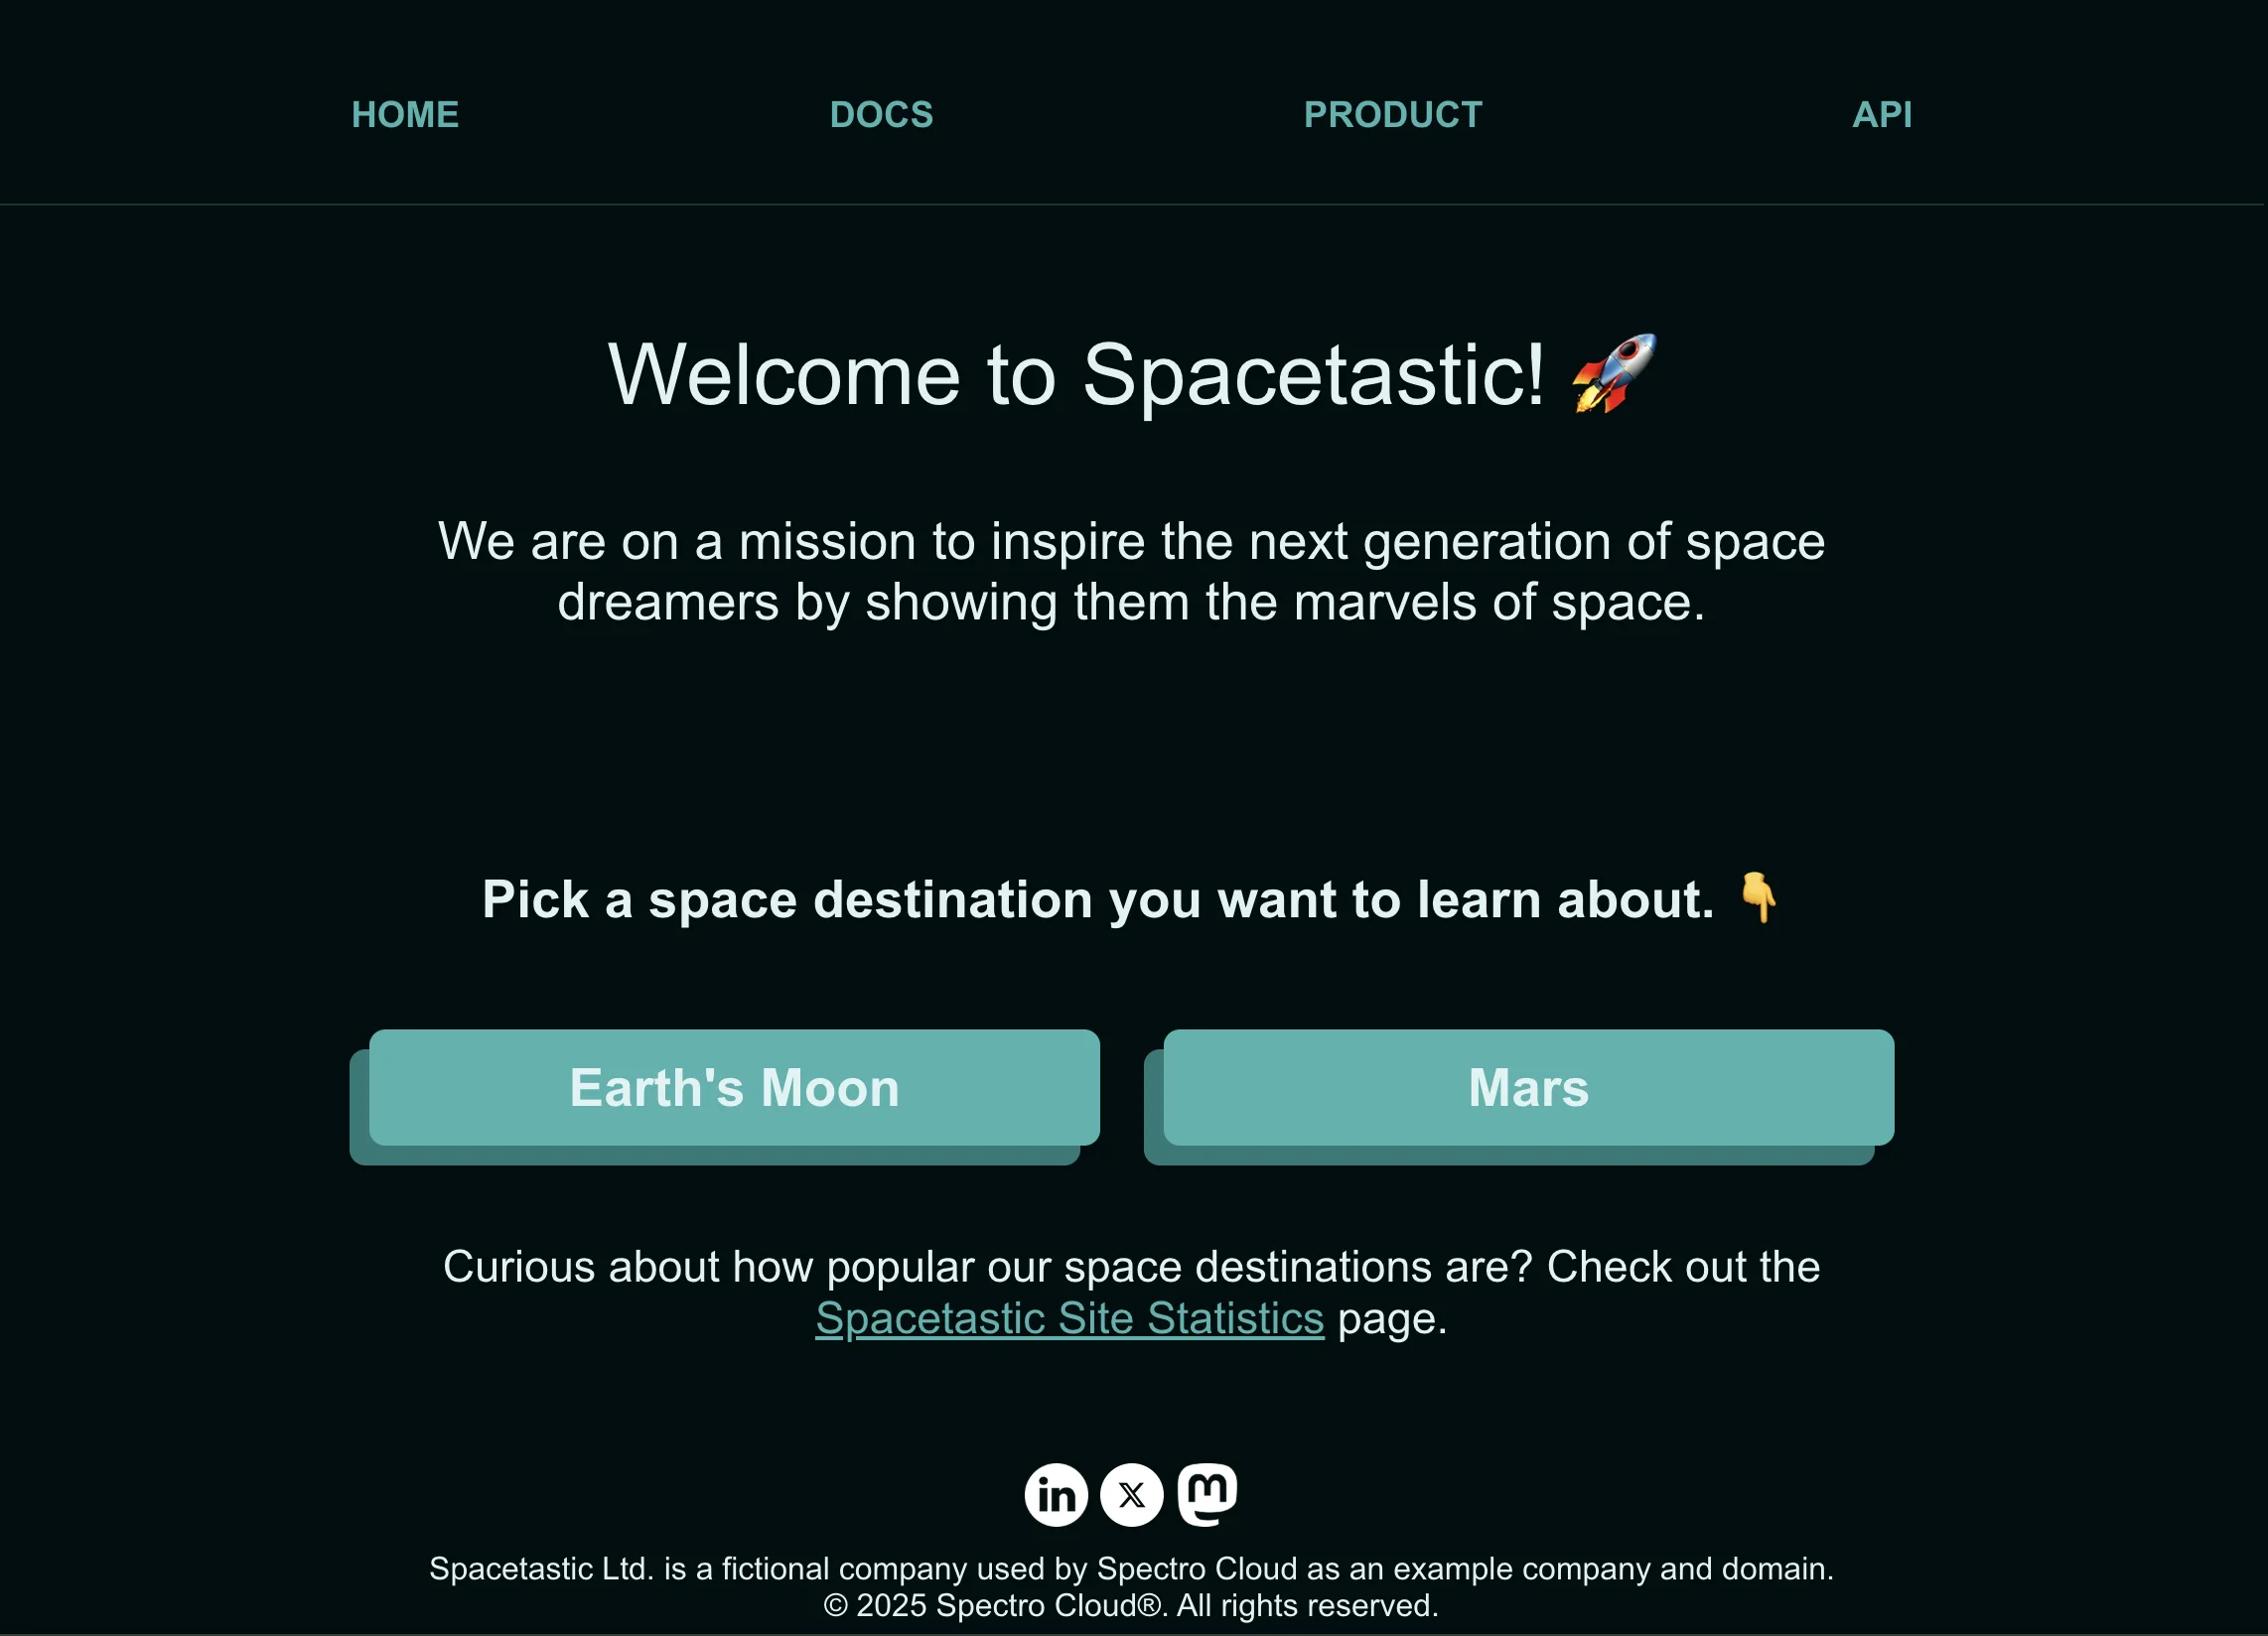
The dev-cluster-aws cluster is serving the Hello Universe application.
Repeat these steps for prod-cluster-aws to confirm you can launch its Hello Universe application.
Create a New Cluster Profile Version
The Kubecost pack provides real-time cost visibility. We recommend creating a new cluster profile version for every
change so clusters on other versions are unaffected. Create version 1.1.0 to add Kubecost. dev-cluster-aws and
prod-cluster-aws remain on 1.0.0 for now.
In Palette, navigate to the left main menu and select Profiles. Select cluster-template-profile-aws from the
profile list.
The current version is displayed in the drop-down menu beside the profile name. The default version is 1.0.0. Select the version drop-down menu and choose Create new version.
In the dialog that appears, enter 1.1.0 in the Version field. Select Confirm.
Palette creates version 1.1.0 with the same packs as version 1.0.0. Select Add New Pack.
Search the Palette Community Registry for the Kubecost pack and select it. No changes to the default configuration are needed for this tutorial. Select Confirm & Create.
The cluster profile now includes the Kubecost (cost-analyzer) pack.
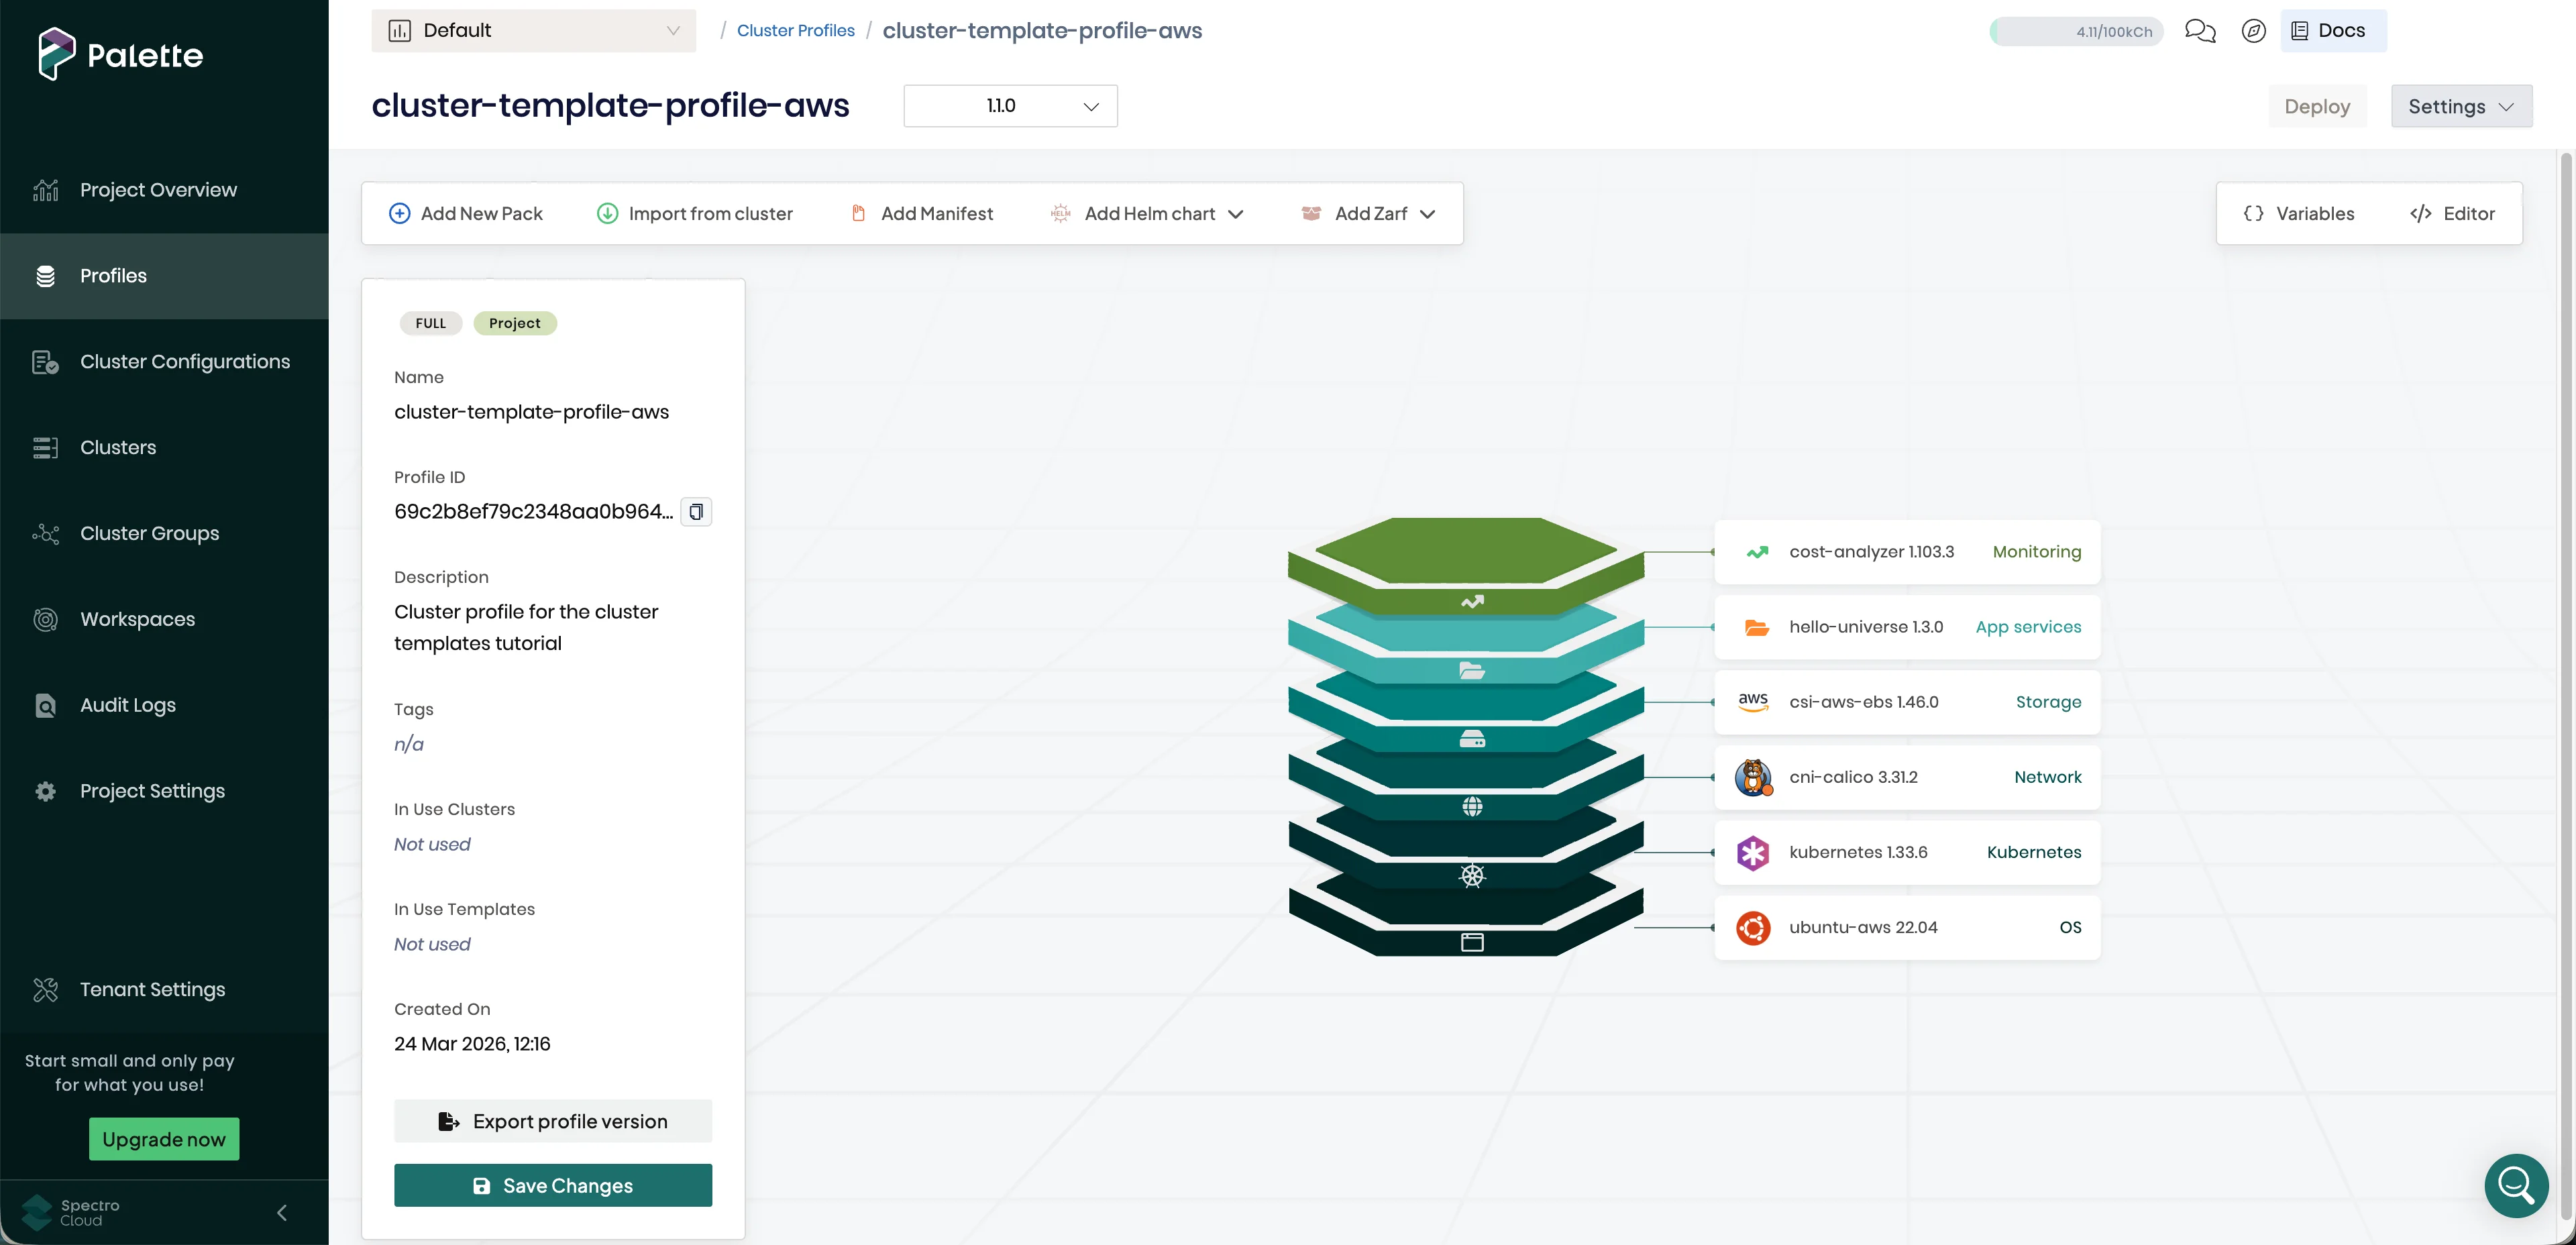
Select Save Changes to finalize the new profile version.
Update the Cluster Template to the New Profile Version
Update the cluster-template-aws cluster template to reference profile version 1.1.0.
From the left main menu, select Cluster Configurations. Select the Templates tab and select
cluster-template-aws. Select the Policies tab.
Under Linked profiles, locate cluster-template-profile-aws and select 1.1.0 in the version drop-down menu.
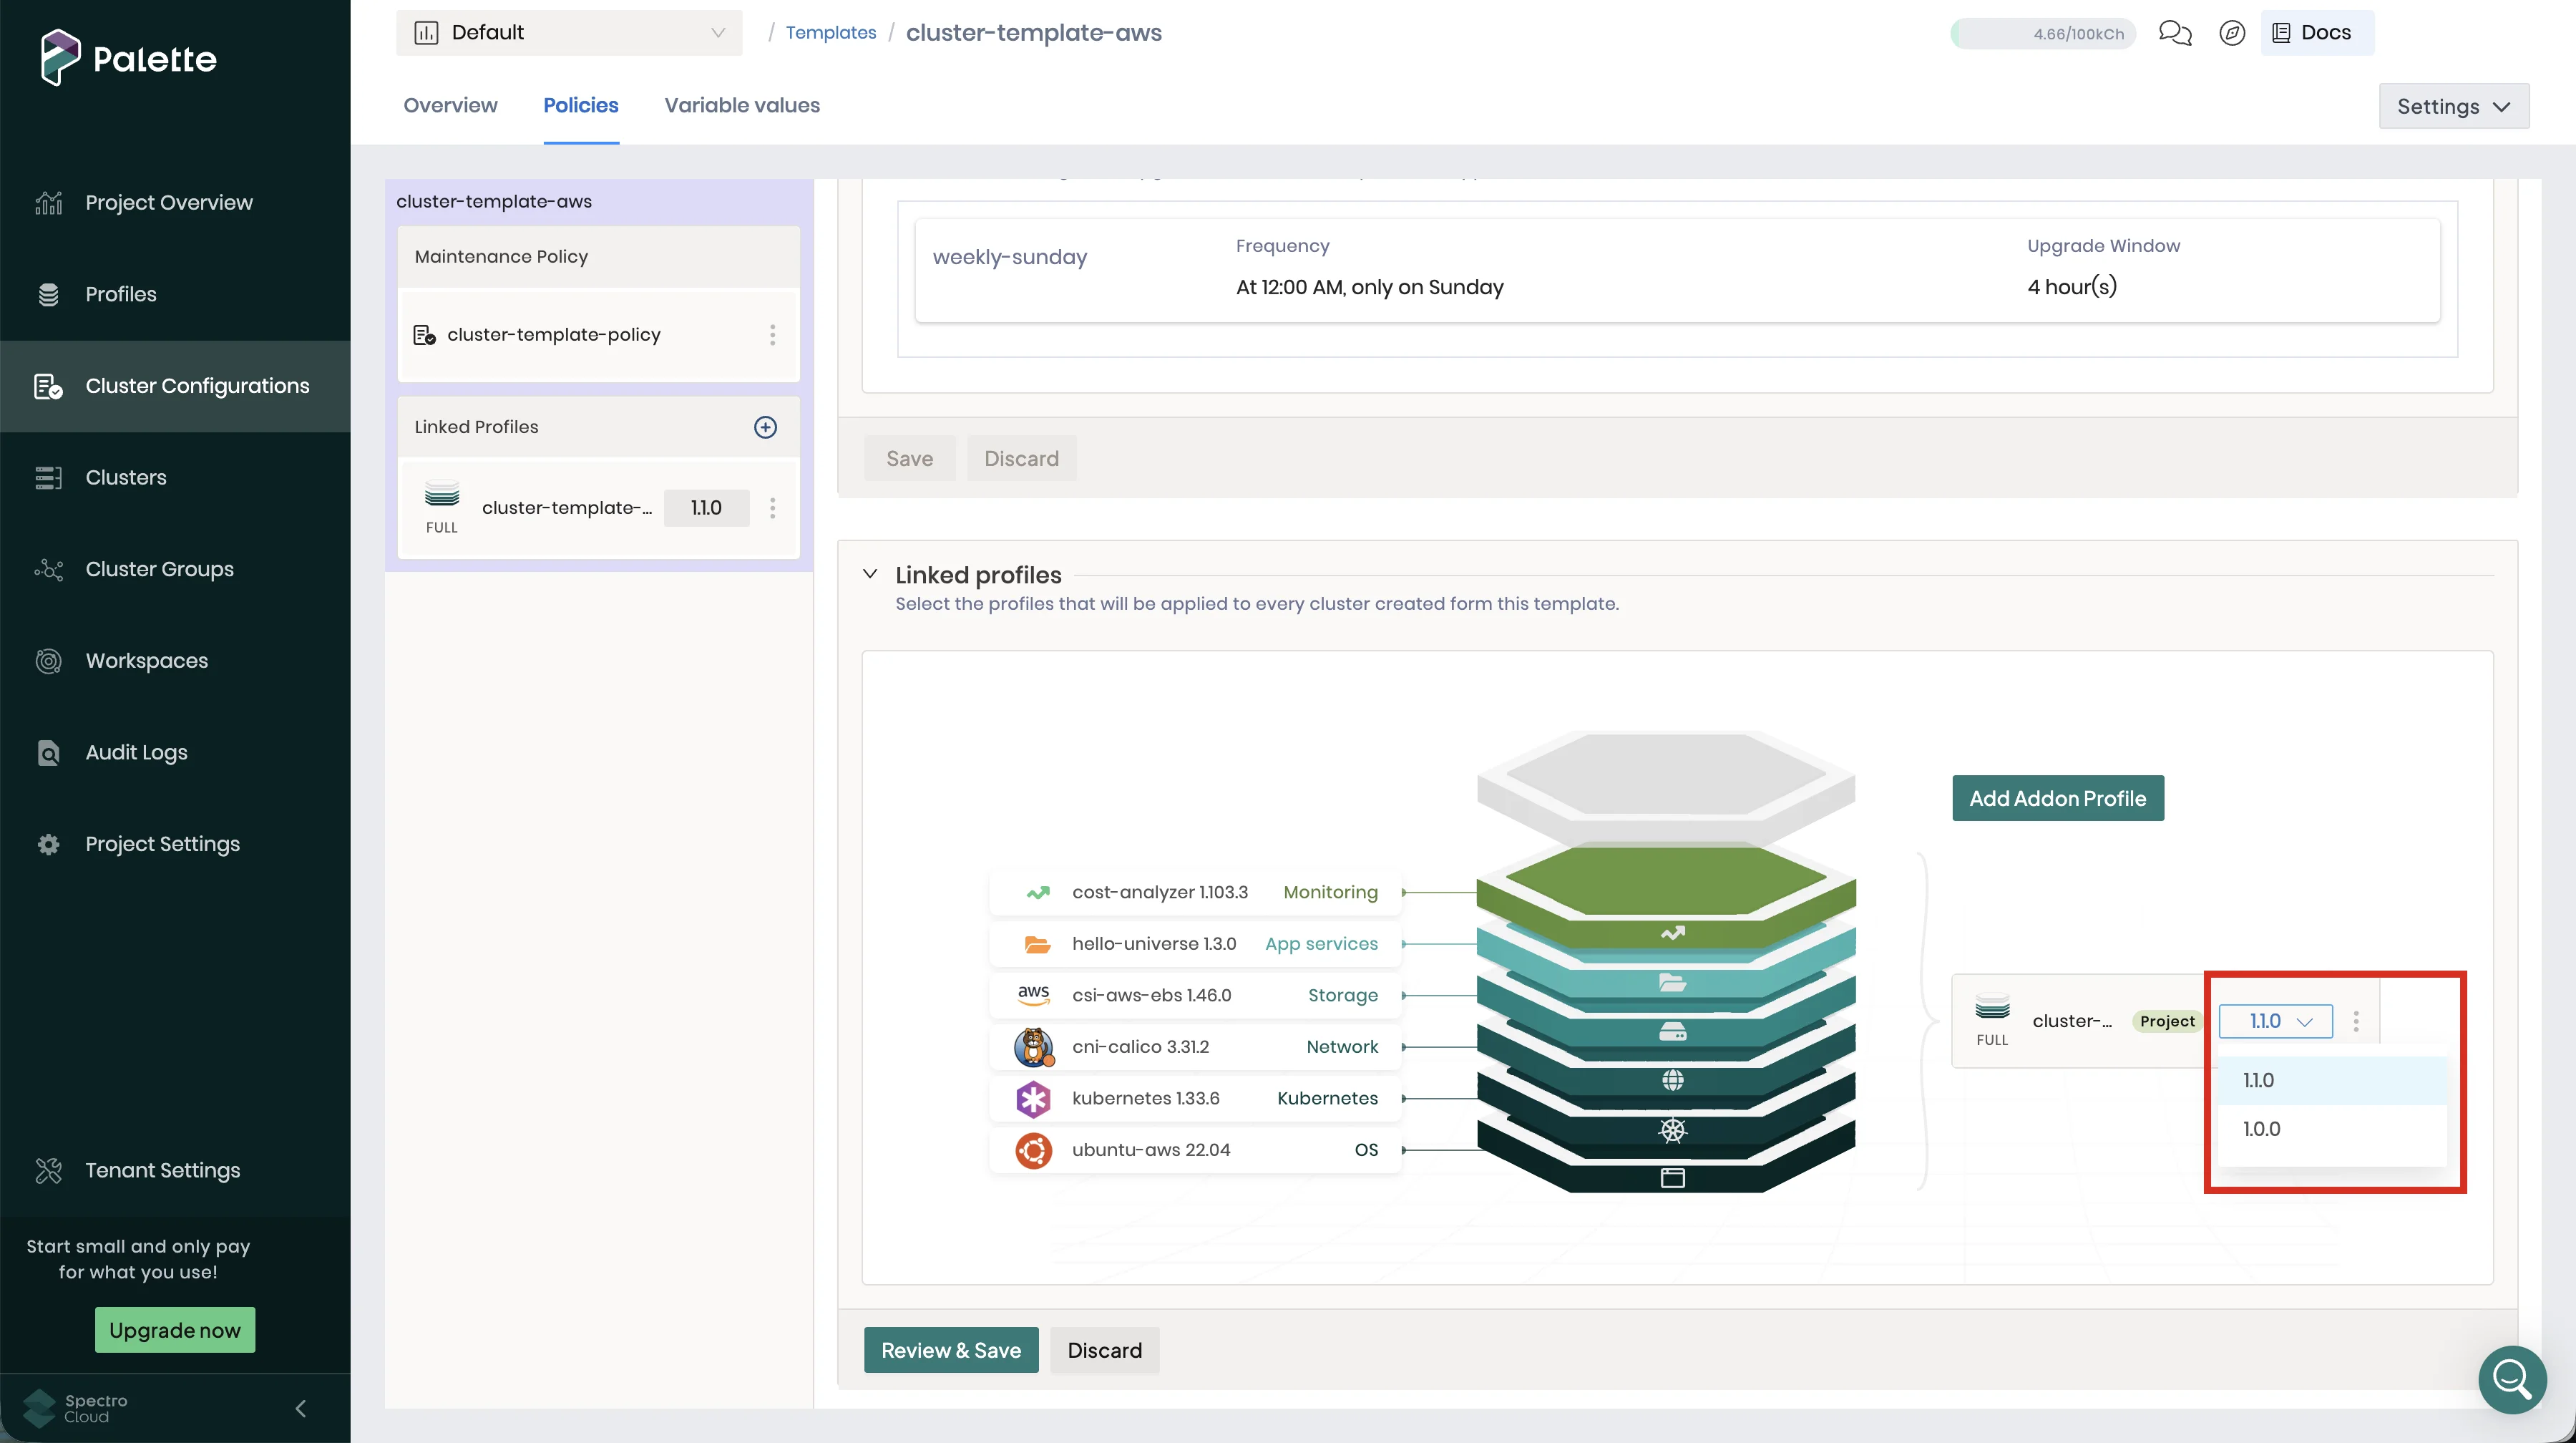
Select Review & Save.
In the Changes Summary dialog, select Review changes in Editor.
Then, select Apply Changes.
The cluster template now references profile version 1.1.0. This does not trigger an upgrade. dev-cluster-aws and
prod-cluster-aws remain on 1.0.0 until the maintenance policy initiates the upgrade.
Upgrade Clusters from the Template
Trigger an upgrade on cluster-template-aws to apply profile version 1.1.0 to both clusters.
From the left main menu, select Cluster Configurations. Select the Templates tab and select
cluster-template-aws. Select the Overview tab.
Select Options > Upgrade now.
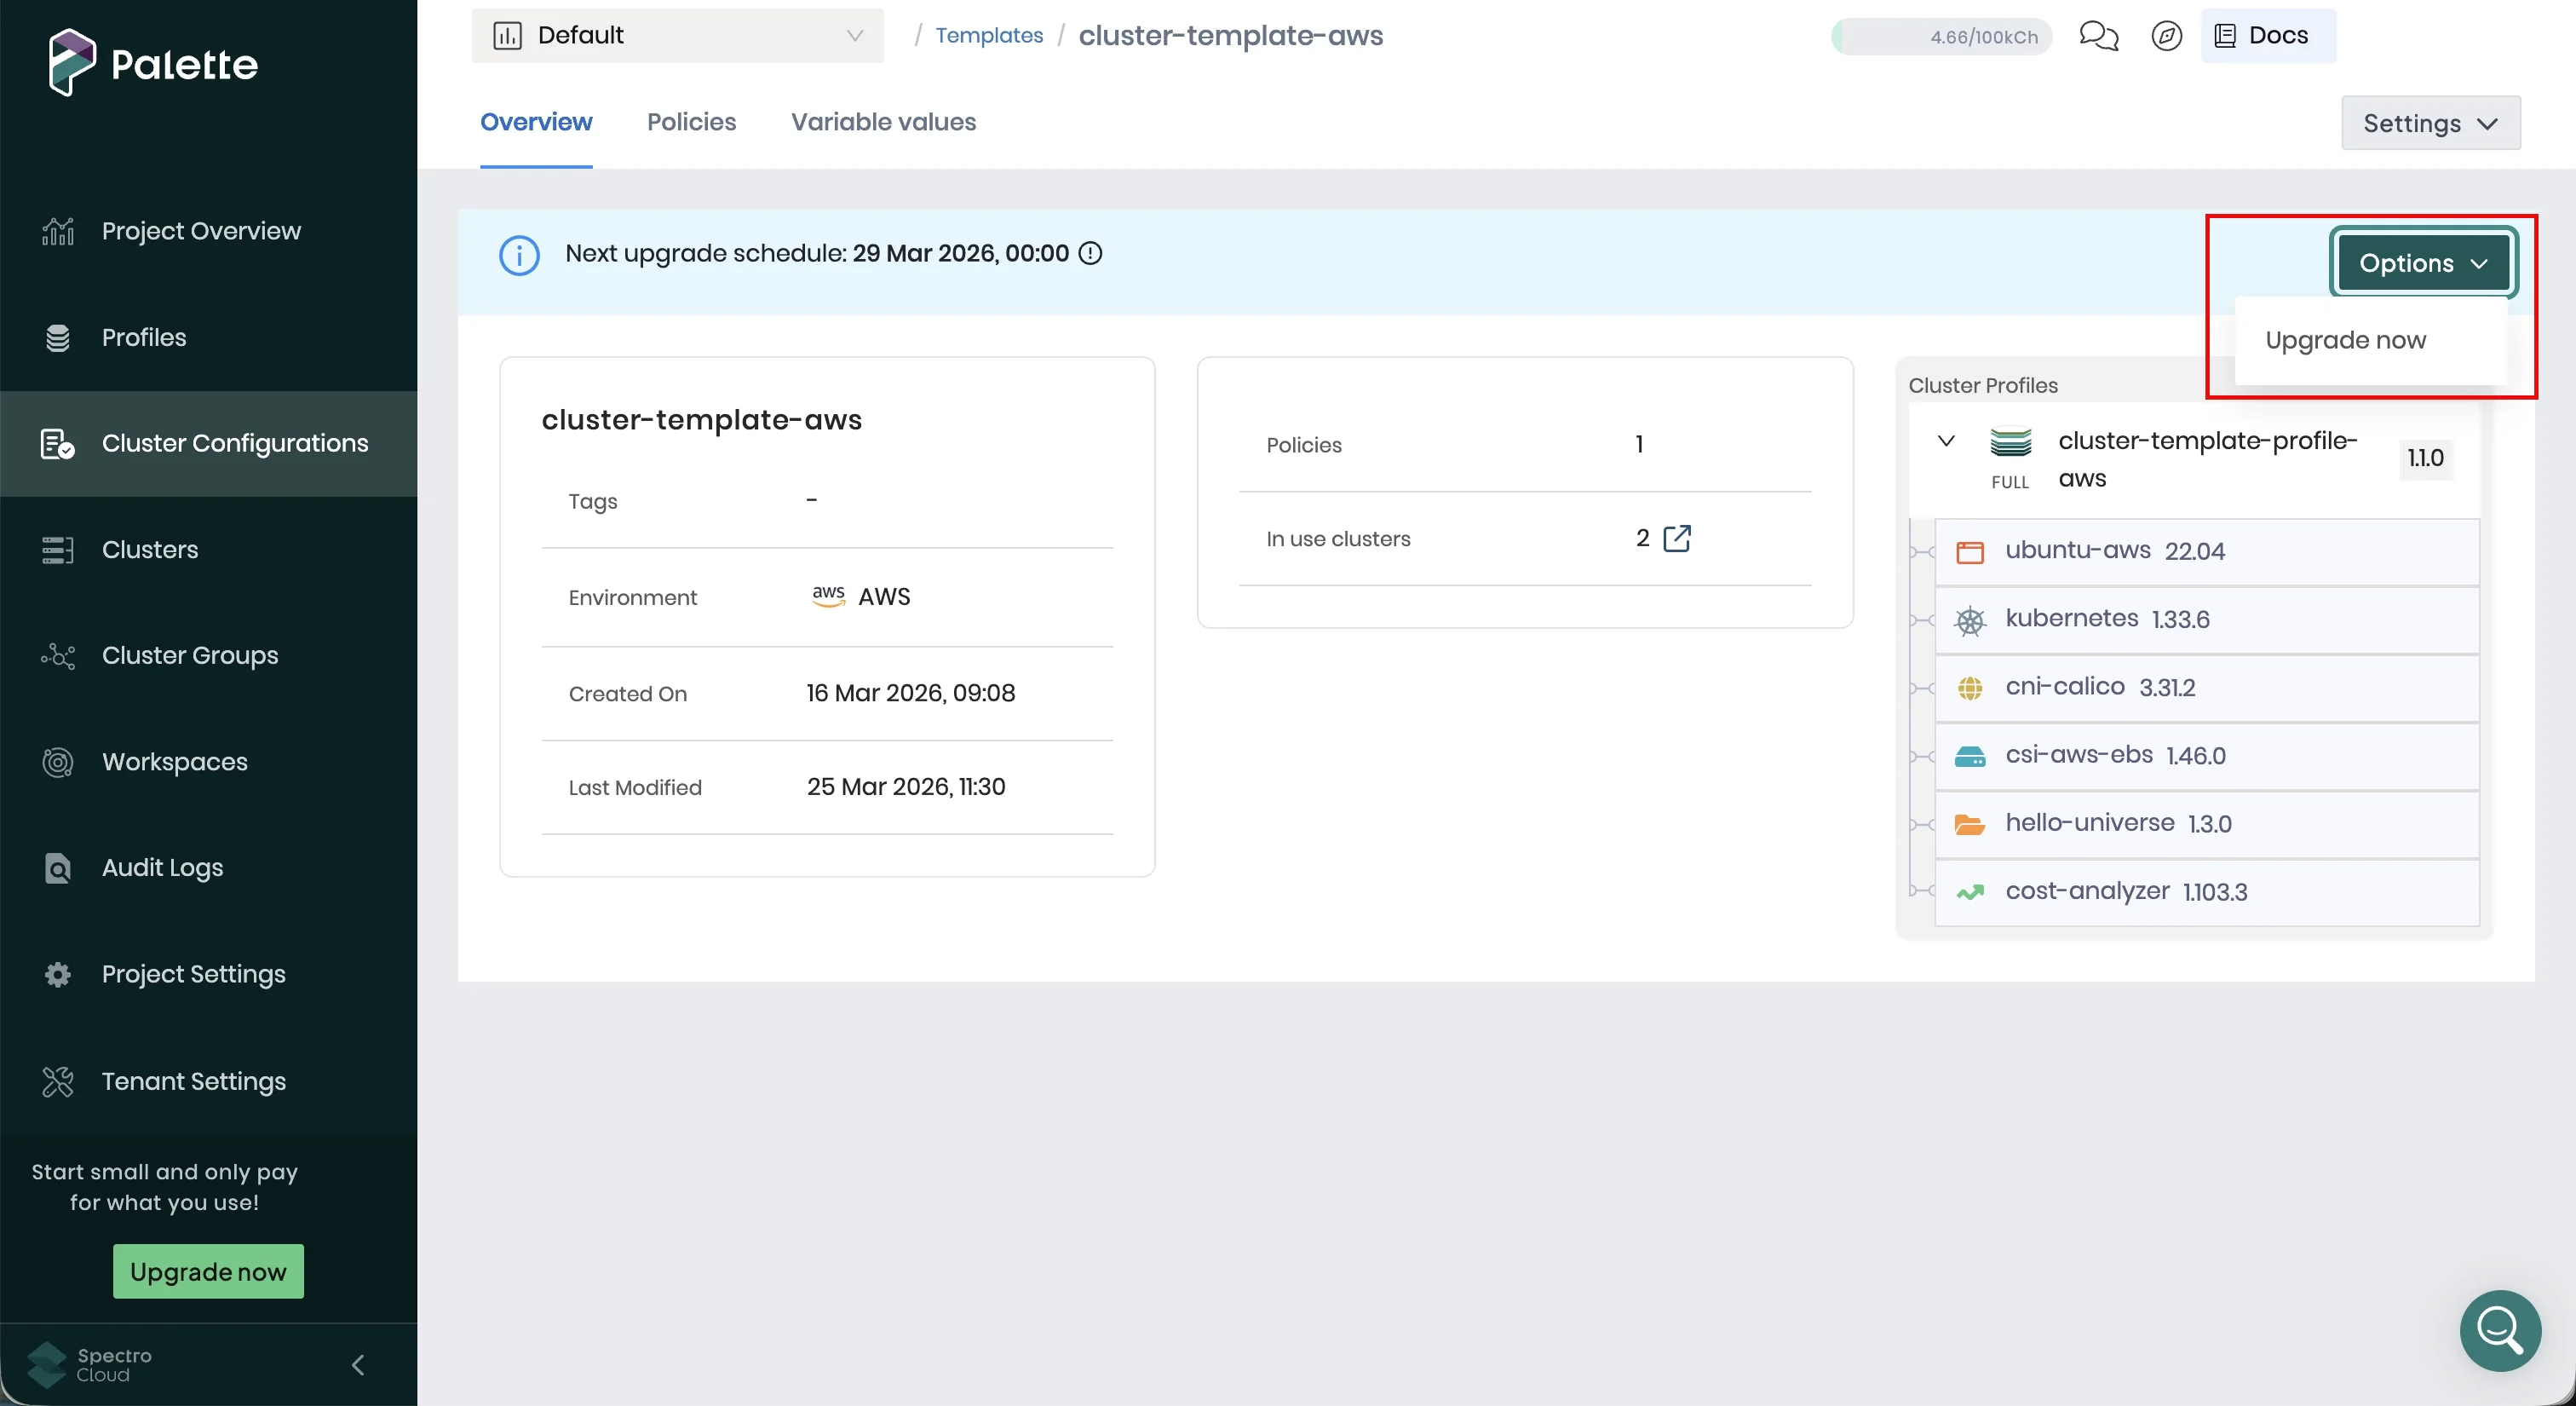
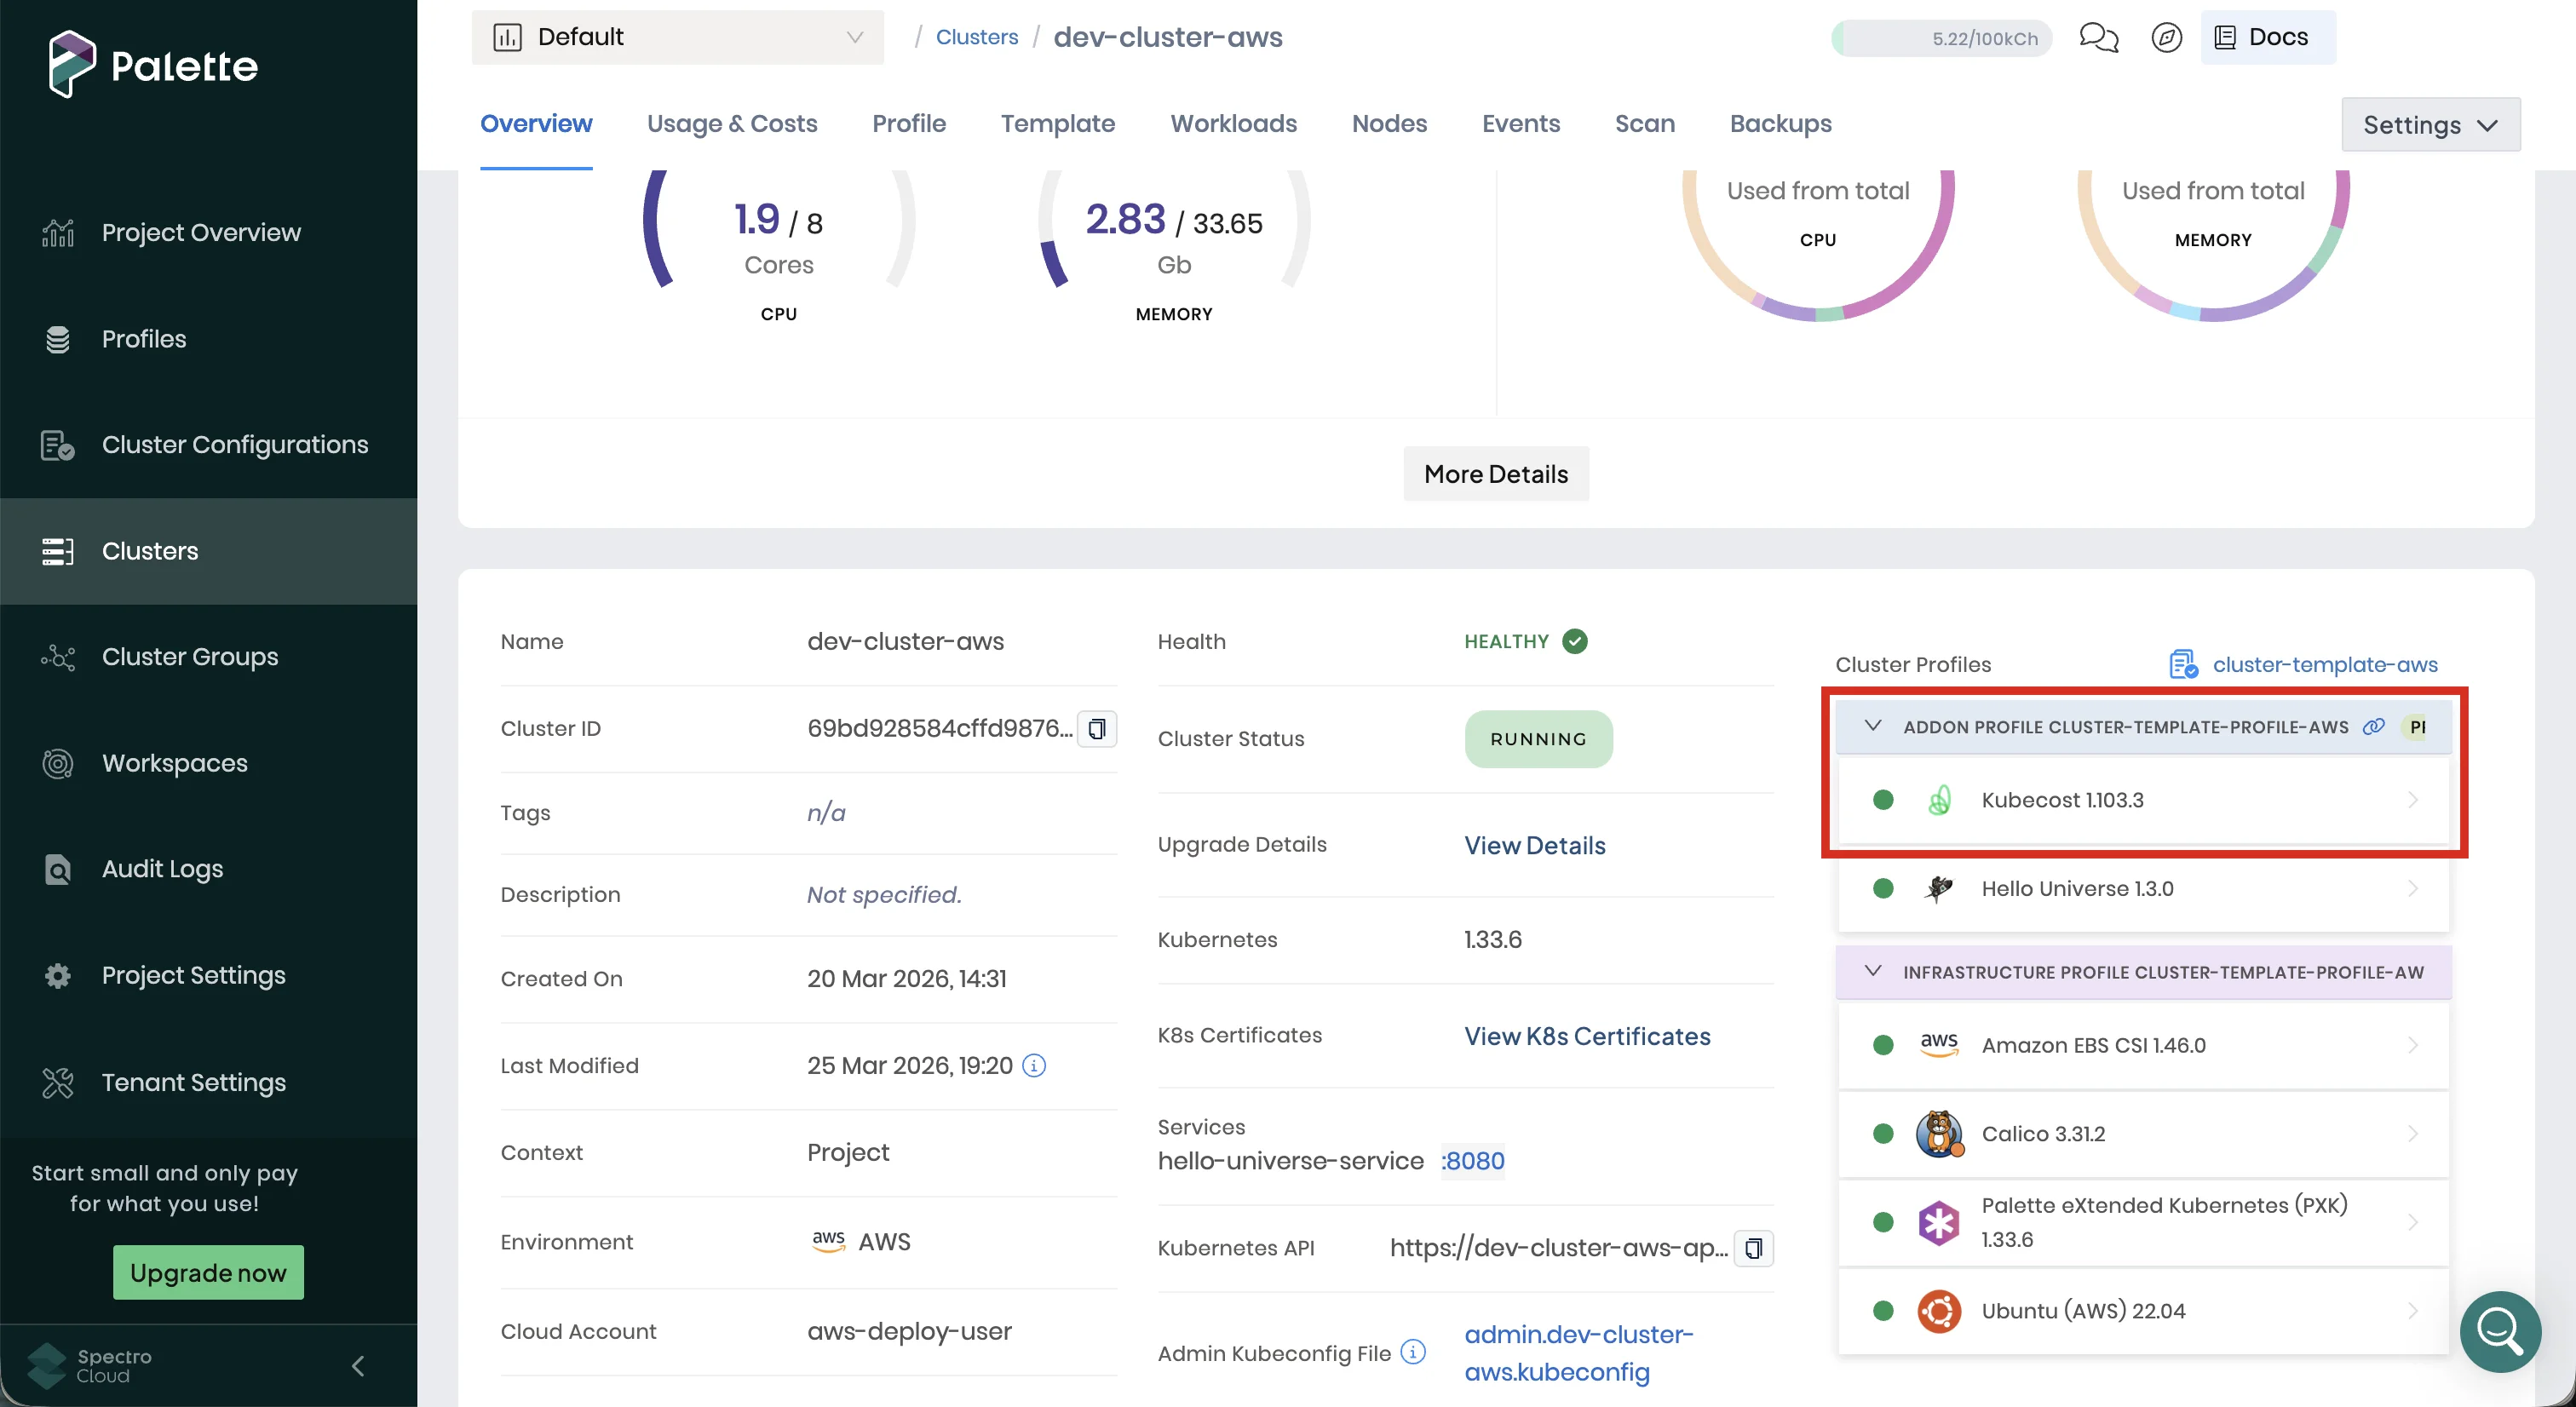
From the left main menu, select Clusters, then select either cluster to track the upgrade progress.
The upgrade may take several minutes per cluster. Once complete, Palette marks the Kubecost layer with a green status indicator.
Validate the Upgrades
Confirm that both clusters upgraded successfully and that Kubecost is deployed and accessible.
From the left main menu, select Clusters, then select dev-cluster-aws. Verify that the cluster status is
Running. Select the Profile tab and confirm the version drop-downs display 1.1.0.
Select the Overview tab and download the kubeconfig file for dev-cluster-aws. This file enables you and other
users to issue kubectl commands against the host cluster.
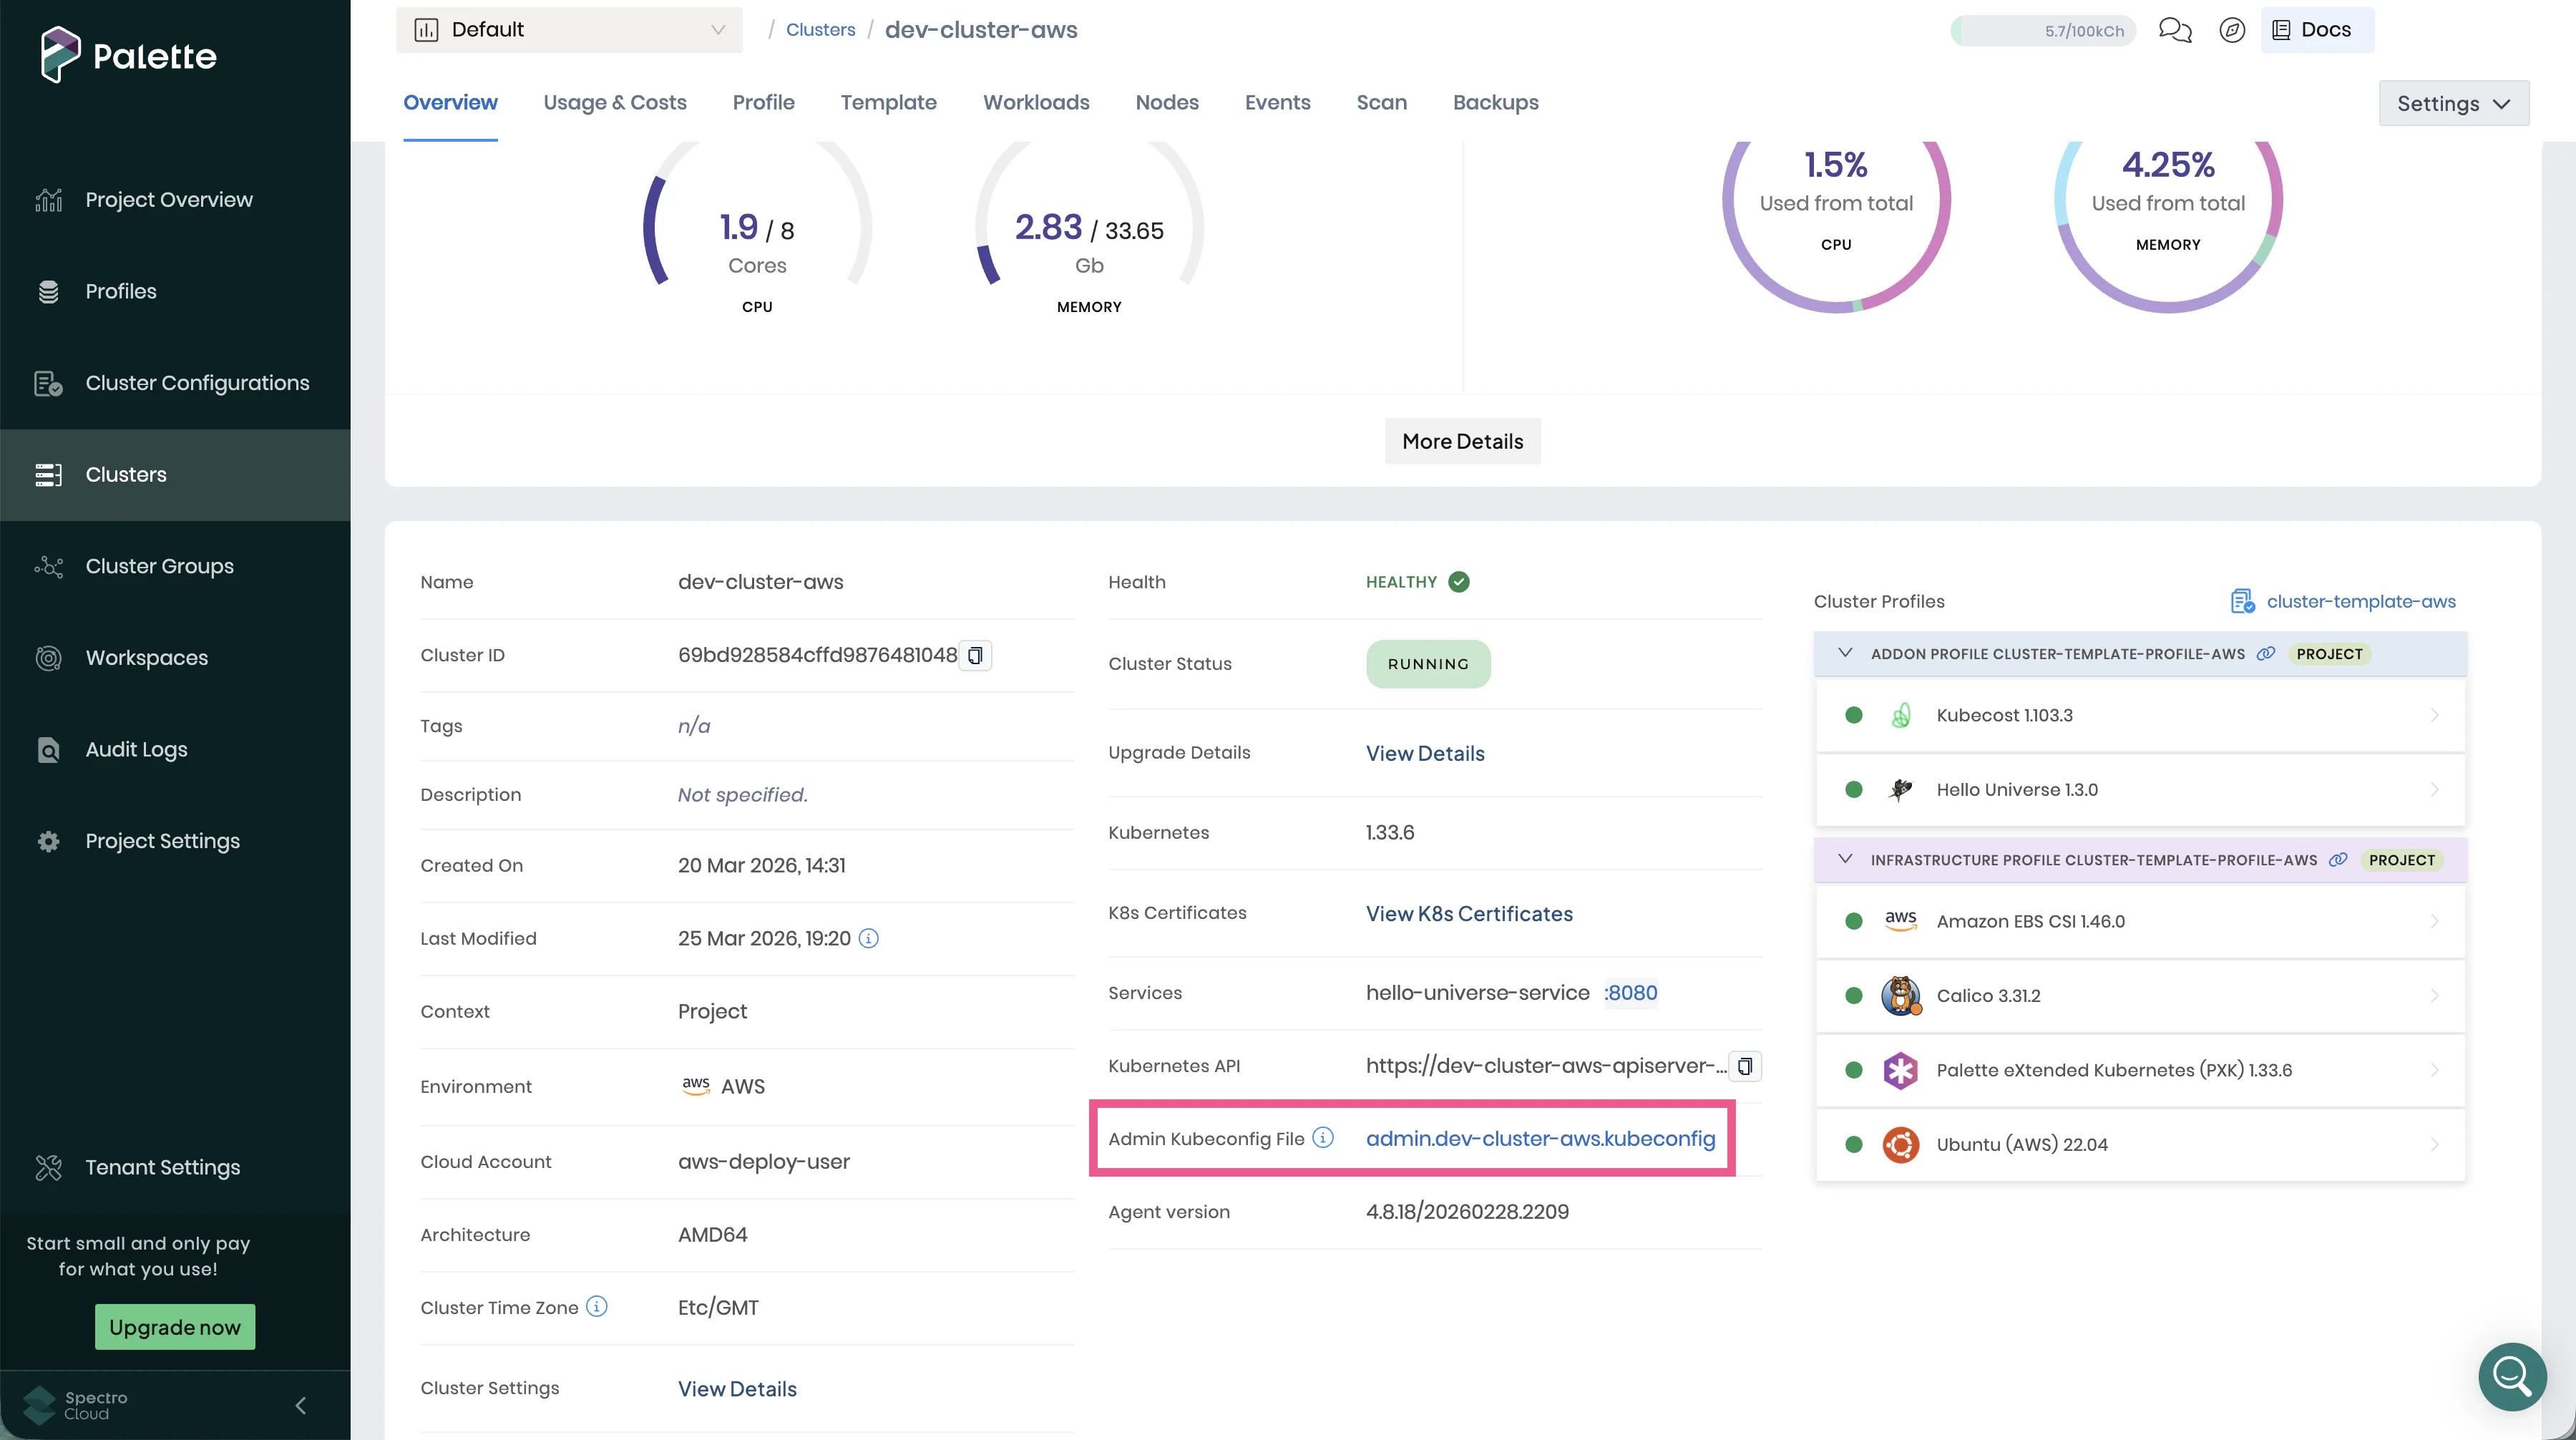
Open a terminal window and set the KUBECONFIG environment variable to point to the file you downloaded.
export KUBECONFIG=<path-to-kubeconfig>
Forward the Kubecost UI to your local machine. The Kubecost dashboard is not exposed externally by default. The
following command makes it available locally on port 9090.
kubectl port-forward --namespace kubecost deployment/cost-analyzer-cost-analyzer 9090
Open a browser window and navigate to http://localhost:9090. The Kubecost dashboard displays cost and resource data
for your cluster. Read more about
navigating the Kubecost UI to make
the most of the cost analyzer.

Once you are done, stop the kubectl port-forward command by closing the terminal window it is executing from.
Repeat the same Kubecost and cluster profile version checks for prod-cluster-aws.
Cleanup
Remove all of the resources you created for the tutorial.
From the left main menu, select Clusters, then select dev-cluster-aws. Select Settings and choose Delete
Cluster. Type the cluster name to confirm and select OK. The deletion process takes several minutes to complete.
Repeat for prod-cluster-aws.
If a cluster remains in the delete phase for over 15 minutes, it becomes eligible for a force delete. To trigger a force delete, navigate to the cluster's details page, select Settings, and choose Force Delete Cluster. Palette automatically removes clusters stuck in the delete phase for over 24 hours.
Once both clusters are deleted, delete the cluster template. From the left main menu, select Cluster Configurations.
Select the Templates tab and select cluster-template-aws. Select Settings and choose Delete. Confirm the
deletion.
Next, delete the cluster profile. From the left main menu, select Profiles. Find cluster-template-profile-aws and
select the three-dot menu. Choose Delete and confirm. This removes all versions of the profile.
Finally, delete the maintenance policy. From the left main menu, select Cluster Configurations. Select the
Policies tab. Find cluster-template-policy and select the three-dot menu. Choose Delete and confirm.
Wrap-Up
In this tutorial, you learned how to enforce consistent configuration and manage upgrades across multiple clusters. You created a cluster profile with a profile variable and a maintenance policy, then combined them into a cluster template to deploy development and production clusters with environment-specific variable values. You then added Kubecost by creating a new profile version, updated the template to reference it, and upgraded both clusters simultaneously.
We encourage you to check out the Cluster Templates documentation to discover how other cluster governance and lifecycle capabilities can help you manage your cluster fleet at scale.