Standardize Cluster Provisioning and Maintenance with Cluster Templates using Terraform
When you manage many Kubernetes clusters, configuring and upgrading them one by one does not scale. You need a way to apply the same configuration and upgrade rules across multiple clusters.
Palette supports this workflow with cluster templates. Cluster templates let you reuse a cluster configuration, control when upgrades happen, and apply changes to multiple clusters at once.
Cluster templates combine a cluster profile and one or more cluster template policies.
- Cluster profiles define what a cluster runs. They contain the software stack and infrastructure configuration.
- Cluster template policies define how clusters created from a template are managed throughout their lifecycle, including when upgrades can run.
Cluster profiles can include cluster profile variables, which let you reuse the same profile while changing specific values per cluster, such as the worker node instance size or the number of application replicas.
A maintenance policy is one example of a cluster template policy. Maintenance policies define a maintenance window that controls when upgrades can run. Currently, maintenance policies are the only supported cluster template policy type in Palette.

When you create clusters from the same template, they inherit the same base configuration and the same governance rules. For example, you can create development and production clusters from a single template. Both clusters run the same software stack and follow the same upgrade policy. You can assign different profile variable values to handle environment-specific requirements.
In this tutorial, you will:
- Create a cluster profile, a cluster template policy, and a cluster template that uses them together
- Deploy two clusters (development and production) from the same template
- Use cluster profile variables to apply environment-specific settings
- Update the template and upgrade both clusters
You will complete this tutorial using Terraform. You will define a cluster profile, create a cluster template with a maintenance policy, and deploy clusters from it.
Prerequisites
- A Palette account with permissions to create cluster profiles, cluster template policies, cluster templates, and clusters.
- A cloud account registered in Palette. Refer to AWS, Azure, GCP, or VMware to get started.
- Ensure that the Palette Community Registry is available in your Palette environment.
- kubectl installed locally. Use the Kubernetes Install Tools page for further guidance.
- Terraform version 1.x installed.
- A Palette API key set as an environment variable.
All commands and expected outputs use AWS as the example. Azure users follow the same steps with Azure-specific resource names in the output.
You can clone the Tutorials repository locally or follow along by downloading a container image that includes the tutorial code and all dependencies.
- Docker
- Podman
- Git
Start Docker Desktop and ensure that the Docker daemon is available by issuing the following command.
docker ps
Next, download the tutorial image, start the container, and open a bash session into it.
docker run --name tutorialContainer --interactive --tty ghcr.io/spectrocloud/tutorials:1.3.3 bash
Do not exit the container until the tutorial is complete. Otherwise, you may lose your progress.
If you are not using a Linux operating system, create and start the Podman Machine in your local environment. Otherwise, skip this step.
podman machine init
podman machine start
Use the following command and ensure you receive an output displaying the installation information.
podman info
Next, download the tutorial image, start the container, and open a bash session into it.
podman run --name tutorialContainer --interactive --tty ghcr.io/spectrocloud/tutorials:1.3.3 bash
Do not exit the container until the tutorial is complete. Otherwise, you may lose your progress.
Open a terminal window and download the tutorial code from GitHub.
git clone https://github.com/spectrocloud/tutorials.git
Change the directory to the tutorial folder.
cd tutorials/
Check out the following git tag.
git checkout v1.3.3
Navigate to the terraform/cluster-templates-tf directory.
cd terraform/cluster-templates-tf
Confirm you are in the correct directory.
pwd
/workspace/terraform/cluster-templates-tf
Configure the Terraform Provider
The directory contains files that configure the Spectro Cloud provider and point it at your Palette project. Review each file before running any commands.
| File | Description |
|---|---|
| provider.tf | Configures the Spectro Cloud Terraform provider and sets the target Palette project. |
| inputs.tf | Declares the input variables the configuration expects: the Palette project and cloud provider. |
| terraform.tfvars | Supplies values for the variables declared in inputs.tf. Update palette-project if your project is not named Default, and set deploy-aws or deploy-azure to true to match your cloud provider. |
| data.tf | Resolves the Palette project, registries, and pack configuration referenced by cluster_profiles.tf. |
inputs.tf declares all variables used across the configuration. palette-project sets the Palette project where all
resources will be created. app_port is set at apply time and shared across every cluster the template manages.
deploy-aws and deploy-azure specify the cloud provider for the cluster template and all clusters it manages.
#########
# Palette
#########

variable "palette-project" {
  description = "Palette project name"
  type        = string
}

#####################
# Hello Universe
#####################

variable "app_port" {
  type        = number
  description = "The cluster port number on which the service will listen for incoming traffic."
}

#######
# AWS
#######

variable "deploy-aws" {
  type        = bool
  description = "A flag for enabling a deployment on AWS."
}

#########
# Azure
#########

variable "deploy-azure" {
  type        = bool
  description = "A flag for enabling a deployment on Azure."
}
Terraform loads terraform.tfvars automatically at runtime. If your project is not named Default, update
palette-project. Set either deploy-aws or deploy-azure to true to match your cloud provider. Only one should be
true at a time.
#####################
# Palette Settings
#####################
palette-project = "Default" # The name of your project in Palette.

##############################
# Hello Universe Configuration
##############################
app_port = 8080 # The cluster port number on which the service will listen for incoming traffic.

###########################
# AWS Deployment Settings
############################
deploy-aws = false # Set to true to deploy to AWS.

###########################
# Azure Deployment Settings
############################
deploy-azure = false # Set to true to deploy to Azure.
provider.tf pins the Spectro Cloud provider to its registry source and sets a minimum version requirement. The
provider block reads var.palette-project to target the correct Palette project.
data.tf resolves the Palette project, registries, and packs that cluster_profiles.tf references. The project lookup
runs first, so if authentication fails or the project does not exist, Terraform stops before creating any resources.
Set API Key Environment Variable
Terraform authenticates to Palette using your API key. Export it as an environment variable so the provider picks it up automatically.
export SPECTROCLOUD_APIKEY=<your-api-key>
Confirm the variable is set correctly.
echo $SPECTROCLOUD_APIKEY
abcd1234efgh5678...
Check Terraform Version
Confirm that Terraform 1.x is installed.
terraform version
Terraform v1.x.x
on darwin_arm64
Initialize the Working Directory
Initialize the working directory to download the Spectro Cloud provider.
terraform init
Terraform has been successfully initialized!
Successful initialization confirms the provider plugin was downloaded and the working directory is ready.
Create a Cluster Profile
cluster_profiles.tf declares two cluster profiles: one for AWS and one for Azure. The count meta-argument on each
resource reads var.deploy-aws or var.deploy-azure and resolves to either 1 or 0, so only the matching resource
is created when you run terraform apply.
Pack versions are defined in data.tf. To use a different version, update the version field in the corresponding
spectrocloud_pack data source before running terraform apply.
- AWS
- Azure
| Pack Type | Pack Name | Version |
|---|---|---|
| OS | ubuntu-aws | 22.04 |
| Kubernetes | kubernetes | 1.35.2 |
| Network | cni-calico | 3.31.4 |
| Storage | csi-aws-ebs | 1.59.0 |
| App Services | hello-universe | 1.3.0 |
| Pack Type | Pack Name | Version |
|---|---|---|
| OS | ubuntu-azure | 22.04 |
| Kubernetes | kubernetes | 1.35.2 |
| Network | cni-calico-azure | 3.31.4 |
| Storage | csi-azure | 1.31.2 |
| App Services | hello-universe | 1.3.0 |
cluster_profiles.tf loads the hello-universe pack values from manifests/values-hello-universe.yaml. This file sets
replicas to {{.spectro.var.app_replicas}}, a
cluster profile variable
declared in the profile_variables block with required = true. Each cluster template that uses this profile must
supply a value for app_replicas, which is what allows development and production clusters to run different replica
counts while sharing the same profile.
Create a Maintenance Policy
maintenance_policy.tf defines a
maintenance policy that controls
when Palette schedules upgrades for clusters managed by the cluster template. For the tutorial, the policy is set to run
every Sunday at midnight UTC with a four hour upgrade window.
resource "spectrocloud_cluster_config_policy" "maintenance" {
  name    = "tf-maintenance-policy"
  context = "project"

  schedules {
    name         = "weekly-sunday"
    start_cron   = "0 0 * * SUN"
    duration_hrs = 4
  }
}
Create a Cluster Template
cluster_templates.tf defines a cluster template that links
the cluster profile and maintenance policy. context = "project" scopes the template to the current Palette project
rather than "tenant", which would make it available across all projects in the organization. kind = "maintenance"
tells Palette how to apply the attached policy. Cluster templates are designed to support multiple kinds of policies,
and kind is how Palette distinguishes between them.
resource "spectrocloud_cluster_config_template" "aws_template" {
  count = var.deploy-aws ? 1 : 0

  name       = "tf-cluster-template-aws"
  cloud_type = "aws"
  context    = "project"

  cluster_profile {
    id = spectrocloud_cluster_profile.aws_profile[0].id
  }

  policy {
    id   = spectrocloud_cluster_config_policy.maintenance.id
    kind = "maintenance"
  }
}
Deploy Clusters from the Template
Deploy a development cluster and a production cluster from tf-cluster-template-aws, using profile variables to apply
environment-specific replica counts.
Deploy a Development Cluster from the Template
clusters.tf defines a development cluster that uses the AWS cluster template. The cluster_template block links the
cluster to the template. The nested cluster_profile block is needed to override the variable value for the profile
within that template, scoped to just this cluster. app_replicas is set to "1", without changing the shared template
or profile.
resource "spectrocloud_cluster_aws" "dev_cluster" {
  count = var.deploy-aws ? 1 : 0

  name             = "tf-dev-cluster"
  cluster_timezone = "UTC"
  cloud_account_id = data.spectrocloud_cloudaccount_aws.account[0].id

  cloud_config {
    region       = var.aws-region
    ssh_key_name = var.aws-key-pair-name
  }

  cluster_template {
    id = spectrocloud_cluster_config_template.aws_template[0].id

    cluster_profile {
      id = spectrocloud_cluster_profile.aws_profile[0].id
      variables = {
        "app_replicas" = "1"
      }
    }
  }
}
Deploy a Production Cluster from the Template
clusters.tf also defines a production cluster using the same template. The only difference is app_replicas is set to
"2", giving the production environment more replicas without changing the shared template or profile.
resource "spectrocloud_cluster_aws" "prod_cluster" {
  count = var.deploy-aws ? 1 : 0

  name             = "tf-prod-cluster"
  cluster_timezone = "UTC"
  cloud_account_id = data.spectrocloud_cloudaccount_aws.account[0].id

  cloud_config {
    region       = var.aws-region
    ssh_key_name = var.aws-key-pair-name
  }

  cluster_template {
    id = spectrocloud_cluster_config_template.aws_template[0].id

    cluster_profile {
      id = spectrocloud_cluster_profile.aws_profile[0].id
      variables = {
        "app_replicas" = "2"
      }
    }
  }
}
Run terraform test to verify the full configuration. The tests use a mock provider, so no credentials are required.
terraform test
tests/aws-replace.tftest.hcl... in progress
  run "verify_aws"... pass
tests/aws-replace.tftest.hcl... tearing down
tests/aws-replace.tftest.hcl... pass
tests/aws.tftest.hcl... in progress
  run "verify_aws"... pass
  run "verify_profile_v110_planned"... pass
  run "verify_template_updated_to_v110"... pass
tests/aws.tftest.hcl... tearing down
tests/aws.tftest.hcl... pass
tests/azure-replace.tftest.hcl... in progress
  run "verify_azure"... pass
tests/azure-replace.tftest.hcl... tearing down
tests/azure-replace.tftest.hcl... pass
tests/azure.tftest.hcl... in progress
  run "verify_azure"... pass
  run "verify_profile_v110_planned"... pass
  run "verify_template_updated_to_v110"... pass
tests/azure.tftest.hcl... tearing down
tests/azure.tftest.hcl... pass

Success! 8 passed, 0 failed.
Open terraform.tfvars. Set deploy-aws to true and replace each REPLACE ME placeholder with the correct value for
your environment.
Ensure that aws-cloud-account-name matches the name of the AWS cloud account registered in Palette. The SSH key pair
specified in aws-key-pair-name must exist in the same region as aws-region.
###########################
# AWS Deployment Settings
###########################
deploy-aws = true # Set to true to deploy to AWS.

aws-cloud-account-name = "REPLACE ME"
aws-region             = "REPLACE ME"
aws-key-pair-name      = "REPLACE ME"

aws_control_plane_nodes = {
  count              = "1"
  control_plane      = true
  instance_type      = "m4.2xlarge"
  disk_size_gb       = "60"
  availability_zones = ["REPLACE ME"]
}

aws_worker_nodes = {
  count              = "1"
  control_plane      = false
  instance_type      = "m4.2xlarge"
  disk_size_gb       = "60"
  availability_zones = ["REPLACE ME"]
}
Issue the terraform plan command to preview all resources. This also confirms that Terraform can authenticate to
Palette and that your project exists.
terraform plan
data.spectrocloud_registry.community_registry: Reading...
data.spectrocloud_project.current: Reading...
data.spectrocloud_cloudaccount_aws.account[0]: Reading...
data.spectrocloud_registry.public_registry: Reading...
data.spectrocloud_cloudaccount_aws.account[0]: Read complete after 0s [id=<account-id>]
data.spectrocloud_project.current: Read complete after 0s [id=<project-id>]
...

  # spectrocloud_cluster_aws.dev_cluster[0] will be created
  + resource "spectrocloud_cluster_aws" "dev_cluster" { ... }

  # spectrocloud_cluster_aws.prod_cluster[0] will be created
  + resource "spectrocloud_cluster_aws" "prod_cluster" { ... }

  # spectrocloud_cluster_config_policy.maintenance will be created
  + resource "spectrocloud_cluster_config_policy" "maintenance" { ... }

  # spectrocloud_cluster_config_template.aws_template[0] will be created
  + resource "spectrocloud_cluster_config_template" "aws_template" { ... }

  # spectrocloud_cluster_profile.aws_profile[0] will be created
  + resource "spectrocloud_cluster_profile" "aws_profile" { ... }

Plan: 5 to add, 0 to change, 0 to destroy.
If Read complete appears in the output, Terraform successfully authenticated and found your Palette project. A plan of
5 to add confirms all resources are ready to be created.
Issue the terraform apply command to create all resources in Palette.
terraform apply -auto-approve
spectrocloud_cluster_config_policy.maintenance: Creating...
spectrocloud_cluster_profile.aws_profile[0]: Creating...
spectrocloud_cluster_config_policy.maintenance: Creation complete after 0s [id=<policy-id>]
spectrocloud_cluster_profile.aws_profile[0]: Creation complete after 2s [id=<profile-id>]
spectrocloud_cluster_config_template.aws_template[0]: Creating...
spectrocloud_cluster_config_template.aws_template[0]: Creation complete after 1s [id=<template-id>]
spectrocloud_cluster_aws.dev_cluster[0]: Creating...
spectrocloud_cluster_aws.prod_cluster[0]: Creating...
spectrocloud_cluster_aws.dev_cluster[0]: Still creating... [10s elapsed]
spectrocloud_cluster_aws.prod_cluster[0]: Still creating... [10s elapsed]
...
spectrocloud_cluster_aws.dev_cluster[0]: Creation complete after Xm Ys [id=<cluster-id>]
spectrocloud_cluster_aws.prod_cluster[0]: Creation complete after Xm Ys [id=<cluster-id>]

Apply complete! Resources: 5 added, 0 changed, 0 destroyed.
The cluster deployments may take 15 to 30 minutes each. Navigate to Palette and from
the left main menu, select Clusters to monitor progress. Once tf-dev-cluster has a Running status, select it
and go to the Profile tab. Confirm it is using tf-cluster-template-profile-aws. Select the Hello Universe
pack, then select Configure Values and confirm that app_replicas is set to 1.
Once tf-prod-cluster has a Running status, select it and go to the Profile tab. Confirm it is using
tf-cluster-template-profile-aws. Select the Hello Universe pack, then select Configure Values and confirm that
app_replicas is set to 2.
Validate the Deployments
From the left main menu, select Clusters, and then select tf-dev-cluster.
When the application is deployed and ready for network traffic, indicated in the Services field, Palette exposes the service URL. Open the URL for port :8080 to launch the Hello Universe application.
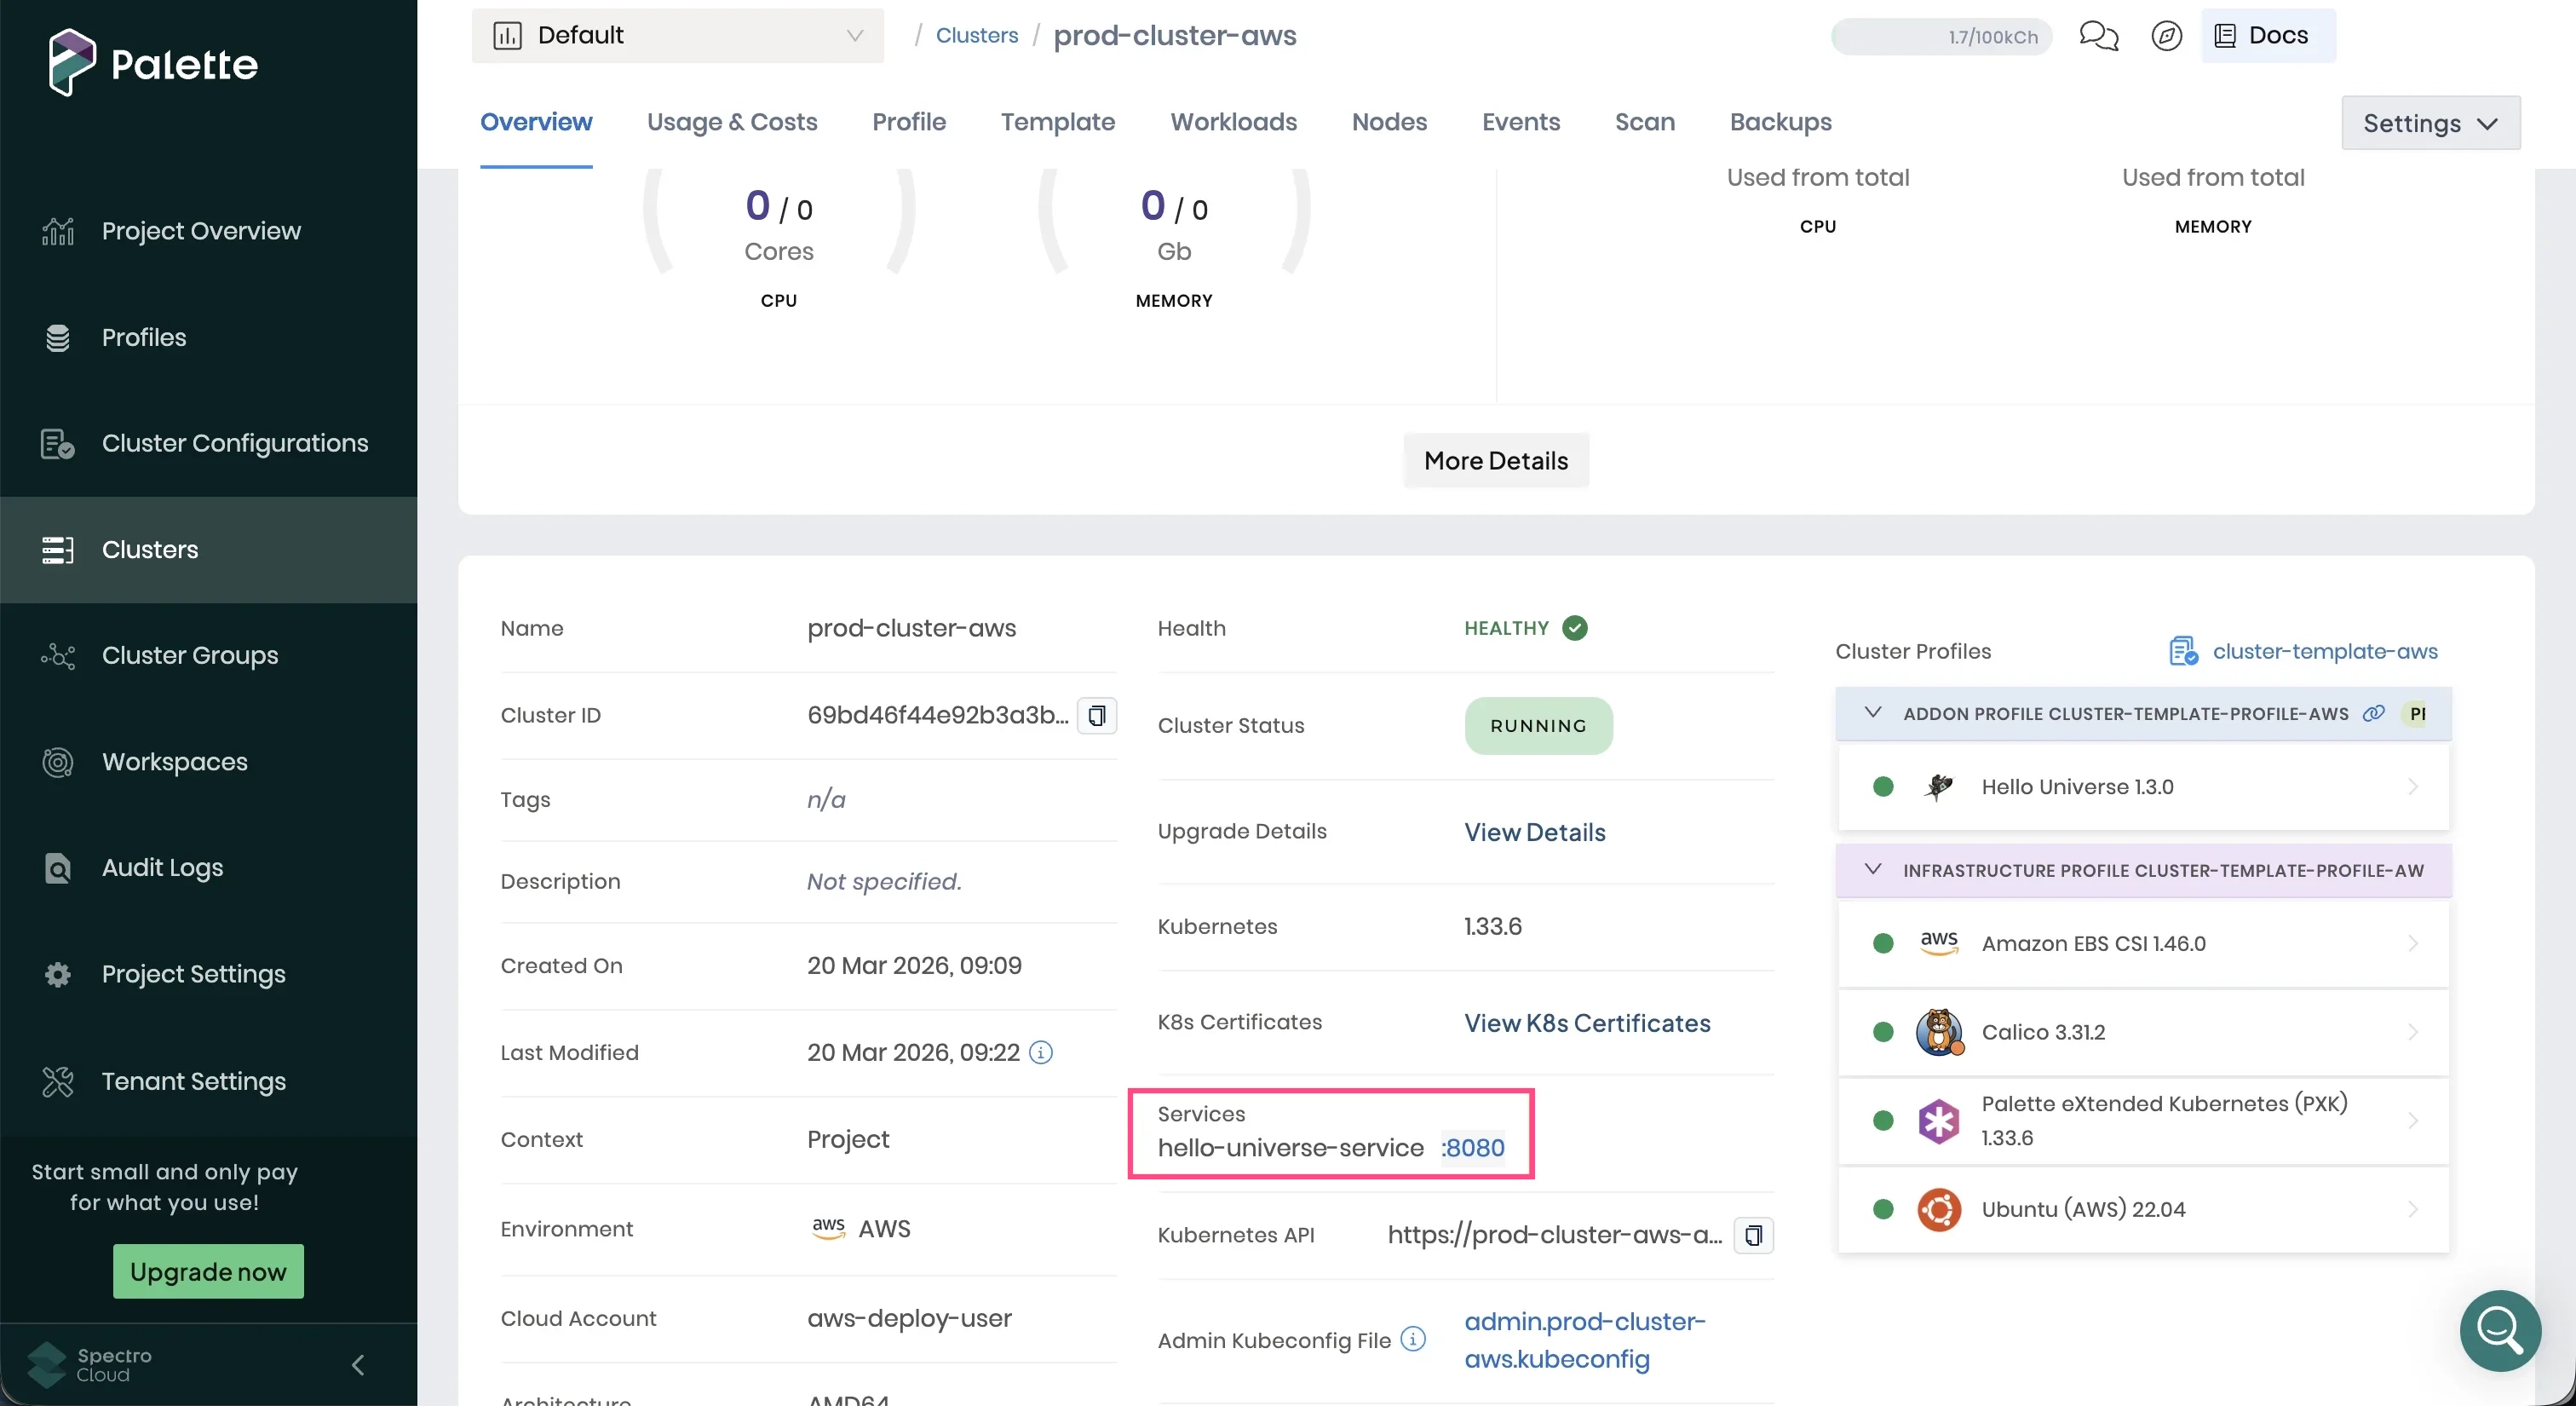
It can take up to three minutes for DNS to properly resolve the public load balancer URL. We recommend waiting a few moments before opening the service URL to prevent the browser from caching an unresolved DNS request.
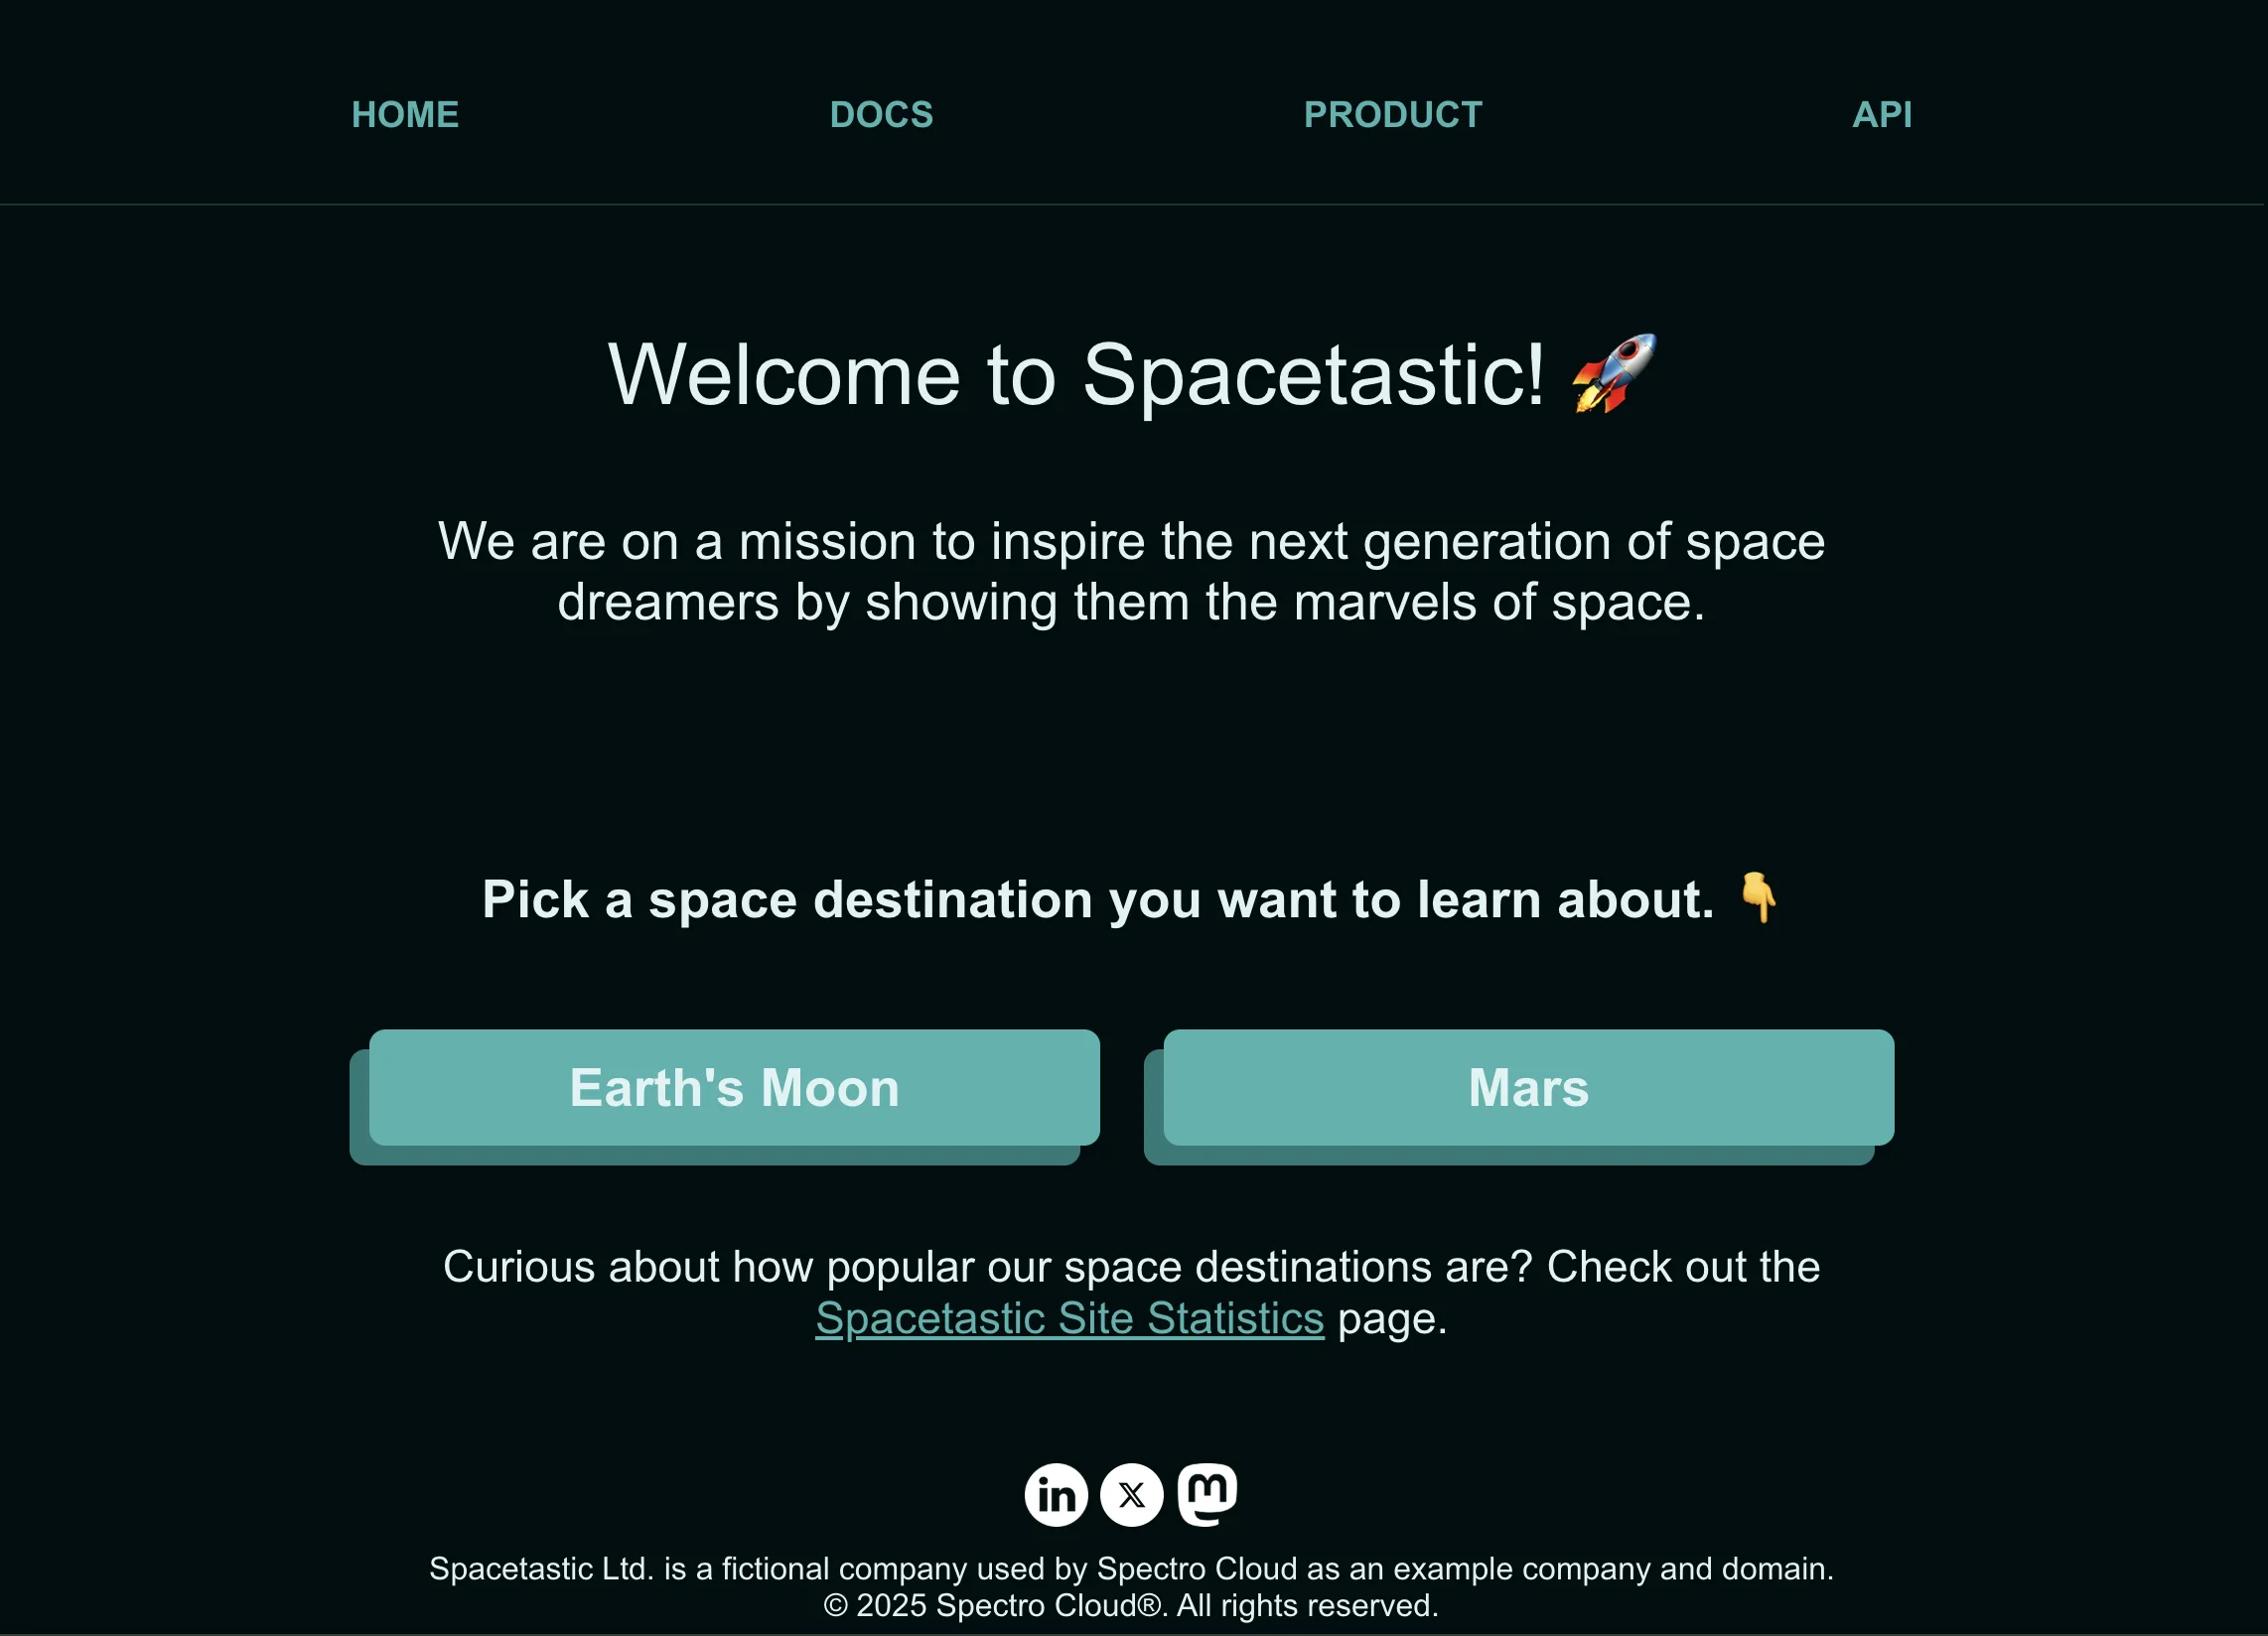
The tf-dev-cluster cluster is serving the Hello Universe application.
Repeat these steps for tf-prod-cluster to confirm you can launch its Hello Universe application.
Create a New Cluster Profile Version
In this section, you will create a new cluster profile version that adds the Kubecost pack for real-time cost
visibility. The configuration adds a new spectrocloud_cluster_profile resource with version = "1.1.0" and the same
name as the existing profile.
The Spectro Cloud Terraform provider models each spectrocloud_cluster_profile resource as one profile version.
Creating a new resource with the same name but a different version registers it as a new version of the same profile
in Palette.
tf-dev-cluster and tf-prod-cluster remain on 1.0.0 until you explicitly upgrade them.
Set create_new_profile_version to true in terraform.tfvars after the initial clusters are deployed.
##############################
# Hello Universe Configuration
##############################
app_port = 8080 # The cluster port number on which the service will listen for incoming traffic.

create_new_profile_version = true # Set to true to create cluster profile version 1.1.0 with Kubecost.
Review the New Profile Version Code
data.tf includes a new data source for the Kubecost pack (cost-analyzer) that Terraform fetches only when
create_new_profile_version is true.
data "spectrocloud_pack" "kubecost" {
  count        = var.create_new_profile_version ? 1 : 0
  name         = "cost-analyzer"
  version      = "1.103.3"
  registry_uid = data.spectrocloud_registry.community_registry.id
}
The cluster_profiles.tf file includes a new v1.1.0 profile resource that is only created when both deploy-aws and
create_new_profile_version are true. Version 1.1.0 includes the same five packs as v1.0.0 and adds Kubecost as a
sixth.
- AWS
- Azure
resource "spectrocloud_cluster_profile" "aws_profile_v110" {
  count = (var.deploy-aws && var.create_new_profile_version) ? 1 : 0

  name        = "tf-cluster-template-profile-aws"
  description = "Cluster profile for the cluster templates tutorial"
  cloud       = "aws"
  type        = "cluster"
  version     = "1.1.0"

  pack {
    name   = data.spectrocloud_pack.aws_ubuntu.name
    tag    = data.spectrocloud_pack.aws_ubuntu.version
    uid    = data.spectrocloud_pack.aws_ubuntu.id
    values = data.spectrocloud_pack.aws_ubuntu.values
    type   = "spectro"
  }

  pack {
    name   = data.spectrocloud_pack.aws_k8s.name
    tag    = data.spectrocloud_pack.aws_k8s.version
    uid    = data.spectrocloud_pack.aws_k8s.id
    values = data.spectrocloud_pack.aws_k8s.values
    type   = "spectro"
  }

  pack {
    name   = data.spectrocloud_pack.aws_cni.name
    tag    = data.spectrocloud_pack.aws_cni.version
    uid    = data.spectrocloud_pack.aws_cni.id
    values = data.spectrocloud_pack.aws_cni.values
    type   = "spectro"
  }

  pack {
    name   = data.spectrocloud_pack.aws_csi.name
    tag    = data.spectrocloud_pack.aws_csi.version
    uid    = data.spectrocloud_pack.aws_csi.id
    values = data.spectrocloud_pack.aws_csi.values
    type   = "spectro"
  }

  pack {
    name   = data.spectrocloud_pack.hellouniverse.name
    tag    = data.spectrocloud_pack.hellouniverse.version
    uid    = data.spectrocloud_pack.hellouniverse.id
    values = templatefile("manifests/values-hello-universe.yaml", {
      port = var.app_port
    })
    type   = "oci"
  }

  pack {
    name = data.spectrocloud_pack.kubecost[0].name
    tag  = data.spectrocloud_pack.kubecost[0].version
    uid  = data.spectrocloud_pack.kubecost[0].id
    type = "oci"
  }

  profile_variables {
    variable {
      name          = "app_replicas"
      display_name  = "Hello Universe Replicas"
      format        = "number"
      description   = "Number of replicas for the hello-universe workload"
      default_value = "1"
      required      = true
    }
  }
}
resource "spectrocloud_cluster_profile" "azure_profile_v110" {
  count = (var.deploy-azure && var.create_new_profile_version) ? 1 : 0

  name        = "tf-cluster-template-profile-azure"
  description = "Cluster profile for the cluster templates tutorial"
  cloud       = "azure"
  type        = "cluster"
  version     = "1.1.0"

  pack {
    name   = data.spectrocloud_pack.azure_ubuntu.name
    tag    = data.spectrocloud_pack.azure_ubuntu.version
    uid    = data.spectrocloud_pack.azure_ubuntu.id
    values = data.spectrocloud_pack.azure_ubuntu.values
    type   = "spectro"
  }

  pack {
    name   = data.spectrocloud_pack.azure_k8s.name
    tag    = data.spectrocloud_pack.azure_k8s.version
    uid    = data.spectrocloud_pack.azure_k8s.id
    values = data.spectrocloud_pack.azure_k8s.values
    type   = "spectro"
  }

  pack {
    name   = data.spectrocloud_pack.azure_cni.name
    tag    = data.spectrocloud_pack.azure_cni.version
    uid    = data.spectrocloud_pack.azure_cni.id
    values = data.spectrocloud_pack.azure_cni.values
    type   = "spectro"
  }

  pack {
    name   = data.spectrocloud_pack.azure_csi.name
    tag    = data.spectrocloud_pack.azure_csi.version
    uid    = data.spectrocloud_pack.azure_csi.id
    values = data.spectrocloud_pack.azure_csi.values
    type   = "spectro"
  }

  pack {
    name   = data.spectrocloud_pack.hellouniverse.name
    tag    = data.spectrocloud_pack.hellouniverse.version
    uid    = data.spectrocloud_pack.hellouniverse.id
    values = templatefile("manifests/values-hello-universe.yaml", {
      port = var.app_port
    })
    type   = "oci"
  }

  pack {
    name = data.spectrocloud_pack.kubecost[0].name
    tag  = data.spectrocloud_pack.kubecost[0].version
    uid  = data.spectrocloud_pack.kubecost[0].id
    type = "oci"
  }

  profile_variables {
    variable {
      name          = "app_replicas"
      display_name  = "Hello Universe Replicas"
      format        = "number"
      description   = "Number of replicas for the hello-universe workload"
      default_value = "1"
      required      = true
    }
  }
}
Issue the terraform plan command to preview the changes. Terraform reports one new resource to add.
terraform plan
Plan: 1 to add, 0 to change, 0 to destroy.
Apply the changes to create the new profile version in Palette.
terraform apply -auto-approve
spectrocloud_cluster_profile.aws_profile_v110[0]: Creating...
spectrocloud_cluster_profile.aws_profile_v110[0]: Creation complete after 2s [id=<profile-id>]

Apply complete! Resources: 1 added, 0 changed, 0 destroyed.
Validate the New Profile Version
In Palette, navigate to the left main menu and select Profiles. Select tf-cluster-template-profile-aws from the
profile list. Select the version drop-down beside the profile name and confirm that version 1.1.0 now appears
alongside 1.0.0.
Select 1.1.0 and confirm the Kubecost (cost-analyzer) pack appears in the pack list.
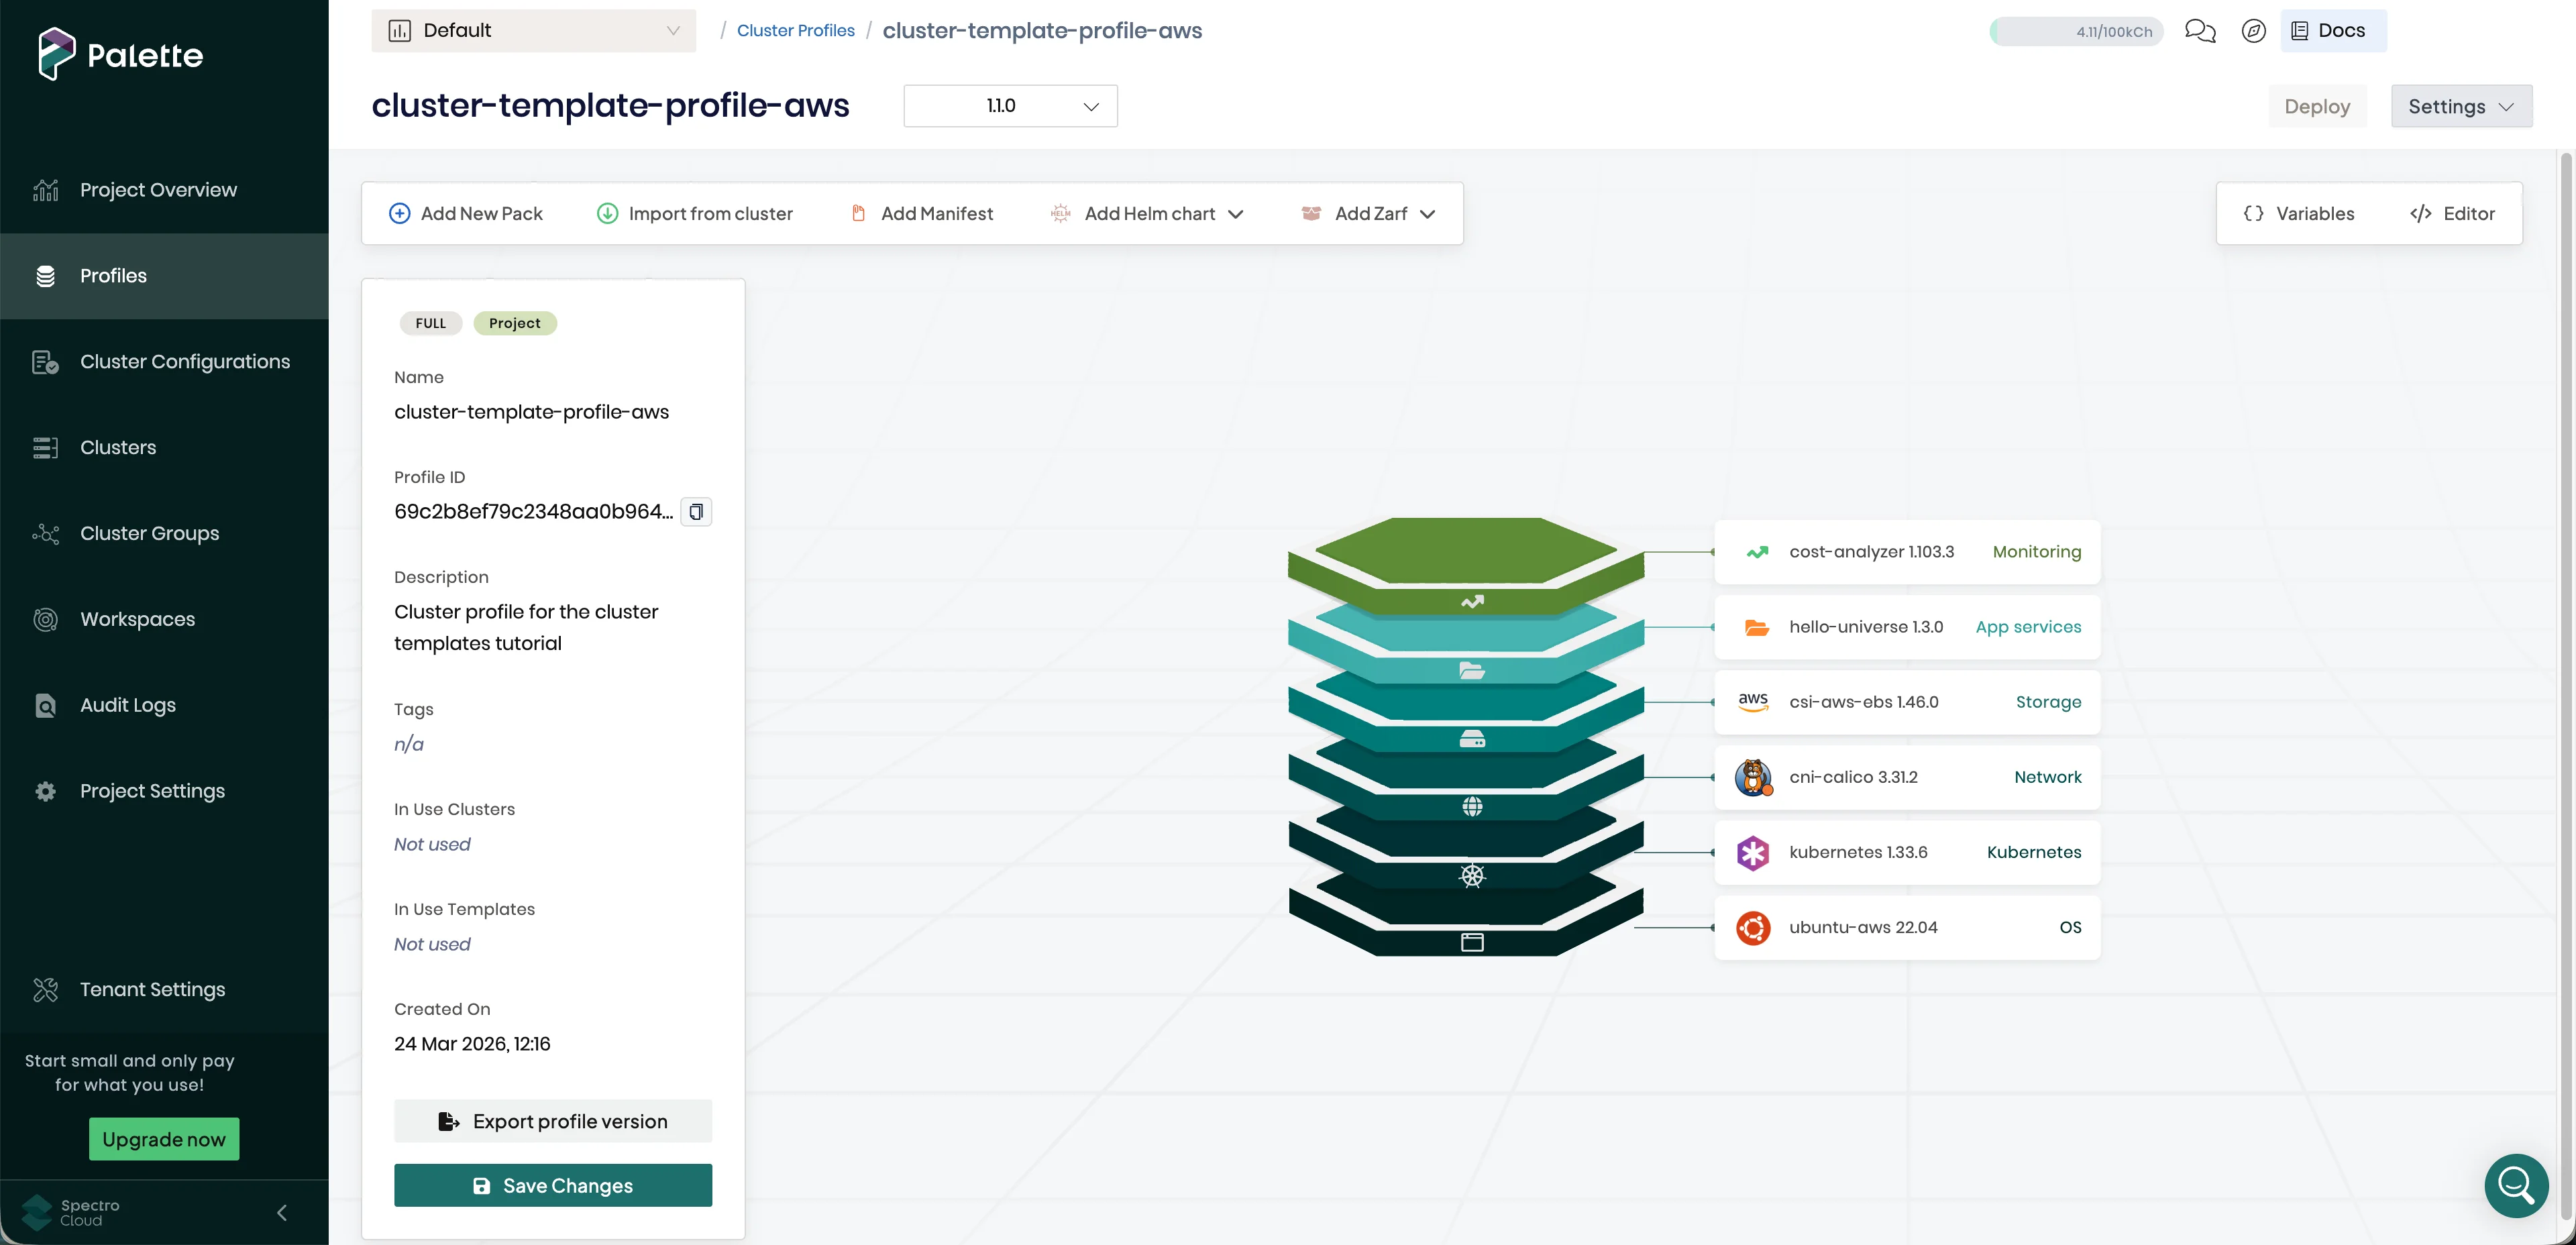
The tf-dev-cluster and tf-prod-cluster clusters are still referencing profile version 1.0.0 and are unaffected by
this change.
Update the Cluster Template to the New Profile Version
In this section, you will update the cluster template to reference profile version 1.1.0. This tells Palette which
profile version to use for the next upgrade cycle. Updating the template does not trigger an upgrade. tf-dev-cluster
and tf-prod-cluster remain on 1.0.0 until the maintenance policy initiates an upgrade.
In cluster_templates.tf, the cluster_profile block assigns a different profile ID depending on the values of
create_new_profile_version and update_template_profile_version. When both are true, the template references
v1.1.0. Otherwise, it references v1.0.0.
- AWS
- Azure
resource "spectrocloud_cluster_config_template" "aws_template" {
  count = var.deploy-aws ? 1 : 0

  name       = "tf-cluster-template-aws"
  cloud_type = "aws"
  context    = "project"

  cluster_profile {
    id = (var.create_new_profile_version && var.update_template_profile_version) ? spectrocloud_cluster_profile.aws_profile_v110[0].id : spectrocloud_cluster_profile.aws_profile[0].id
  }

  policy {
    id   = spectrocloud_cluster_config_policy.maintenance.id
    kind = "maintenance"
  }
}
resource "spectrocloud_cluster_config_template" "azure_template" {
  count = var.deploy-azure ? 1 : 0

  name       = "tf-cluster-template-azure"
  cloud_type = "azure"
  context    = "project"

  cluster_profile {
    id = (var.create_new_profile_version && var.update_template_profile_version) ? spectrocloud_cluster_profile.azure_profile_v110[0].id : spectrocloud_cluster_profile.azure_profile[0].id
  }

  policy {
    id   = spectrocloud_cluster_config_policy.maintenance.id
    kind = "maintenance"
  }
}
In terraform.tfvars, set update_template_profile_version to true.
update_template_profile_version = true
Issue the terraform plan command to preview the changes.
terraform plan
Terraform reports one in-place update to the cluster template resource.
# spectrocloud_cluster_config_template.aws_template[0] will be updated in-place
  ~ resource "spectrocloud_cluster_config_template" "aws_template" {
      ...
    }

Plan: 0 to add, 1 to change, 0 to destroy.
Apply the changes to update the cluster template in Palette.
terraform apply -auto-approve
spectrocloud_cluster_config_template.aws_template[0]: Modifying...
spectrocloud_cluster_config_template.aws_template[0]: Modifications complete after 2s

Apply complete! Resources: 0 added, 1 changed, 0 destroyed.
Upgrade Clusters from the Template
In this section, trigger an immediate upgrade of both clusters attached to tf-cluster-template-aws. tf-dev-cluster
and tf-prod-cluster move from profile version 1.0.0 to 1.1.0.
In cluster_templates.tf, the upgrade_now argument is set to the value of upgrade_now_timestamp. When this value
changes, Palette immediately upgrades all clusters attached to the template.
- AWS
- Azure
resource "spectrocloud_cluster_config_template" "aws_template" {
  count = var.deploy-aws ? 1 : 0

  name       = "tf-cluster-template-aws"
  cloud_type = "aws"
  context    = "project"

  cluster_profile {
    id = (var.create_new_profile_version && var.update_template_profile_version) ? spectrocloud_cluster_profile.aws_profile_v110[0].id : spectrocloud_cluster_profile.aws_profile[0].id
  }

  policy {
    id   = spectrocloud_cluster_config_policy.maintenance.id
    kind = "maintenance"
  }

  upgrade_now = var.upgrade_now_timestamp != "" ? var.upgrade_now_timestamp : null
}
resource "spectrocloud_cluster_config_template" "azure_template" {
  count = var.deploy-azure ? 1 : 0

  name       = "tf-cluster-template-azure"
  cloud_type = "azure"
  context    = "project"

  cluster_profile {
    id = (var.create_new_profile_version && var.update_template_profile_version) ? spectrocloud_cluster_profile.azure_profile_v110[0].id : spectrocloud_cluster_profile.azure_profile[0].id
  }

  policy {
    id   = spectrocloud_cluster_config_policy.maintenance.id
    kind = "maintenance"
  }

  upgrade_now = var.upgrade_now_timestamp != "" ? var.upgrade_now_timestamp : null
}
In terraform.tfvars, set upgrade_now_timestamp to the current time in RFC3339 format.
upgrade_now_timestamp = "2026-05-12T14:30:00Z"
Issue the terraform plan command to preview the changes.
terraform plan
Terraform reports one update to the cluster template resource.
# spectrocloud_cluster_config_template.aws_template[0] will be updated in-place
  ~ resource "spectrocloud_cluster_config_template" "aws_template" {
      + upgrade_now = "2026-05-12T14:30:00Z"
        ...
    }

Plan: 0 to add, 1 to change, 0 to destroy.
Apply the changes to trigger the upgrade.
terraform apply -auto-approve
spectrocloud_cluster_config_template.aws_template[0]: Modifying...
spectrocloud_cluster_config_template.aws_template[0]: Modifications complete after 3s

Apply complete! Resources: 0 added, 1 changed, 0 destroyed.
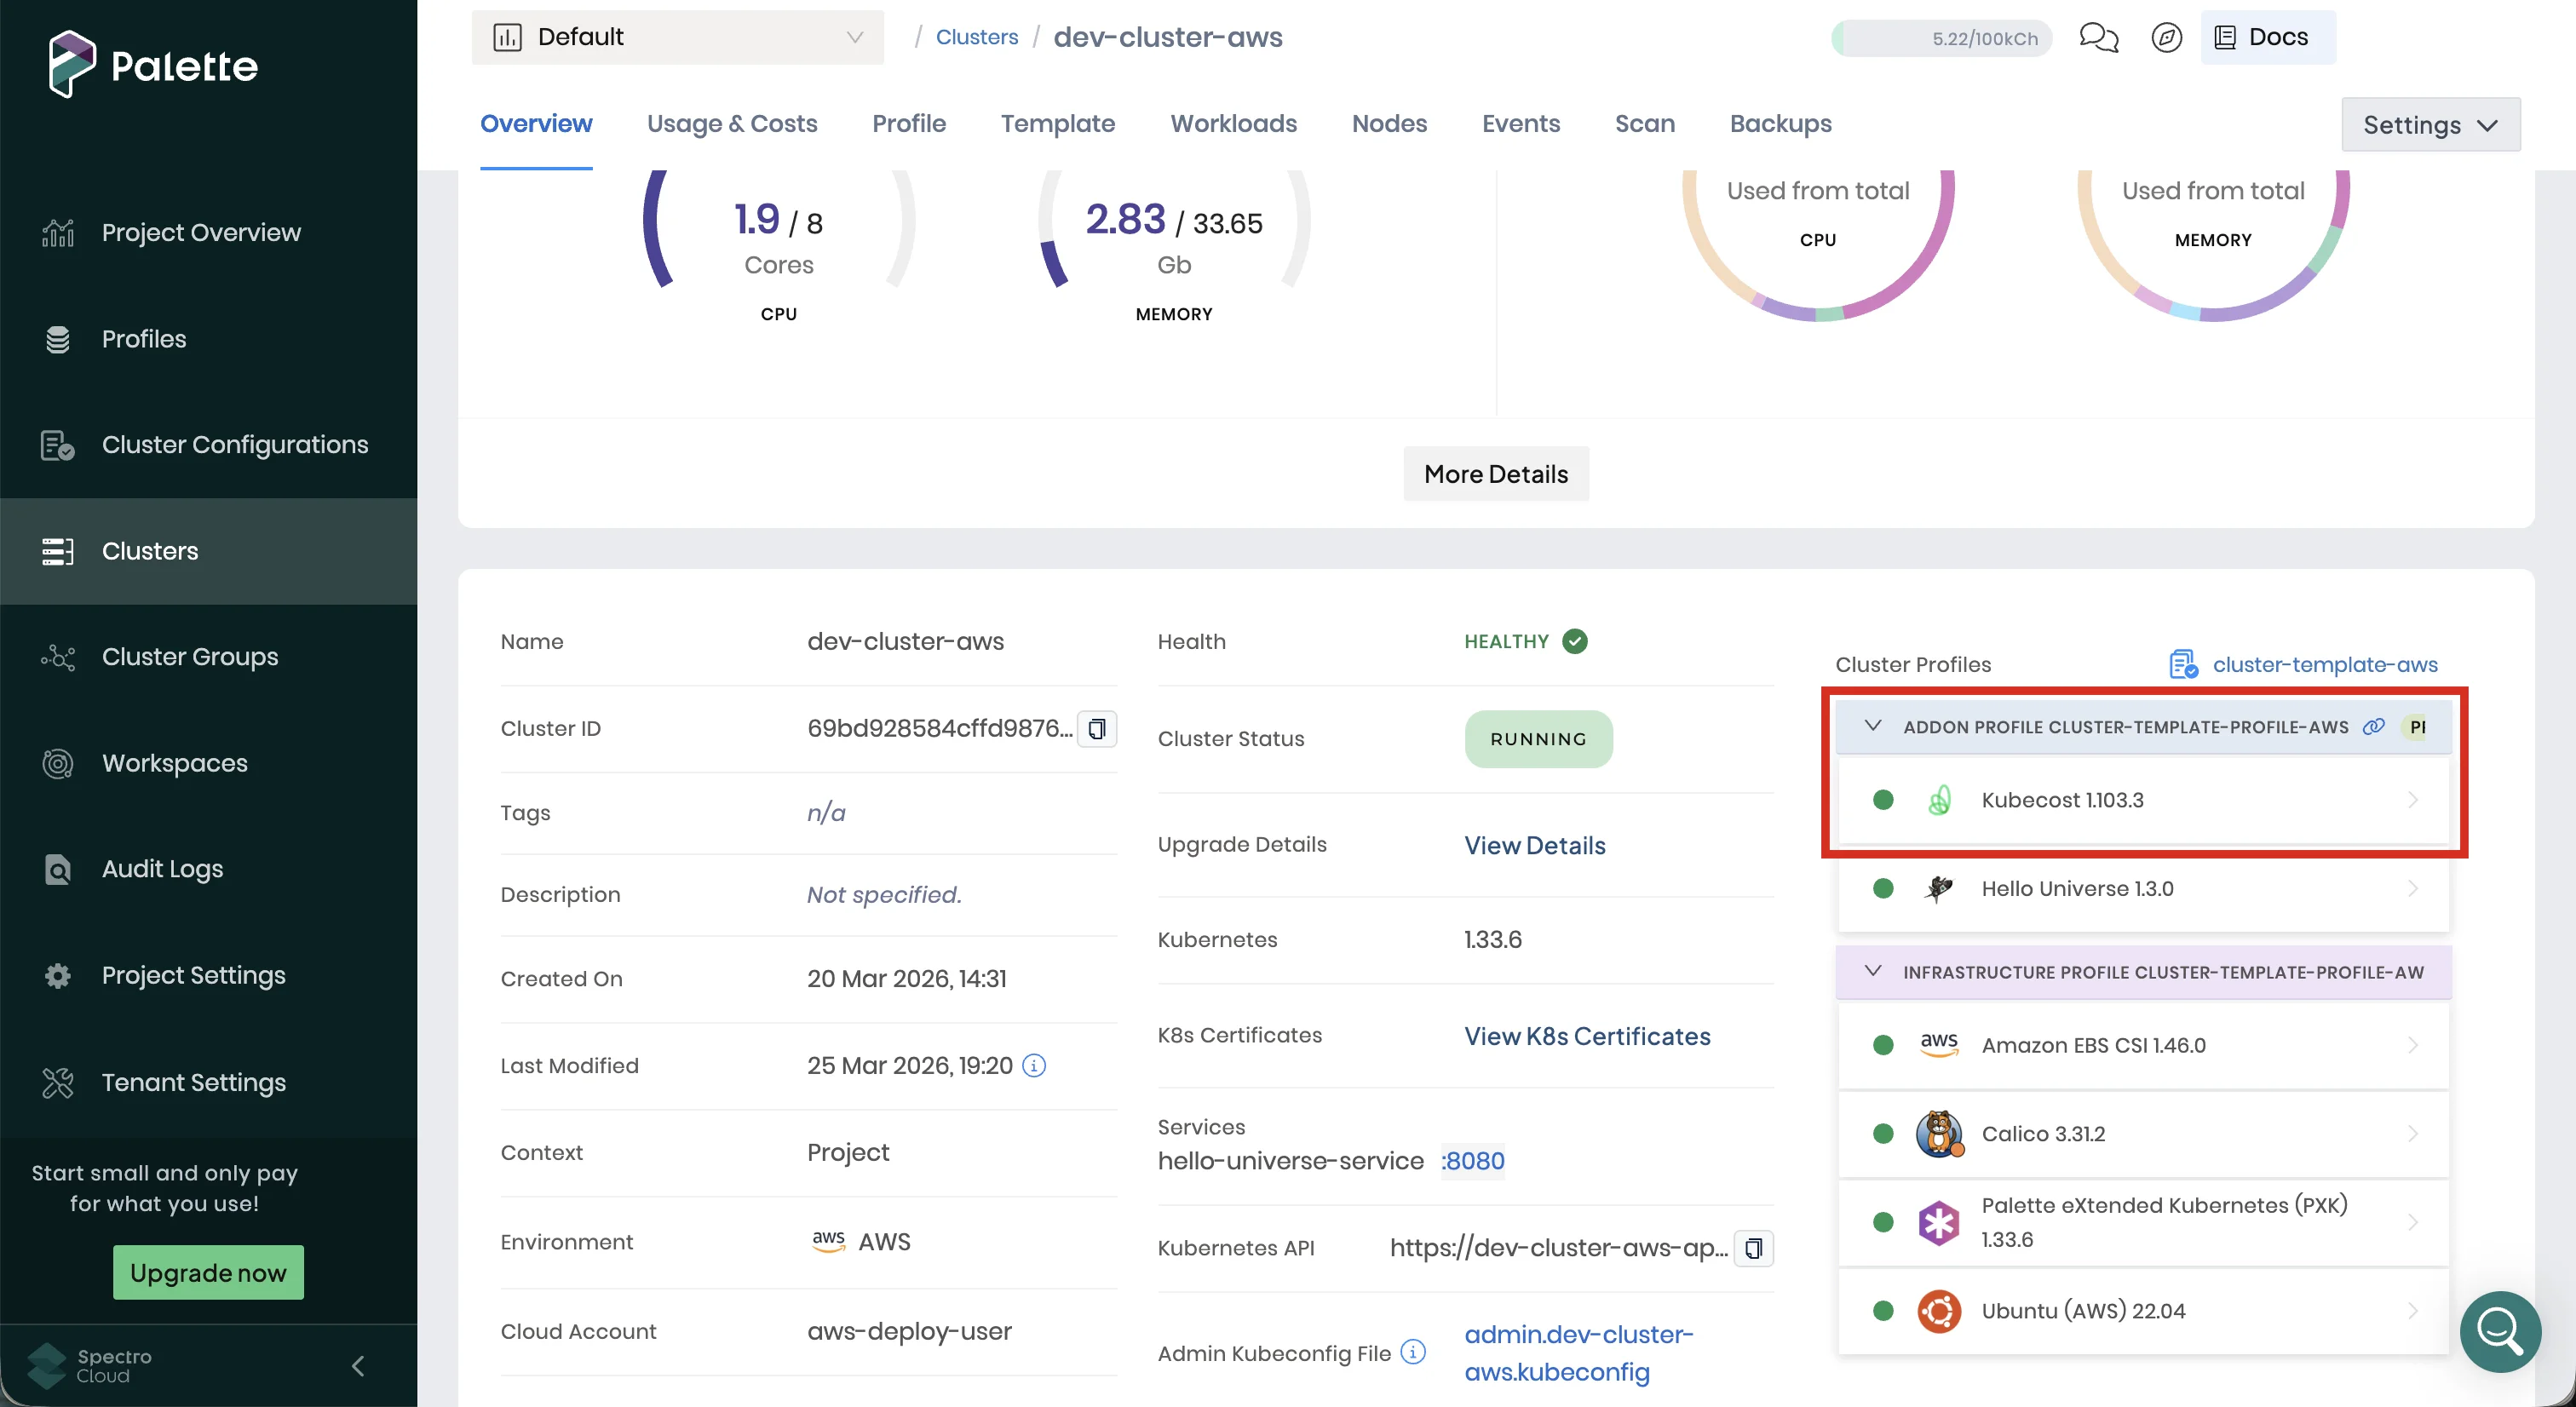
The template update triggers an upgrade on both clusters attached to the template. tf-dev-cluster and
tf-prod-cluster both move from profile version 1.0.0 to 1.1.0. The upgrade may take several minutes. In Palette,
navigate to the left main menu and select Clusters, then select either cluster to track the upgrade progress. Once
complete, Palette marks the Kubecost layer with a green status indicator.
Validate the Upgrades
From the left main menu, select Clusters, then select tf-dev-cluster. Verify that the cluster status is
Running. Select the Profile tab and confirm the version drop-downs display 1.1.0.
Select the Overview tab and download the kubeconfig file for tf-dev-cluster. This file enables you and other users
to issue kubectl commands against the host cluster.
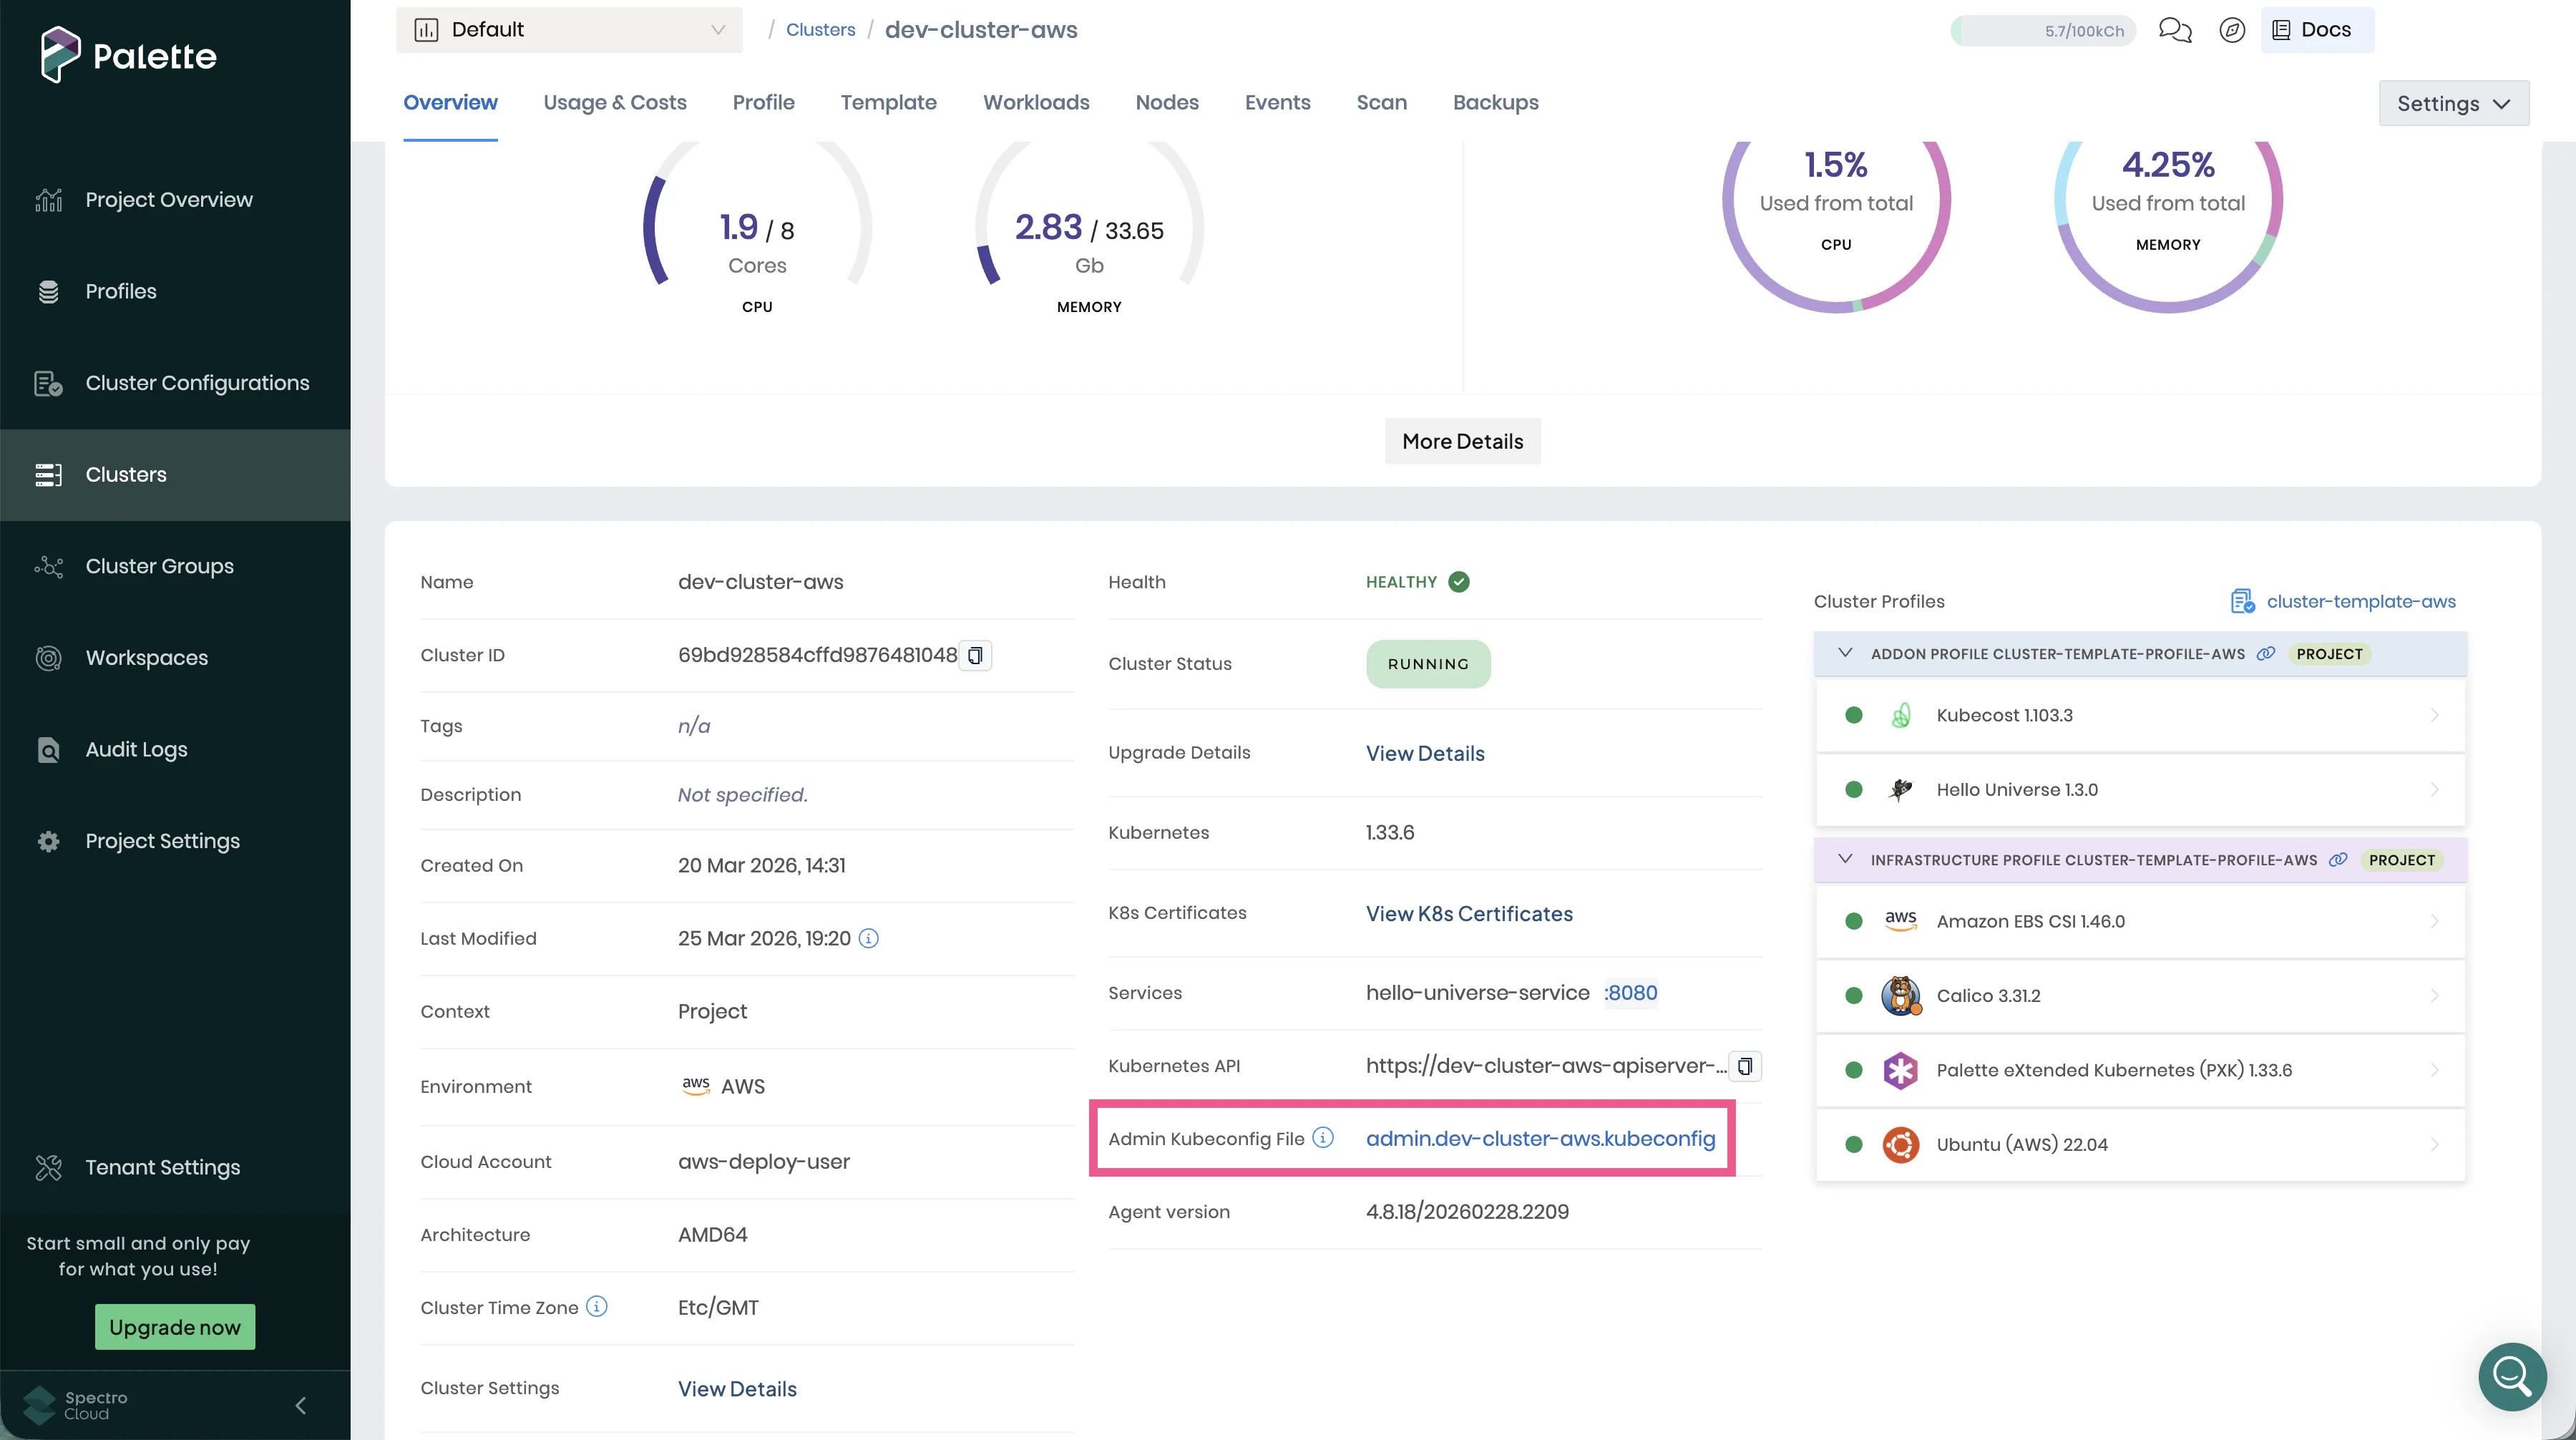
Open a terminal window and set the KUBECONFIG environment variable to point to the file you downloaded.
export KUBECONFIG=<path-to-kubeconfig>
Forward the Kubecost UI to your local machine. The Kubecost dashboard is not exposed externally by default. The
following command makes it available locally on port 9090.
kubectl port-forward --namespace kubecost deployment/cost-analyzer-cost-analyzer 9090
Open a browser window and navigate to http://localhost:9090. The Kubecost dashboard displays cost and resource data
for your cluster. Read more about
navigating the Kubecost UI to make
the most of the cost analyzer.

Once you are done, stop the kubectl port-forward command by closing the terminal window it is executing from.
Repeat the same Kubecost and cluster profile version checks for tf-prod-cluster.
Cleanup
Run terraform destroy to remove all resources created during this tutorial. Terraform deletes resources in dependency
order: clusters first, followed by the cluster template, profiles, and finally the maintenance policy.
Issue terraform plan -destroy to preview the resources that Terraform removes.
terraform plan -destroy
Plan: 0 to add, 0 to change, 6 to destroy.
Apply the destroy to remove all resources.
terraform destroy -auto-approve
spectrocloud_cluster_aws.dev_cluster[0]: Destroying...
spectrocloud_cluster_aws.prod_cluster[0]: Destroying...
spectrocloud_cluster_aws.dev_cluster[0]: Destruction complete after 20m0s
spectrocloud_cluster_aws.prod_cluster[0]: Destruction complete after 22m0s
spectrocloud_cluster_config_template.aws_template[0]: Destroying...
spectrocloud_cluster_config_template.aws_template[0]: Destruction complete after 1s
spectrocloud_cluster_profile.aws_profile_v110[0]: Destroying...
spectrocloud_cluster_profile.aws_profile[0]: Destroying...
spectrocloud_cluster_profile.aws_profile_v110[0]: Destruction complete after 1s
spectrocloud_cluster_profile.aws_profile[0]: Destruction complete after 1s
spectrocloud_cluster_config_policy.maintenance: Destroying...
spectrocloud_cluster_config_policy.maintenance: Destruction complete after 1s

Destroy complete! Resources: 6 destroyed.
Cluster deletion may take 15 to 30 minutes.
If a cluster is still deleting after 30 minutes, set force_delete = true on the affected cluster resource in
clusters.tf and run terraform apply -auto-approve.
Terraform waits 20 minutes for the cluster to delete naturally. If the deletion does not complete within that time, Terraform force-deletes the cluster from Palette.
When a cluster is force-deleted, Palette does not clean up the underlying cloud resources. You must manually remove any remaining infrastructure.
resource "spectrocloud_cluster_aws" "dev_cluster" {
  count = var.deploy-aws ? 1 : 0
  ...
  force_delete = true
}
Once terraform destroy completes, confirm in Palette that all resources are removed.
From the left main menu, select Clusters and confirm that tf-dev-cluster and tf-prod-cluster no longer appear.
From the left main menu, select Cluster Configurations. Select the Templates tab and confirm
tf-cluster-template-aws no longer appears. Select the Policies tab and confirm tf-maintenance-policy no longer
appears.
From the left main menu, select Profiles and confirm tf-cluster-template-profile-aws no longer appears.
Wrap-Up
In this tutorial, you learned how to enforce consistent configuration and manage upgrades across multiple clusters using Terraform. You defined a cluster profile with a profile variable and a maintenance policy, then combined them into a cluster template to deploy development and production clusters with environment-specific replica counts. You then added Kubecost by creating a new profile version, updating the cluster template to reference it, and triggering an immediate upgrade across both clusters with a single Terraform change.
We encourage you to check out the Cluster Templates documentation to discover how other cluster governance and lifecycle capabilities can help you manage your cluster fleet at scale. You can also explore the Spectro Cloud Terraform Provider documentation to view all available resources and data sources for managing Palette infrastructure as code.