Add an External Identity Provider
This guide explains how to let people sign in to a PaletteAI Inference Launchpad appliance through your identity provider, such as Okta or Auth0. You add the provider in Keycloak, the open source sign-in service that ships with the appliance. Then you give the provider's groups access to a workspace. For the console labels and rules, refer to Identity Providers.
Prerequisites
-
A running PaletteAI Inference Launchpad appliance, with the console reachable.
-
Console access as a person who holds the Platform administrator role.
-
The Local Admin Username and Local Admin Password that were set when the appliance was installed. For details, refer to Local admin.
-
An application for the appliance at the external identity provider. For an OpenID Connect provider, the application's client ID and client secret. For the steps, refer to your provider's documentation.
-
For Okta with OpenID Connect, a Web Application. Refer to Create OpenID Connect app integrations.
-
For Auth0, a Regular Web Application. Refer to Register Regular Web Applications.
-
-
The provider's discovery endpoint, or its authorization, token, user info, and JSON Web Key Set (JWKS) URLs. For a Security Assertion Markup Language (SAML) 2.0 provider, the provider's single sign-on service URL instead.
-
A groups claim at the provider that carries each person's groups, such as
groups. For a SAML 2.0 provider, a group attribute statement namedgroupsinstead.-
For Okta with OpenID Connect, a groups claim named
groups, with the filter Matches regex and the value.*. Refer to Customize tokens returned from Okta with a groups claim. -
For Okta with SAML 2.0, a group attribute statement named
groups, with a regular expression filter. Refer to Define group attribute statements. -
For Auth0, a post-login Action that puts the person's roles in a namespaced claim, such as
https://inference-launchpad/groups. Refer to Add user roles to tokens.
-
Add the Provider in Keycloak
-
From the left main menu, select Settings.
-
On the Settings menu, under External access, select Identity Providers.
-
Select Open Keycloak. The Keycloak sign-in page opens.
-
Sign in with the Local Admin Username and Local Admin Password. Keycloak opens Identity providers in the
airealm. -
Select the provider type. If the page already lists providers, select the type from the Add provider drop-down menu.
-
To add an OpenID Connect provider, select OpenID Connect v1.0.
-
To add a SAML 2.0 provider, select SAML v2.0.
-
-
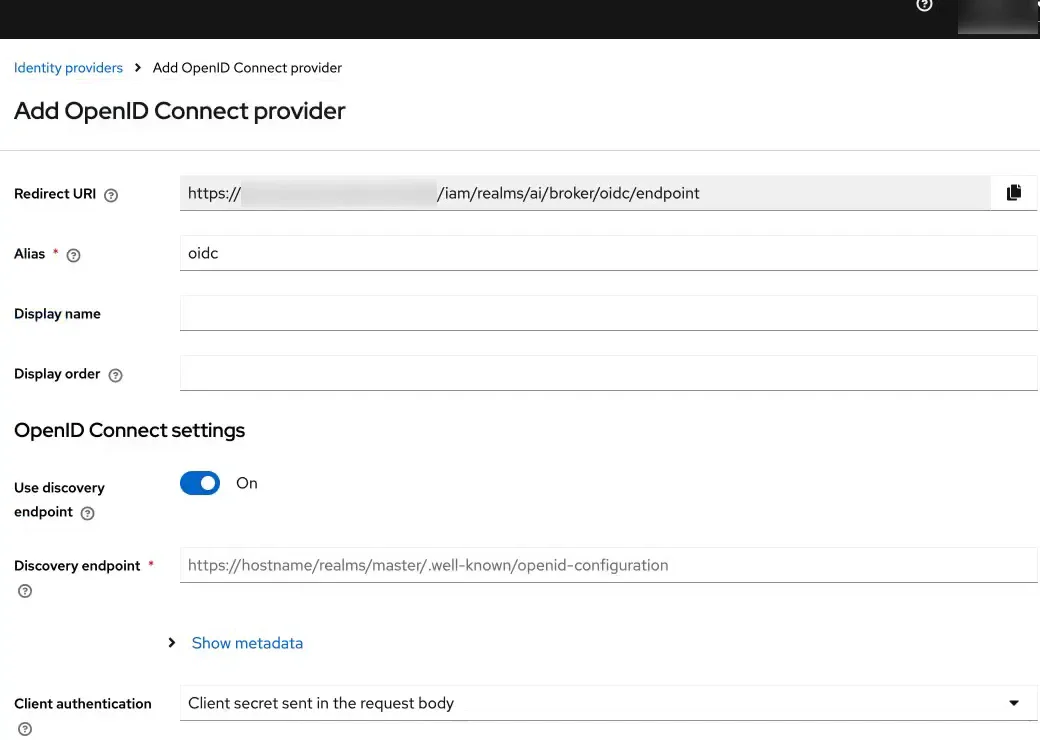
Enter an Alias, such as
okta, and a Display name for the sign-in button, such asOkta. -
Enter the provider's connection details.
-
For an OpenID Connect provider, enter the provider's discovery endpoint. If the provider has none, turn off Use discovery endpoint. Enter its authorization, token, user info, and JWKS URLs instead. Then enter the Client ID and the Client Secret from the provider's application. For the field definitions, refer to OpenID Connect v1.0 identity providers.
-
For a SAML 2.0 provider, set the Service provider entity ID to
https://<appliance-address>/iam/realms/ai. Replace<appliance-address>with the address of your appliance. Turn off Use entity descriptor. Then enter the provider's single sign-on service URL. For the field definitions, refer to SAML v2.0 Identity Providers.
-
-
Copy the Redirect URI that Keycloak shows. At the provider, register it as the application's callback address.
-
Select Add. The provider's settings page opens.
-
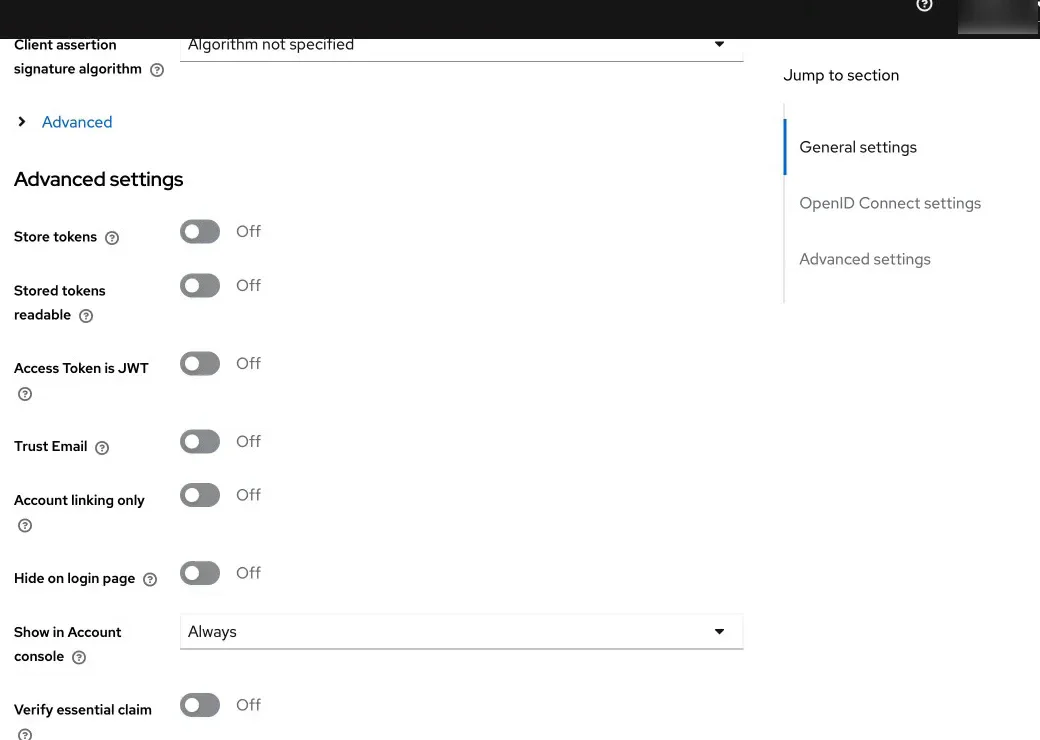
In Advanced settings, turn on Trust Email. Leave Sync mode set to Import.
-
(OpenID Connect providers only) Open Advanced, and set Scopes to
openid email profile. For Okta, set Scopes toopenid email profile groups.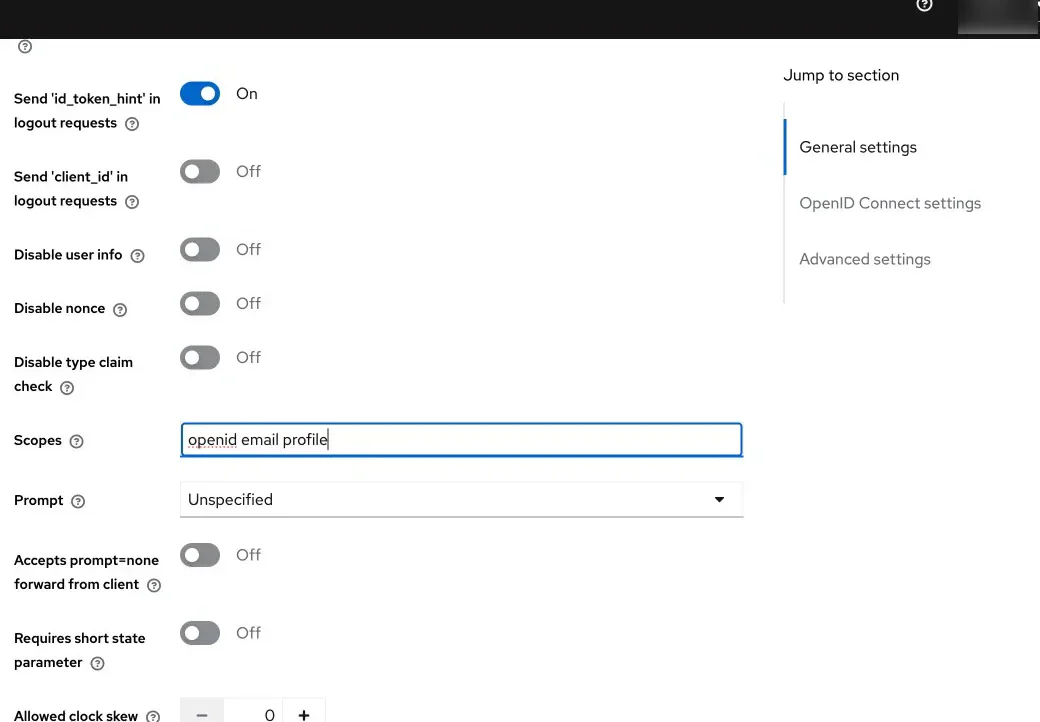
-
Select Save.
Map the Provider's Groups
-
On the provider's page in Keycloak, select Mappers > Add mapper.
-
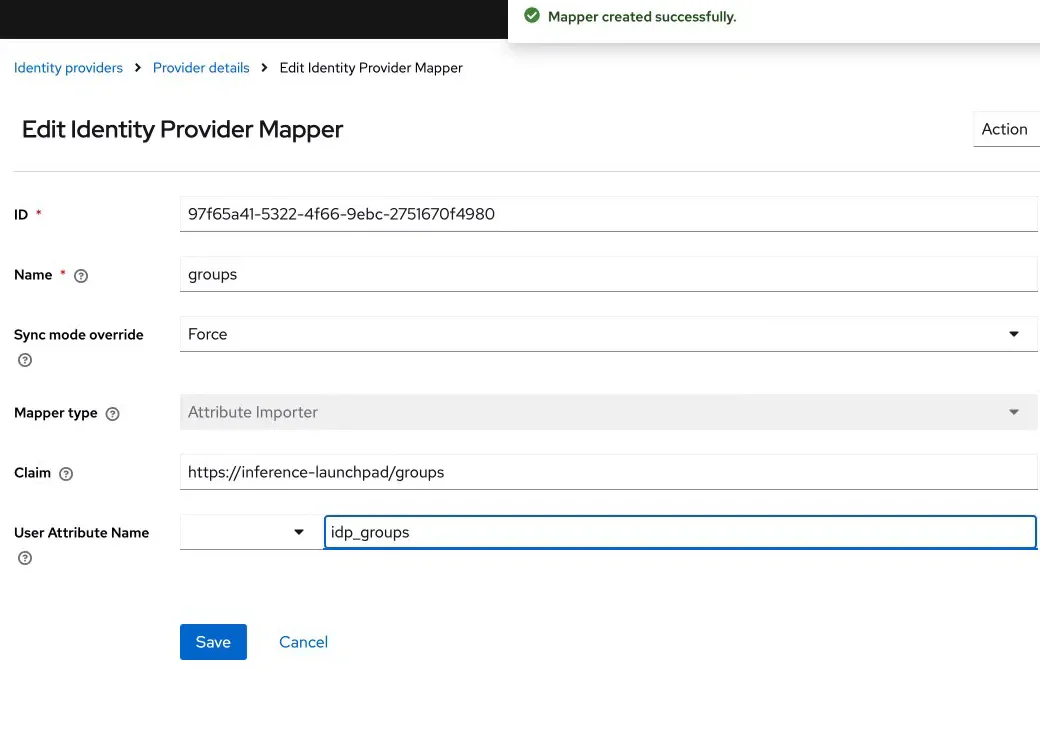
Enter a Name, such as
groups, and set Mapper type to Attribute Importer. -
Enter the name of the field that holds the groups.
-
For an OpenID Connect provider, set Claim to the provider's groups claim, such as
groups. For Auth0, set Claim to the namespaced claim from the post-login Action. -
For a SAML 2.0 provider, set Attribute Name to
groups.
-
-
Set User Attribute Name to
idp_groups, and Sync mode override to Force. -
Select Save. Keycloak confirms that the mapper was created.
Give the Provider's Groups Access
-
In the console, add a group with the exact name that the provider sends, such as
platform-team. For Auth0, use the role name. For the steps, refer to Add a Group. -
Add the group as a member of each workspace that its people need, and give it a role. For the steps, refer to Manage Workspace Members.
Validate
-
From the left main menu, select Settings.
-
On the Settings menu, under External access, select Identity Providers.
-
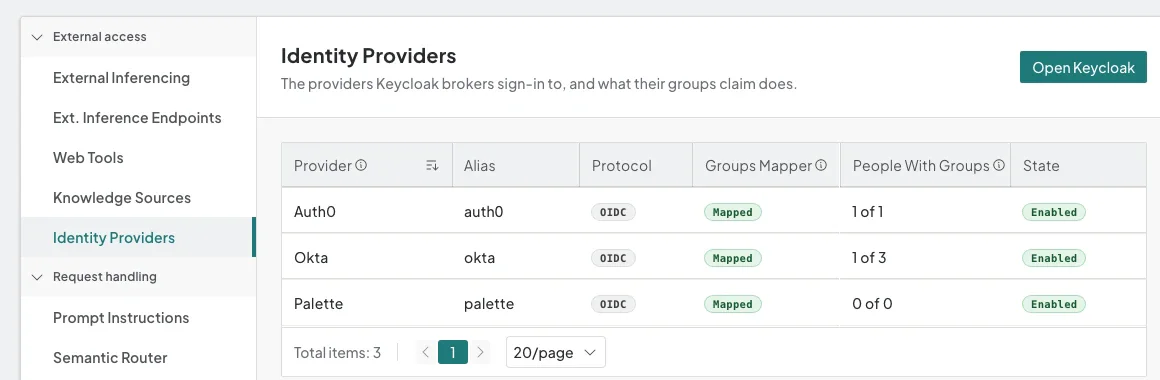
Confirm that the provider is in the list, that Groups Mapper is Mapped, and that State is Enabled.
-
Sign out of the console.
-
On the sign-in page, under Or sign in with, select the provider's button. Sign in with a provider account that is in the group, such as
platform-team. -
Confirm that the console opens in the group's workspace.
If the console shows
You do not have access yet. Ask your administrator to add you to a workspace.instead, check that a group on the appliance has the exact name that the provider sends, and that the group is a member of a workspace. For the steps, refer to Give the Provider's Groups Access. -
Sign out, and then sign in again as a platform administrator.
-
From the left main menu, select Users.
-
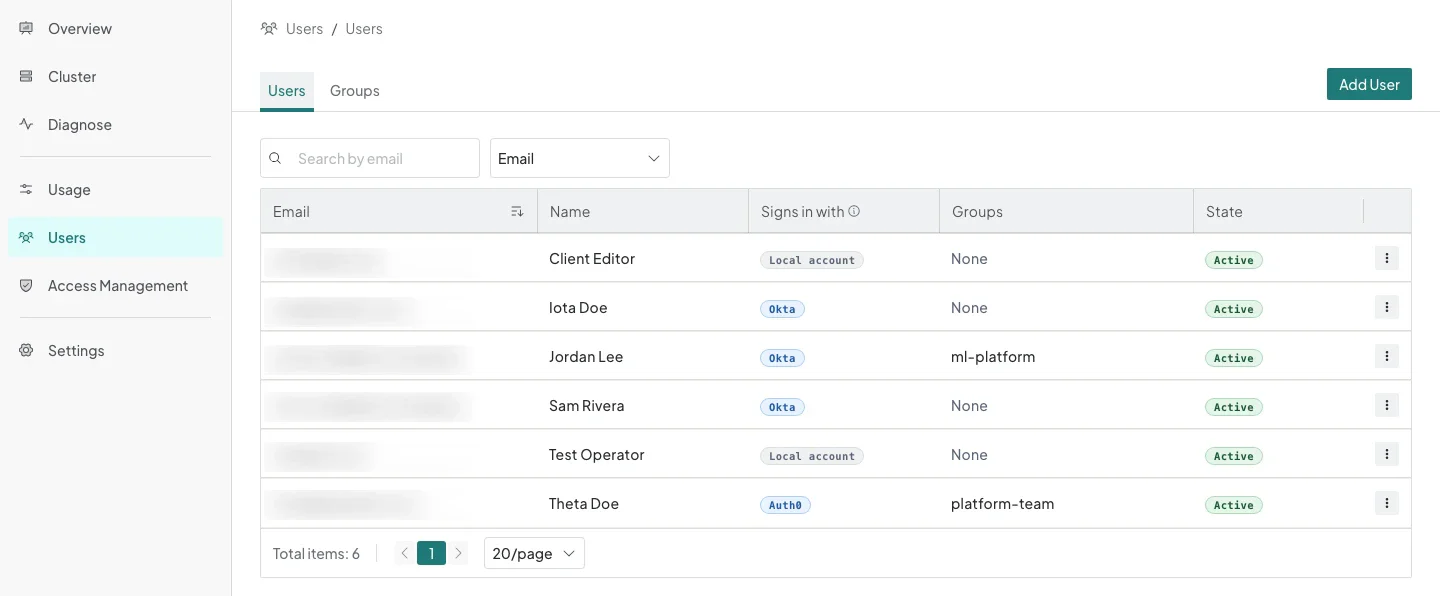
On the Users tab, confirm that the Signs in with column names the provider for the person who signed in.
Next Steps
-
Manage Users to maintain the people who sign in through the provider.
-
Manage Workspace Members to change a group's role in a workspace.
-
Access Management Reference describes the Identity Providers section and provider sign-in.