Deploy Edge on AWS Outposts
Palette supports deploying an Edge host on an Amazon Elastic Compute Cloud (EC2) instance provisioned on Amazon Web Services (AWS) Outposts. This document guides you through launching an EC2 instance on Outposts and registering it with Palette as an Edge host.
Prerequisites
-
A deployed AWS Outposts server.
-
A capacity task created according to the Prepare Environment guide.
-
A Virtual Private Cloud (VPC) configured for use with AWS Outposts.
-
An Outposts subnet associated with the VPC, created according to the Prepare Environment guide.
-
An AWS EC2 key pair.
-
An active Palette account.
-
Palette registration token for pairing the Edge host with Palette. You need tenant admin access to Palette to generate a new registration token. For detailed instructions, refer to the Create a Registration Token guide.
Create the Edge Host
To configure an Edge host on your Outpost server, complete the following steps.
-
Log in to the AWS Console. Select the AWS Outposts service.
-
Select your AWS Outposts server.
-
Click the Launch instance button.
-
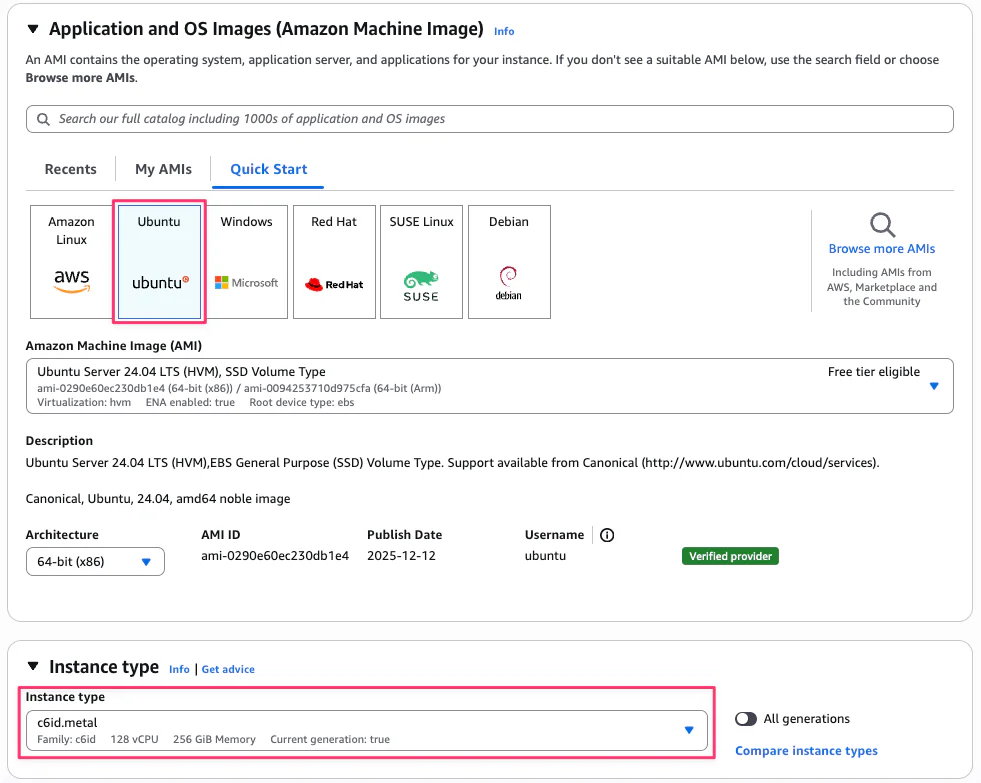
In the Application and OS Images (Amazon Machine Image) section, select a Linux-based OS supported by agent mode (for example, Ubuntu).
-
Verify that the Instance type is set to c6id.metal.
-
In the Key pair (login) section, select a value for Key pair name.
-
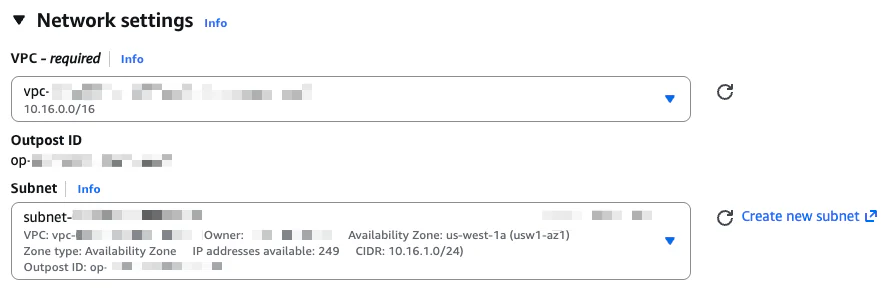
In the Network settings section, click Edit, then in the VPC - required field, select the VPC associated with your Outposts subnet. Then select the Subnet you created when following the Prepare Environment guide.
-
Expand Advanced network configuration, then select Add network interface.
-
Ensure that the Device index is set to
1, as you enabled the Local Network Interface (LNI) for device ID 1 when creating the subnet. Enter a value in the Description field. -
Expand the Advanced details section.
-
Populate the User data - optional field. You can upload a file containing the user data or enter the text directly in the UI.
You must configure the OS to enable the LNI to communicate on your local area network (LAN), just as you would for any on-premises system. Do not use VPC > DHCP option sets to configure the LNI, as it operates on your LAN rather than within the VPC.
Below is an example of a
user-datafile. It applies a custom Netplan configuration to the underlying OS.#cloud-config
write_files:
# Netplan configuration file for static IP and routing.
- path: /etc/netplan/99-custom-network.yaml
permissions: "0600"
content: |
network:
version: 2
renderer: networkd
ethernets:
ens1:
dhcp4: true
dhcp4-overrides:
use-routes: false
routes:
# Manually define routes to remote networks via the upstream gateway.
- to: <remote-network-cidr>
via: <upstream-gateway-ip>
ens2:
dhcp4: false # Apply static IP address.
dhcp6: false
addresses:
- <interface-ip-cidr>
routes: # Redirect all outgoing traffic to the LNI.
- to: 0.0.0.0/0
via: <default-gateway-ip>
metric: 50
# Palette agent configuration file.
- path: /opt/palette/user-data
owner: root:root
permissions: "0644"
content: |
#cloud-config
stylus:
site:
edgeHostToken: <edge-token>
paletteEndpoint: <palette-endpoint>
projectName: <project-name>
install:
reboot: true
stages:
initramfs:
- users:
<username>:
groups:
- sudo
passwd: <password>
runcmd:
# Create a log file for debugging cloud-init steps.
- touch /var/log/cloud-init-userdata.log
# Remove default cloud-init Netplan configs.
- rm -f /etc/netplan/50-cloud-init.yaml >> /var/log/cloud-init-userdata.log 2>&1
- rm -f /etc/netplan/01-network-manager-all.yaml >> /var/log/cloud-init-userdata.log 2>&1
- rm -f /etc/netplan/00-installer-config.yaml >> /var/log/cloud-init-userdata.log 2>&1
# Apply the custom Netplan configuration.
- chmod 600 /etc/netplan/99-custom-network.yaml >> /var/log/cloud-init-userdata.log 2>&1
- netplan apply >> /var/log/cloud-init-userdata.log 2>&1
- sleep 10 >> /var/log/cloud-init-userdata.log 2>&1
# Install required OS packages for Palette agent.
- apt-get update >> /var/log/cloud-init-userdata.log 2>&1
- apt-get install --yes bash jq zstd rsync systemd-timesyncd iptables rsyslog conntrack --no-install-recommends >>
/var/log/cloud-init-userdata.log 2>&1
# Install AWS Systems Manager (SSM) agent for remote troubleshooting.
- snap install amazon-ssm-agent --classic >> /var/log/cloud-init-userdata.log 2>&1
- systemctl enable snap.amazon-ssm-agent.amazon-ssm-agent.service >> /var/log/cloud-init-userdata.log 2>&1
- systemctl start snap.amazon-ssm-agent.amazon-ssm-agent.service >> /var/log/cloud-init-userdata.log 2>&1
# Prepare Palette installer environment variable.
- echo "USERDATA=/opt/palette/user-data" >> /etc/environment
# Download Palette agent installer.
- mkdir -p /opt/palette >> /var/log/cloud-init-userdata.log 2>&1
- curl --location --output /opt/palette/palette-agent-install.sh
https://github.com/spectrocloud/agent-mode/releases/latest/download/palette-agent-install.sh >>
/var/log/cloud-init-userdata.log 2>&1
- chmod +x /opt/palette/palette-agent-install.sh >> /var/log/cloud-init-userdata.log 2>&1
# Ensure USERDATA variable persists.
- echo 'USERDATA=/opt/palette/user-data' >> /etc/environment >> /var/log/cloud-init-userdata.log 2>&1
# Run Palette agent installer.
- cd /opt/palette && export USERDATA=./user-data && sudo --preserve-env ./palette-agent-install.sh >>
/var/log/cloud-init-userdata.log 2>&1
# Give installer time to finish before reboot.
- sleep 30
# Final reboot to complete installation.
- rebootReplace the following placeholders in the YAML file:
<remote-network-cidr>— The Classless Inter-Domain Routing (CIDR) block of the remote or internal network that the instance must route traffic to.<upstream-gateway-ip>— The IP address of the upstream gateway that routes traffic to the remote network.<interface-ip-cidr>— The static IPv4 (IP version 4) address and subnet mask assigned to the interface, expressed in CIDR notation.<default-gateway-ip>— The IP address of the default gateway used for outbound traffic.<edge-token>- The Palette registration token.<palette-endpoint>- The Palette endpoint, for example,api.spectrocloud.com<project-name>- The Palette project name. This parameter is required only if you have not set a default project for the registration token.<username>- The local username for the instance OS.<password>- The username's password.
Validate
-
Log in to Palette.
-
Navigate to your project.
-
From the left main menu, select Clusters.
-
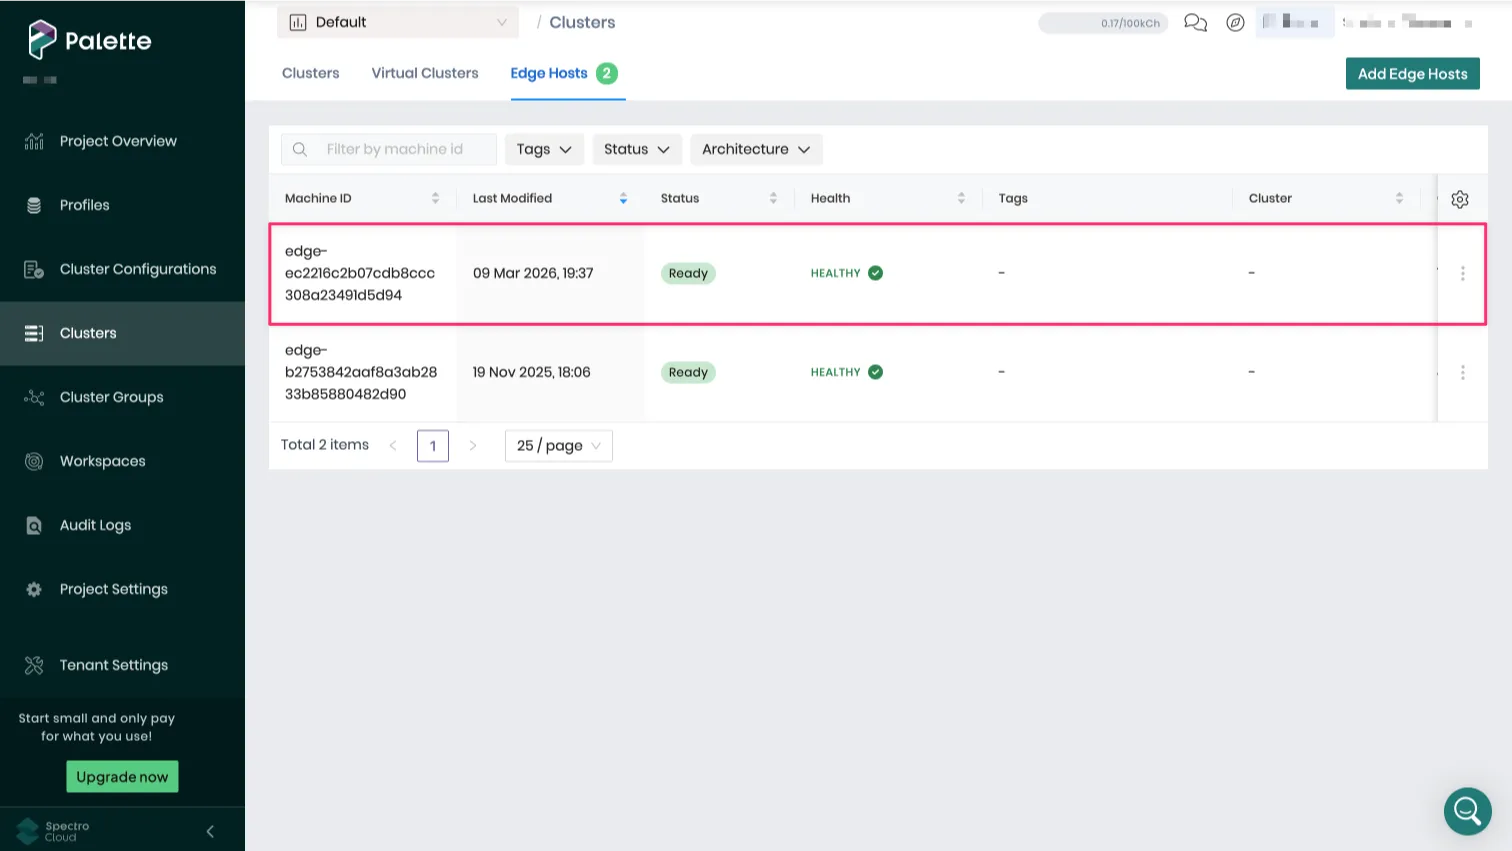
Select the Edge Hosts tab to display the registered hosts.
-
Confirm your Edge host is listed as Ready and HEALTHY.
Next Steps
Once an Edge host is registered with Palette, you can allocate the Edge host to a cluster. For more information, refer to Create Cluster Definition.