Deploy a PCG to an Existing Kubernetes Cluster
For infrastructure environments that the Palette CLI does not support, you can deploy a Private Cloud Gateway (PCG) to an existing Kubernetes cluster. This guide provides the steps to deploy a PCG to an existing Kubernetes cluster.
Supported Environments
You can deploy a PCG onto an existing Kubernetes cluster that is not managed by Palette to the following environments:
- AWS
- Azure
- Nutanix. Requires the registration of a Nutanix cloud. Refer to the Register Nutanix Cloud section for more information.
PCG Sizing
The following table provides the recommended sizing for the PCG based on the number of nodes, CPU, memory, storage, and the maximum concurrent cluster deployments. You can continue to deploy additional clusters once the current clusters deployment batch is complete.
We recommend using a minimum of 3 nodes for production environments. Single node clusters are better suited for development and testing environments.
Single-Node Cluster
| Size | Nodes | CPU | Memory | Storage | Maximum concurrent cluster deployments |
|---|---|---|---|---|---|
| Small | 1 | 4 | 4 GB | 60 GB | 1-3 |
| Medium | 1 | 8 | 8 GB | 100 GB | 4-6 |
| Large | 1 | 16 | 16 GB | 120 GB | 7-10 |
High-Availability (HA) Cluster
| Size | Nodes | CPU | Memory | Storage | Maximum concurrent cluster deployments |
|---|---|---|---|---|---|
| Small | 3 | 4 | 4 GB | 60 GB | 4-6 |
| Medium | 3 | 8 | 8 GB | 100 GB | 7-10 |
| Large | 3 | 16 | 16 GB | 120 GB | 10-15 |
Prerequisites
-
An existing Kubernetes cluster that has network connectivity with Palette. The Kubernetes cluster must be able to connect to the internet to download the required images and packages and connect with Palette on port 443. To learn more about PCG network requirements, refer to the Network Communication section.
warningDo not install the PCG in a Kubernetes cluster managed by Palette. The installation will fail due to resource naming conflicts.
-
You need sufficient permissions to deploy the PCG services in the cluster. The default Kubernetes cluster roles cluster-admin and admin have the necessary permissions to deploy the PCG services.
-
The Kubernetes cluster must have at least the following resources:
- 4 vCPUs
- 4 GB of memory
- 60 GB of disk space
- 1 control plane node and 1 worker node. We recommend using a minimum of 3 nodes for production environments. Refer to the PCG Sizing section for more information.
- A Container Network Interface plugin installed.
- A Container Storage Interface plugin installed.
- The Kubernetes cluster must be set up on a version of Kubernetes that is compatible to your Palette version. Refer to the Kubernetes Requirements section to find the required Kubernetes version.
-
PCG IP address requirements:
- One IP address for a single-node PCG or three IP addresses for a three-node PCG. Refer to the PCG Sizing section for more information on sizing.
- One IP address reserved for cluster repave operations.
- One IP address for the Virtual IP (VIP).
- DNS can resolve the domain
api.spectrocloud.comor the domain that you have configured for a self-hosted Palette installation.
-
If you want Palette to display cluster metrics, ensure that the metrics server is installed in the cluster. You can install the metrics server by using the following command.
kubectl apply --filename https://github.com/kubernetes-sigs/metrics-server/releases/latest/download/components.yaml
Install PCG
Use the following steps to install the PCG in your existing Kubernetes cluster.
-
Log in to Palette.
-
From the left Main Menu, select Tenant Settings.
-
Next, on the Tenant Settings Menu, select Private Cloud Gateways and click on Add New Private Cloud Gateway.
-
Select Self Hosted in the next window that Palette displays.
-
Provide a name for the PCG and use the drop-down Menu to select the target infrastructure provider. Click Confirm to continue. You will be redirected to the Private Cloud Gateway Overview page.
-
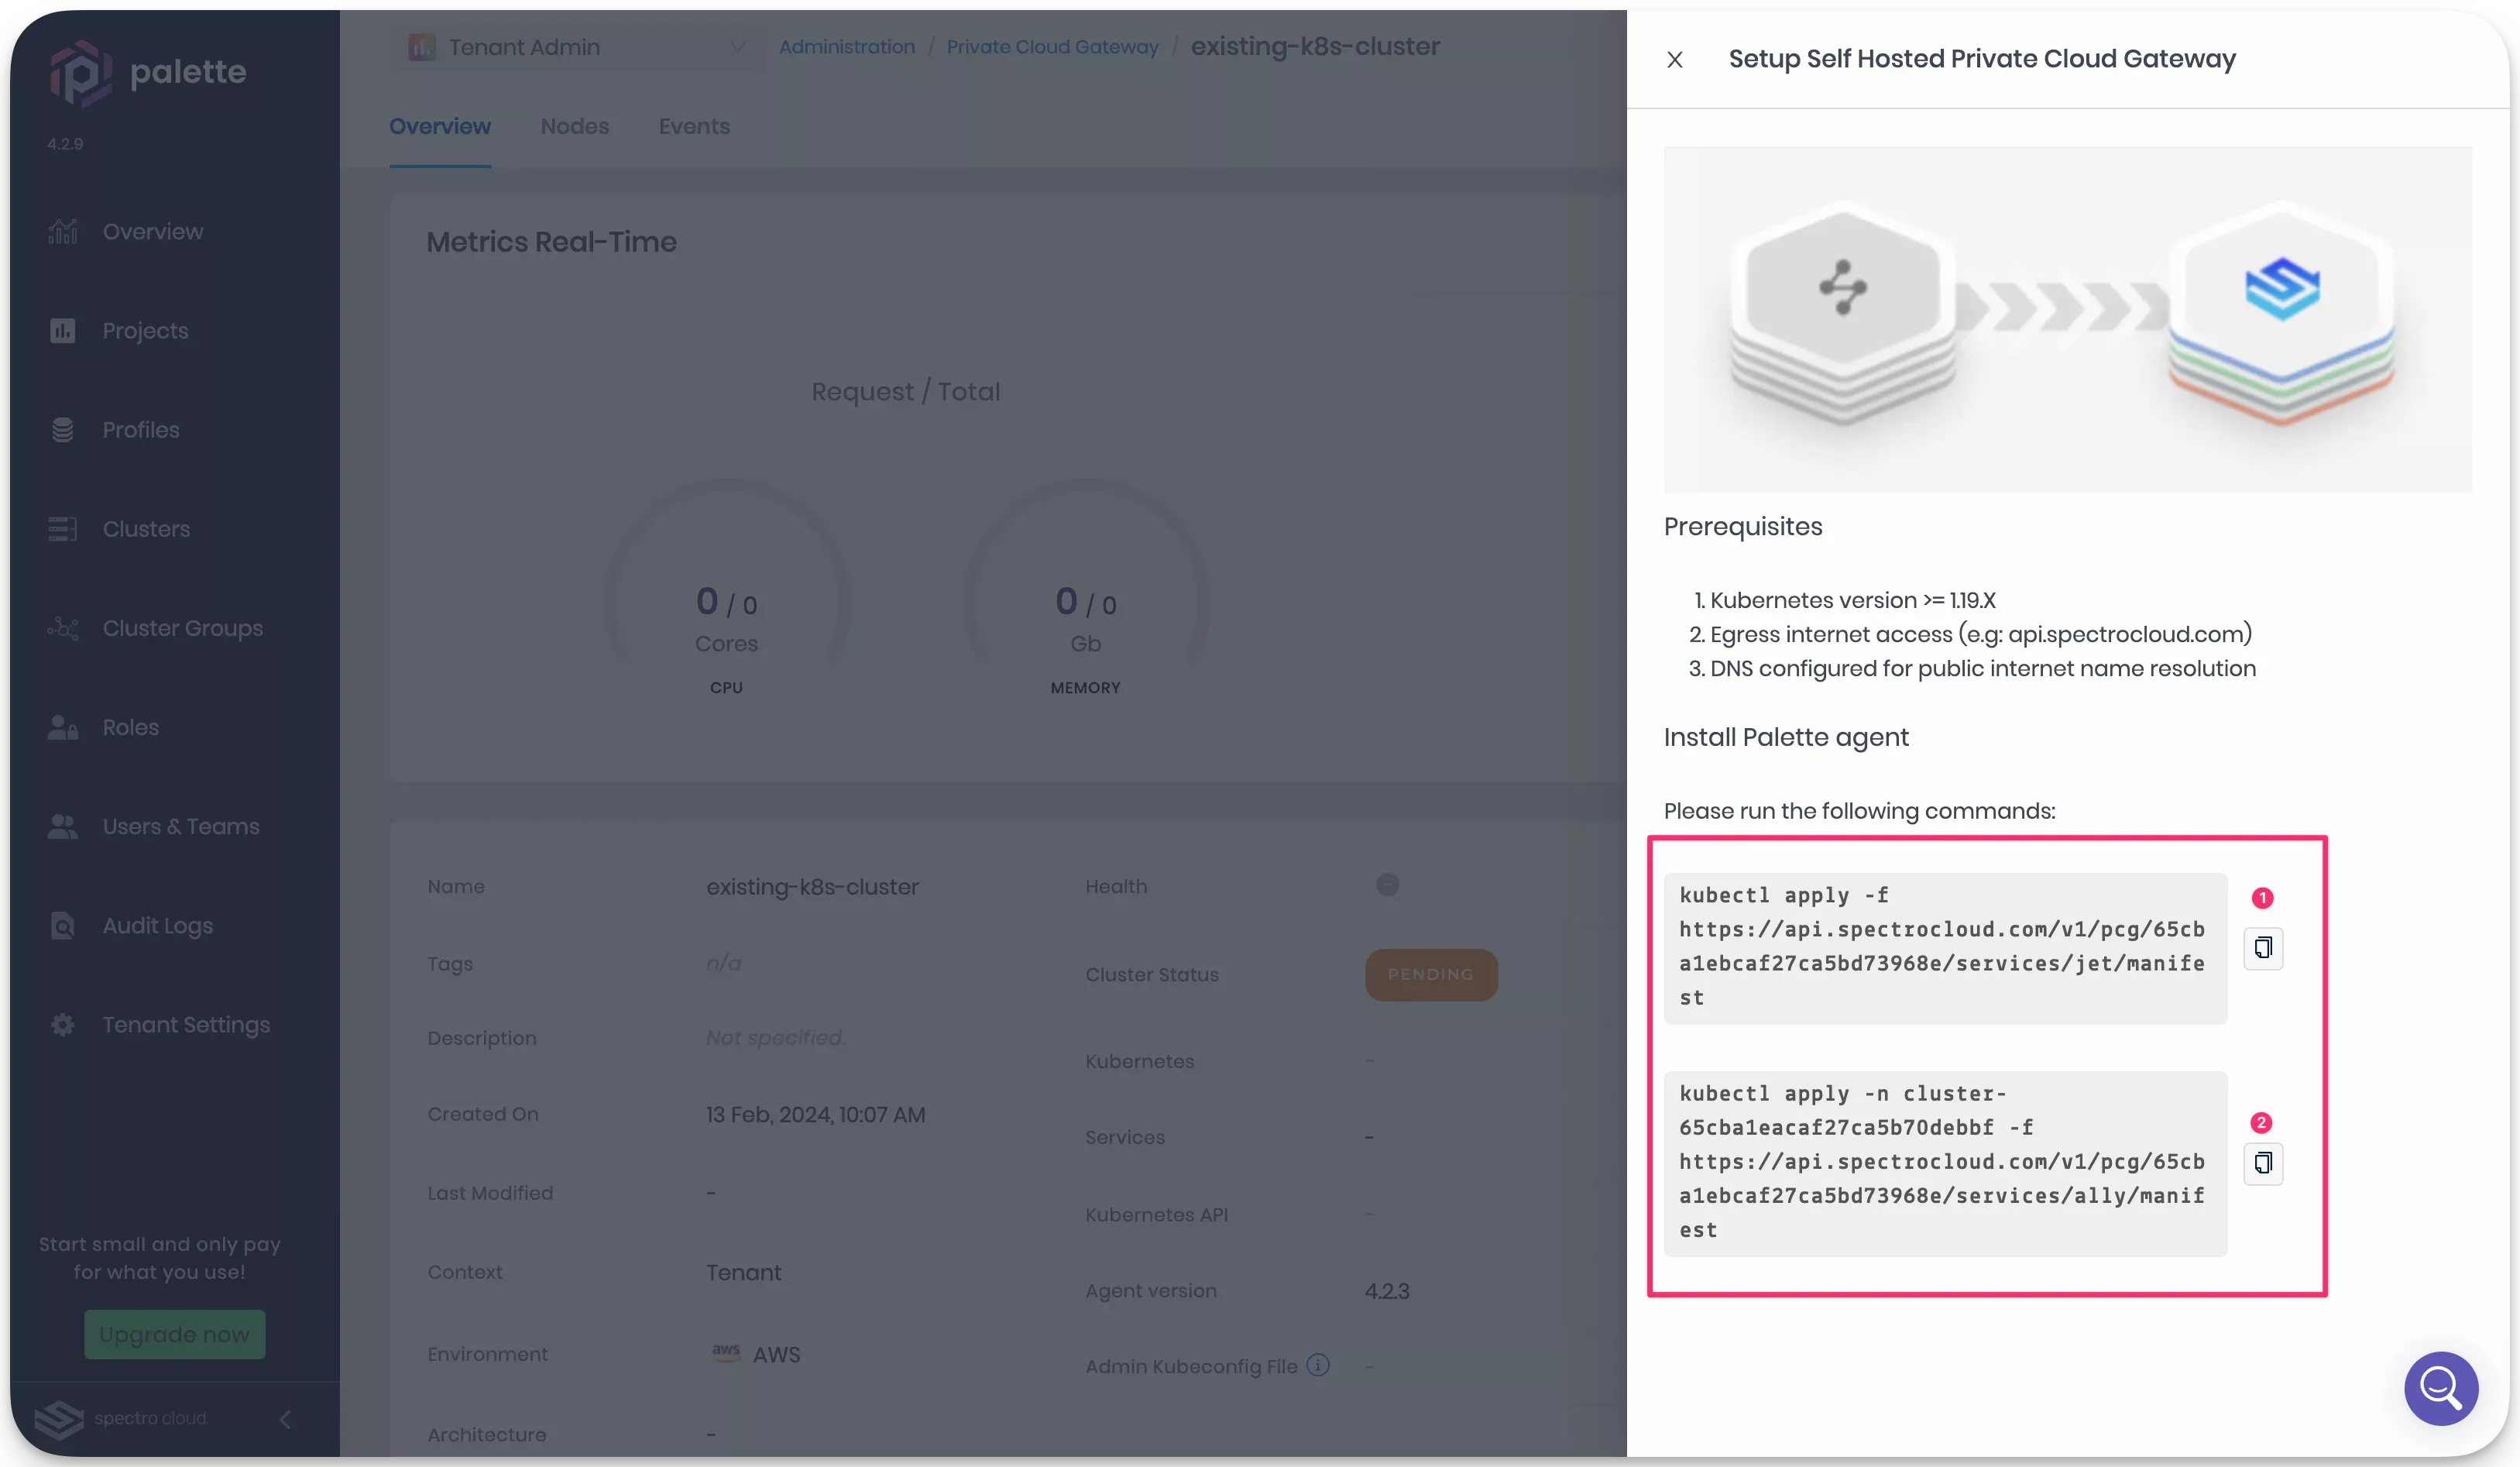
To install the Palette agent, copy the kubectl commands from the slide-out panel and execute them against your self-hosted cluster. Issue the commands in the order they are listed.

-
Close the slide-out panel when you have copied and issued both commands. The PCG Overview page Cluster Status field will display Pending while the PCG is deploying. The deployment is complete when the Cluster Status field displays the status Running.
tipYou can provide network proxy configurations to your Kubernetes clusters deployed through Palette. To provide network proxy configurations to your host clusters, update the PCG with the proxy server details. To learn more, check out the Proxy Configuration guide.
Validate
When deployed, the PCG registers itself with Palette. Use the steps below to verify if the PCG registration is successful.
-
Log in to Palette.
-
Navigate to the left Main Menu and select Tenant Settings.
-
Next, on the Tenant Settings Menu, select Private Cloud Gateways.
-
Locate the PCG and verify it is installed and in the Running state.
Next Steps
When the PCG is in the Running state, you can create a cloud account, toggle Connect Private Cloud Gateway, and select the PCG you just deployed. The option to use the PCG you deployed on an existing cluster is only available to the infrastructure provider you selected when you deployed the PCG. Clusters deployed to the cloud account with the Connect Private Cloud Gateway enabled will use the PCG you deployed to support cluster deployment and removal operations.