Node Labels
Node labels provide pods the ability to specify which nodes they should be scheduled on. This ability can be useful in scenarios where pods should be co-located or executed on dedicated nodes. A common use case of node labels is to ensure that certain workloads only execute on certain hardware configurations. Labels are optional configurations, as the scheduler automatically places pods across nodes.
You can think of node labels as having the opposite effect to Taints and Tolerations. Taints allow you to mark nodes as not accepting certain pods, while node labels allow you to specify that your pods should only be scheduled on certain nodes.
Palette allows you to apply node labels during cluster provisioning.
This guide covers the Palette UI flow.
Node labels can also be applied to node pools using our Terraform provider.
Limitations
- Palette automatically creates certain node labels that are not displayed in the interface. You can still list these
labels using
kubectlorK9s, but updates to them are not supported.
Prerequisites
- A Palette account with the permissions to create cluster profiles and manage clusters. Refer to the Roles and Permissions guide for more information.
- kubectl or K9s installed locally.
Enablement
-
Log in to Palette.
-
Navigate to the left main menu and select Profiles.
-
Create a cluster profile to deploy to your environment. Refer to the Create a Full Profile guide for more information.
-
Add a manifest to your cluster profile with a custom workload of your choice. Refer to the Add a Manifest for additional guidance.
-
Add a node selector to the pod specification of your manifest. Refer to the Assign Pods to Nodes official documentation page for more details.
nodeSelector:
key1: value1infoYou can also specify a node by name by using the
nodeName: nameoption on your pod specification. We recommend using a node selector, as it provides a more scalable and robust solution.When using packs or Helm charts, the
nodeSelectorornodeNameoptions can only be specified if they are exposed for configuration in thevalues.yamlfile. -
Save the changes made to your cluster profile.
-
Navigate to the left main menu and select Clusters.
-
Click on Add New Cluster.
-
Fill in the Basic Information for your cluster and click Next.
-
On the Cluster Profile tab, select the cluster profile you previously created. Click Next.
-
Select a Subscription, Region, and SSH Key on the Cluster Config tab. Click Next.
-
On the Nodes Config tab, configure your control plane pool and worker pools by providing the instance type, availability zones and disk size.
-
The control plane pool and worker pool provide the Additional Labels (Optional) section. Palette accepts labels in the
key:valueformat. Fill in the labels corresponding to the values provided in your pod specification node selector. Click on Next.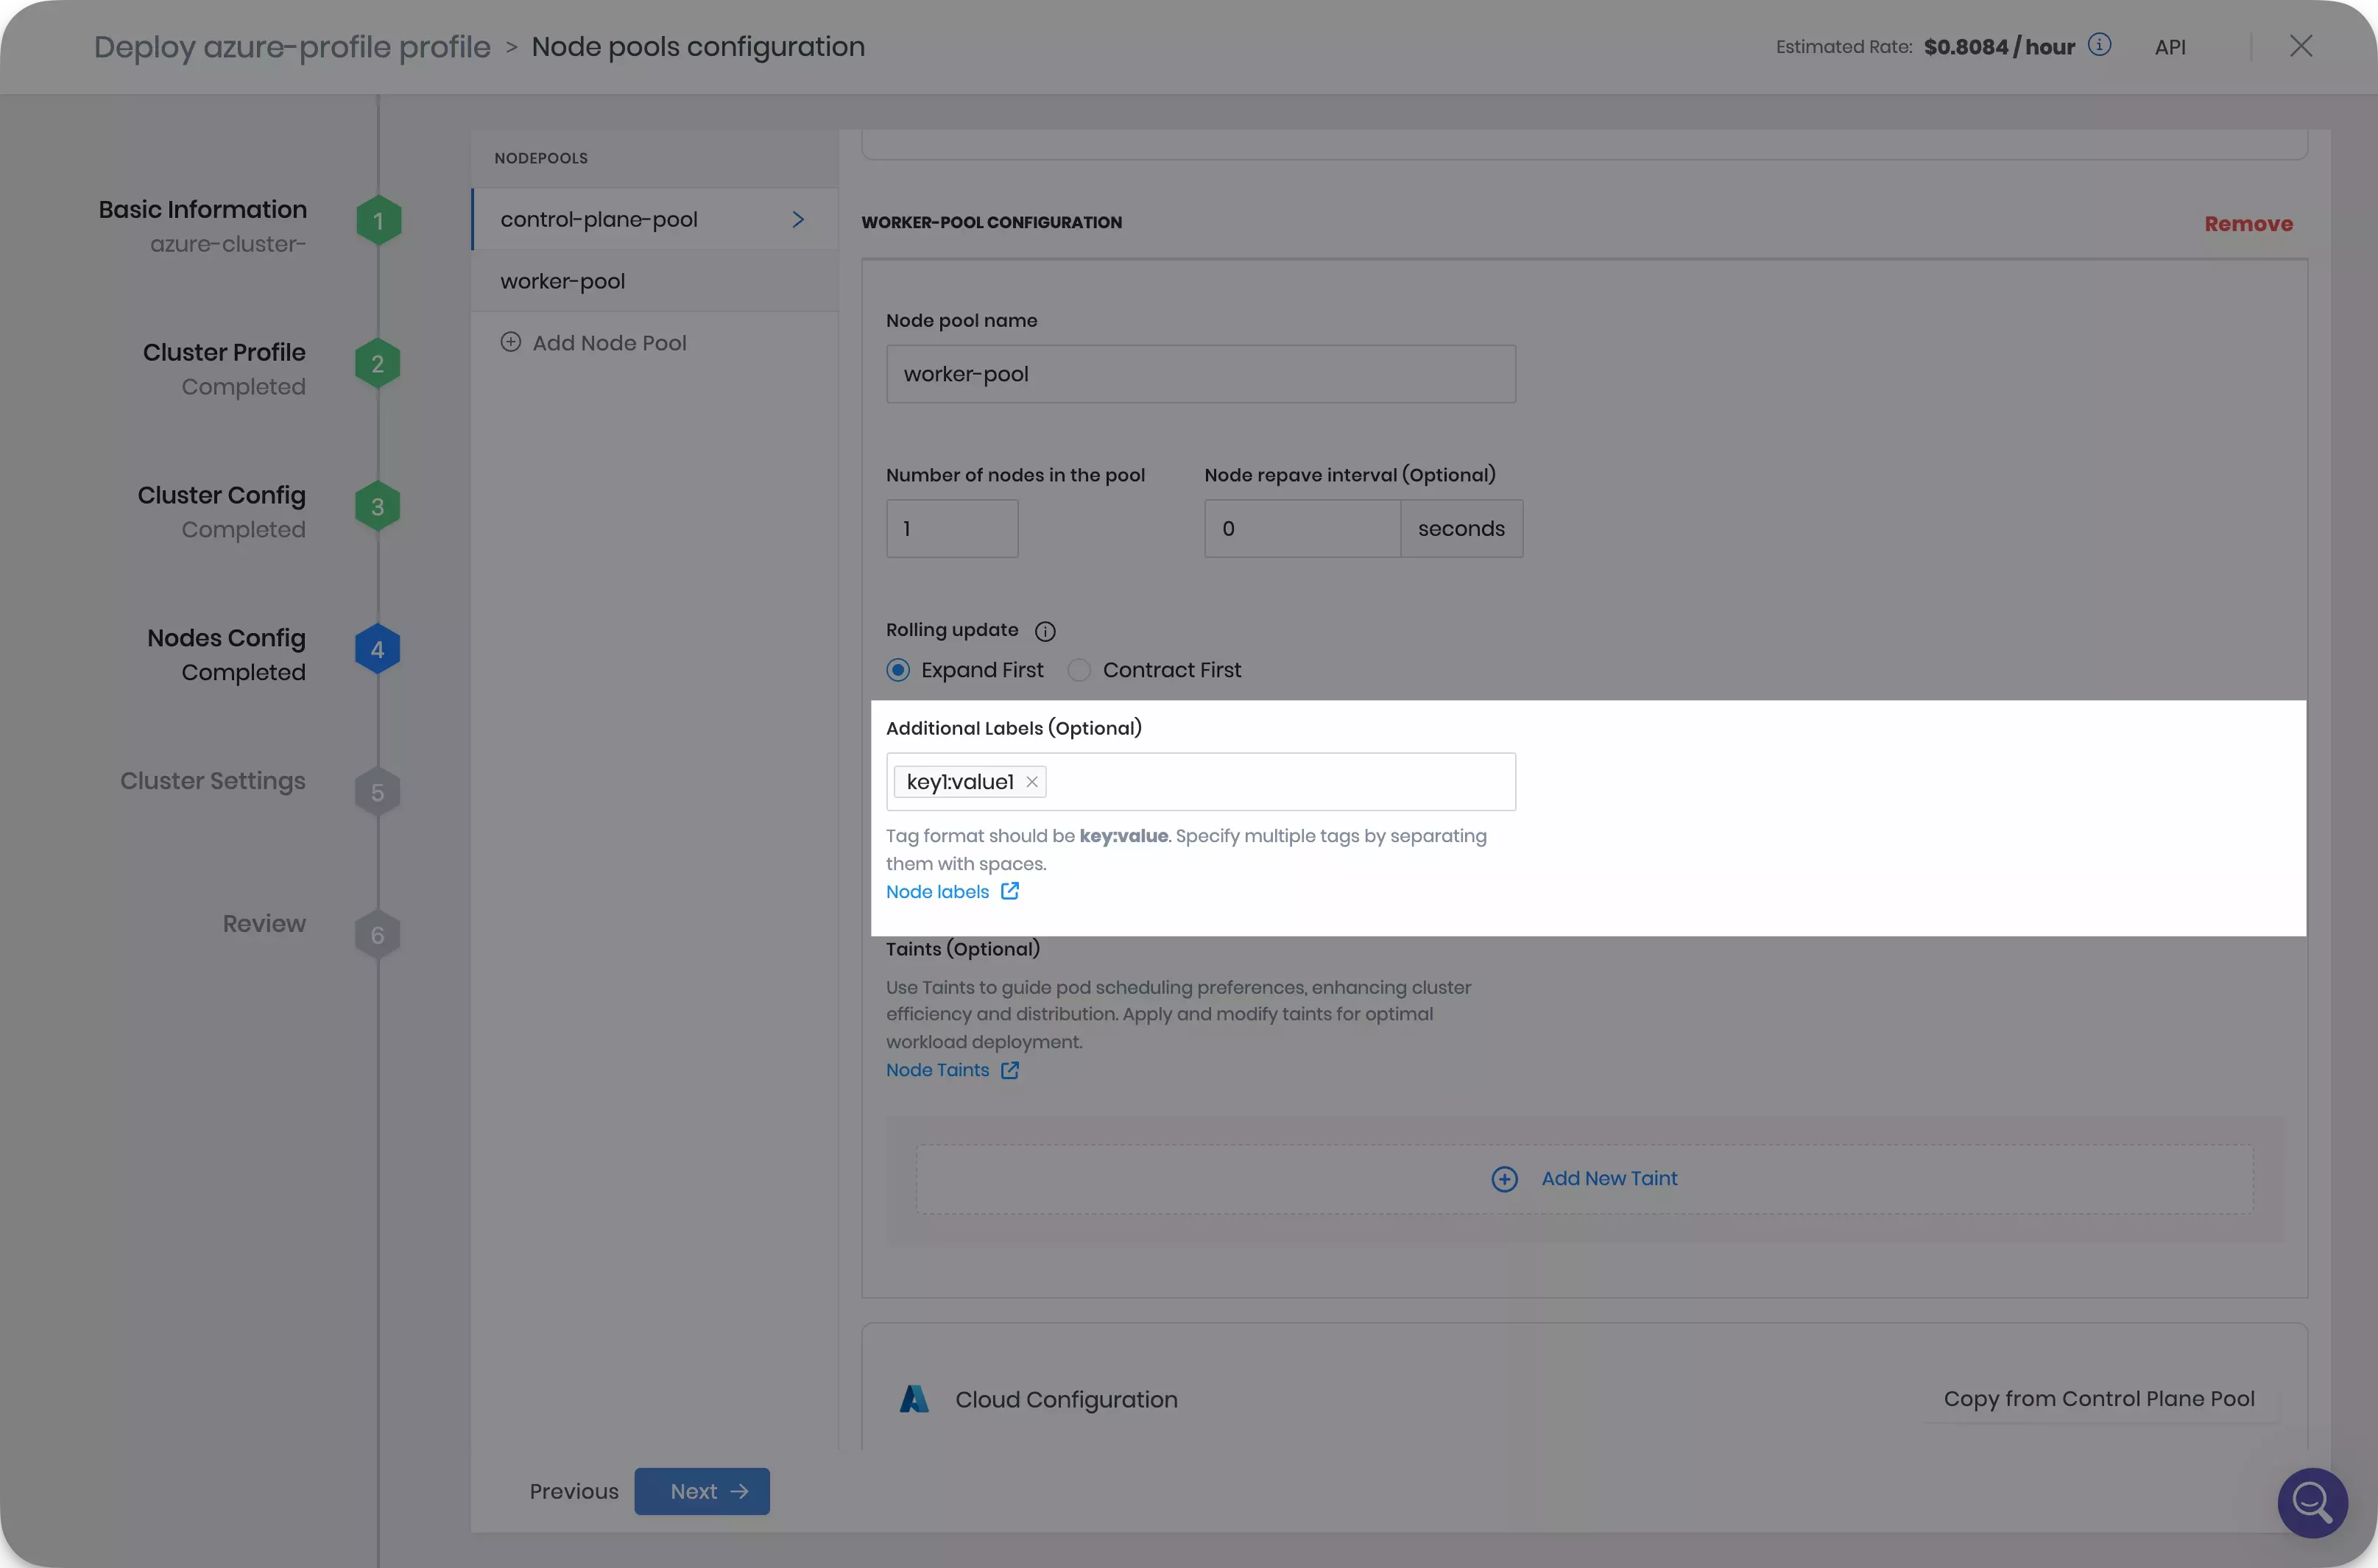
-
Accept the default settings on the Cluster Settings tab and click on Validate.
-
Click on Finish Configuration and deploy your cluster.
further guidanceRefer to our Getting Started tutorials for detailed guidance on how to deploy a cluster with Palette using Amazon Web Services (AWS), Microsoft Azure, or Google Cloud Platform (GCP) cloud providers.
Validate
You can follow these steps to validate that your node labels are applied successfully.
-
Log in to Palette.
-
Navigate to the left main menu and select Clusters.
-
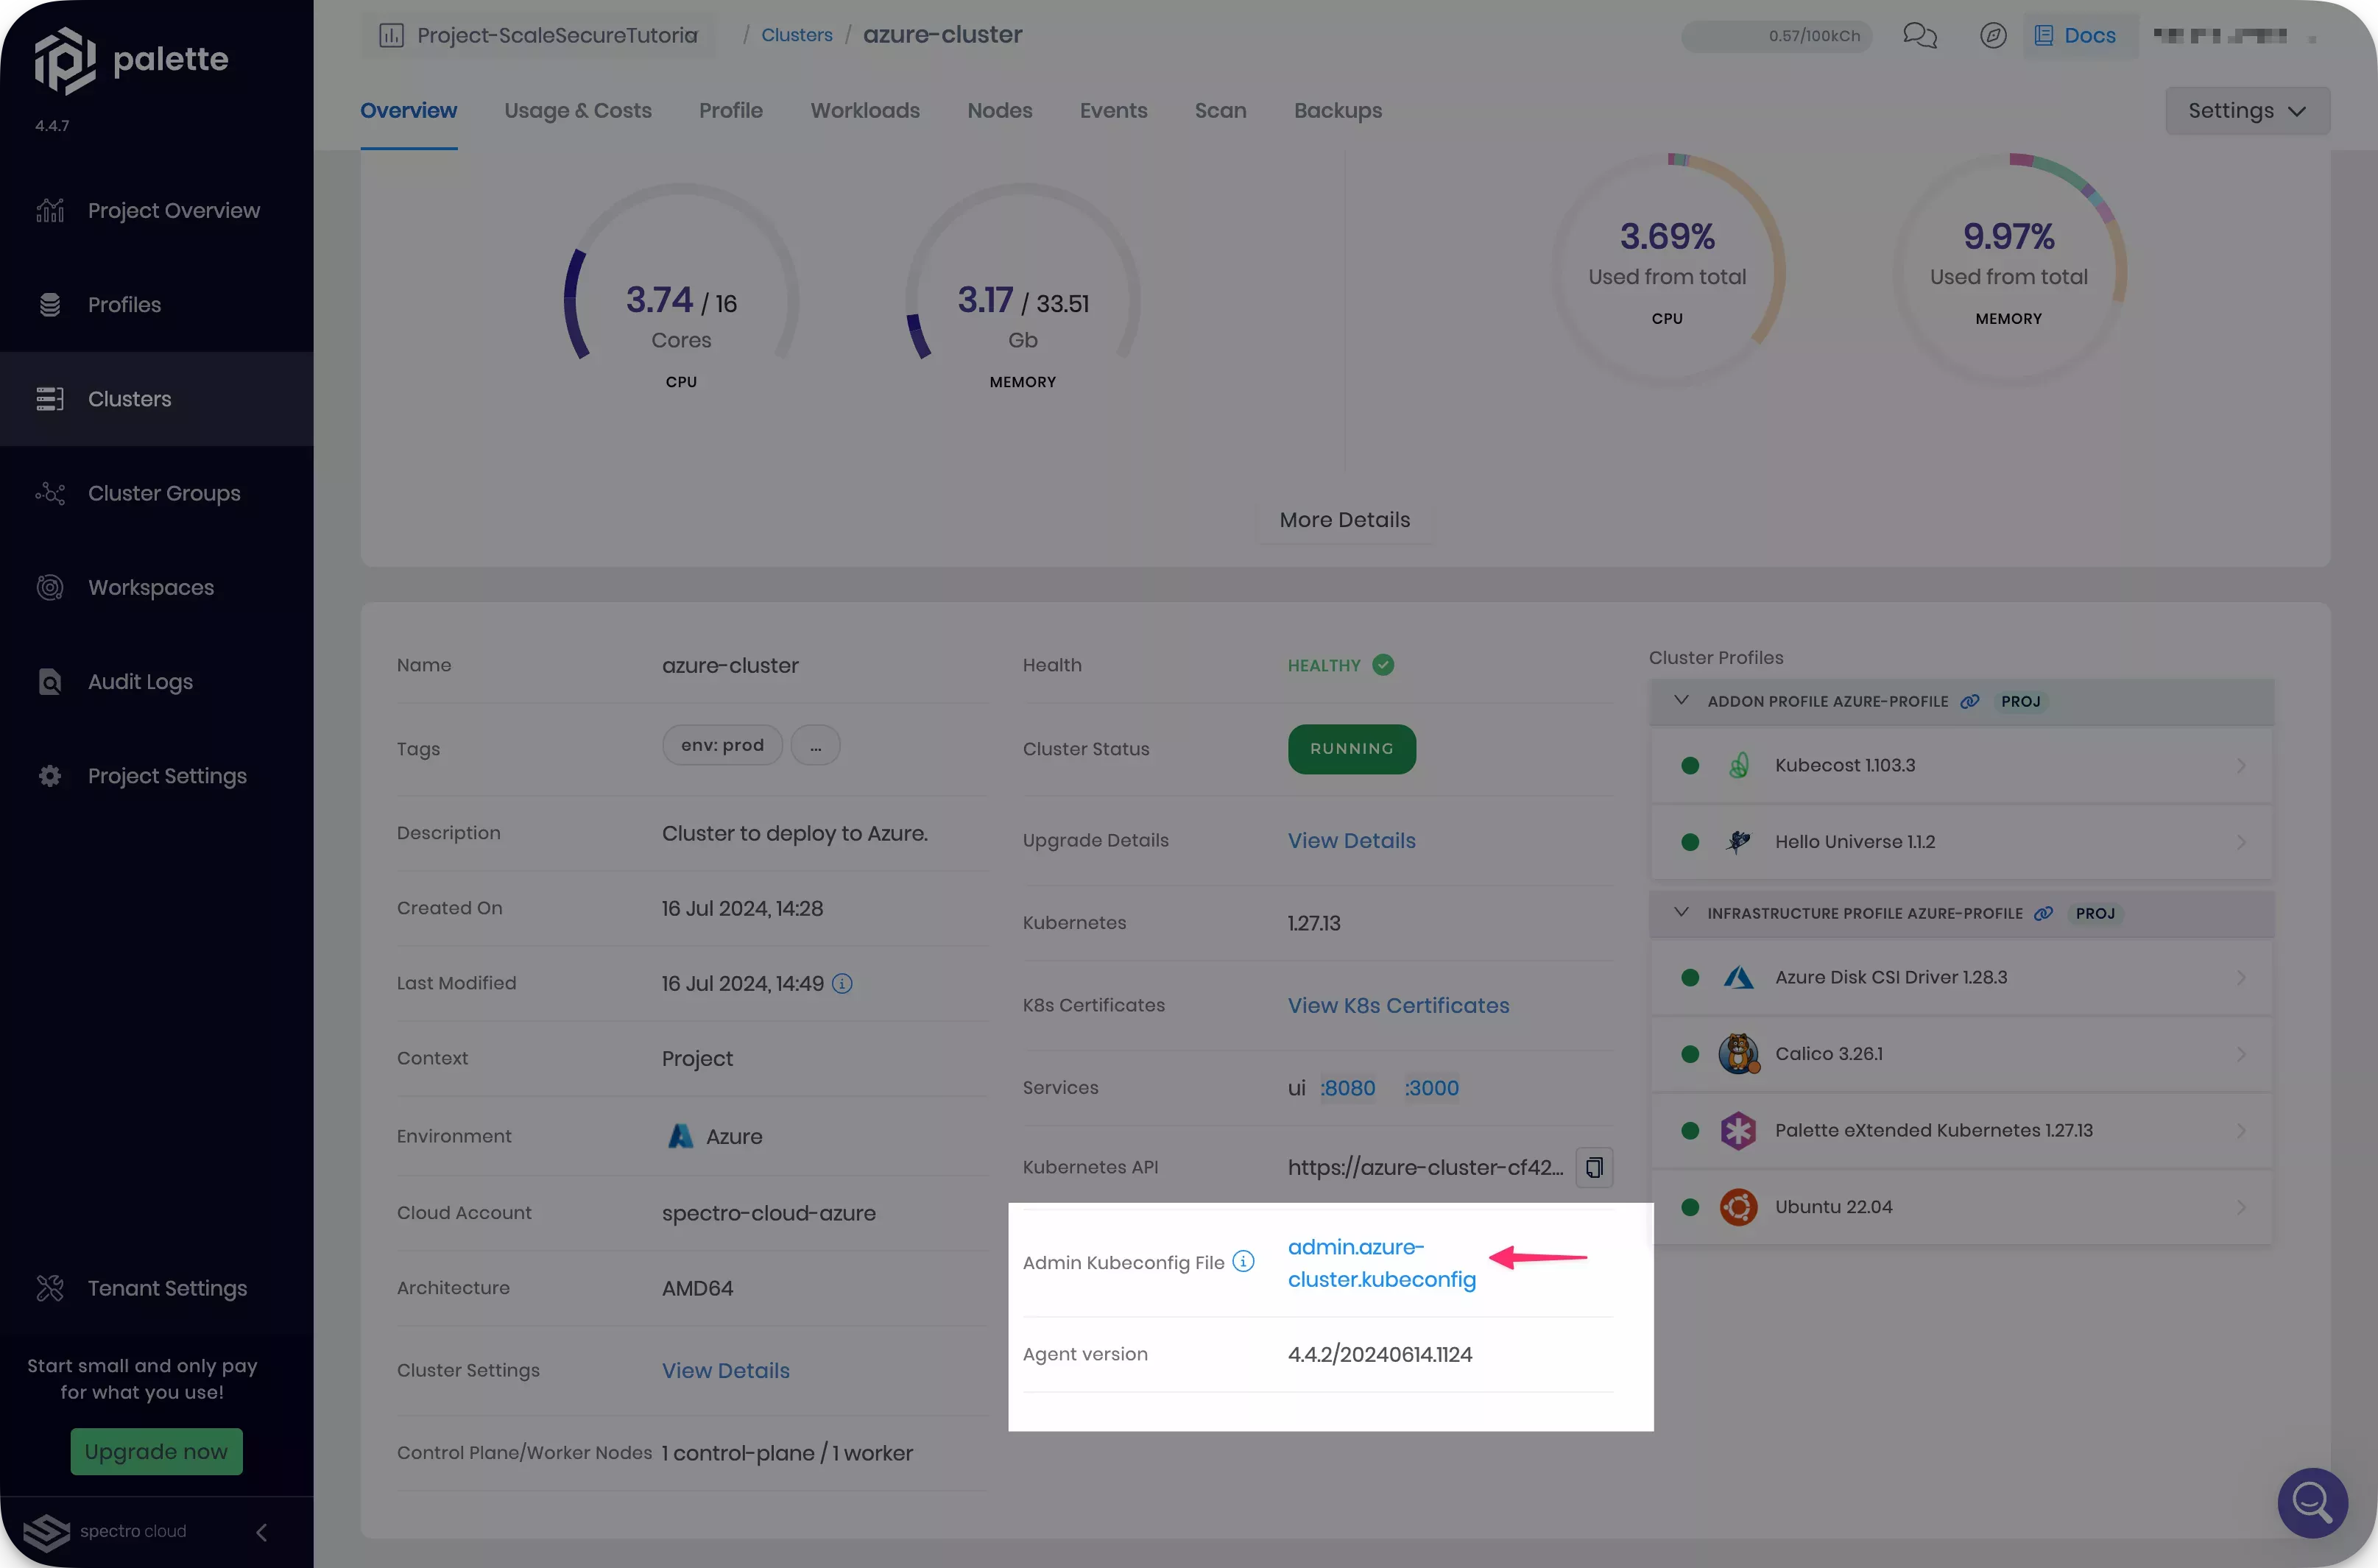
Select the cluster you deployed, and download the kubeconfig file.
-
Open a terminal window and set the environment variable
KUBECONFIGto point to the kubeconfig file you downloaded.export KUBECONFIG=~/Downloads/admin.azure-cluster.kubeconfig -
Confirm the cluster deployment process has scheduled your pods as expected. Remember that pods are only scheduled on nodes with labels matching their node selectors.
kubectl get pods --all-namespaces --output widetipFor a more user-friendly experience, consider using K9s or a similar tool to explore your cluster workloads.
-
Verify the labels were correctly applied. You can retrieve the
<node-name>from the output of step 5.kubectl describe nodes <node-name> --all-namespaces | grep --ignore-case label