Namespace Management
In Kubernetes, namespaces provide a way to isolate groups of resources within a single cluster. Some of the benefits of namespaces are:
-
They can be used to partition resources among multiple users via resource quota – where each namespace has its own set of resources – without having to set up multiple physical clusters.
-
You can configure Role-Based Access Control (RBAC) based on namespaces. For information about configuring namespaces and RBAC, check out RBAC and NS Support.
-
Namespaces can be used for different purposes such as testing, development, and production.
-
You can use namespaces to help prevent resource naming conflicts. Resource names must be unique within a namespace but not across namespaces.
-
In environments that have hybrid containerized and virtualized applications, a separate namespace can be used to isolate virtual machines (VMs). For information about a VM environment in Palette, check out Virtual Machine Management.
Create a Namespace
The following steps will guide you on how to create a namespace.
Prerequisites
-
An active cluster.
-
Permission to create a namespace.
-
A unique namespace name.
Limitations
- When using GPU Allocation, NVIDIA is the only supported vendor.
Create a Namespace in a Cluster
-
Log in to Palette as a tenant admin.
-
Navigate to the left Main Menu and click on Clusters.
-
Select the cluster in which you want to create a namespace.
-
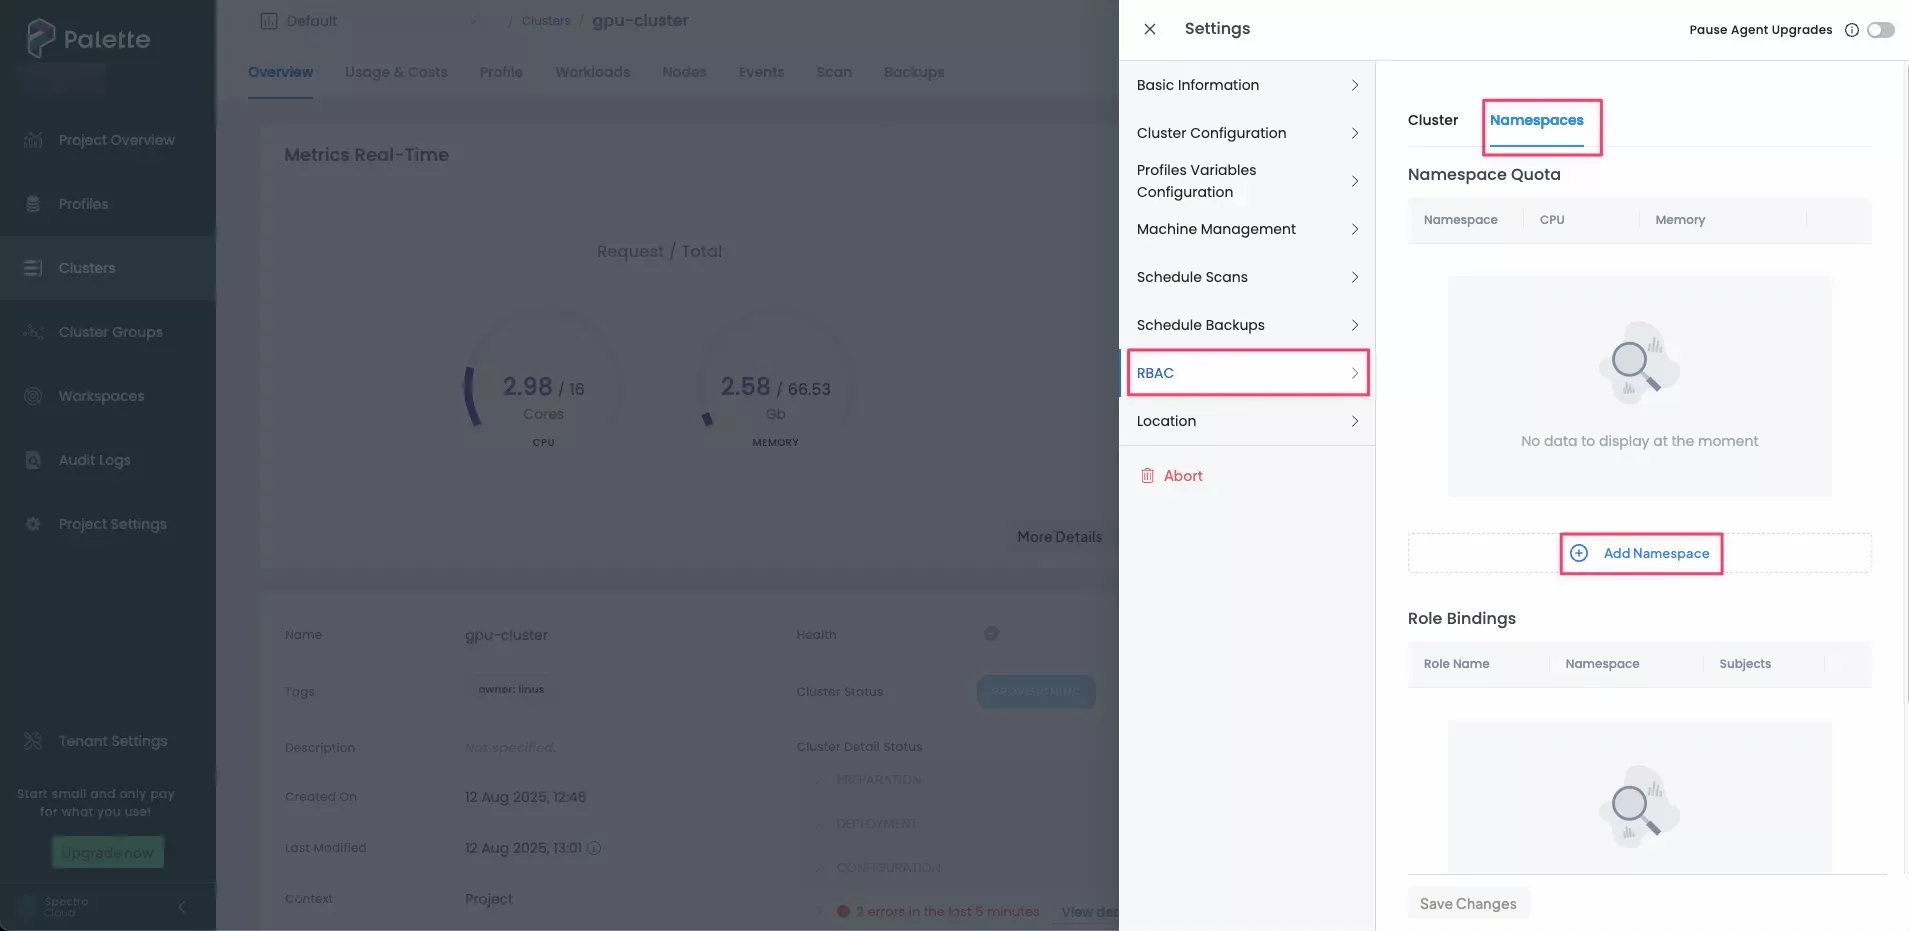
Navigate to the Workloads > Namespaces tab, and click the Manage Namespaces button.
The Settings pane displays with RBAC preselected and the Namespaces tab opened by default.
-
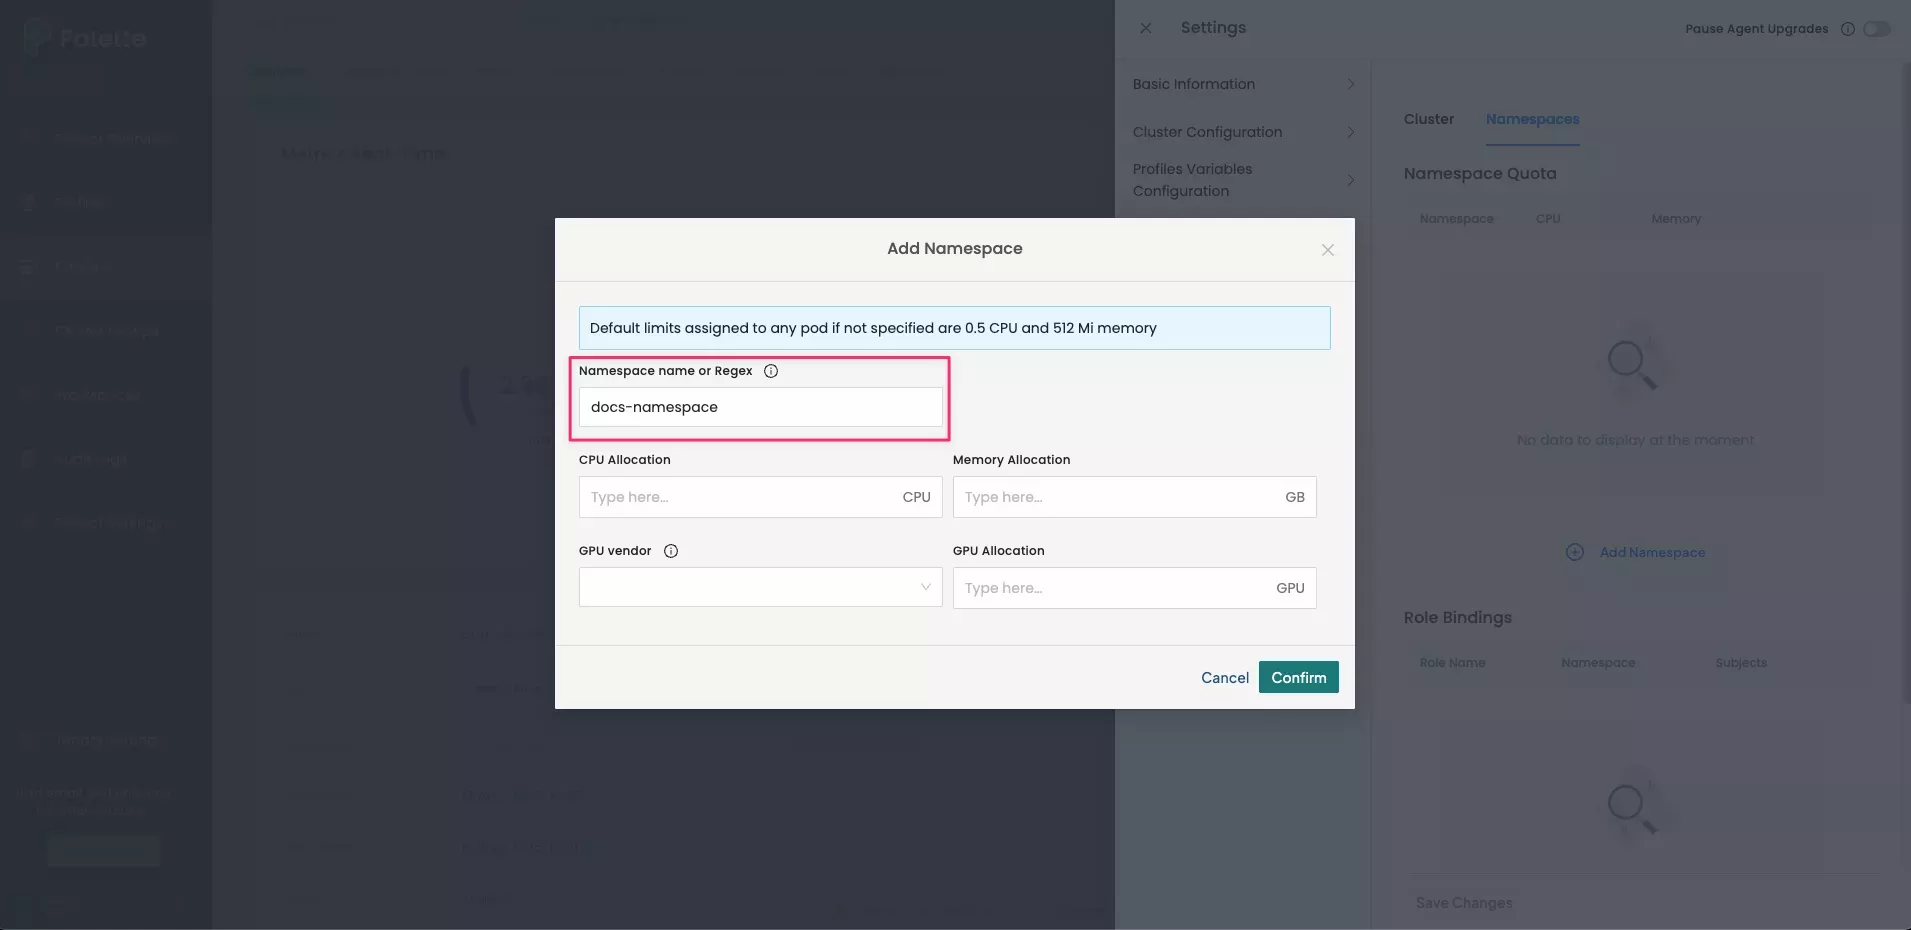
Type a unique namespace name or a regular expression according to which Palette will assign names to namespaces in the Namespace name or Regex field and click Confirm at right.
-
You can assign resource quotas now or at a later time. To learn how, check out Assign Resource Quotas.
For details on how to configure RBAC for namespaces, check out the RBAC and NS Support guide.
-
Once you have made all needed changes, click Save Changes.
Validate
Validate that the namespace was successfully created.
-
Log in to Palette as a tenant admin.
-
Navigate to the left Main Menu and click on Clusters.
-
Select the cluster that contains the namespace you created and view its details.
-
In the Settings pane, click Cluster Settings, and then select RBAC > Namespaces tab.
The namespace you created will be listed under Namespace Quota.
Assign Resource Quotas
You can assign resource quotas for resource sharing among multiple users who have access to a namespace.
Prerequisites
- A running cluster with at least one namespace.
Assign Resource Quotas to a Namespace
-
Log in to Palette as a tenant admin.
-
Navigate to the left Main Menu and click on Clusters.
-
Select the cluster with the namespace to which you will assign cluster quotas.
-
Navigate to the Workloads > Namespaces tab, and click the Manage Namespaces button.
-
The Settings pane displays with RBAC > Namespaces preselected.
-
Click on the three-dot menu on the namespace and select Edit.
-
Specify the number of CPUs and GPUs, and the amount of memory (in GB) to allocate to the namespace. Click Confirm to your changes.
When using GPU Allocation you must use a whole number and must select the vendor from the dropdown. You must also ensure that the appropriate GPU device plugin is installed and compatible with your nodes to enforce the quota as Palette does not verify GPU vendor selection.
infoCurrently, NVIDIA is the only supported vendor.
-
Once you have made all needed changes, click Save Changes.
Delete a Namespace
When you delete a namespace, all the resources that were created within the namespace will also be deleted, such as pods, services and endpoints, config maps, and more.
Prerequisites
- Ensure that no other resources depend on the namespace being deleted.
Delete a Namespace from a Cluster
-
Navigate to the left Main Menu and click on Clusters.
-
Select the cluster in which you want to create a namespace.
-
Navigate to the Workloads > Namespaces tab, and click the Manage Namespaces button. The Settings pane displays with RBAC preselected and the Namespaces tab opened by default.
-
Click the three-dot menu on the namespace you want to delete and select Remove.
-
Click Save Changes.
Validate
Validate that the namespace was successfully deleted.
-
Log in to Palette as a tenant admin.
-
Navigate to the left Main Menu and click on Clusters.
-
Select the cluster that contains the namespace you want to delete and view its details.
-
In the Settings pane, select Cluster Settings, and then select RBAC > Namespaces tab.
The namespace you created is no longer listed under Namespace Quota.